".$title.""); ?>

Tuesday, February 9, 2010

Farmer's (Goat) Cheese aka Neufchatel

I just finished eating a few crackers topped with my first (successful) attempt at Farmer's Cheese, a soft "cream" type cheese.

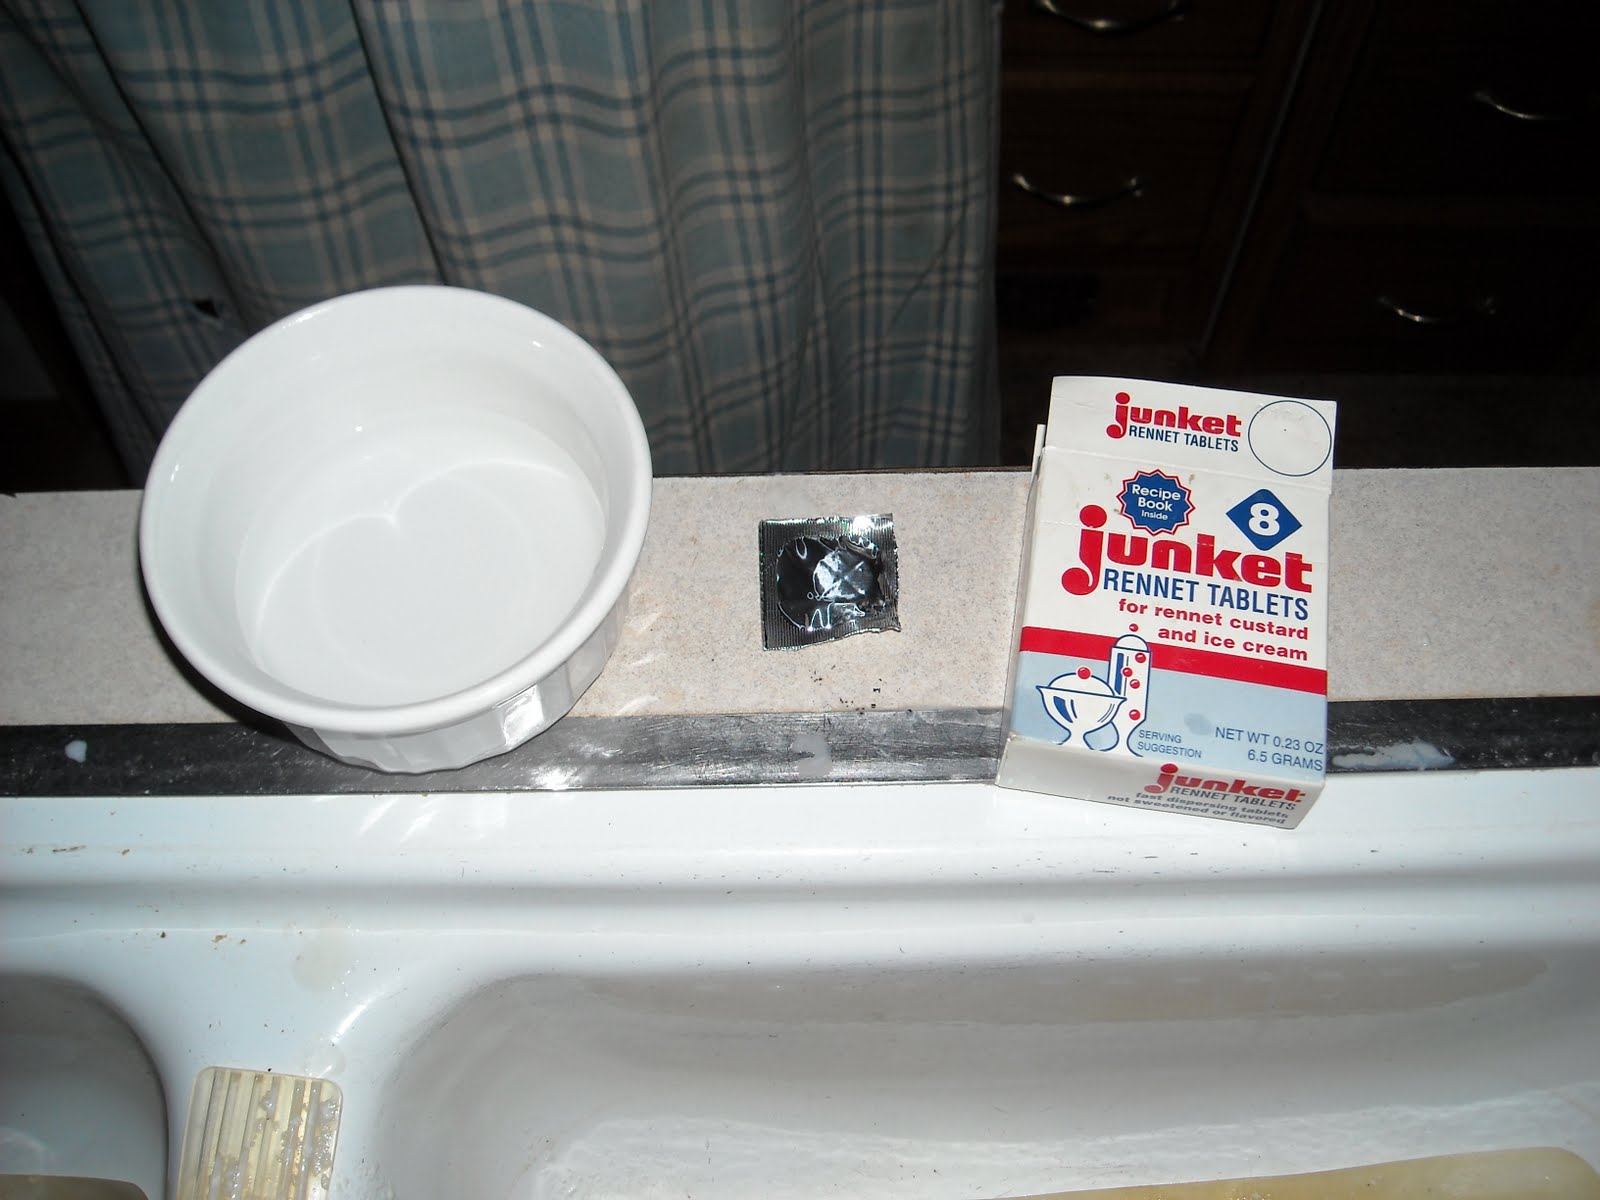
A neighbor said she had made some Farmer's cheese with the inexpensive Junket rennet tablets found in the local grocery store, so I thought I would try that first. An online cheese making blog said not to use Junket rennet because it is not the same as cheese rennet. But it was here and within my budget, so it was cheese rennet to me! :)

Goat Milk Cheese Rennet

My "first" first attempt was a bust, using the original recipe from the Junket instructions. Not to say it doesn't work, but that my attempt didn't work. The recipe calls for buttermilk, which I didn't have; so I looked online and found you can substitute with milk and lemon juice. So I did that, along with adding 1/4 tablet of rennet dissolved in a little water. In hindsight, I don't think the combination of those was enough to coagulate the milk. I heated the milk to 65 degrees F according to the recipe, added the "buttermilk" and rennet, and left the covered pot out overnight per the instructions. It was supposed to solidify overnight; but it just never did, even after I left it another 12+ hours. So that went to the chickens.

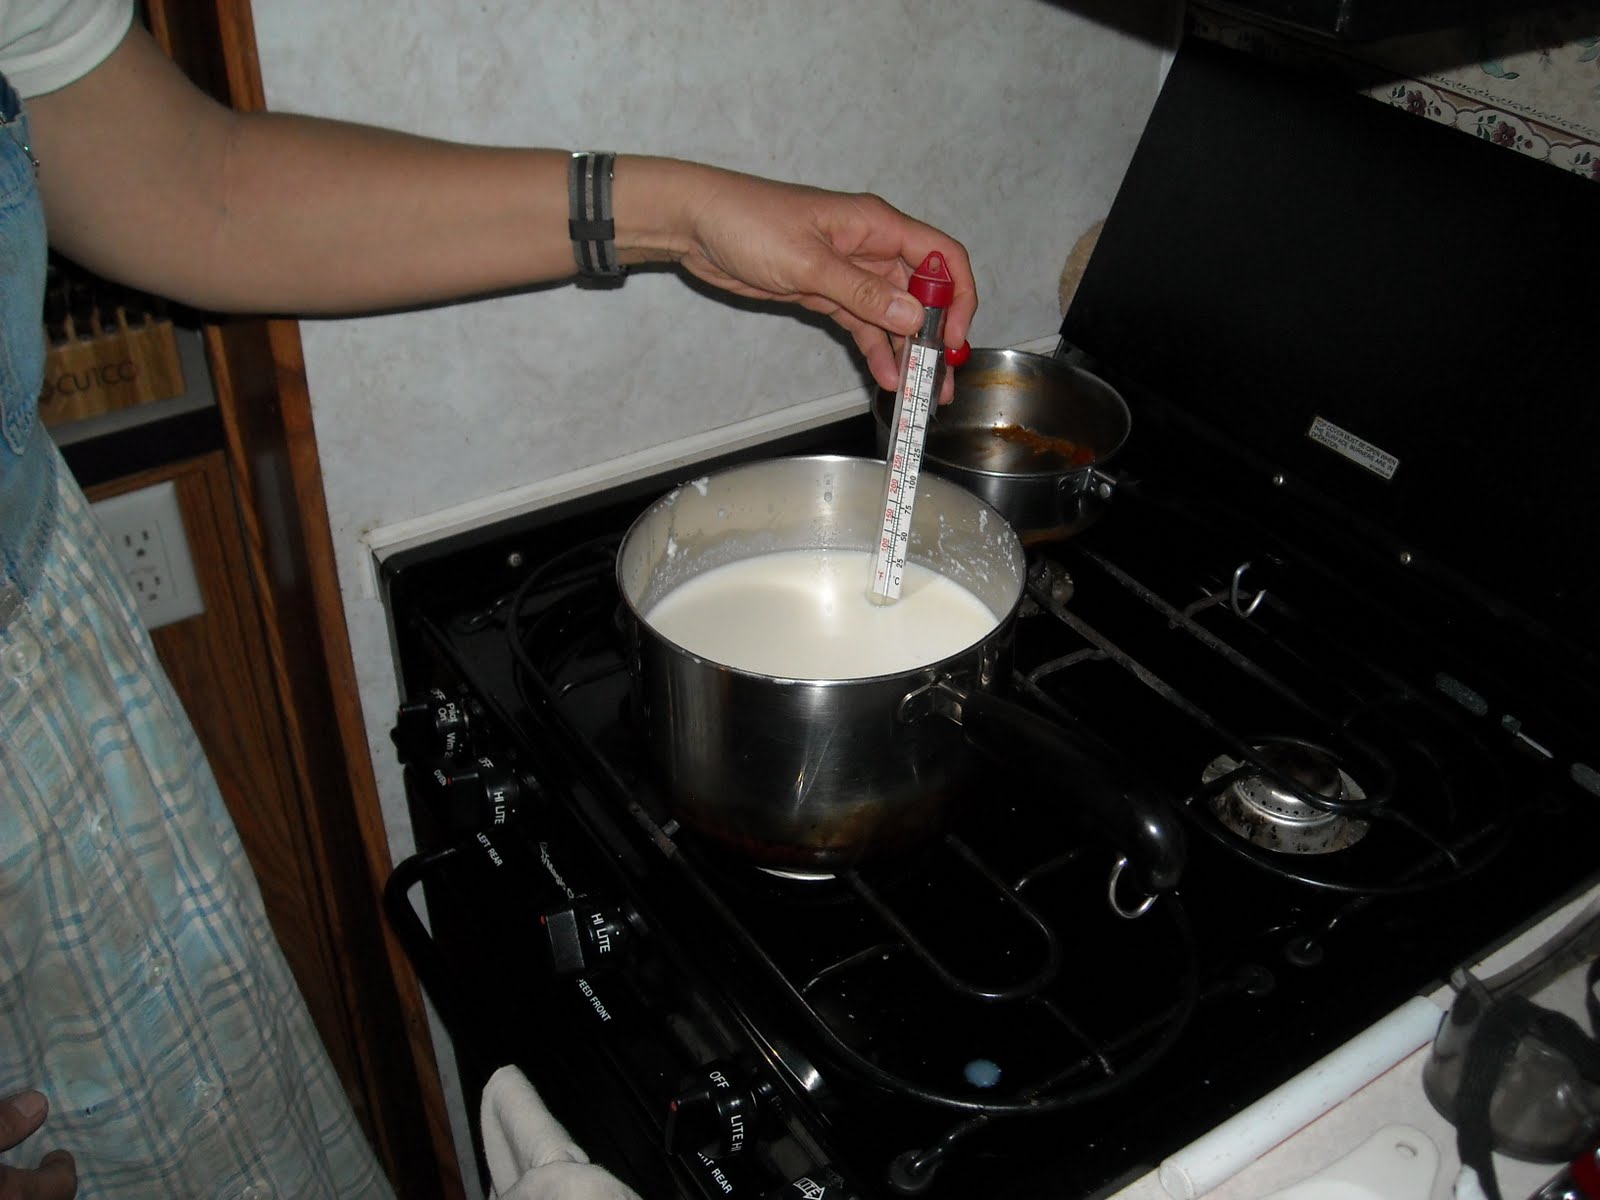
My next attempt was a conglomeration of a couple of recipes. This time I heated two quarts of our raw goat milk to just below boiling, and added two generous tablespoons of white vinegar (one per quart) and 1/2 tablet of the Junket rennet dissolved in a little water. Since this was previously frozen milk, it was a bit watery; so I decided to err on the side of caution and add too much vinegar and rennet rather than too little. The last thing I wanted was to ruin another batch:

Goat Milk Cheese Milk Heating


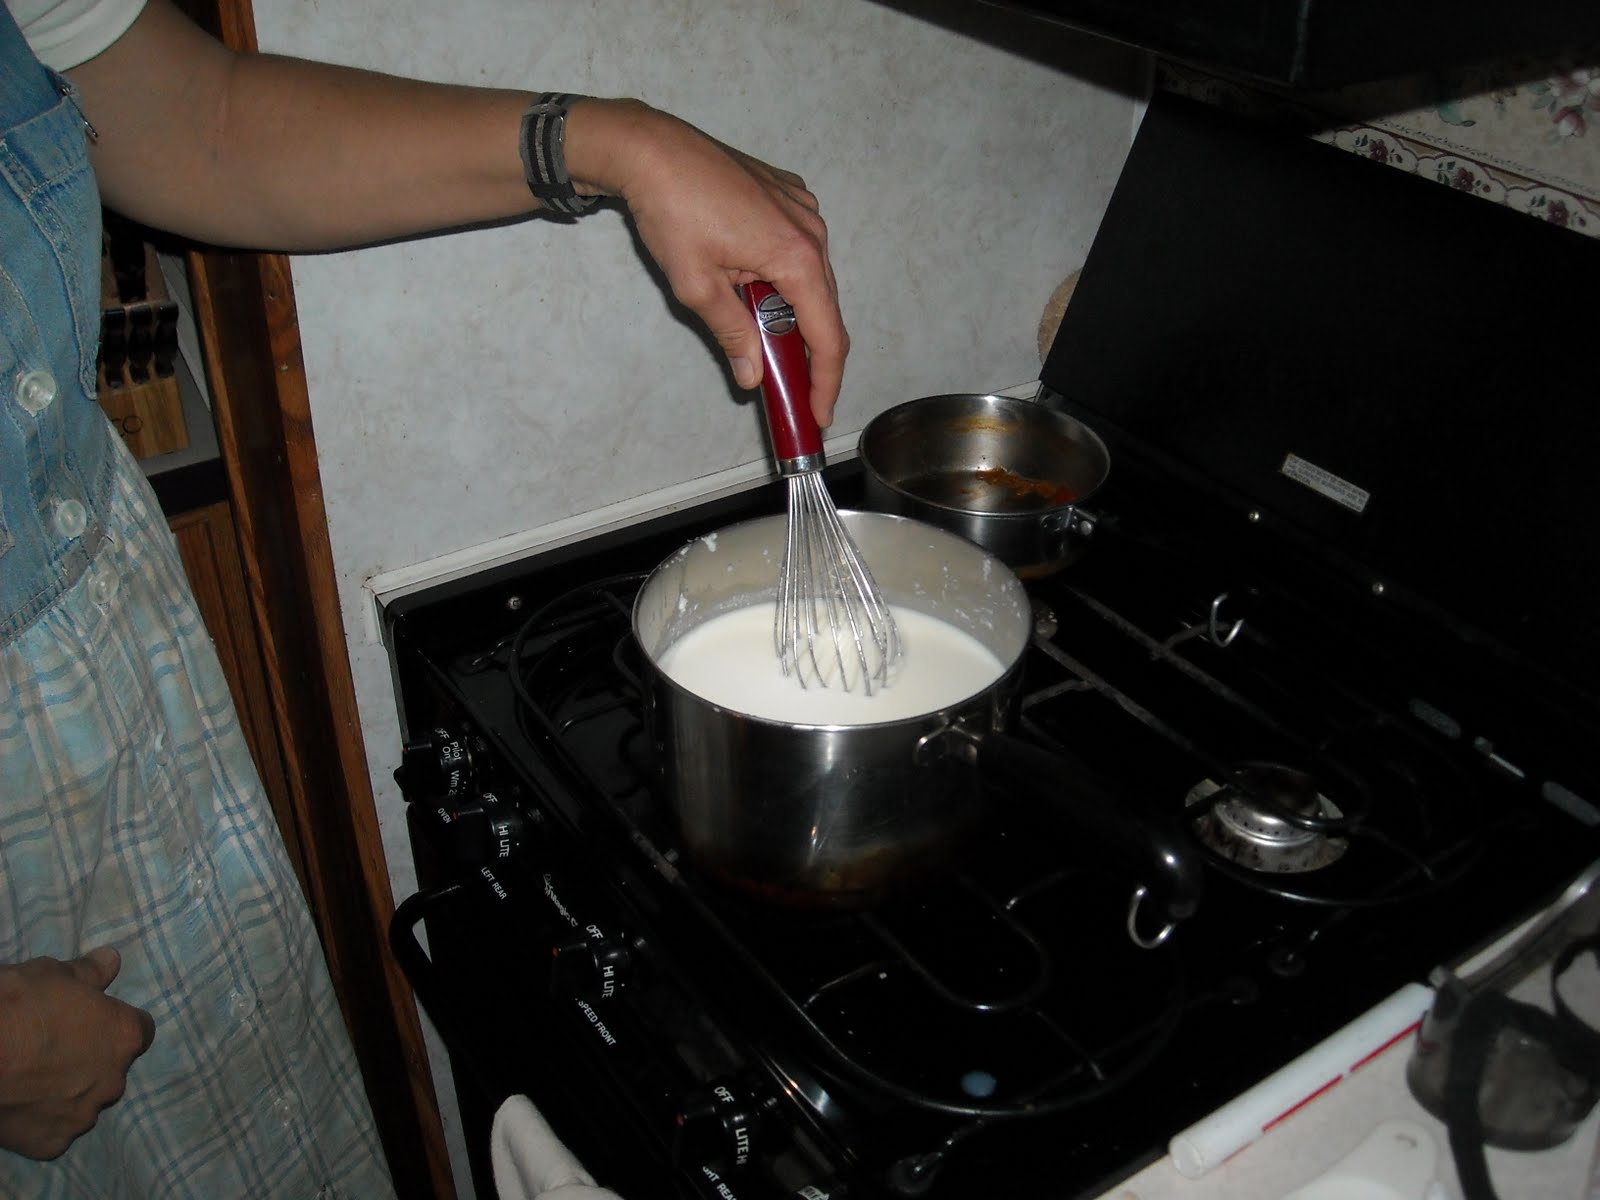
I whisked it all together, covered the pot, and hoped for the best. Well, this time it started to coagulate much more quickly, which gave me hope. By the next day, it was not as solid as I imagine a really good cheese probably would be; but it was close enough!

Goat Milk Cheese Milk Whisking


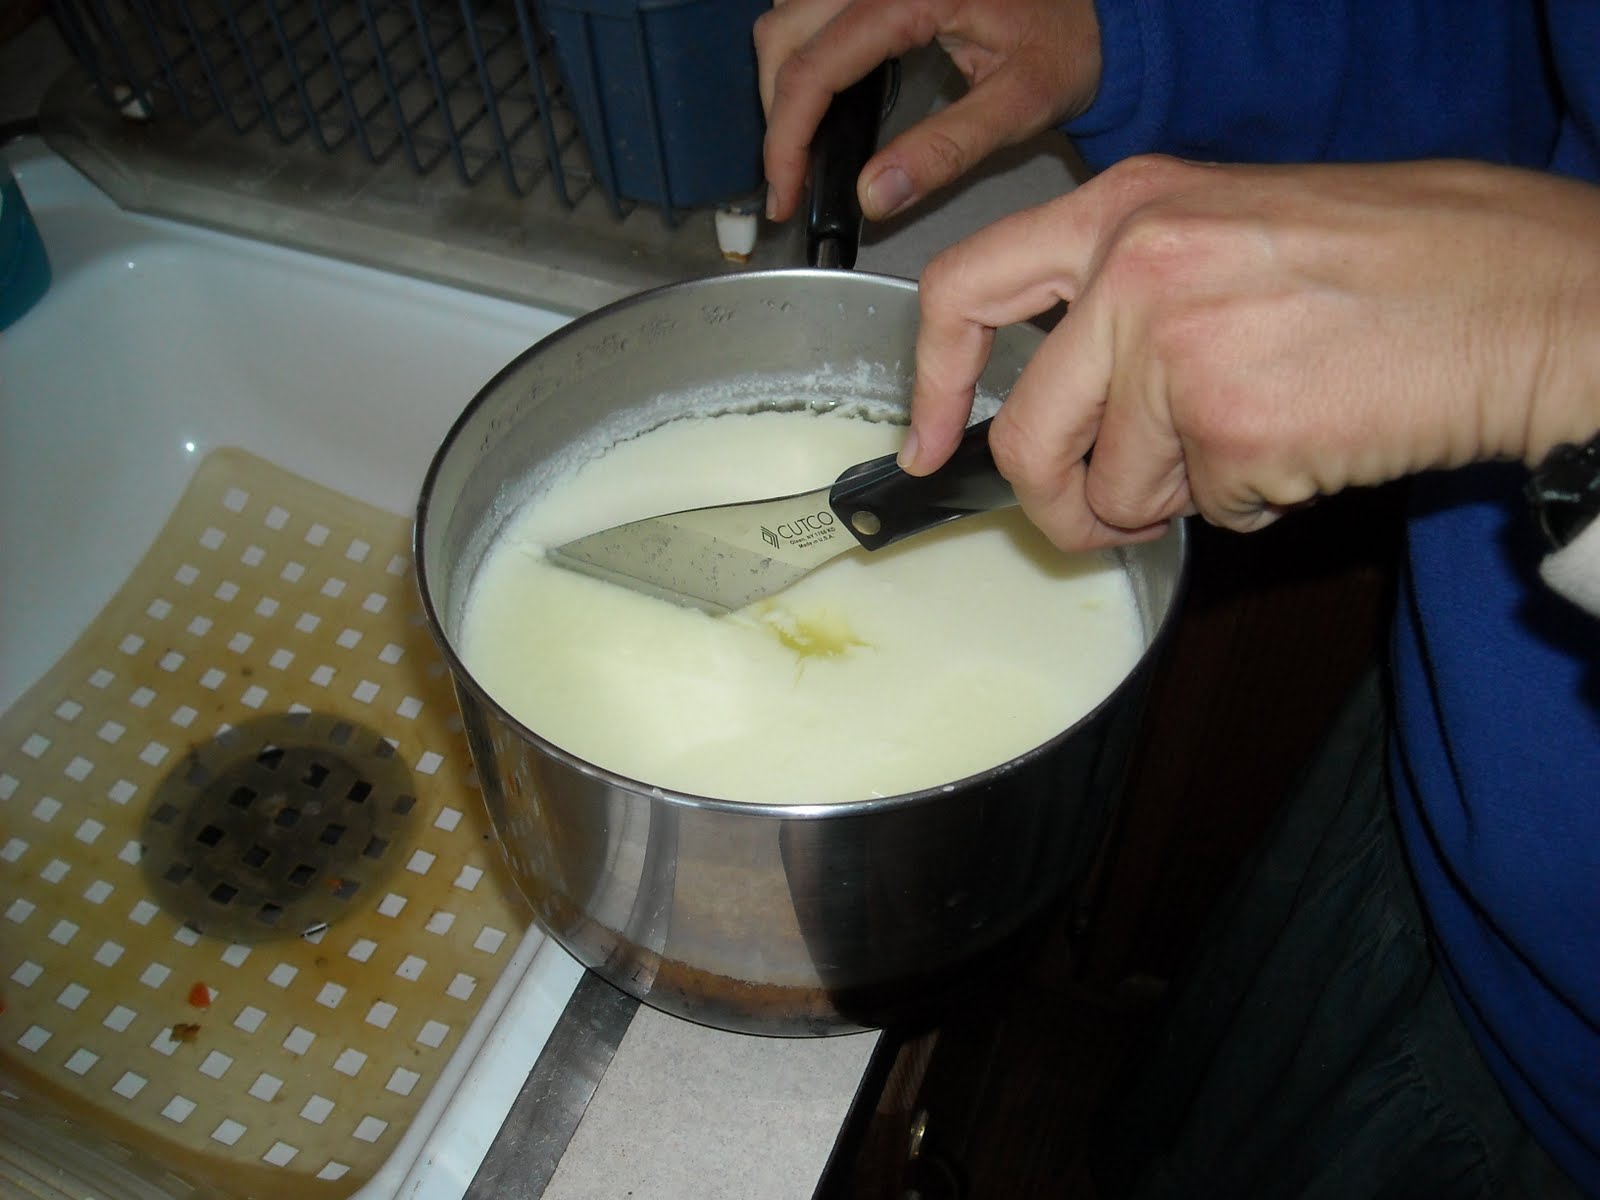
According to the recipe, the cheese is ready when you can poke your finger in and lift the top, gelled layer cleanly from the lower, liquid layer:

Goat Milk Cheese Curds


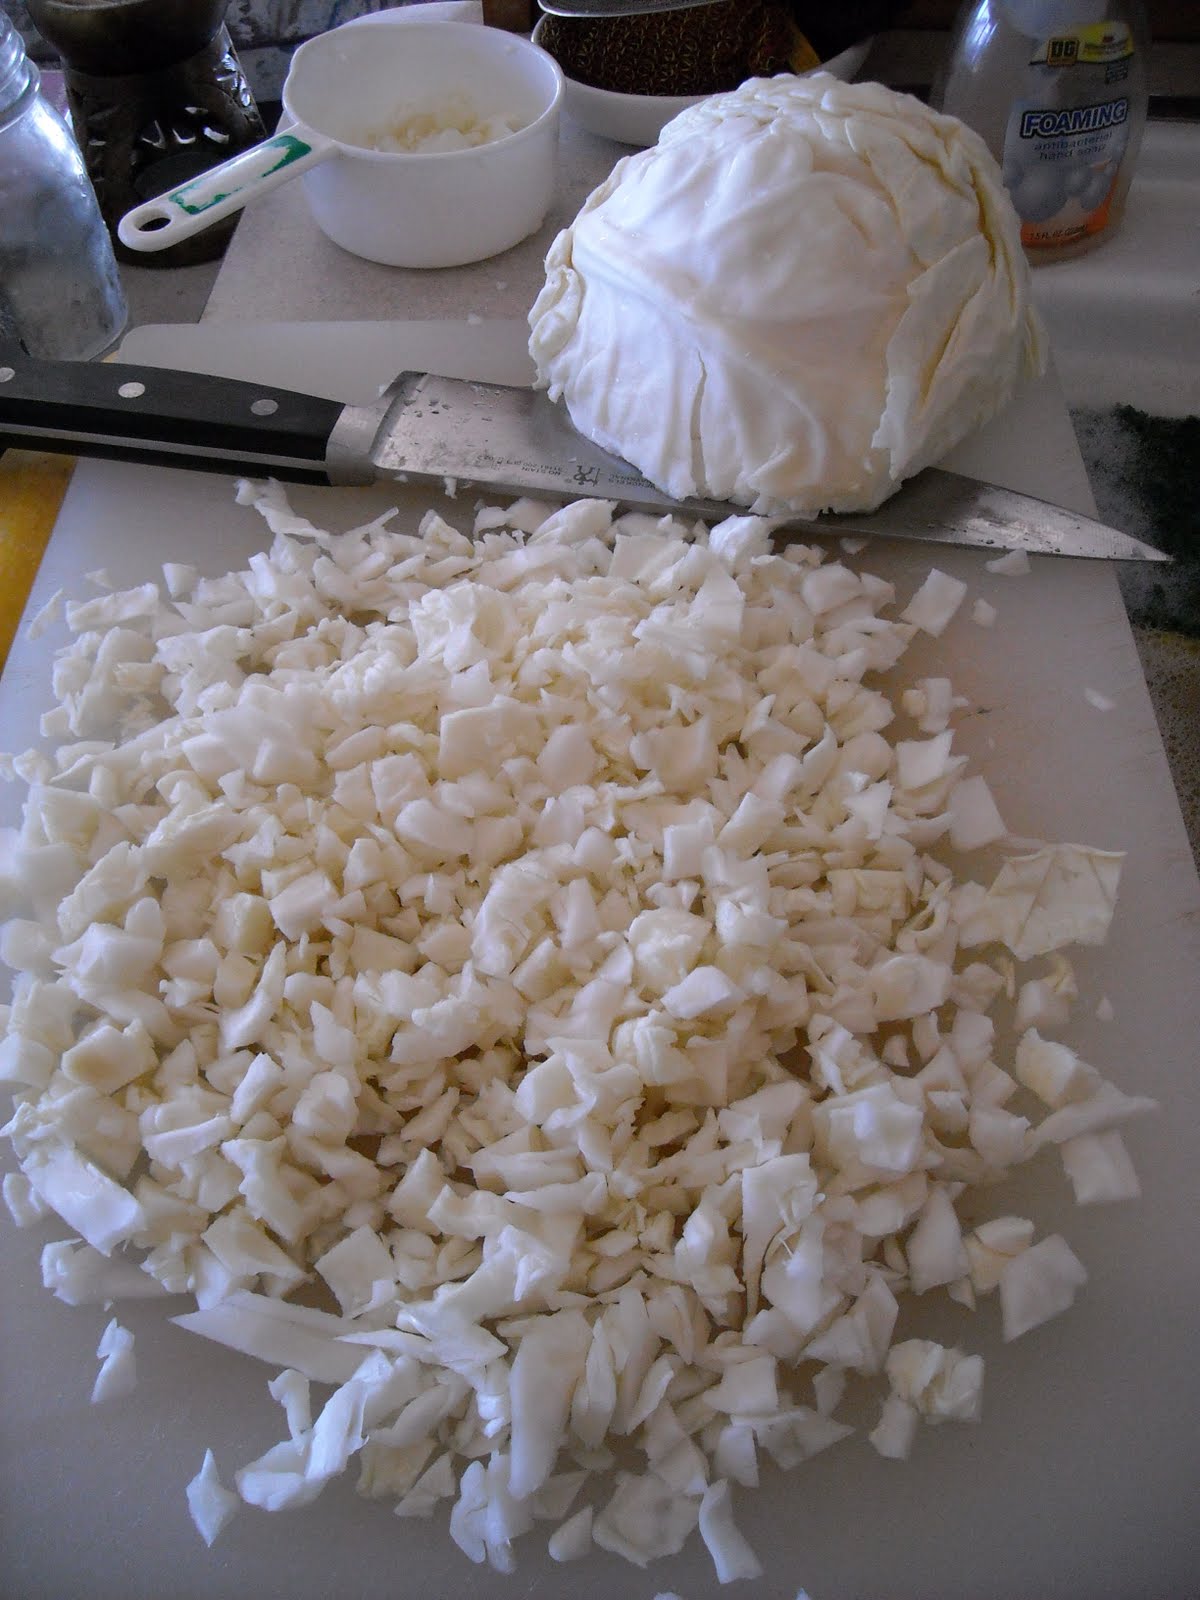
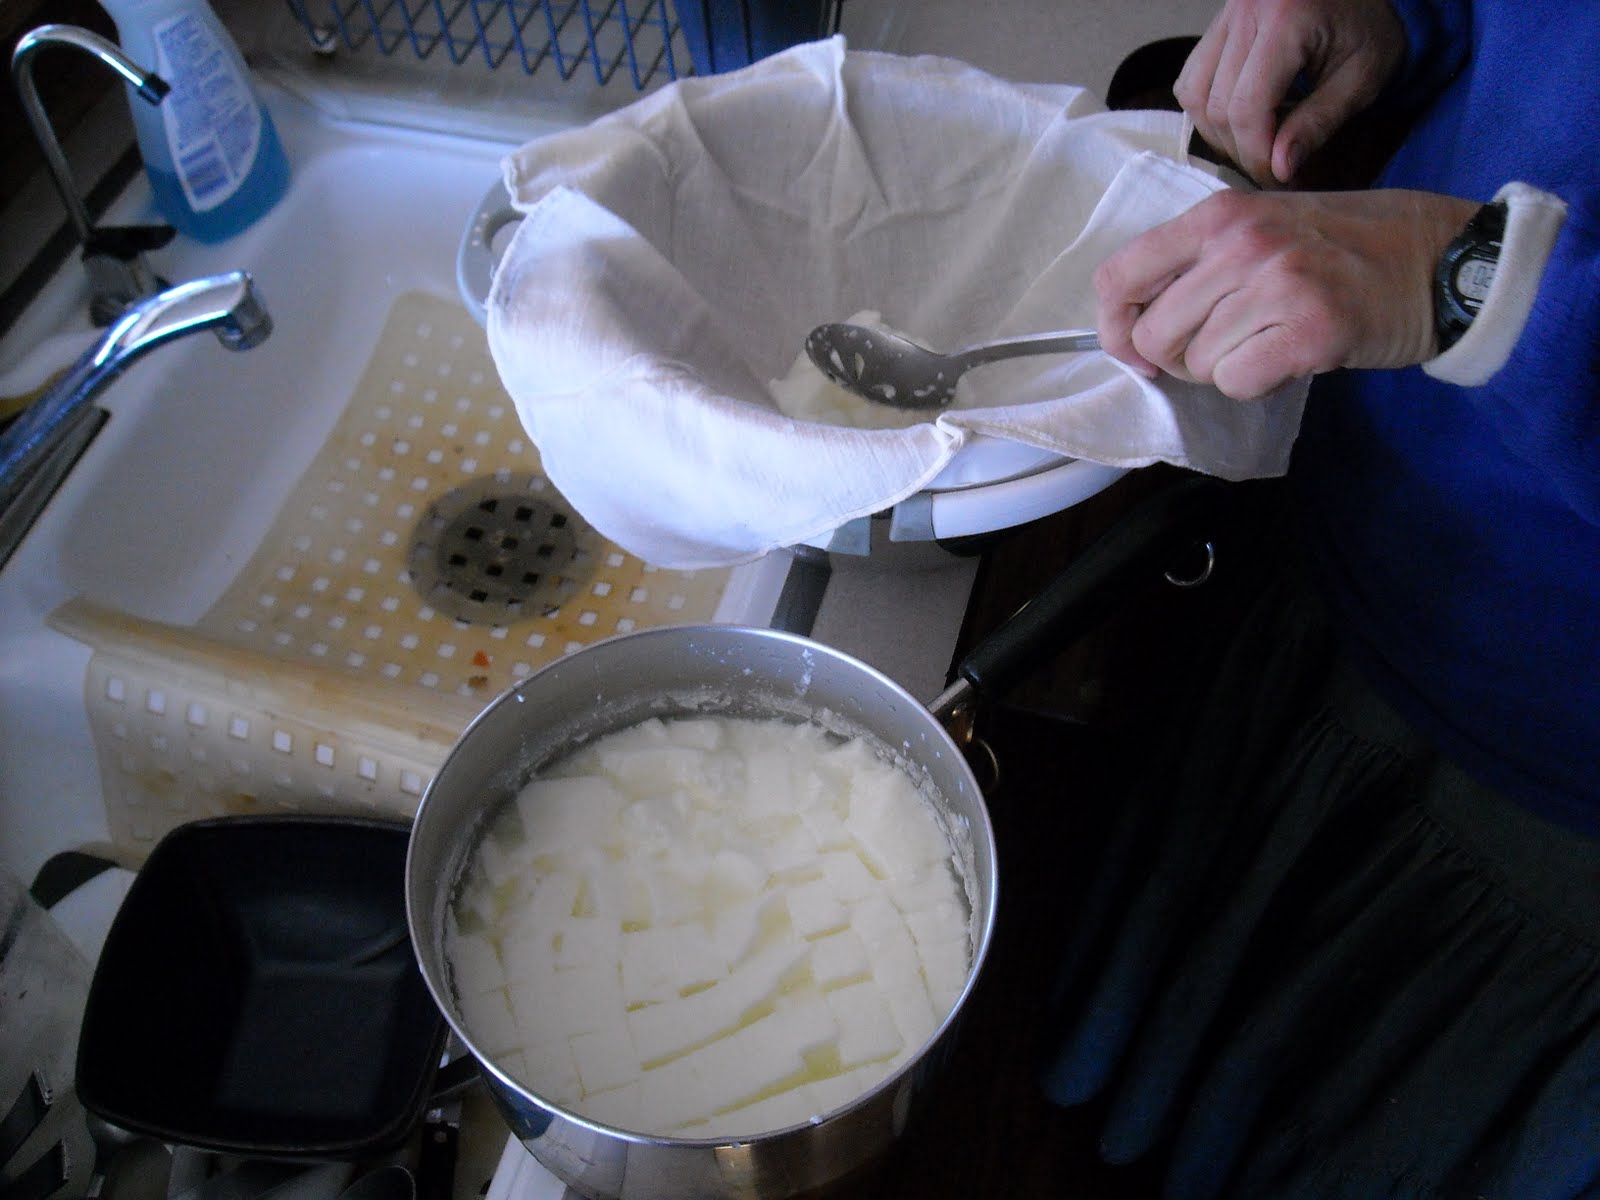
Then, you are supposed to cut it into 1/2 to 1 inch cubes in order to assist with the "draining of the whey" (sounds like a ceremony). The instructions call for the first cut starting down the middle, holding the knife at a 90 degree angle, and then each subsequent cut tilting the knife a little until you get to 45 degrees by the time you reach the side of the pot. You turn the pot 1/4 turn, and repeat the process, which eventually makes a grid of curd cubes. I forgot to tilt the knife as I cut -- oh, well. But, it came out okay anyway:

Goat Milk Cheese Cutting Curds in Pot


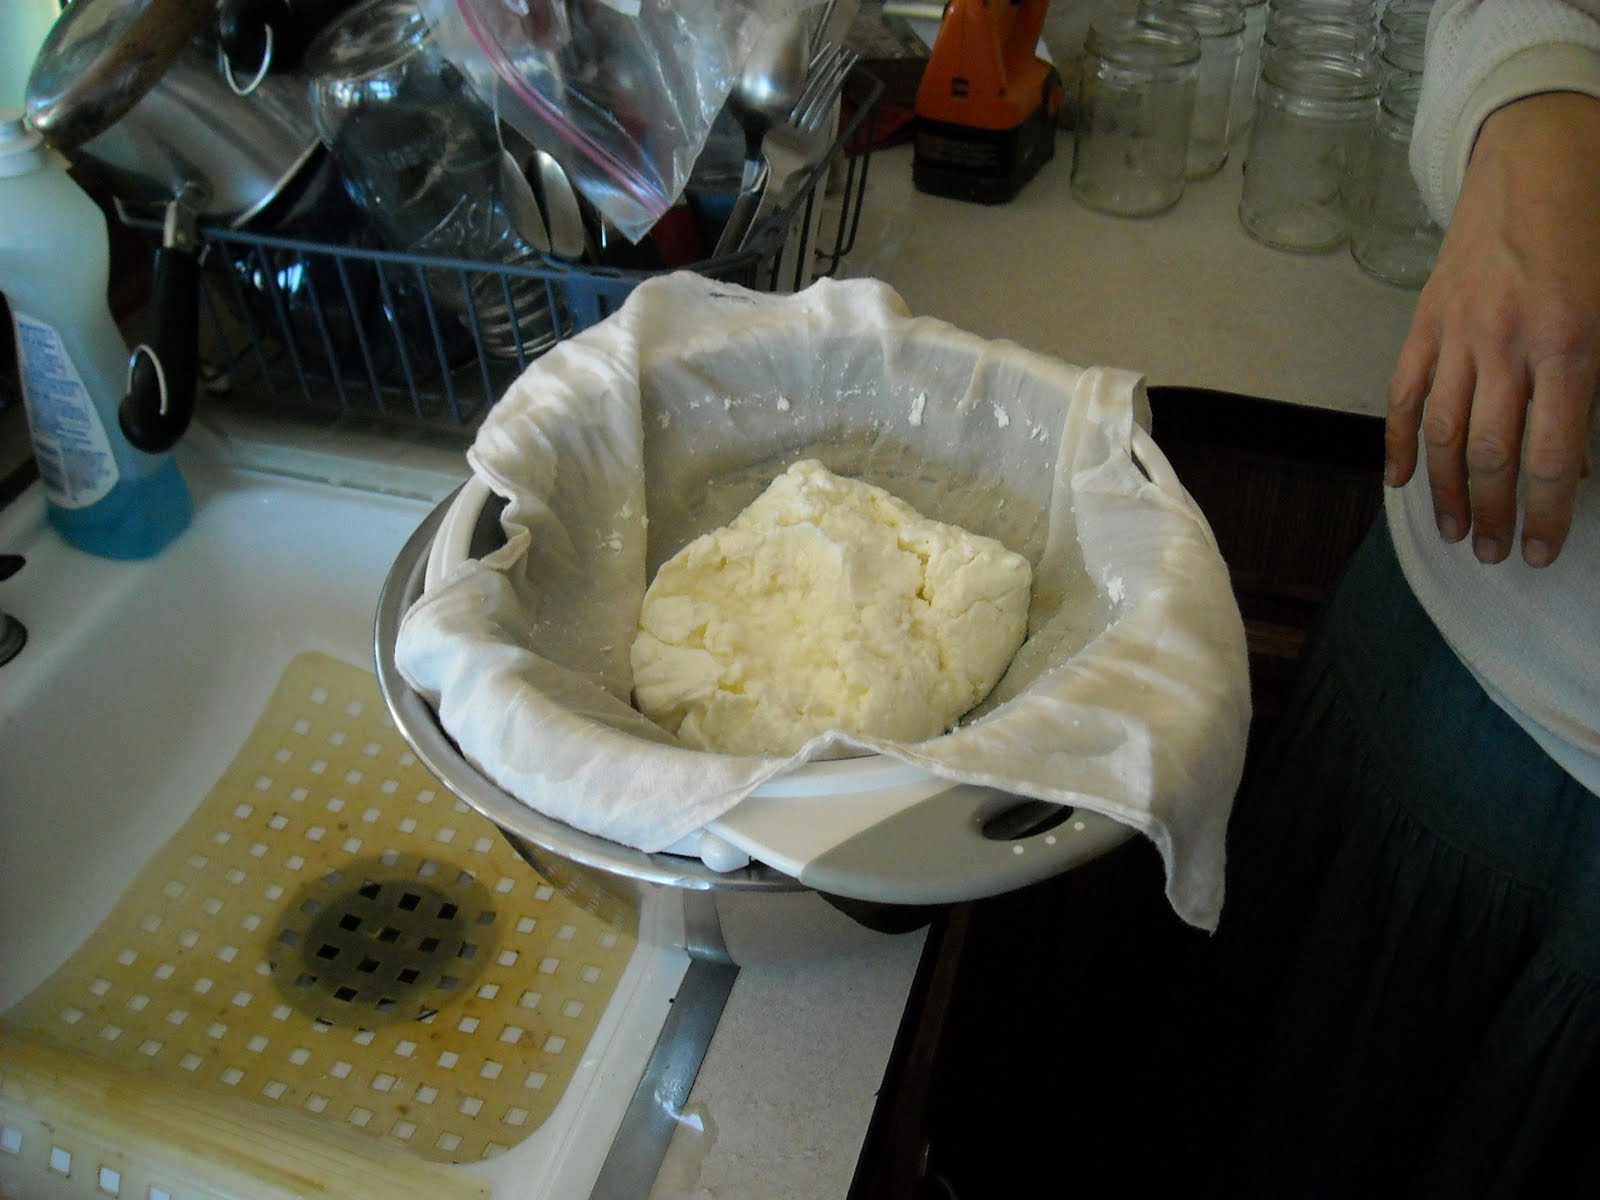
Then, I spooned out the cubes of curds into a handkerchief-lined strainer with a bowl underneath to catch the whey drippings. They say to use cheesecloth, but it just seemed too loose of a mesh, and the handkerchief worked very well for this type of cheese:

Goat Milk Cheese Spooning to Handkerchief


Here it is all spooned into the strainer. You can't tell here, but it's draining like crazy underneath:

Goat Milk Cheese Whey Draining


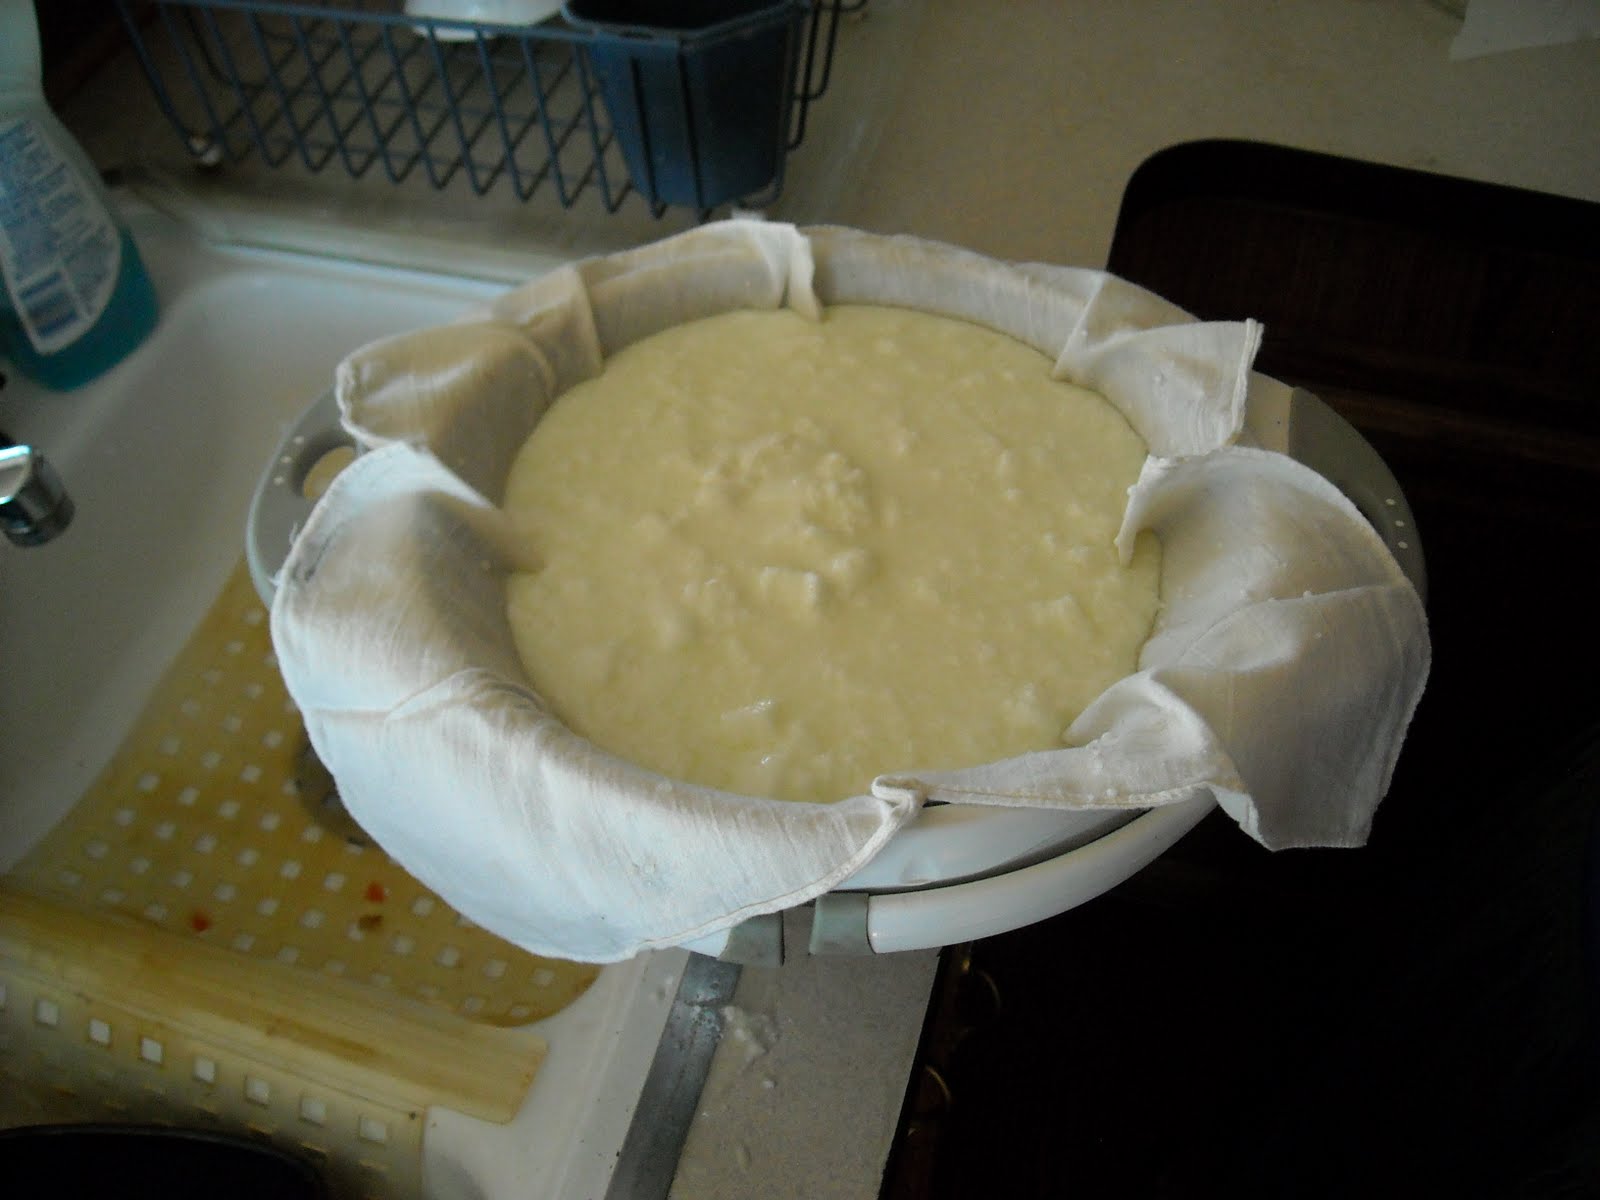
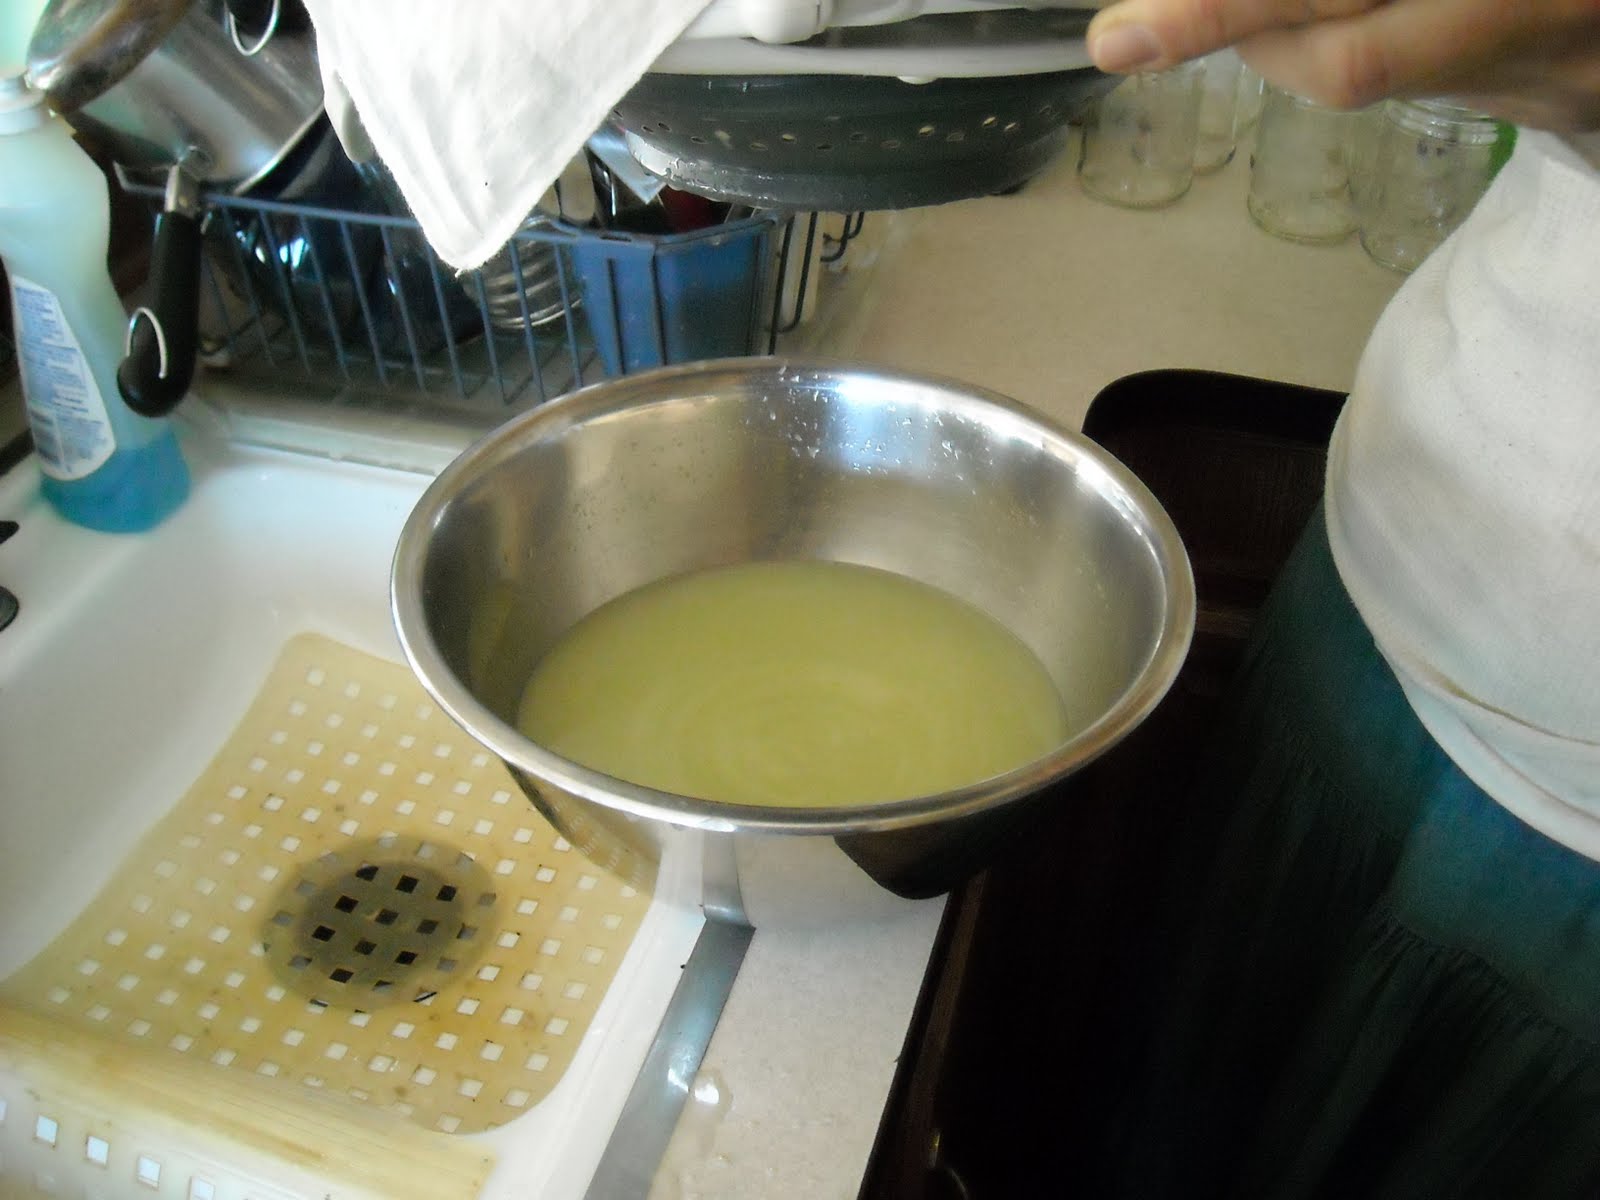
Quite a bit of whey drained quickly, but it takes 2-3 hours to fully drain:

Goat Milk Cheese Whey


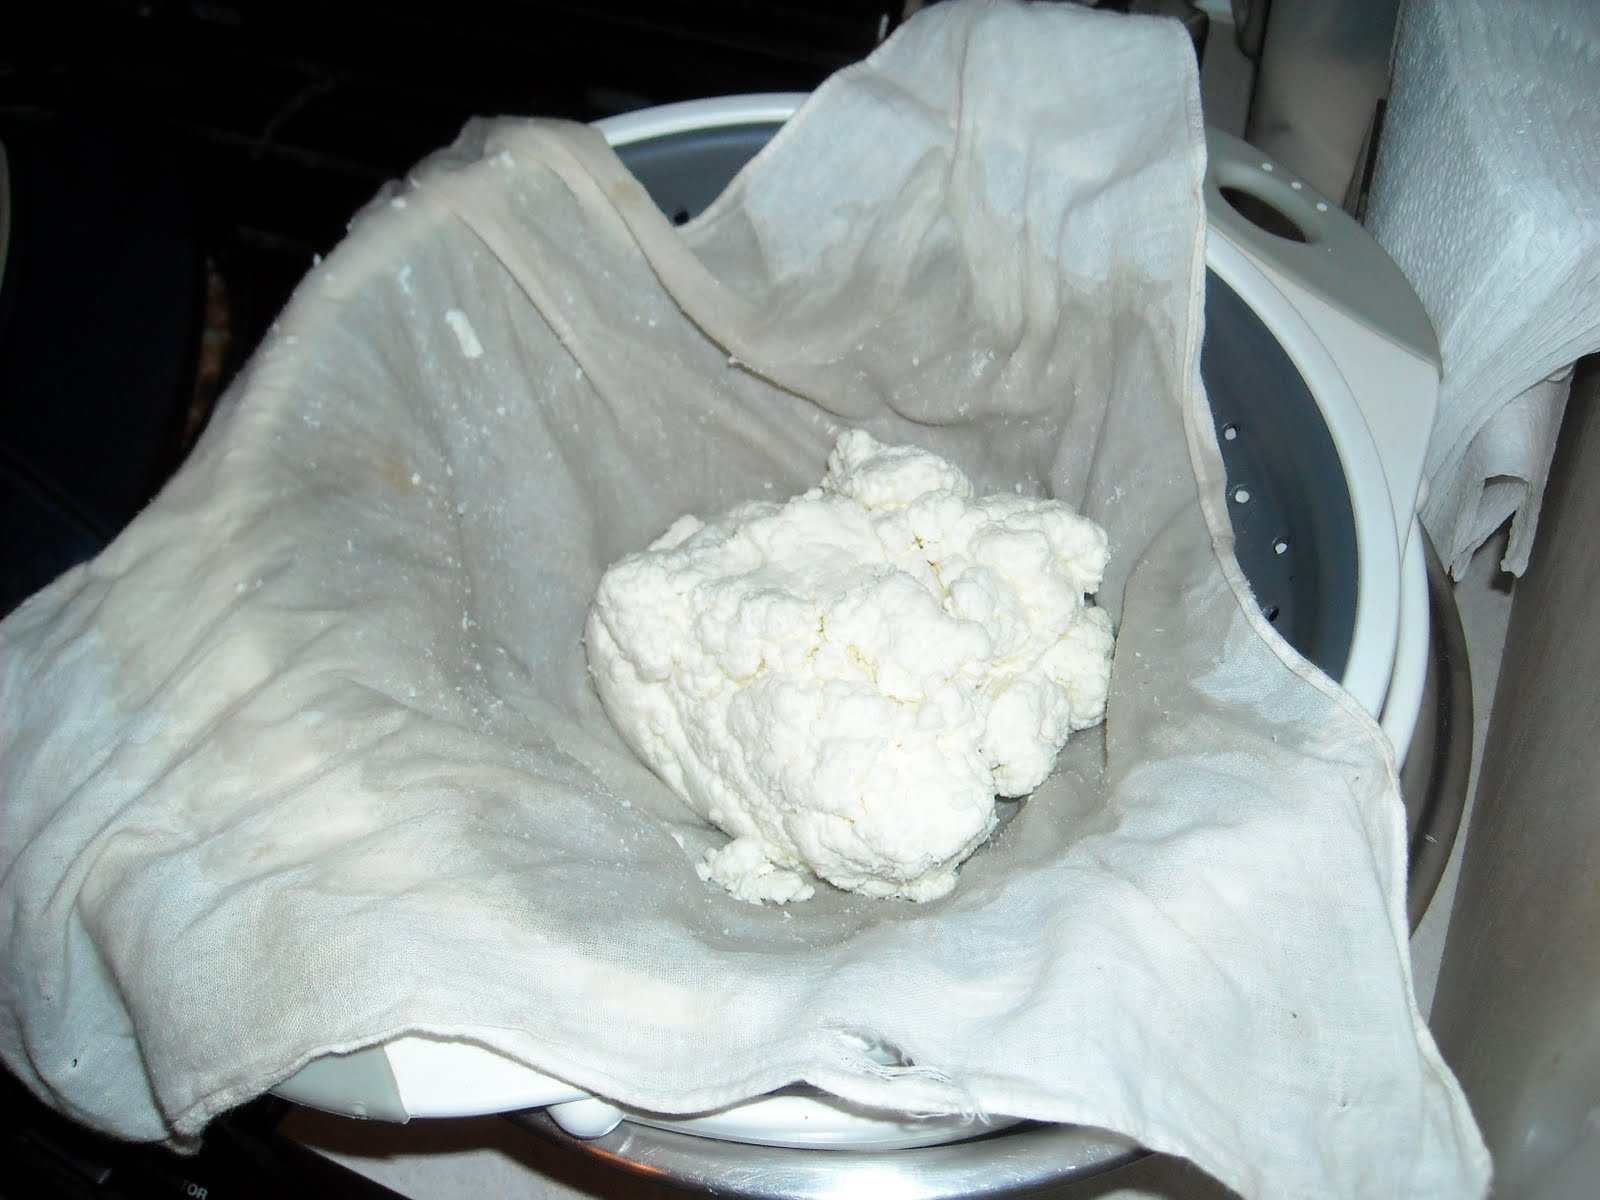
Here are the curds with the majority of the whey drained. Pretty cool, huh?!

Goat Milk Cheese Curds with Whey Drained


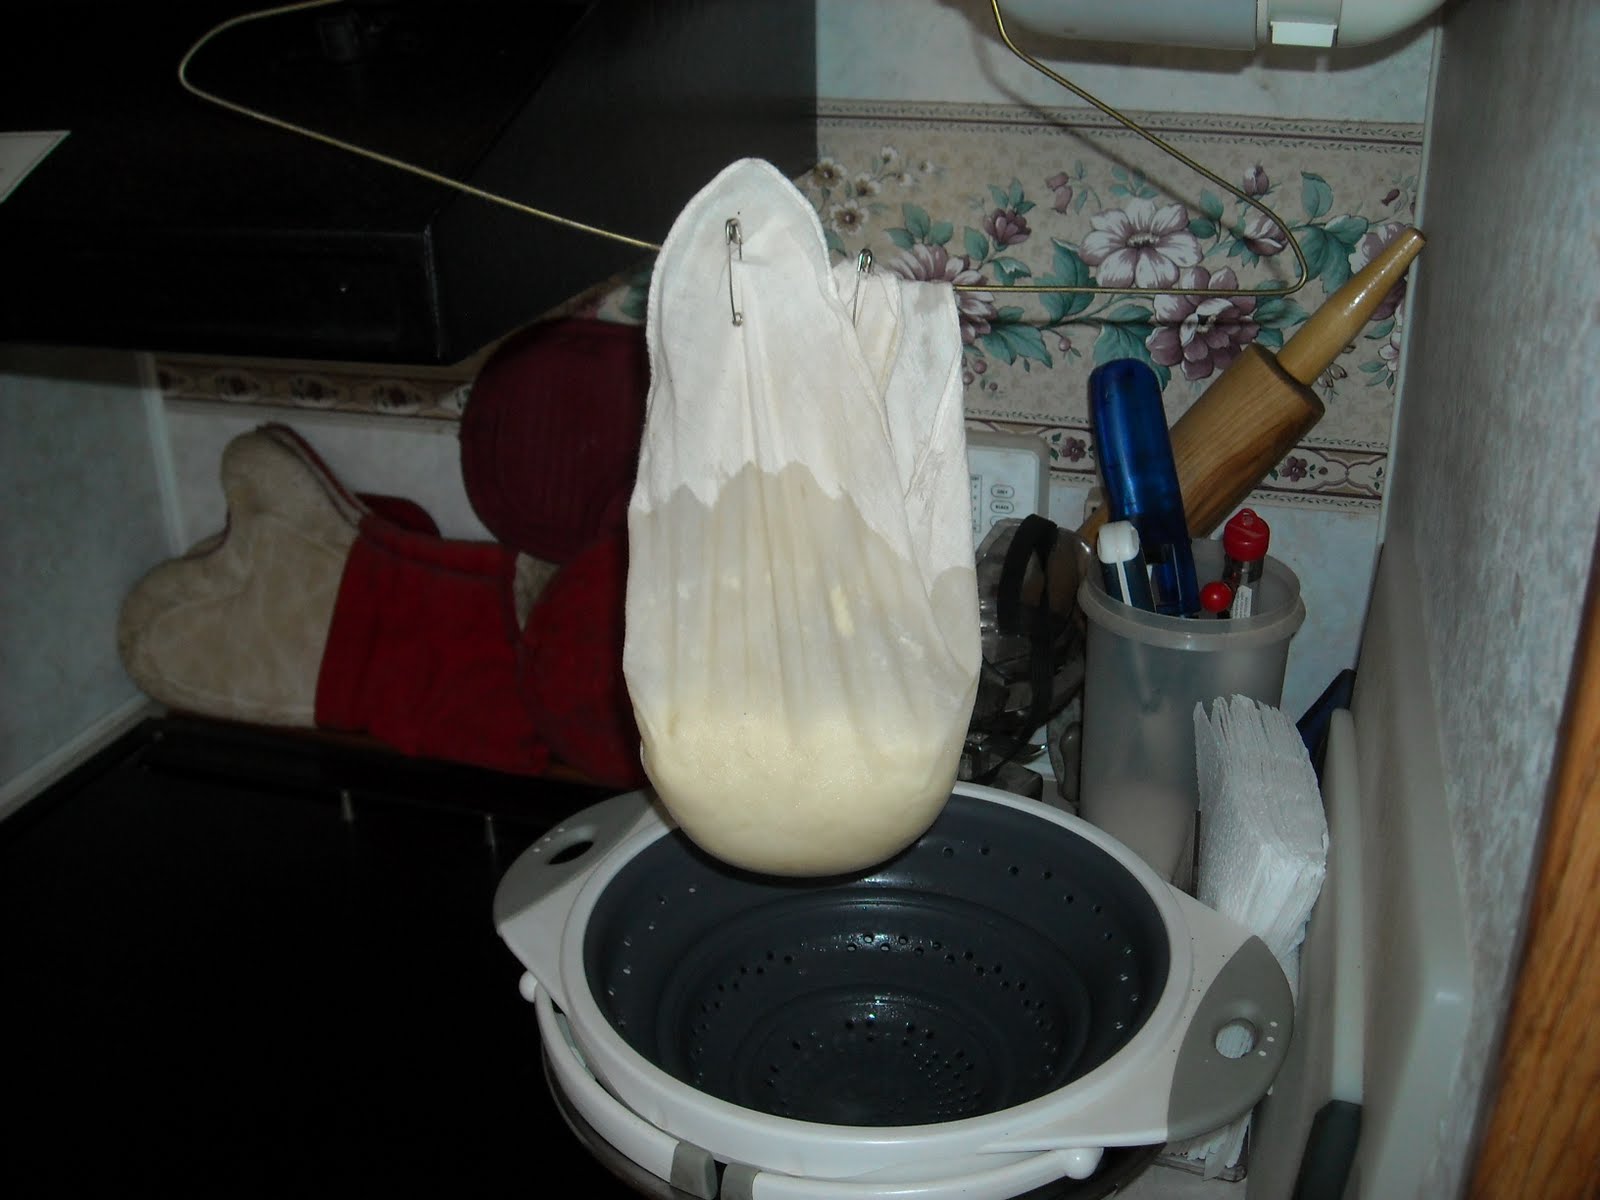
After the main draining, I hung up the handkerchief to draw out the rest of the whey with the help of a bit longer exposure to gravity:

Goat Milk Cheese Curds Drip Draining


Well, this looked like it might resemble Farmer's, or some kind of cheese, and not too much like a train wreck:

Goat Milk Cheese


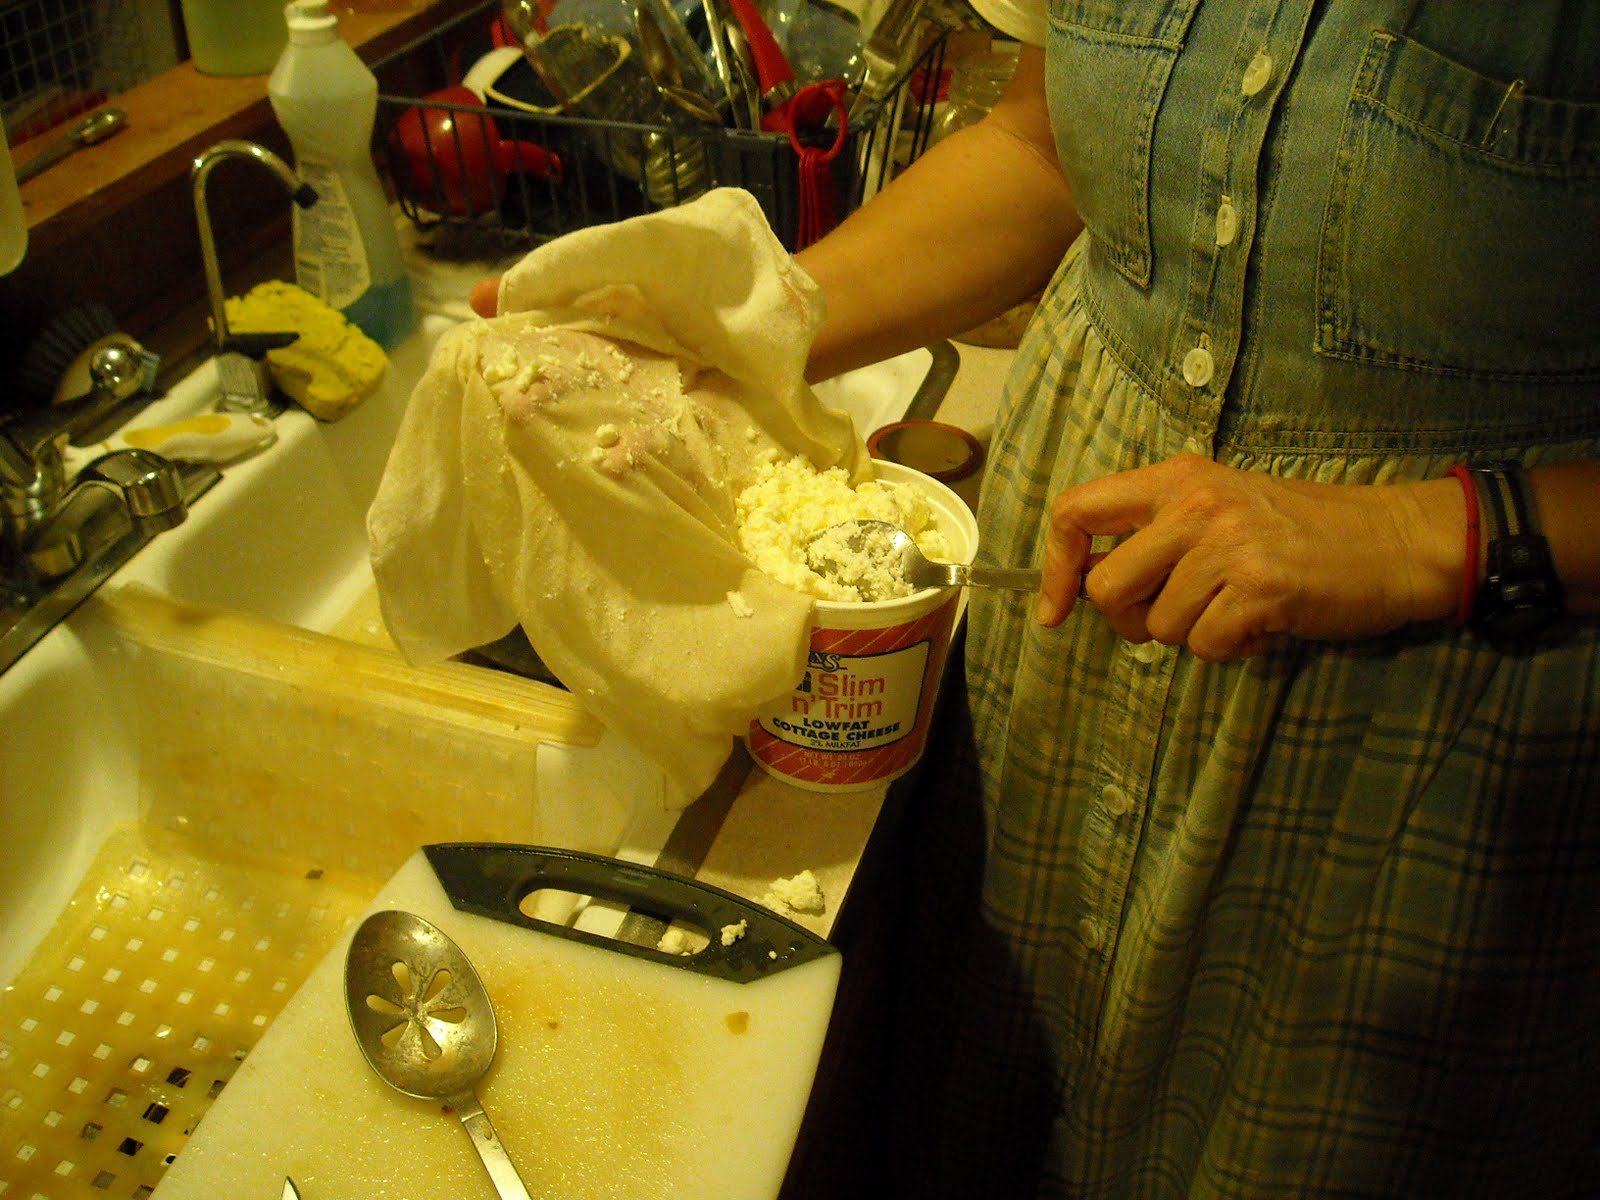
So I seasoned it with a little salt, garlic and onion powder, spooned it into a container and put it in the refrigerator overnight. Using two quarts of milk is supposed to make approximately 3/4 lbs. of cheese, and this looked about right:

Goat Milk Cheese Storage


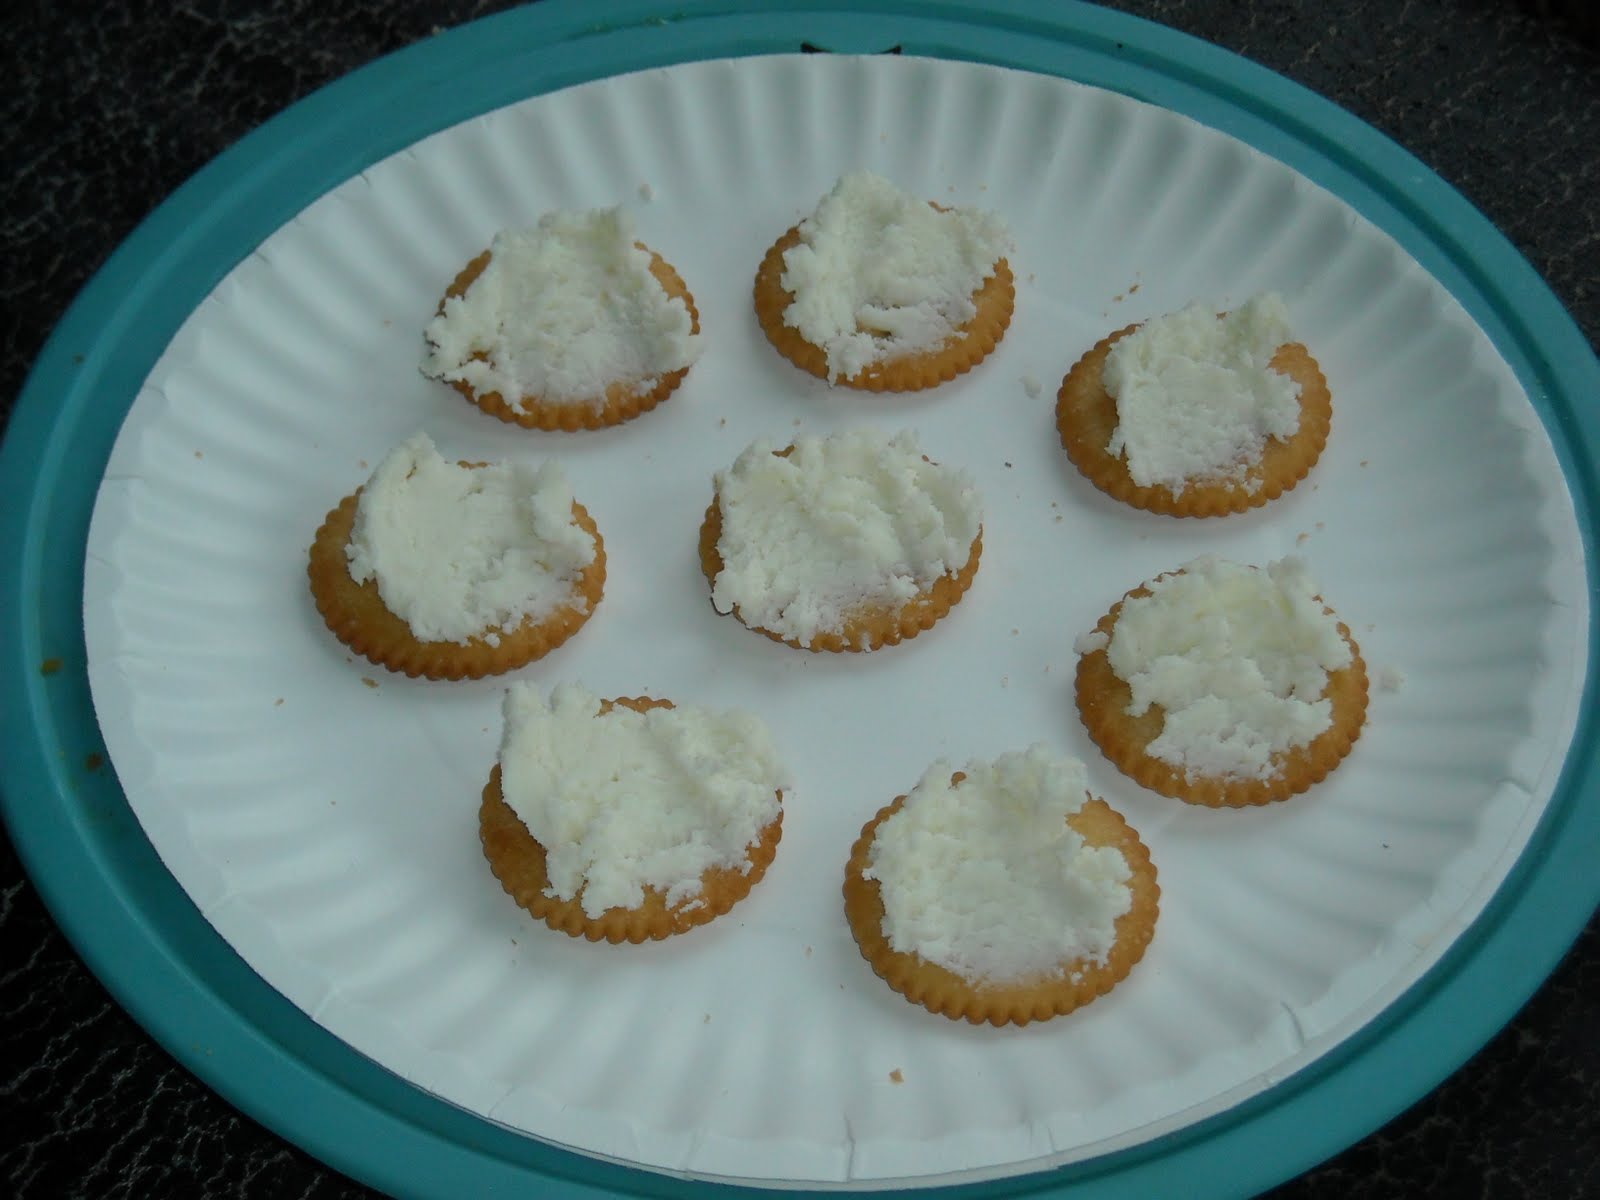
I'm very pleased with the mild, seasoned taste. It has been too easy to eat a lot of crackers topped with the cheese at one sitting! But I'd rather have to combat will power than have to hold my nose closed and gag it down :)

Goat Milk Cheese on Crackers


All of our does have dried up in preparation to deliver more kids in the Spring, if the Lord wills; so this was my last opportunity to attempt making goat cheese until then; and I'm very thankful it turned out. I'm excited (and not as scared) at the future possibilities! What a great way to preserve milk; and we are, as always, very thankful for God's direct provisions. Believe me, I know I probably could have done this much better and more "properly;" but, hey, it worked for me; and it's food! I hope to continue to improve with more practice and maybe somebody out there can learn from my mistakes. Bon appetit!

Susan

Labels: , , , ,

Bookmark and Share

Wednesday, December 23, 2009

Garden 2009 - Spring - Update V - Sweet Potatoes


Last year, Dave and I cut up some sweet potatoes and planted the pieces in one of our garden beds. We were very excited at the end of summer to dig up our hopefully large, robust sweet potatoes. Well, when we dug them up, about the only thing they were good for was to use as replacement shoe strings :( We sort of gave up after that and planted turnips in that garden bed this year. About half way through summer, we started to see these weird green leaves coming from the turnip bed; and by the end of summer, the leaves had taken over the entire bed. Go figure, the sweet potatoes from last year had been growing and had really taken off. The picture above is our yield! For reference, the larger ones are at least 6-7" long. What a blessing to have this unexpected crop of good lookin' sweet potatoes.

(I was so inspired about it, I'm writing the sequel to the children's book "Green Eggs and Ham" entitled "Sam I Yam".......and I'm also waiting to hear back from the Broadway producers regarding my musical remake of "Anna and the King of SiYAM." Hmmmmm, not sure why I haven't heard back from them yet. Another musical I've pitched is "Yamalot." Then there's my nursery rhyme "Mary Had a Little Yam".....I got a million of 'em folks...well, four anyway.......<tap, tap>...um, is this thing on?)

I was excited to start using them, so I made sweet potato biscuits for our Sunday community fellowship meal. Here they are before being put into the oven. (Note to self, let the potatoes cool before mixing them into the dough. That's why these are spoon-dropped biscuits and not perfectly round):


And here they are fresh out of the oven:


We're very thankful to God for the unexpected blessing and provision of these sweet potatoes.

Susan

Labels: ,

Bookmark and Share

Tuesday, October 6, 2009

Garden 2009 - Spring - Update IV - 24 (Pint) Carrot Gold and Other Precious Commodities


Boy, if there was any doubt carrots grow well in West Central Texas, may it be forever removed. We planted carrot seeds in one entire bed this year; and, wow, the carrots took advantage of every bit of space in that bed. This blog post reflects the second round of thinning of the carrots; and I still have one, maybe two, rounds to go!


The carrots grew very densely because there was so much depth for them to grow in the double-dug, raised bed. So each pull of the greens revealed a handful of carrots:


"Ehhhhhh......what's up, doc?" Gary loves carrots. The greens, eh, not so much:


So I filled the bucket with greens knowing they would be appreciated somewhere else......


Shatner, on the other hand, loves carrot greens. (In a high-class maître d’ French accent..."Taybelll for one, Monsieur?")


I stopped pulling carrots when the basket was fairly full, knowing this many would take several hours to prepare for canning:


What a blessing to sit out in the fresh air and sunshine to work at my "day job." I had two buckets for the initial processing of the carrots: one was for a first rinse to get the major dirt off, and the other was to give them a good scrub with the vegetable brush to get them as clean as possible:


Next, I gave them a final rinse, cut off the ends, and cut up the carrots into smaller pieces. I munched along the way and loved knowing these carrots are God's direct provision, and that any middle men and chemicals have been eliminated:


Here they are in the jars ready to go into the canner:


And, yippeeeee! Fresh garden carrots preserved to be used in many delicious dishes:


And speaking of delicious things for meals, I thought I'd provide an update on our other garden adventures.

In addition to our abundant yield of Zuchini, we were blessed with an abundance of summer squash:


We also shredded up much of the summer squash and put it in jars with salt for lactic fermentation, and placed them down in the root cellar. It tastes great - just like sauer kraut. And it makes a very flavorful and healthy salad when you add cucumber and tomato:


Our peppers are still going gangbusters. Here is a bowl of freshly cut peppers ready to be put in jars. I have found it to be very handy to grab a jar of these off the shelf and saute them with onions when I'm making fajitas. Thanks to one our readers, Ginny, we also got the idea to cut them up and dry them in our solar dryer. They are great to add into recipes, and I was very pleasantly surprised at how much taste is packed into even one of these small pieces:


Here they are ready to be canned. As I was going through the pepper plants harvesting the ripe ones, I found that a plant with smaller red and green peppers resembling chili peppers had popped up. (Imagine, if you will, what the Chili's Restaurant pepper logo looks like.) Well, I haven't been canning those because Dave likes to eat them raw here and there. HOWEVER, we have found that somehow these peppers were rubbing elbows with some of the other peppers; and sometimes when we bite into a sweet red or green pepper, we'll get a HOT surprise! So some of these jars are packed with more taste than we bargained for! :)


We planted 17 tomato plants this year hoping that we might have a successful crop; but for some reason, none of them did well at all. We have harvested probably fewer than 40 tomatoes the entire summer. Not sure what happened. But, thankfully, the local produce market was selling fresh tomatoes at a fraction of the normal price to keep them moving. We paid a whopping $5.00 for these tomatoes and got 22 quarts! Thanks to the Lord!


Hmmmmmm, then there is okra (not to be confused with Oprah). Okra and I are still getting to know each other. Coming from the West Coast, I had never eaten okra and don't believe it is on any menu I've ever seen in California. So I'm still becoming acquainted with these Southern crops. To be completely honest, okra and I have a kind of love/hate relationship. They are SO prolific, I could not keep up with them. Do you know that okra can grow to maturity in four days?! It's almost too much of a good thing. They are fibrous by nature; so if you don't catch them when they are young and tender, they can get pretty tough and stringy. However, in the canning process, they do soften up and are very edible. I only tried to fix fried okra once but had to put doing that on the back burner (no pun intended) after that until I have more time to experiment with the seasonings. For now though, we are very grateful to have several jars of nutritious okra put away in the root cellar. They're actually quite tasty when I process them with lemon juice and a little salt:


We planted a half bed of turnips this year as a kind of experiment to see how they would grow. They did very well, and we had many great salads with turnip greens. The greens are a bit misleading because the actual number of turnips that were harvested were not that many. But we were very thankful to have this basket full of them:


Dave put them in freezer bags to be kept in our large freezer (which we had running because I was in the process of canning our two butchered hogs at the time) until I could get around to canning them. Here, we paid Gary a couple carrots to guard them until Dave could put them in the freezer:


Sadly, they thawed just enough in the freezer that they started going bad by the time I could get to them. So our turnips were, instead, enjoyed by our hog, Missy. Maybe next year.......


We also have gotten some great green onions and red onions from our garden, of which I don't currently have pictures. I still haven't gotten used to knowing I can just walk outside over to the garden and pick a bunch of fresh produce to put into our meals. What an amazing blessing for which we are so thankful to God.

Susan

Labels: , , ,

Bookmark and Share

Monday, August 24, 2009

Garden 2009 - Spring - Update III - A Borsch is a Borsch, Of Course, Of Course

We planted cabbage in our summer garden again this year. If you'll remember from our garden last year, we didn't have any cabbage heads to speak of; but this year the Lord has graciously blessed us with large, beautiful cabbage heads to eat fresh and preserve.

I can probably count the number of ounces of cabbage I've eaten in my life in single digits. I have nothing against cabbage in the least but just didn't grow up eating much of it. So I was stumped to find a good way to preserve all of this cabbage with which God had blessed us.

I surfed online a bit under canning cabbage and found a recipe that sounded pretty tasty to me. Fast forward several weeks, and I now have over 60 quarts of borsch in my root cellar! (NOTE: For you proper spellers, "borsch" is, indeed, an approved variant spelling of "borscht.") I had heard of borsch but had never eaten it to my recollection. I'm not certain if this recipe is an "official" borsch; but, regardless, it's tasty! Wow! All these years I've been missing out! This recipe calls for five pounds of tomatoes per batch, so we were very thankful when we discovered the local produce market was having a sale on tomatoes at about $.50 per pound.

I've listed the recipe below in case anybody is panicking like I was, wondering how to capture and preserve their garden cabbage crop. Or if you just have a "hankerin'" for borsch :D

Here is the official link to the recipe, but I made a few changes so I thought I would post it here also with a few personal notes in italics:

Yield: Eight pints (or four quarts) although I was generous with the ingredients and consistently got five quarts each time.
- 5 lbs. tomatoes (about 20 medium tomatoes)
- 8 cups coarsely shredded cabbage (I tried using a grater but realized coarsely chopping the cabbage works just as well and is much faster)
- 6 cups water
- 2 cups chopped onions (approx. 2 medium onions)
- 1 cup chopped apple (approx. 1 medium apple)
- 2 tablespoons instant beef bouillon (store-bought bouillon contains MSG, so on some of the batches I used pork stock from previous canning sessions of our pigs in place of the six cups of water, and added a little garlic and onion powder seasoning in place of the bouillon; and it worked fine)
- 2 tablespoons sugar
- 2 tablespoons lemon juice
- 1 teaspoon salt
- 1/8 teaspoon pepper

1. Wash, peel, remove stem ends and cores, and quarter tomatoes. Use a small spoon to scrape out the excess seeds, if desired. (I didn't take the time to peel the tomatoes or scrape out any seeds, and it was fine)

2. In a four to six quart kettle or dutch oven combine all ingredients. Bring to a boil; boil uncovered five minutes.

3. Ladle hot soup into hot jars, leaving 1/2 inch head space.

4. Adjust the lids.

5. Process in canner at 10 pounds, 45 minutes for pints or 55 minutes for quarts. (Please look online for altitude instructions if you live 1,000 feet or more above sea level)

6. Makes eight pints (or four quarts) (As I stated before, I was generous with the ingredients and consistently got five quarts)


Here are the tomatoes we were blessed to be able to buy very inexpensively. A 20 lb. box yielded three to three and a half batches:


I cut up each tomato in half and then into quarters and placed them in the soup pot:


I coarsely chopped up the cabbage and placed it in with the tomatoes:


I was amazed at how many cups each head of cabbage yielded:


Here are all of the ingredients introducing themselves to each other and ready to be boiled:


The ingredients have now been boiled for five minutes and are ready to be ladled into the canning jars for processing:


MMMmmmmm, delicious Borsch all cooked, processed and ready to eat!


What a blessing to have been able to capture and preserve these abundant, direct provisions from God. Dave and I have had some borsch for supper a couple of times now. Dave said it doesn't smell that great but tastes delicious! It can stand on its own as a very tasty and nutritious soup, or meat may be added to make a wonderful stew. I added in some canned brisket meat recently along with some homemade bread, and it made a well-rounded supper for us. All thanks to God for granting us this food from our garden as a type of the spiritual food He gives us from His Word.

Susan

Labels: , , ,

Bookmark and Share

Wednesday, July 29, 2009

Goat Milk?

video


The background music came from fiddle champion Tony Ludiker's free mp3s page. The recordings have Terry Ludiker and Darin Meeks on guitar.


This was fun to do. Here's a bit of raw footage, some of which hit the cutting room floor.

In this first one, I held out as long as I could, until the end:

video


I almost didn't get the part after this take. Also, based on the last few seconds, it appears that for some reason eating cookies makes me think I'm playing Hannibal Lecter:

video


Here, finishing up after getting the last goat back into the pen didn't work out quite as expected:

video


And just for the record, the milk I drank was from a previous day's milking that had been kept very cold. Apparently, it's better tasting and lasts longer when the goat milk is chilled well right away.


There is a lesson in the main video, in case it wasn't evident: most people go to the store for their provisions; agrarians go straight to the source, which is provided by God directly in accordance with His will, without the need for the world and its government approval, degrading pasteurization, shipping companies, grocery stores, and all of the other in-between means the industrial system requires for sustenance to go from where it's produced to where it is used or consumed.

Which way is the proper way for a Christian to live?


We are thankful to the Lord for the provisions of our goats and the milk He is allowing us to have.

-- David

P.S. In case you weren't aware of the TV commercials, etc., our video is a take off of the California Milk Processing Board (and then licensed by others) ad campaign, "got milk?"

Labels: , , , ,

Bookmark and Share

Thursday, July 23, 2009

Providence's Perpetuation Provisions: New Calf "Secoya"

The Lord once again saw fit in His graces, mercies and wisdom to grant us a new calf, a heifer, to our heifer Catalina (who with this calf has now become a cow). The calf sort of has the color of a redwood tree, so we decided to call her Secoya, which is Spanish for "redwood."

Here is the new little one:


And here she is again, in action:

video


We are again very grateful to God for His provisions of this new calf.

-- David

Labels: , , ,

Bookmark and Share

Tuesday, July 7, 2009

Providence's Perpetuation Provisions: New Calf "Dulce"

Once again God has seen it in His graces to grant another calf, this time to Casi Blanca, daughter of Amistosa. Casi is the calf shown with Ami in the second picture under "Our Herd" in the cattle introduction post. This is Casi's first calf, a little heifer; and her name is Dulce (which means "sweet" or "candy") because she looks like a chocolate dipped ice cream cone.

Here she is:


And here's a video:

video


We are again grateful to the Lord for His provisions of this new calf and the growth of the herd.

-- David

Labels: , , ,

Bookmark and Share

Thursday, July 2, 2009

Providence's Perpetuation Provisions: New Calf "Adelina"

The Lord graciously saw fit to grant us another calf, a little heifer, from Rosalinda, daughter of Rosa. Rosalinda is the calf next to Rosa in the first picture in the "Our Herd" section of our cattle introduction post. This is Rosalinda's first calf; and we have decided to call her Adelina, which means "little noble."

Here is a picture:


And a moving picture:

video


We are once again grateful to God for His providence and graces and mercies in granting this addition to our herd.

-- David

Labels: , , ,

Bookmark and Share

Monday, June 29, 2009

Garden 2009 - Spring - Update II - Sue-cchini


We didn't know what to expect with our 2009 Spring garden, but the Lord has seen fit to provide us with plenty of water in our cistern with which to water the garden; and He has brought the increase, and what an increase! As me and my buddies Rogers and Hammerstein always say, "Zucchini is busting out all over!"


I went out to see what was available to harvest; and, boy, there was an abundance of zucchini ready to be picked:


I looked through our book, "Preserving Food Without Freezing or Canning" by The Gardeners & Farmers of Terre Vivante, to see if there were ways other than canning to preserve the zucchini. The book described a very easy, lactic fermentation method. I simply washed and grated the zucchini, skin and all, and put it into canning jars with a teaspoon of salt per pint alternating layers of zucchini and salt. Then I added water to each jar leaving 1" head space, put on the lids and caps and......that's it! I put the jars down in the root cellar and within days we had a very delicious and fresh tasting zucchini kraut:


I also read that drying zucchini is a very good way to preserve it. I was excited to be able to utilize the wonderful solar food dryer that Dave had made. So I cut up the zucchini into slices, and within a couple of days they were shriveled and crispy! They say you can eat them like potato chips with dip or use them in soups and casseroles.

Here they are put out to dry on trays in our solar food dehydrator:


Here are the dried chips after 1-2 days in the dehydrator (the orange looking pieces are apricots which turned out delicious as well!):


I preserved the dried zucchini chips in glass jars. And I didn't have to use the pressure canner or a drop of propane!


I also harvested a bunch of yellow summer squash I was hoping to preserve. I read online that one woman didn't like the "mushiness" of hot packed canned squash, so she and her family started raw packing it with no water. This way it could be dipped in egg and crumbs to fry it or be used in soups and casseroles. Well, I went ahead and tried it that way, and it worked great! I'm very excited to have found this method, which opens up a wider variety of ways to use squash in meals.

In addition to canning, I also processed some of the yellow summer squash with the lactic fermentation method, as I had done with the zucchini; and it turned out fresh and tasty as well, without any freezing or canning used.

What a huge blessing to be able to capture and preserve the freshness of these garden vegetables without canning or freezing. We are careful to thank God for the bounty of this harvest as well as His many spiritual provisions.

1 Cor. 3:6 - "I have planted, Apollos watered; but God gave the increase."

Susan

Labels: , , , , ,

Bookmark and Share