In trying to continue to get away from dependency on the world, we have looked into preserving food without canning or freezing. One of the methods for doing this with fruits and vegetables is drying. There are food dehydrators available for purchase, some electric, some solar; but it seemed to me this would probably be pretty easy to construct. And so I searched for plans on the Internet and settled on these solar food dehydrator plans (originally available from North Dakota State University), partially because the design was very specifically laid out (which I need), and also because it appeared to be the most compact for the process behind the drying and still large enough to be able to dry quite a bit of food.
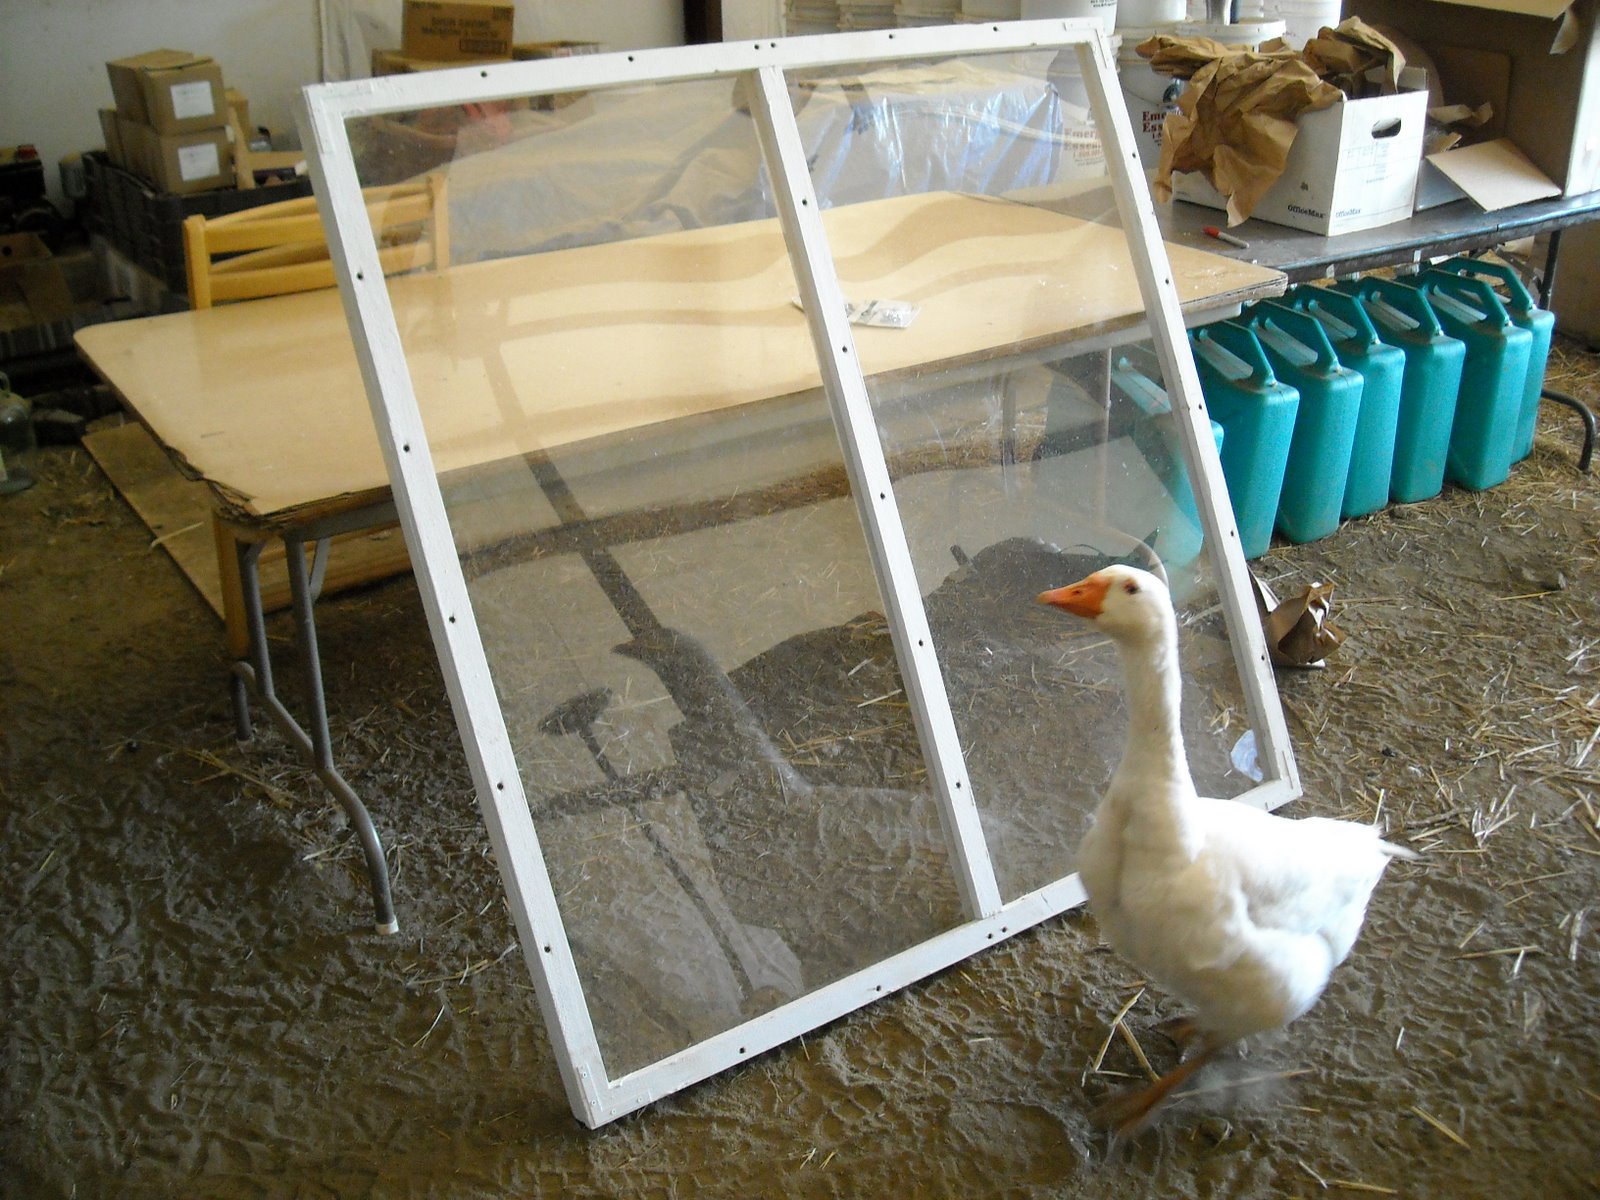
Here are some pictures of ours as I built it:
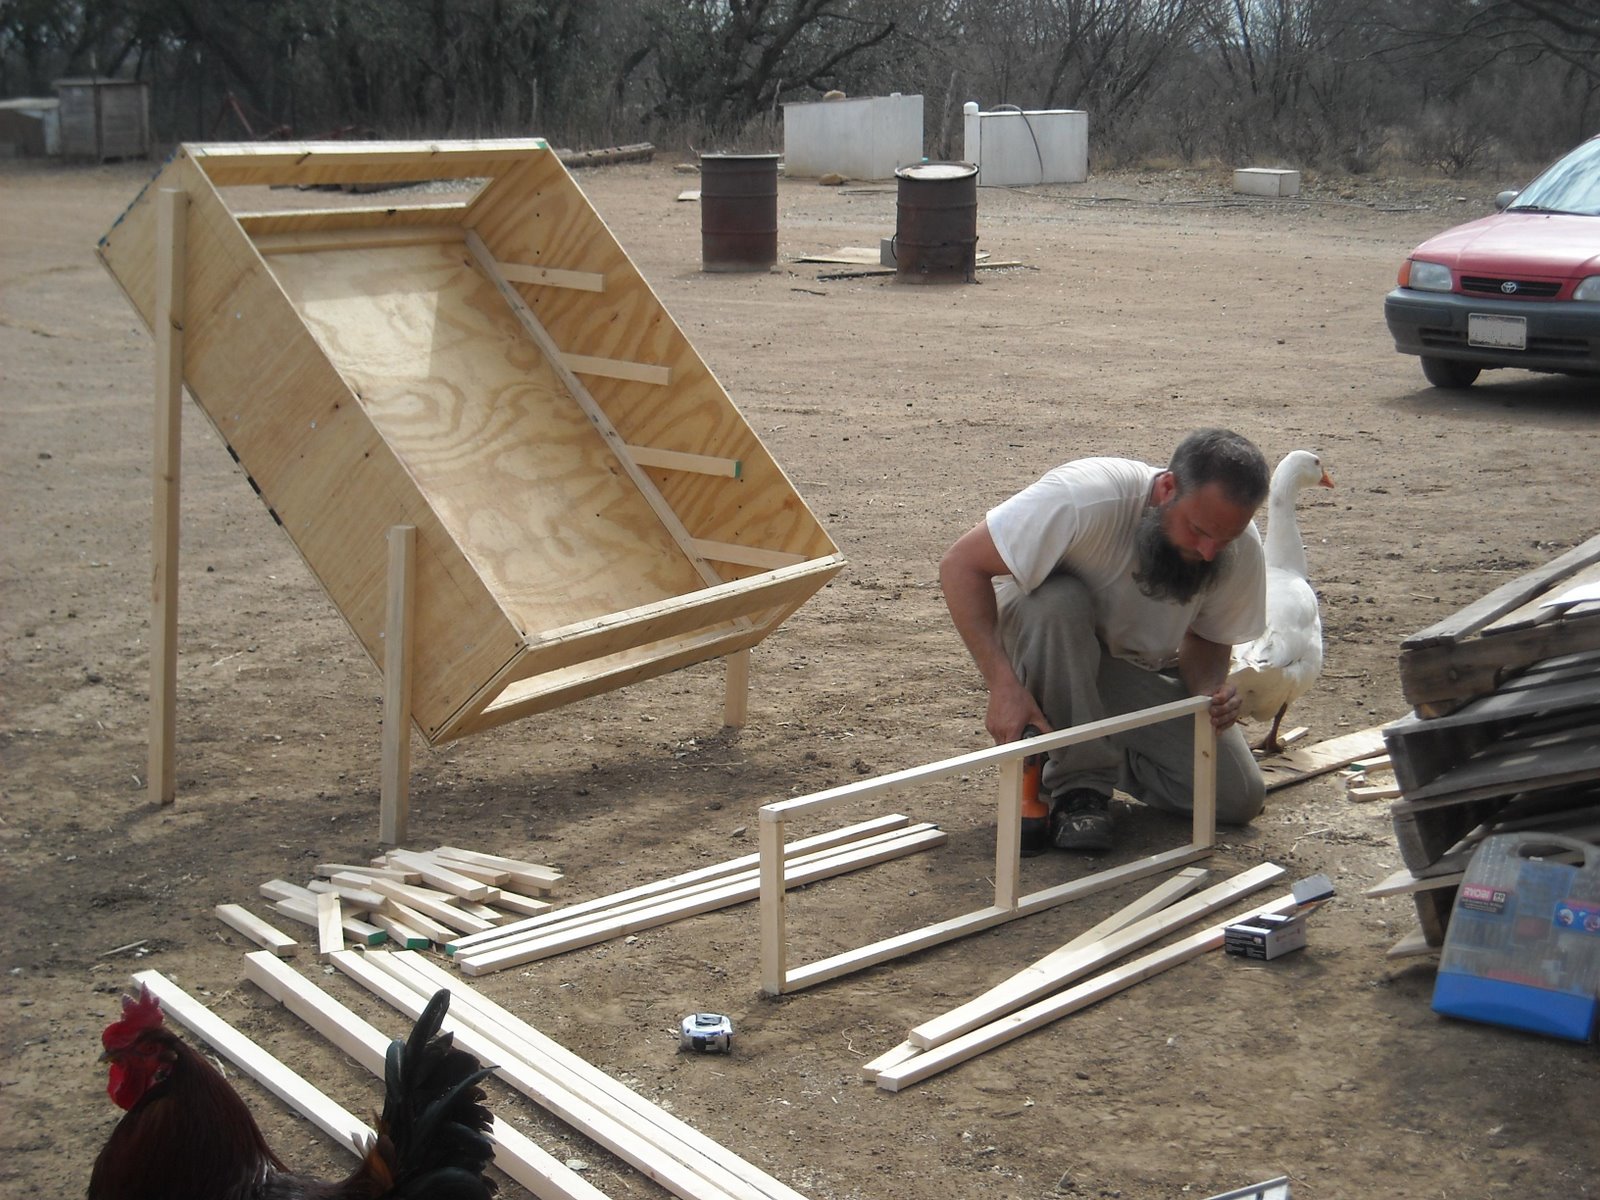

I decided to use 1″ wood screws and 2″ coarse drywall screws for most of it, and 1 5/8″ deck screws for the legs. I found that a 1/8″ pilot hole worked best with the 1x2s.
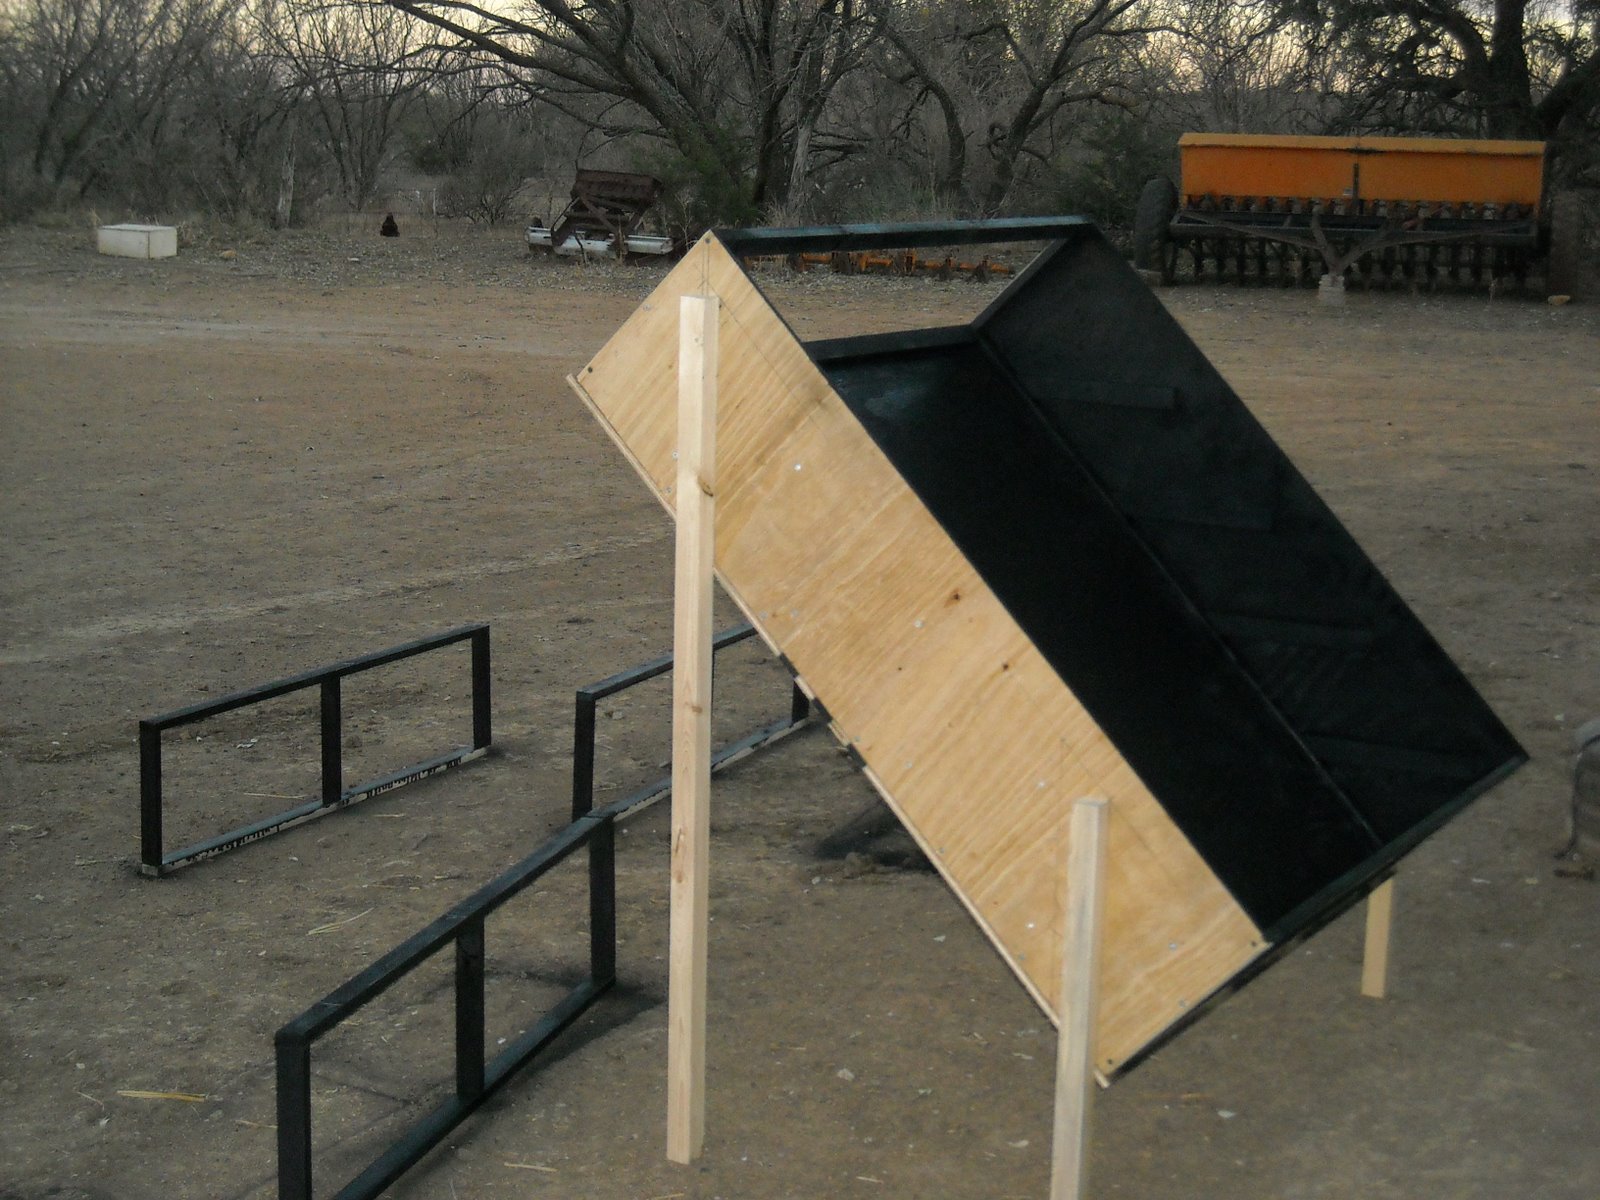
On the top I didn’t use a miter joint on the ends; I simply used butted joints and alternated them for the vertical vs. the horizontal frames. Also, for strength and longevity, I decided to use .93 plexiglas instead of 4-6 mil clear plastic sheeting. I tried to find a 48″ x 48″ piece but couldn’t; and so I thought I would use two 24″ x 48″ pieces with a support in the middle, but the store I was at was out of them. I went to another store, and they didn’t have 24″ x 48″ pieces; and so, I had to buy 30″ x 60″ pieces and a scoring tool. However, that was good because the distance from edge to edge of the top was for me 49 7/8″ (which means the other sizes would have been too small); and so, I was able to cut each piece to fit very nicely. Before I did that though and because of the extra plexiglas I had, I was able to practice scoring and drilling the plexiglas so as to not crack it when setting the real pieces in place. This was good because my first attempts did not work well. After practice though, I was able to get the hang of scoring and drilling, which worked pretty well on the final product:
I learned a few things with plexiglas: the scoring tool would cut into my 4′ level when using it to guide my scoring, and so I switched to a straight piece of wood; I would score only a few times with the wood guide in place and then would do it free hand as I was able to apply much more pressure causing the scoring process to be finished quicker; and I found that quick speed and light pressure was the best way to drill a hole. Also, the drilled hole should be at least the full diameter of the screw so the screw doesn’t put pressure on the hole, which I believe can cause the plexiglas to crack.
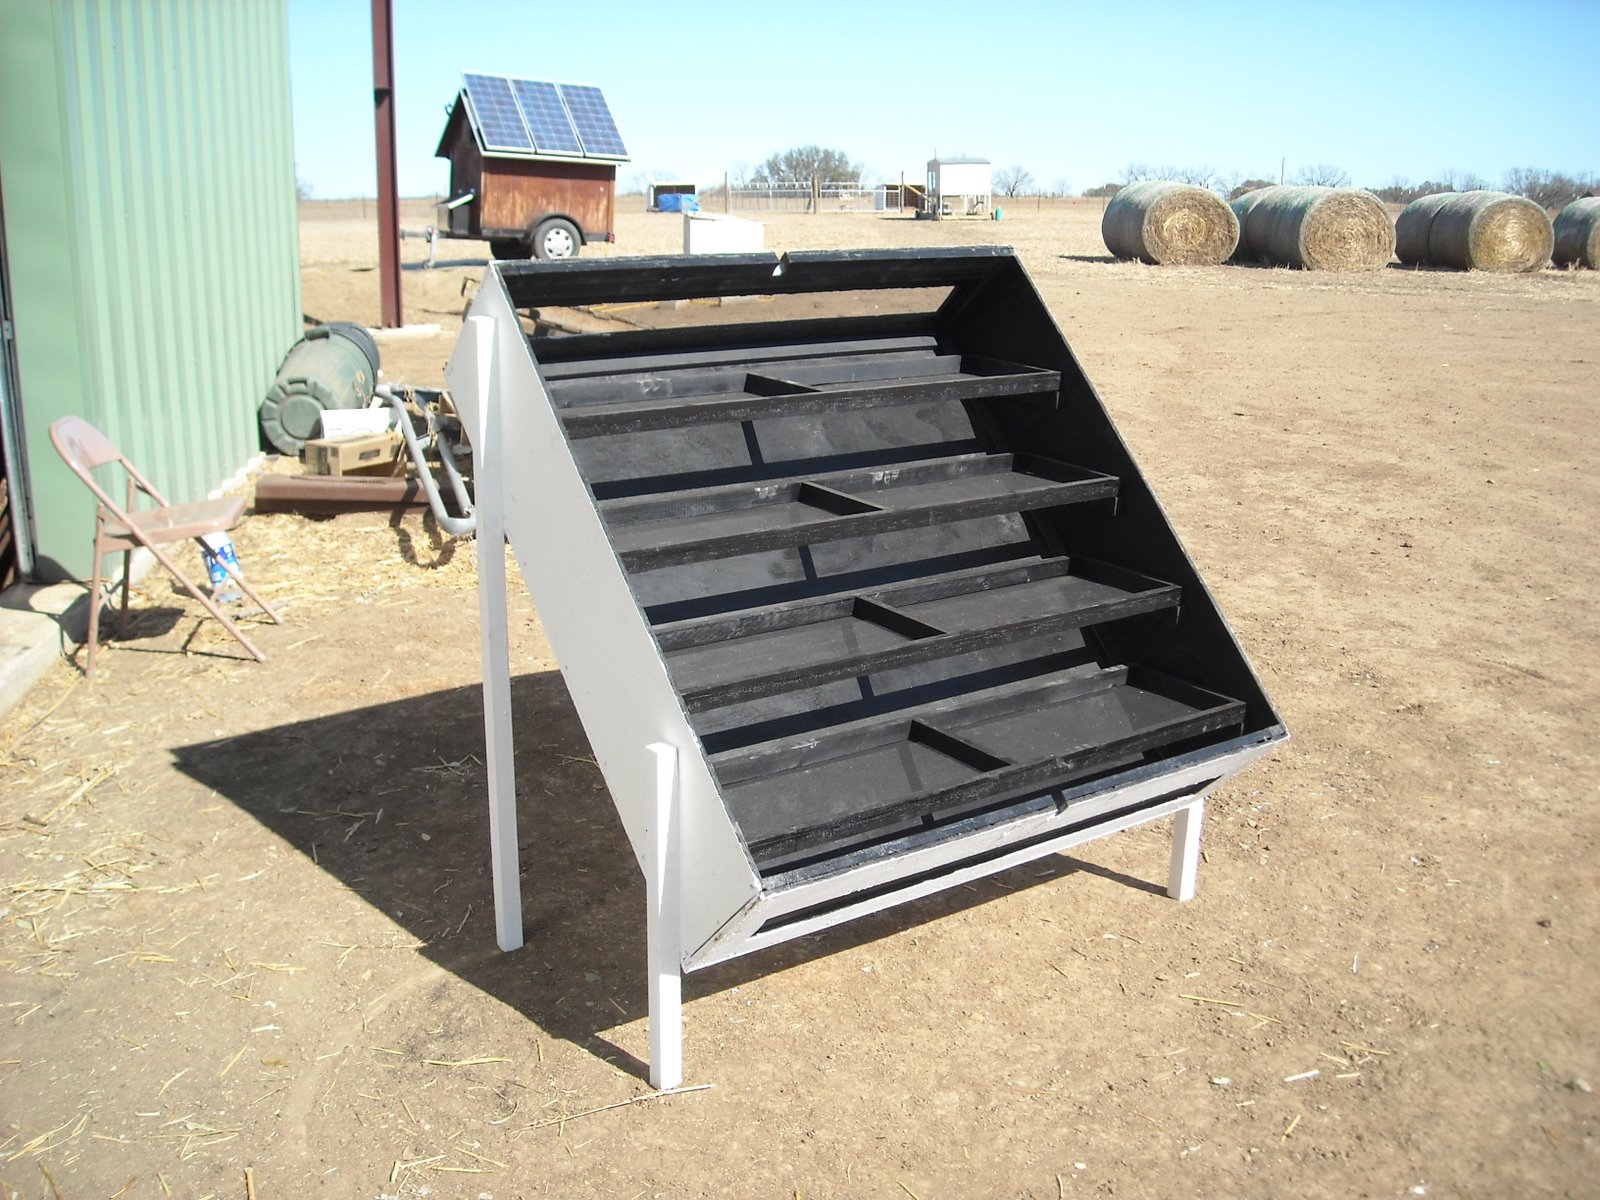
After the dryer was completed, I let it sit in the sun with the top off for a couple of days before putting food on the trays to allow the paint to bake in so the fumes would be hopefully removed.
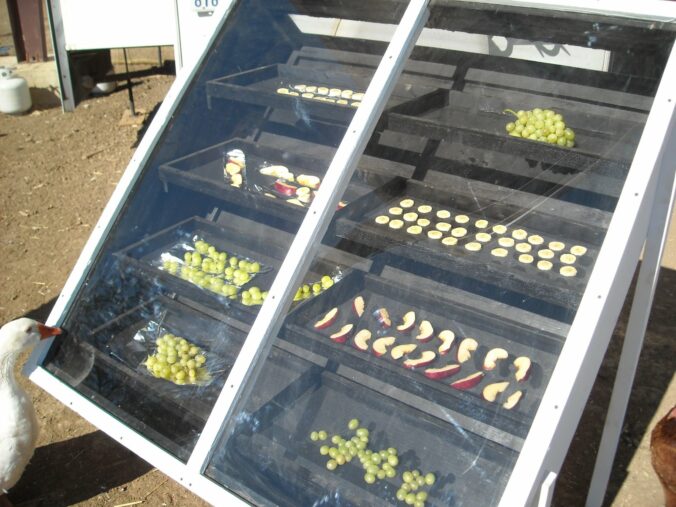
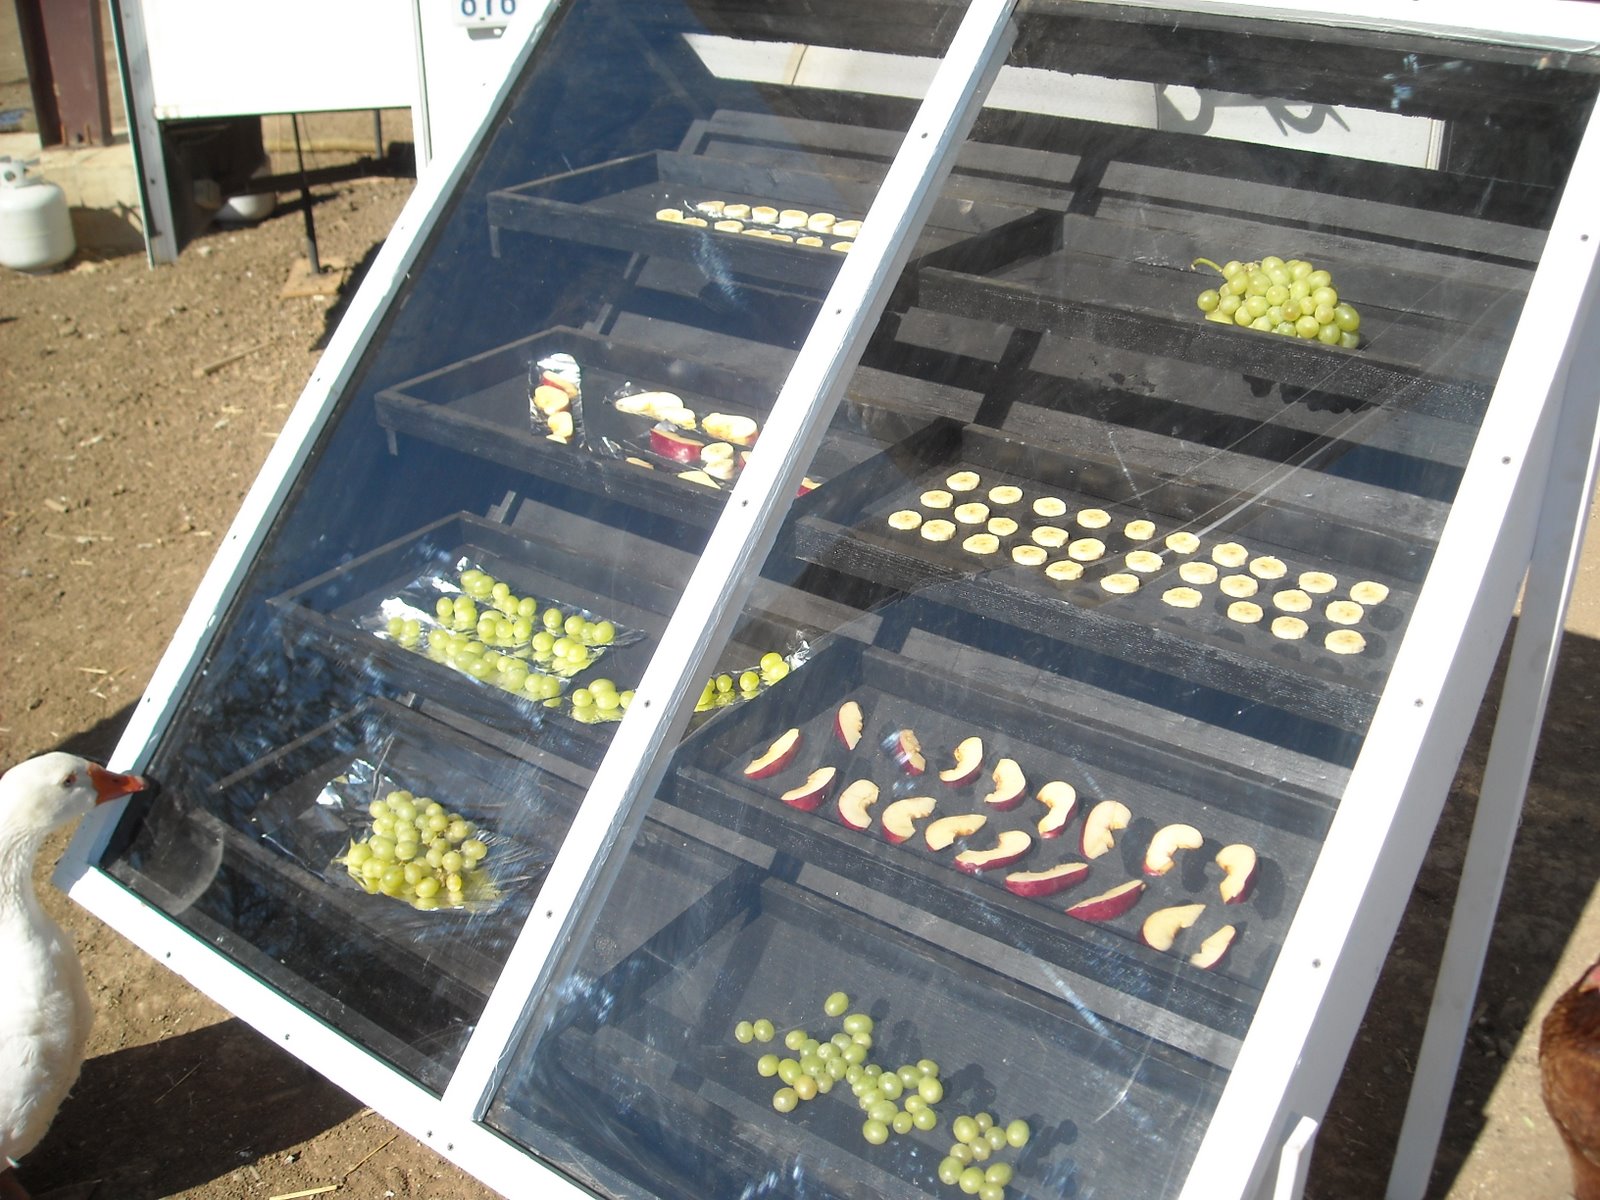
Here is some food drying in it:
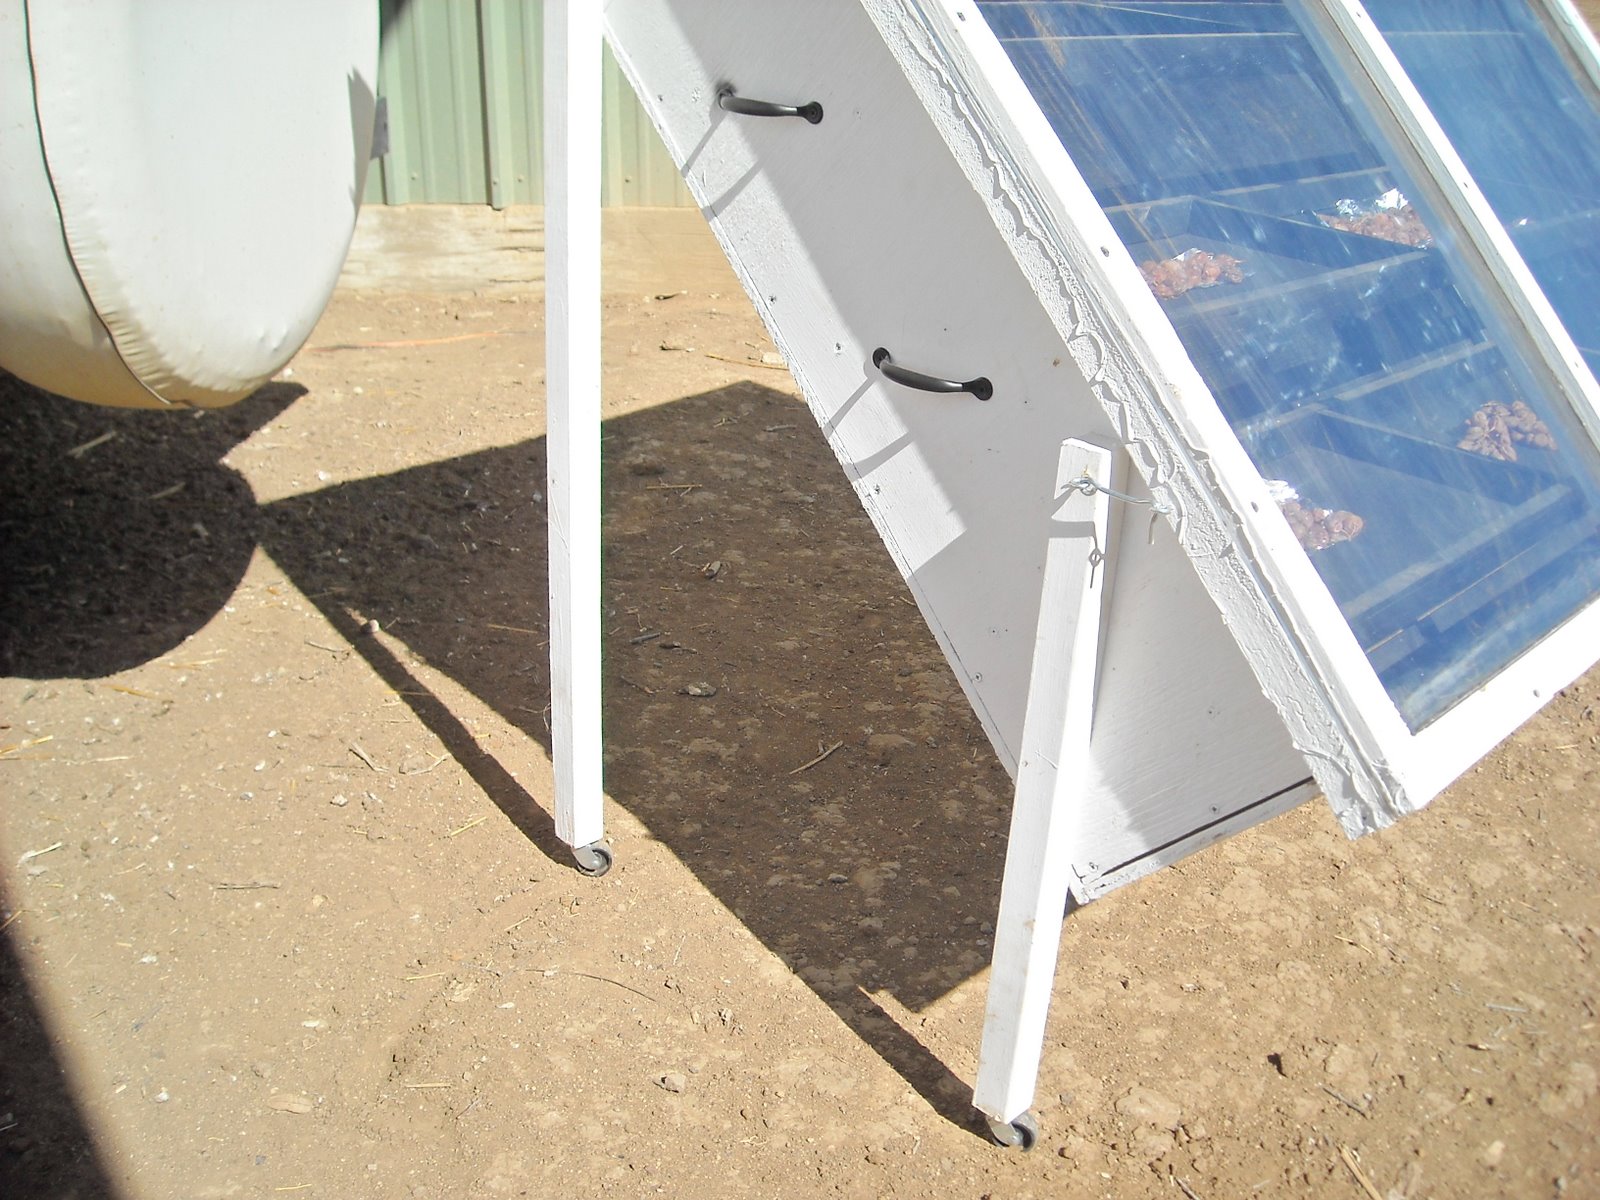
I added casters (swivel wheels) on the bottom of the legs to make it easier to move, and also added some handles which I attached to the sides where the inside food frame supports where located so that the handles would be more firmly secured and the handles’ screws wouldn’t be poking through the plywood siding:
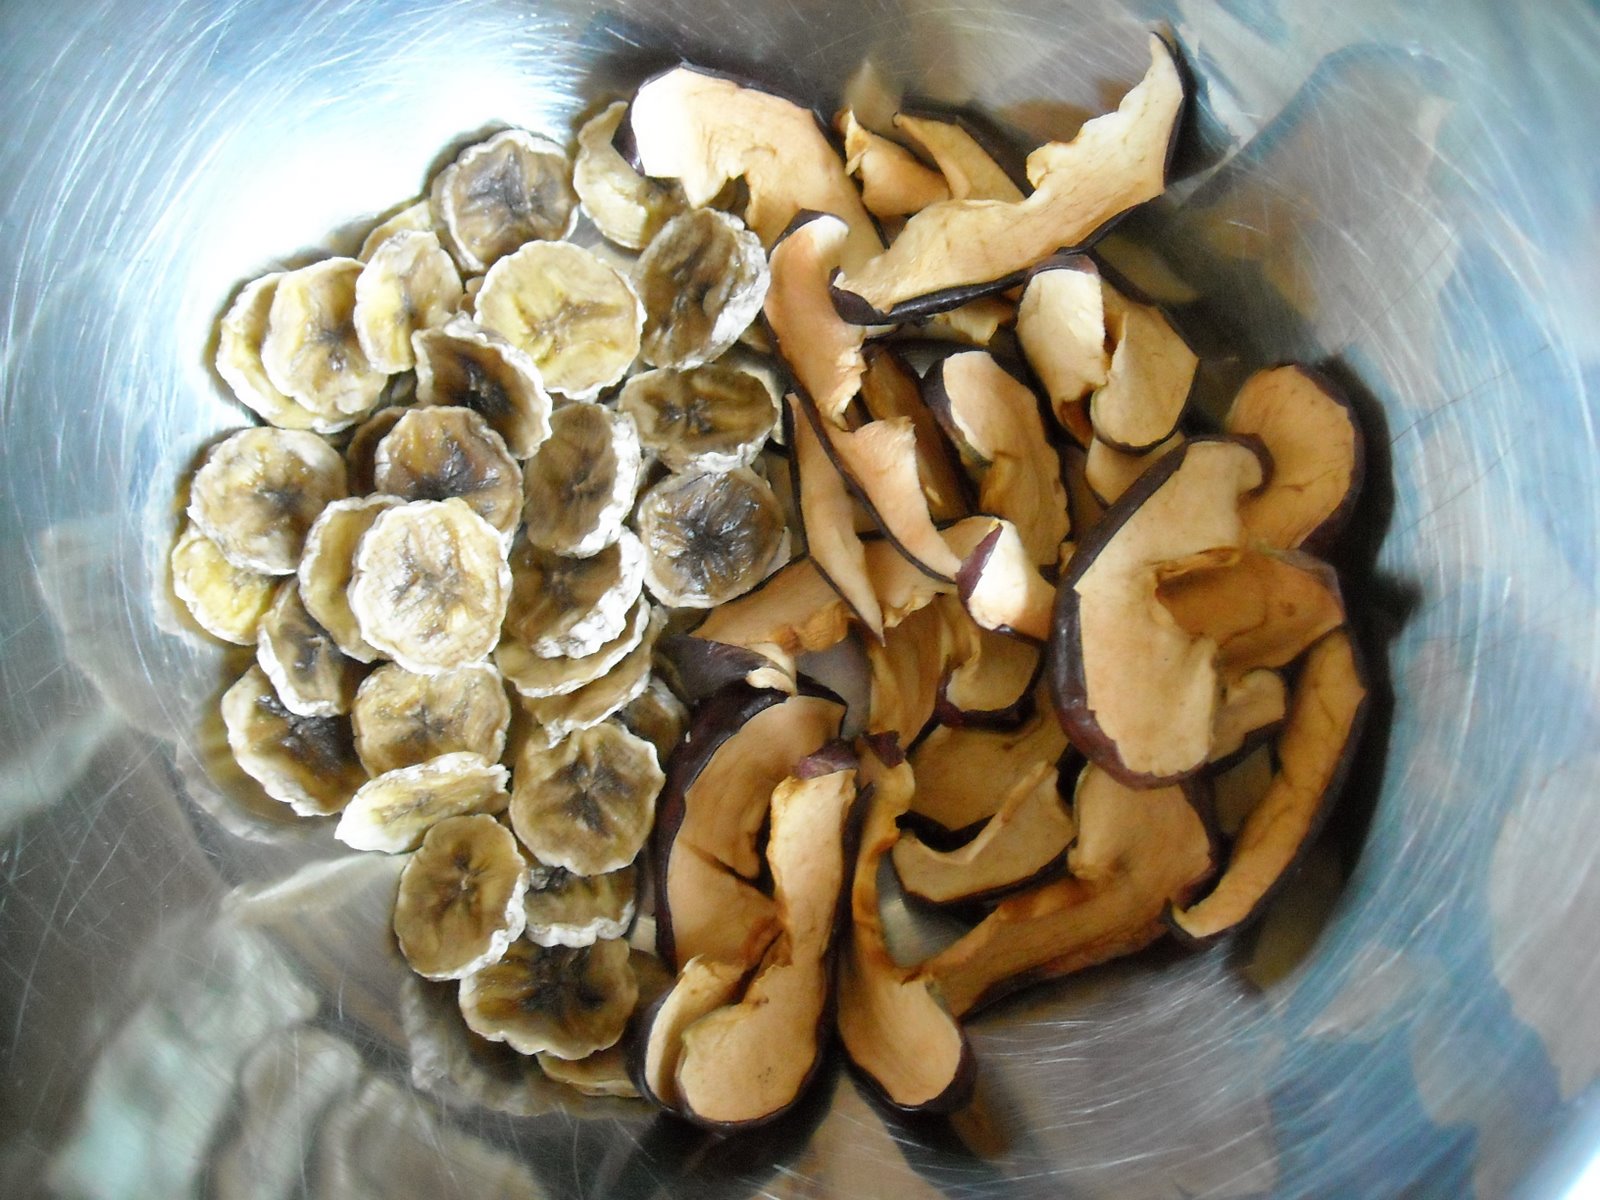
And here are the banana and apple results. Quite tasty!
At this point they can be bagged and stored in the root cellar, and should last for some time.
We thank the Lord for His provisions in being able to make this food dryer, and for His provisions in creation to allow us to preserve in this way the food He grants us.
— David
I love this idea. I am currently using two Excalibur dehydrators and am loving it. While I believe the solar variety to be more reliable, I love the idea of drying even if we don’t get enough sun. On those days when it is rainy/snowy and dark I can dehydrate inside the house when going outside is prohibitive for drying.
But you have an AWESOME looking setup there. Do you have any plans or did you just eyeball the idea?
sorry about the last comment, I’m a bit dim today, I just saw the link for the plans.
Wow, David! Great work. We have a reclaimed glass patio door that we plan to use to make a similar dehydrator. You’re going to love using yours. We have an electric one that we no longer use now that we’re off-grid in the cabin. We’ve used it to dry many things. I’m actually right now soaking some of last year’s asparagus for a pasta sauce. Our dried staples include asparagus, beet and other greens (a great parsley substitute), hominy, tomatoes, peppers, herbs, mushrooms and winter squash (when the squash bugs don’t destroy the crop. LOL)
Judy
Wow! That is super nifty!
😀
Nice dehydrator! This project is definately something up my husband’s ally. I’ll have to remember to show it to him.
We have two Excalibur dehydrators that we bought at garage sales (one for $0.25!!) and a round Mr. Coffee brand one. During the spring/summer/fall, we dehydrate a ton of stuff out of our garden, as well as when we find things on sale. We also like making jerky (venison jerky is gone nearly as fast as I can make it…lol!).
My husband and oldest son built a solor oven a few years ago as a homeschool project. We use it and the dehydrators to dry out mesquite beans to grind into flour. It’s really quite yummy, has a kind of cinnamony taste and is excellent in chocolate chip cookies! We also make the most yummy mesquite bean jelly.
Anyway, we dry a lot of produce and store in canning jars which we seal with our seal-a-meal machine (we have the jar attachments). They look so pretty up in out pantry and we use them constantly throughout the year. Thanks be to God that we can grow year round here in Texas (central Texas)! This year, we were able to keep our garden going all winter!
So, I have been doing some serious thinking about this thing! Do you think that, with glass on the front, like double insulated sliding glass door, that it would work as a solar cooker? And, perhaps with a little more ventilation do you think it would work as a seed starting greenhouse? Oh boy! The possibilities…
😀
Thank you all for your comments.
Ginny, not sure about all of those. For a cooker in order to get high enough temperatures, you might have to add some sort of mirrors on the sides that focus the sunlight. But then you probably wouldn’t want those in place just for drying or with seedlings. As for a greenhouse, I would think the convection flow that happens for drying would do just that to the seedlings which I would think wouldn’t be good, and so I suppose like you were thinking if you were to stop that or allow for cross ventilation or some such, it might work…maybe.
Anyway, good thinking!
— David
Awesome Idea, I just keep learning from you all the time. Now to implement it all when we get there that’s another thing. Oh David wondering do you or Susan use Skype. As you can call anyone through the computer for no charge… just an Idea.
Deb
Hi Debylin,
We don’t use Skype. Sadly, quite frankly, I’m not sure our Internet connection could handle it, being as intermittent as it is. Good idea though, and thanks.
— David
fantastic equipment – useful technology that doesn't pollute, now that's worth the investment.
cheers. lovely blog
patrick
Hi Patrick,
Yes, the dehydrator works great; we use it a lot. And once we get the food on it, it does all of the work for us, so Sue can be processing food that way while moving onto processing it a different way.
Thanks for saying hello.
— David
Thanks for sharing your experiences and knowledge. I love these plans. I agree, they maximize on exposure while keeping overall space down. I plan on using the plans to build one.
Hi Ryan,
Yes, it has worked out really well.
Thanks for saying hi.
— David
thank you for sharing your expereince. i plan to build a solar dehydrator as well. my concern was that the sun light kills some nurtuernts so i was looking to build a box that collected heat with an air flow into a rack that is covered from the sun. I was also concerned about the plastic contaminating the air. my daughter has been getting info on chemicals in plastic. I had planed to use old reclaimed glass. This year my aprocots came off before i was ready. so i put a screen door over a table turned on its side , using the legs as a open frame and the back as a wall. I placed a sliding glass door on angle in front/ south on a few rocks to allow air flow along the bottom. I then made cardboard ends and covered the fruit with a corse 2 layered cloth, just came that way. aproicots dryed well. faster after i got the sides up. a freind told me her friend dryed aproicots on screen without window with shade cloth to keep off bugs and it dred in 2 days. again concern with plastic and some sun. but it is nice to know we do not have to have things excatly percice we can be inginutive and accoomplish great things.
i attended a solar fair and saw a solar cooker that was just a black box with metel bottom with door in back sized to fit containers to be used. no air flow in or out and insulated. cooking in black jars worked great.
It is sacary to do things without plans but it is cice to know ther are those to do and share them.
Hi Anna,
Interesting ideas…thanks. We have a Sun Oven solar oven, and it works great; you can't put a big pot in it, but you can a smaller one, or baked potatoes, etc.
— David
What a great idea! And a really cool project!
Hi Mike,
Thanks…it has ended up working quite well. We are very thankful for being able to find the design and that it accomplishes the task so nicely.
We've had to learn to strap it to one of our external barn posts to keep the wind from blowing it over, which has caused some plexiglass cracking, but I also just contact cement the cracks, which seems to help. 🙂
Anyway, thanks for saying hi!
— David
Great project! What type of paint did you use? Did the smell go away after it baked in?
Hi,
Thanks…we're very thankful for it.
I just used exterior white paint for the outside, and black spray paint for the inside. I think now I would use just normal black paint if I were to do it again.
I don't believe I've noticed paint odors really too much. I have a feeling it being vented constantly like it is helps with that too.
— David
Hi,
Have you really managed to dry a bunch of grape?
Hi Vasilis,
Yes, I believe we did, and if I remember correctly, it worked out well, turning them to raisins. 🙂 The plums turned into prunes too.
— David
Hi Unknown, re: pictures in the book, please put your name and email in another comment on this blog post, and I won't publish the comment but will plan to email you…thanks!
— David
could you use this to make beef jerky?
Hi Anonymous,
Well, I'm not sure, although I built a meat dryer that we have dried meat on:
https://blog.siffordsojournal.com/2011/12/meat-dryer.html
https://blog.siffordsojournal.com/2012/02/meat-dryer-update-i.html
…although, this solar dehydrator might work. Sorry I can't be more helpful.
Thanks for the question though!
— David
What did you use for the trays? I’m sure going to build one.
Hi Joey,
I believe the plans noted at the top say 1″ x 2″ wood (see the 2nd page), and then I used vinyl window screen. I’m pretty sure I did them similar to the plans across the board, except for angled cuts in the corners…I probably just butt one up against the other. I believe I did use the corner brackets too.
HTH! Hope it works out for you!
— David
We are trying to make it on our own. Can you tell me the rough price of it provided materials are to be bought
?
Hi Smriti,
Well, I made this a long time ago and don’t remember how much it cost. And costs I’m sure would be different now too.
The plans in the link at the top of the blog post show the materials needed, except for the plexiglass, so maybe you can use those to get an estimate.
Hope it goes well for you!
— David
Next time you work with plexiglass – use a grinder with a cutting blade. Works so nice. I made 4 double hung windows out of plexiglass for my front porch.
Hi Mary,
Nice tip! Thanks for taking the time to write!
— David
Hi, where can I get the plans for the solar dehydrator? The link posted in this website does not work!
Hi Deja,
Yes, wow, the link must have stopped working fairly recently…I checked it every once in a while to make sure it was active.
I had saved the plans though in case that ever happened, so I updated the link in the blog post, and here’s a direct one:
https://www.siffordsojournal.com/media/solar-food-dehydrator.pdf
Thanks for letting us know!
— David
Thank you David for your quick response! I showed to a friend and asked me , if we would have a problem of keeping bugs out?
Hi Deja,
The 2 insect problems were these:
1. Since I deviated from the original plans by using plexiglass for the lid and splitting that into 2 pieces, I needed to cut notches at the top and bottom of the main box to allow the separator piece of wood on the lid to sit in them, while the rest of the lid sat on the rest of the box. Since those notches were a little bigger than the separator piece, there were little gaps for small insects to get it. So, I put small rags on those notches before putting on the lid, and that blocked those gaps.
2. The hardest part was when the lid was off, and I was adding fruit or moving items around, flies or the like would fly around the fruit while the lid was off. So, when it was time to put the lid back on, I had to wave my hands over the fruit until I shooed away the flies, and then quickly put on the lid. It took half a minute some times, but if I just kept at it, and then was quick enough with the lid, it worked fine. 🙂
Hope that helps! If you or your friend build it, I hope it works out for you. It has really worked well for us.
— David