Our journal of what we pray is our sojourn of life along the narrow way, even the old paths, submitting to the Bible as a light unto both.

Author: David & Susan Sifford (Page 63 of 96)

Hugelkultur Garden Beds

One of the garden bed methodologies we’ve learned about is hugelkultur. Generally, this involves burying (below and/or above ground) tree materials, like stumps, trunks or even branches, under your garden soil. Apparently, as the tree material rots, it also becomes very absorbent, and is supposed to help with holding moisture in the garden bed. There is lots of information and videos about it on the Internet, but here is our first attempt at doing one of these. Since we’re observing a land sabbath and aren’t growing gardens or crops this year, I definitely wanted to start on these while I had extra time.

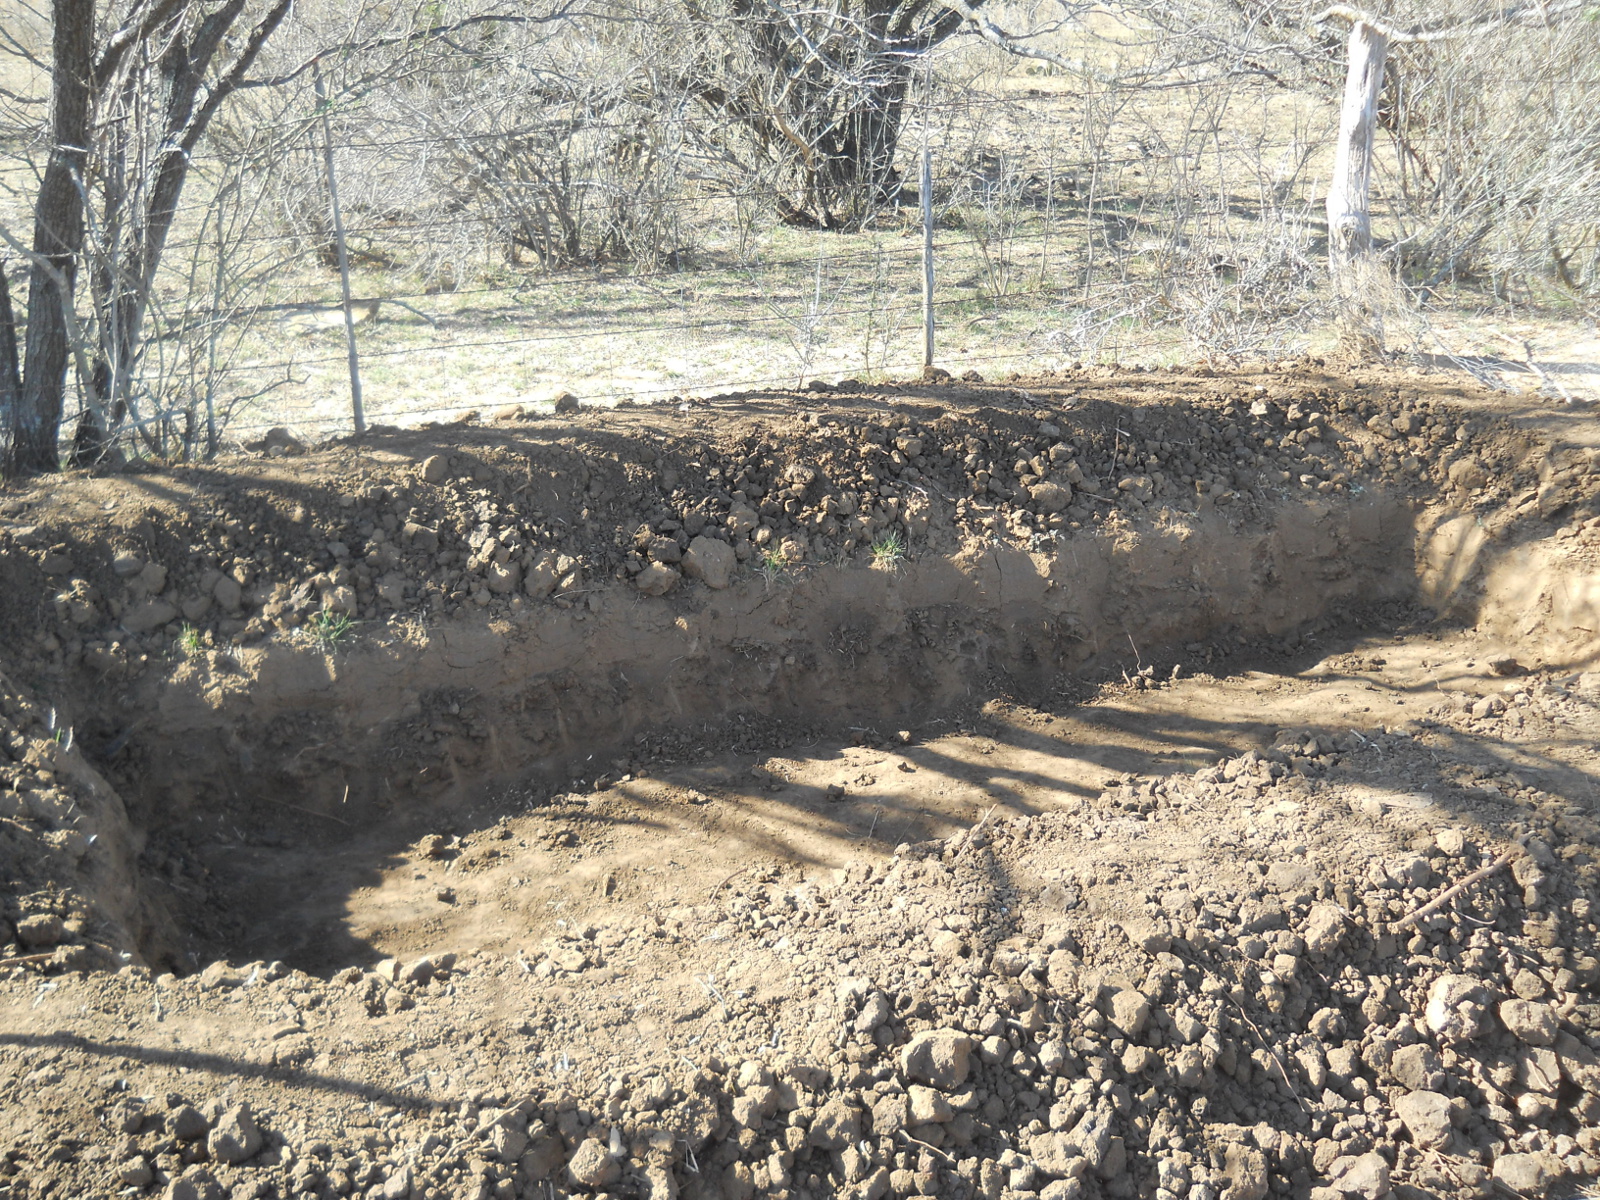
I decided to just locate the beds as an extension of our main garden area, and here is the first level dug out. I thought using the dug-out dirt as a berm around the bed would help even make it deeper:

First Dug Out Level of Hugelkultur Garden Bed

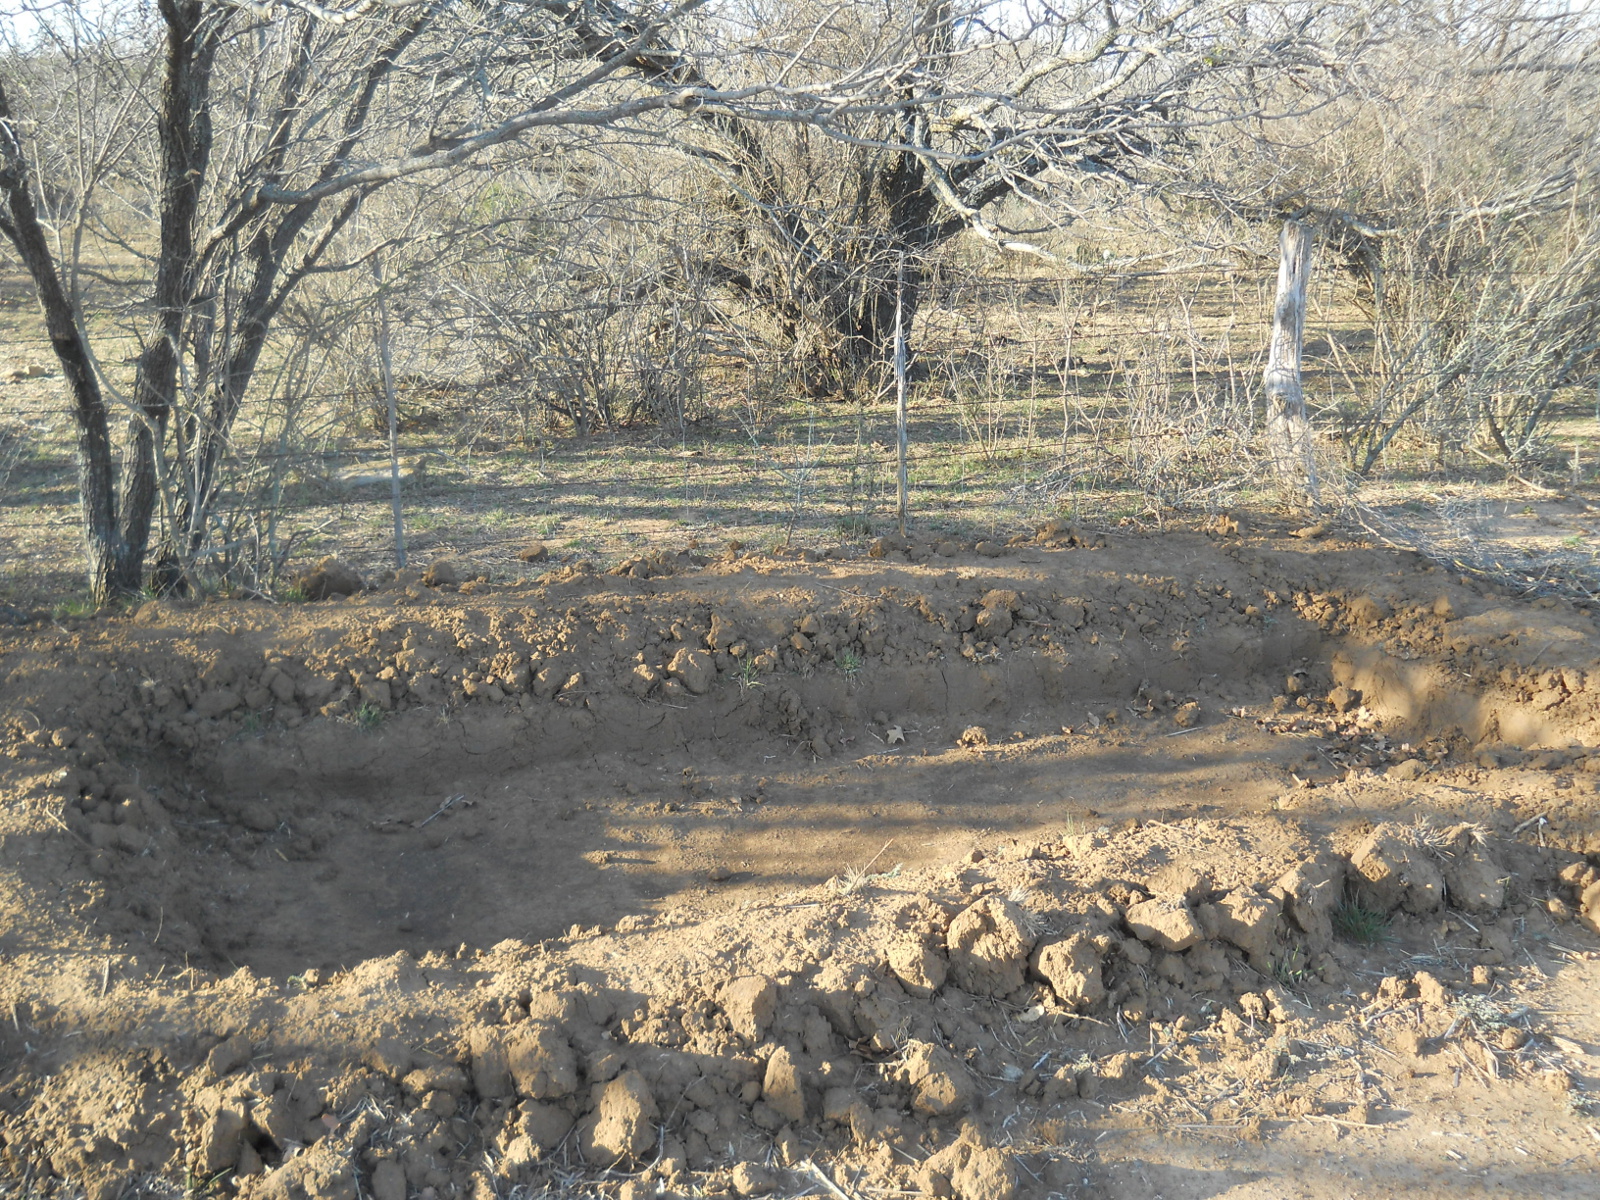
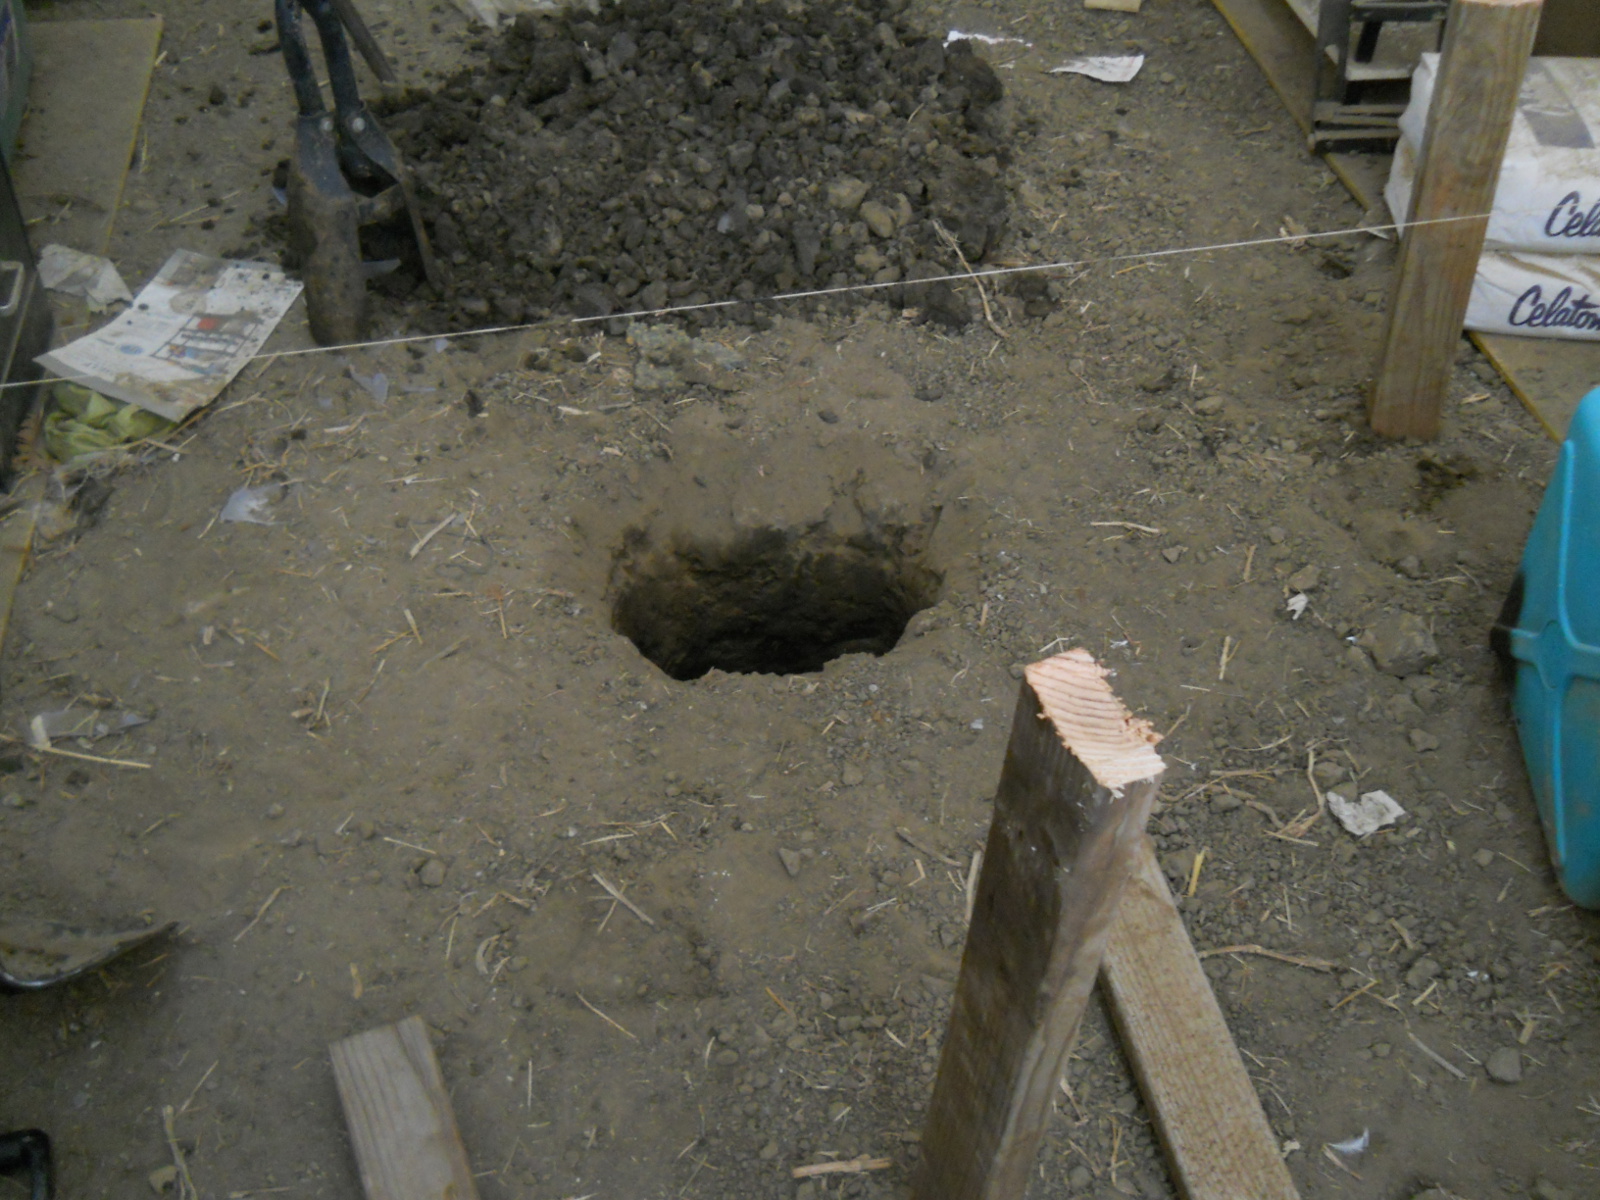
After the first digging, in looking at it, and I think even trying it out by putting a stump in place, it just wasn’t deep enough, so I dug out another round:

Second Dug Out Level of Hugelkultur Garden Bed

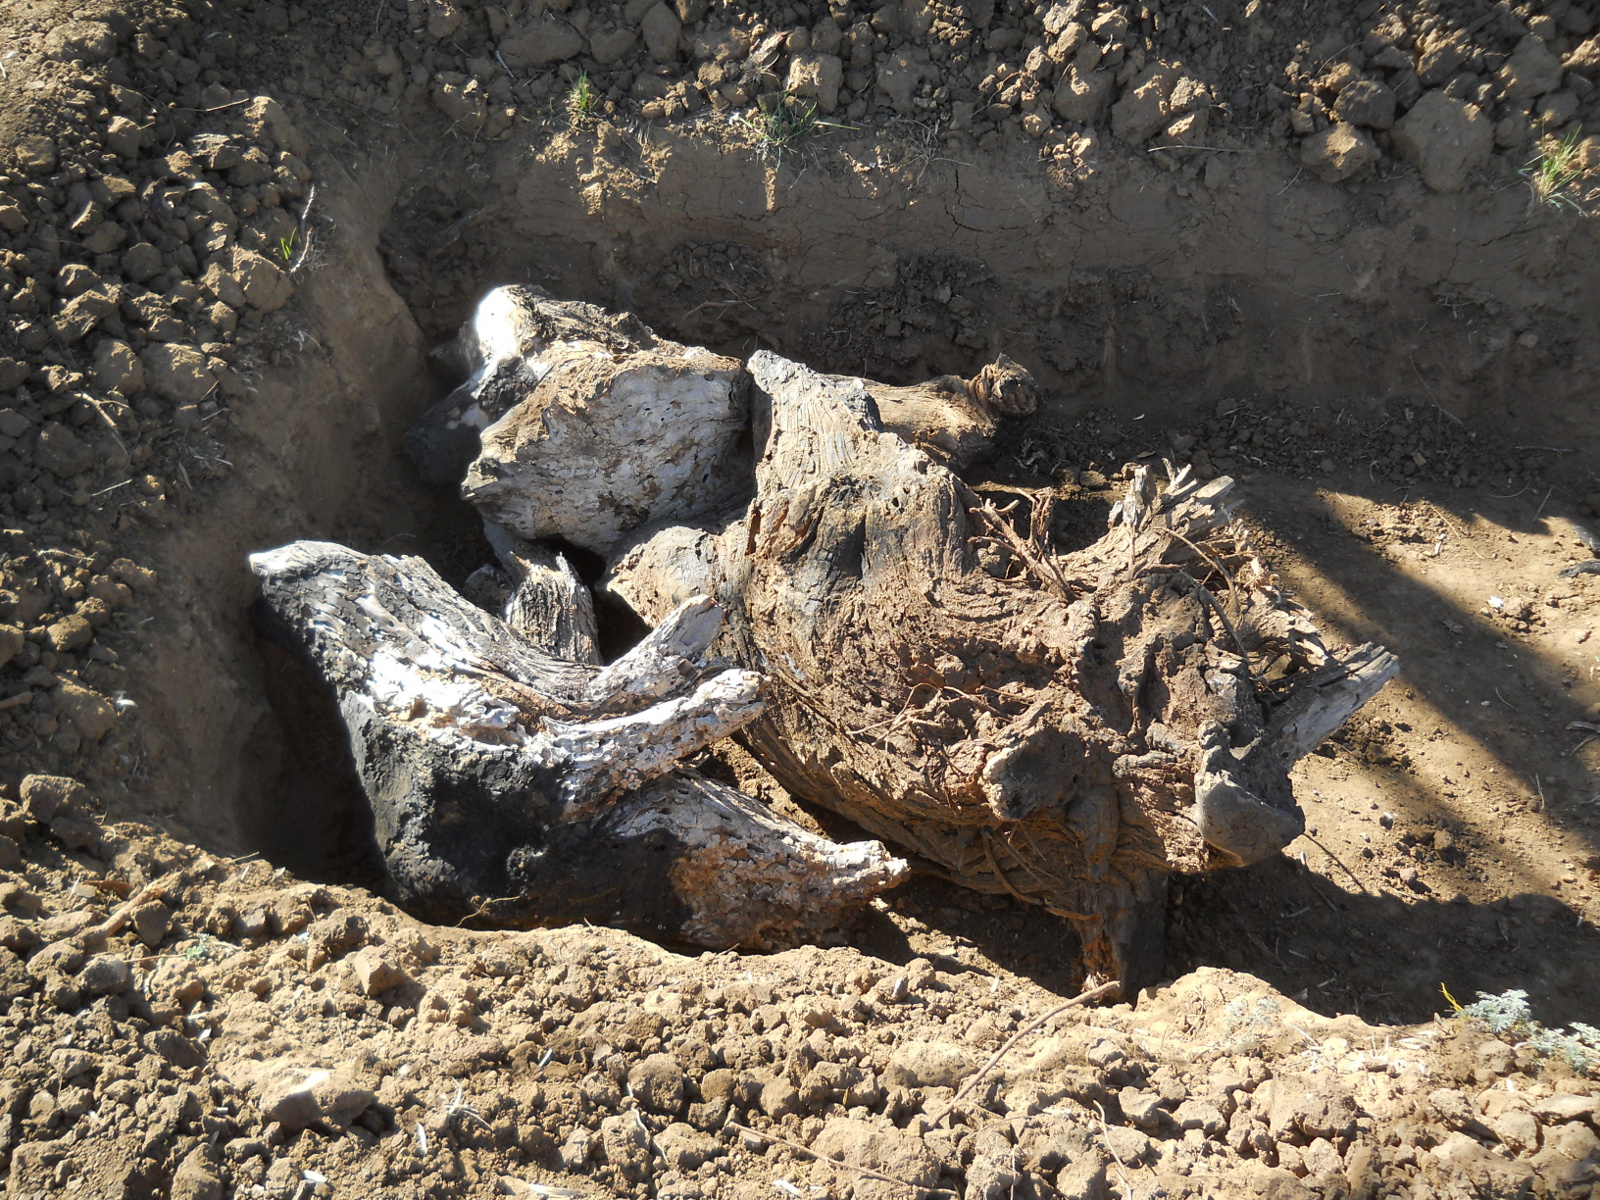
Then, it was time to gather the wood material. For this first bed, I thought I’d go with larger items, and so I went around trying to collect old stumps and similar things:

Hugelkultur Garden Bed First Wood Stumps in Place

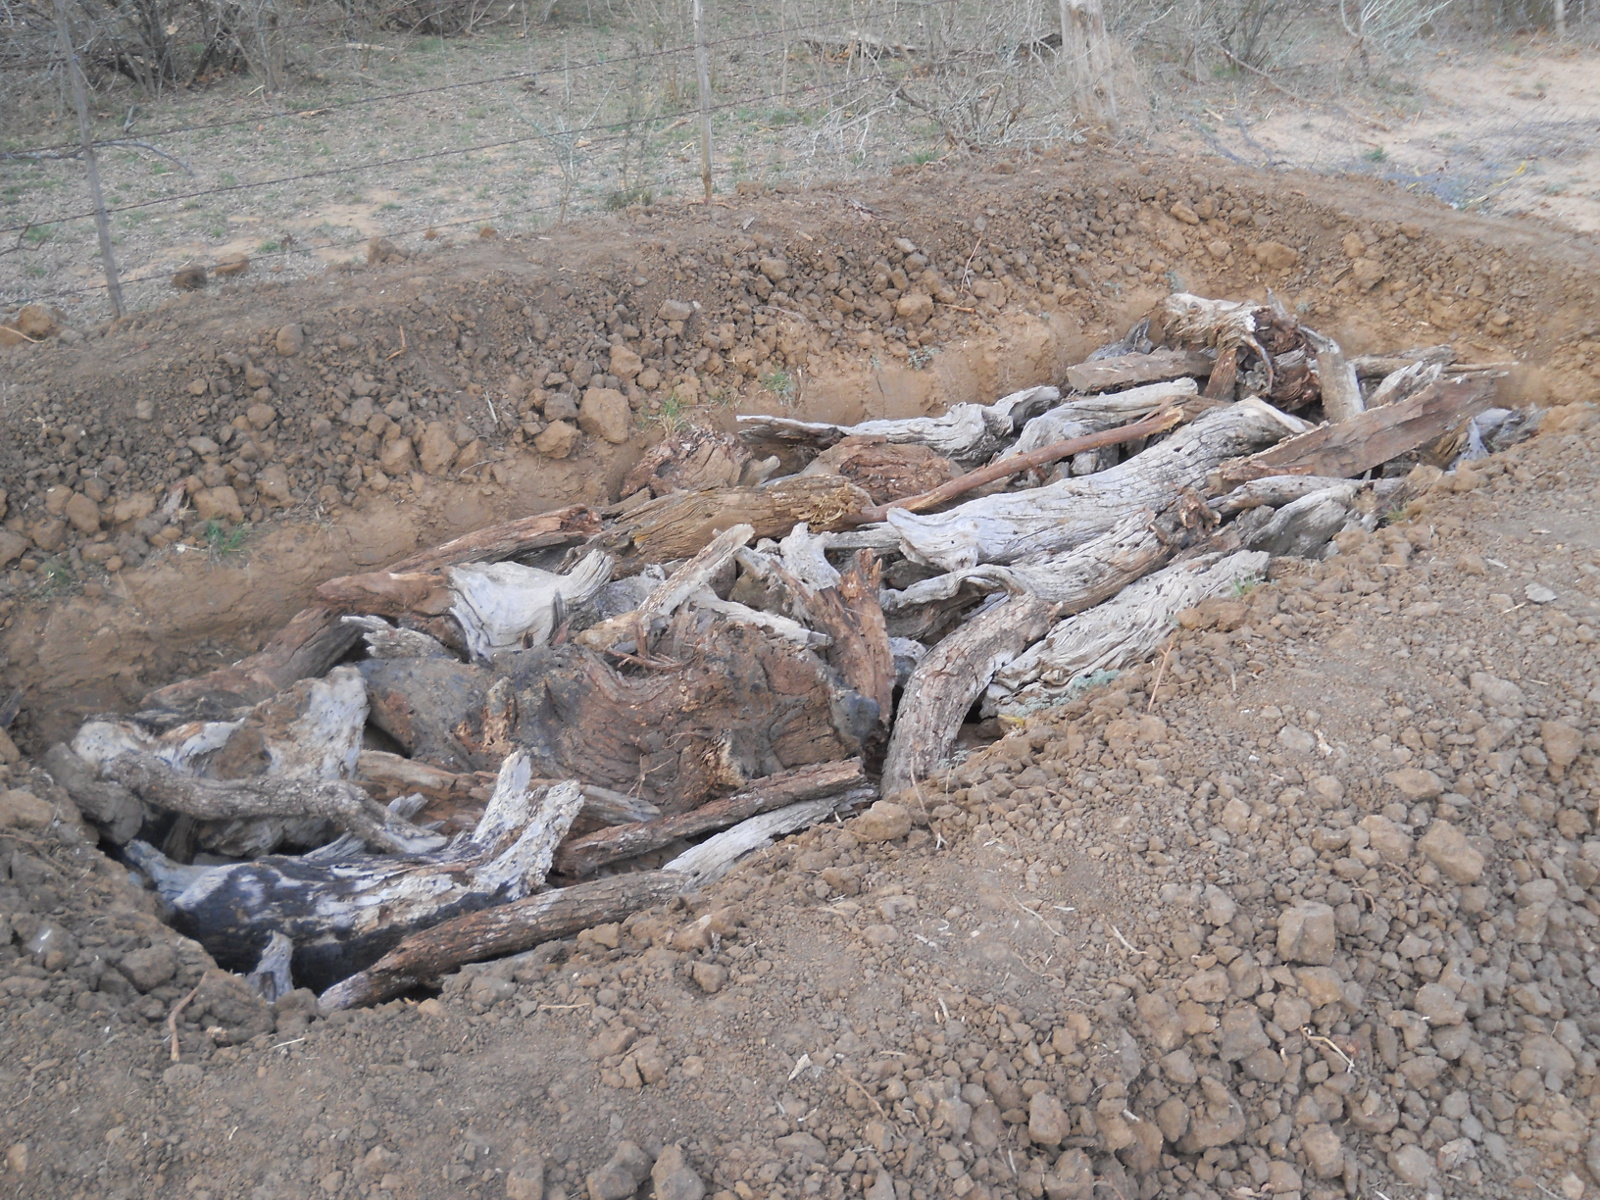
And here is the bed full. It was like a puzzle trying to place the pieces to fit as tightly as possible:

Hugelkultur Garden Bed First Rest of the Wood in Place

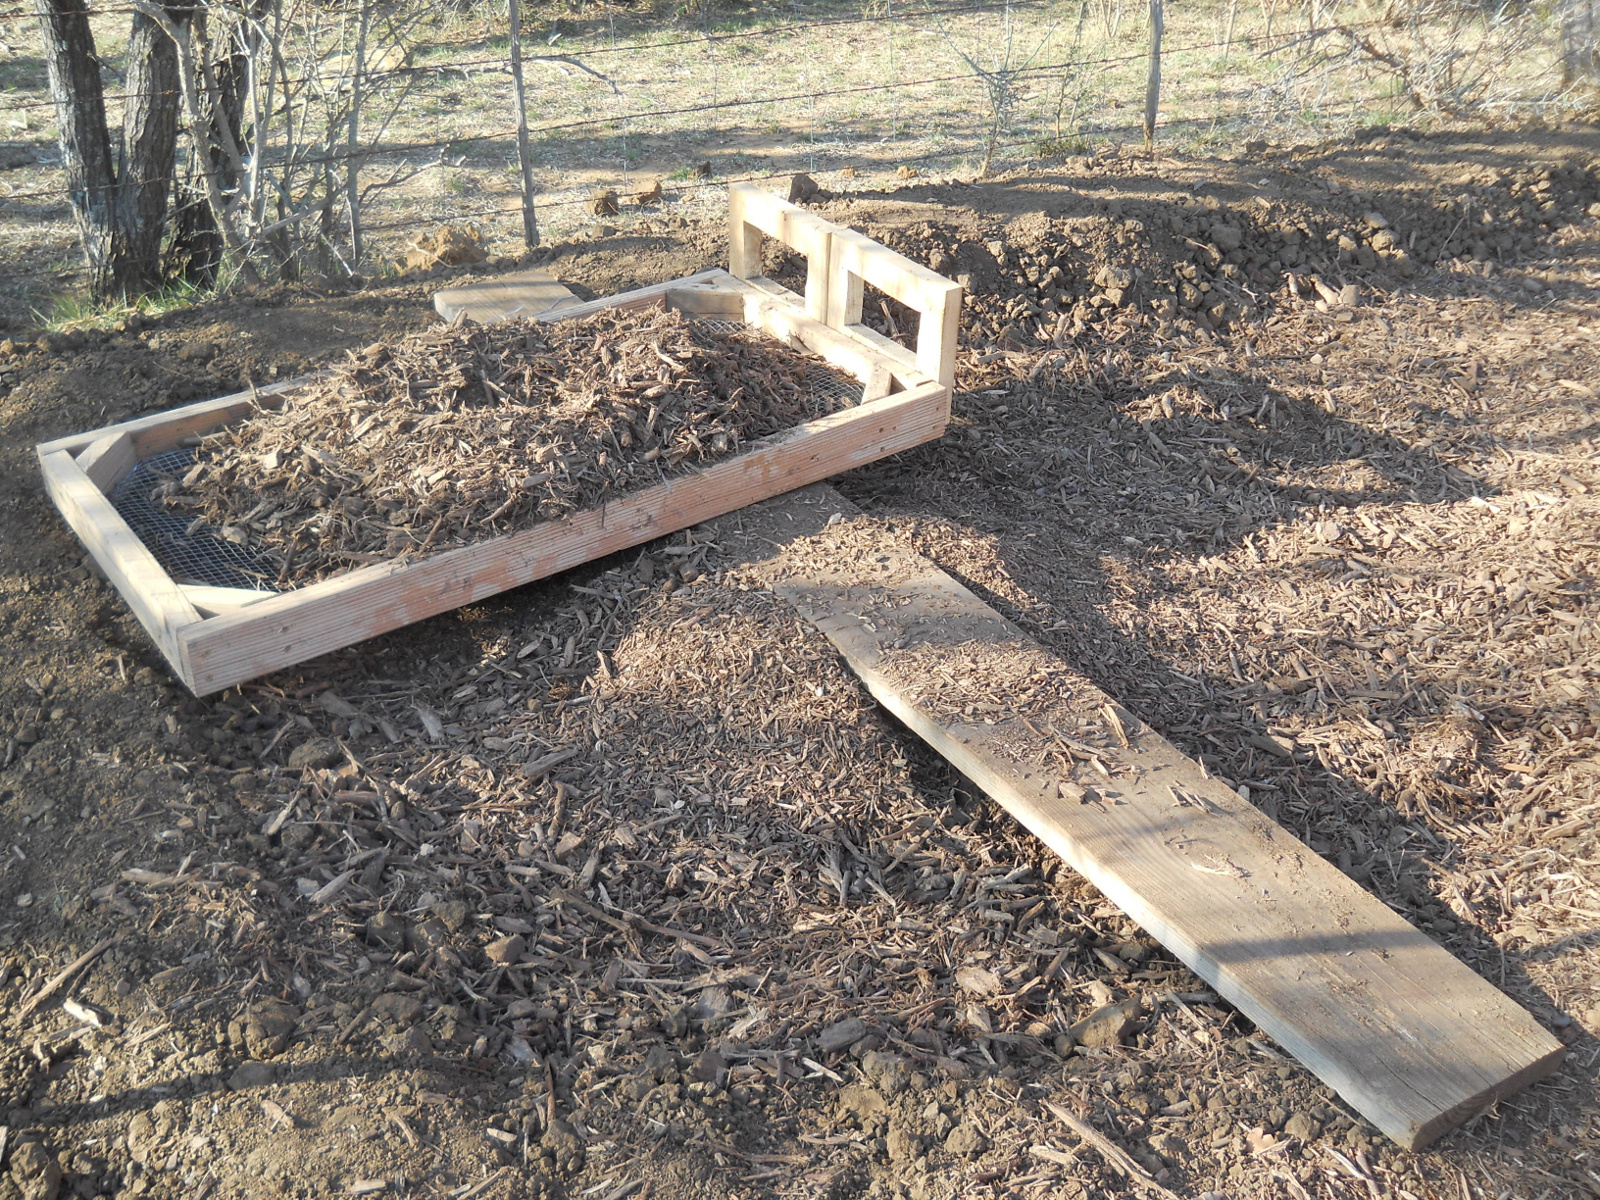
The plan was to then cover the bed with mulch. I had originally wanted to fill the entire thing with sifted mulch, but realized that was going to take a lot of effort for probably not much gain, since I could fill the bed up leaving 8-10 inches at the top with the wood-chips mulch we get from the landfill, and then sift from there, which is what I did. This is the mulch in place:

Hugelkultur Garden Bed Wood Chips in Place

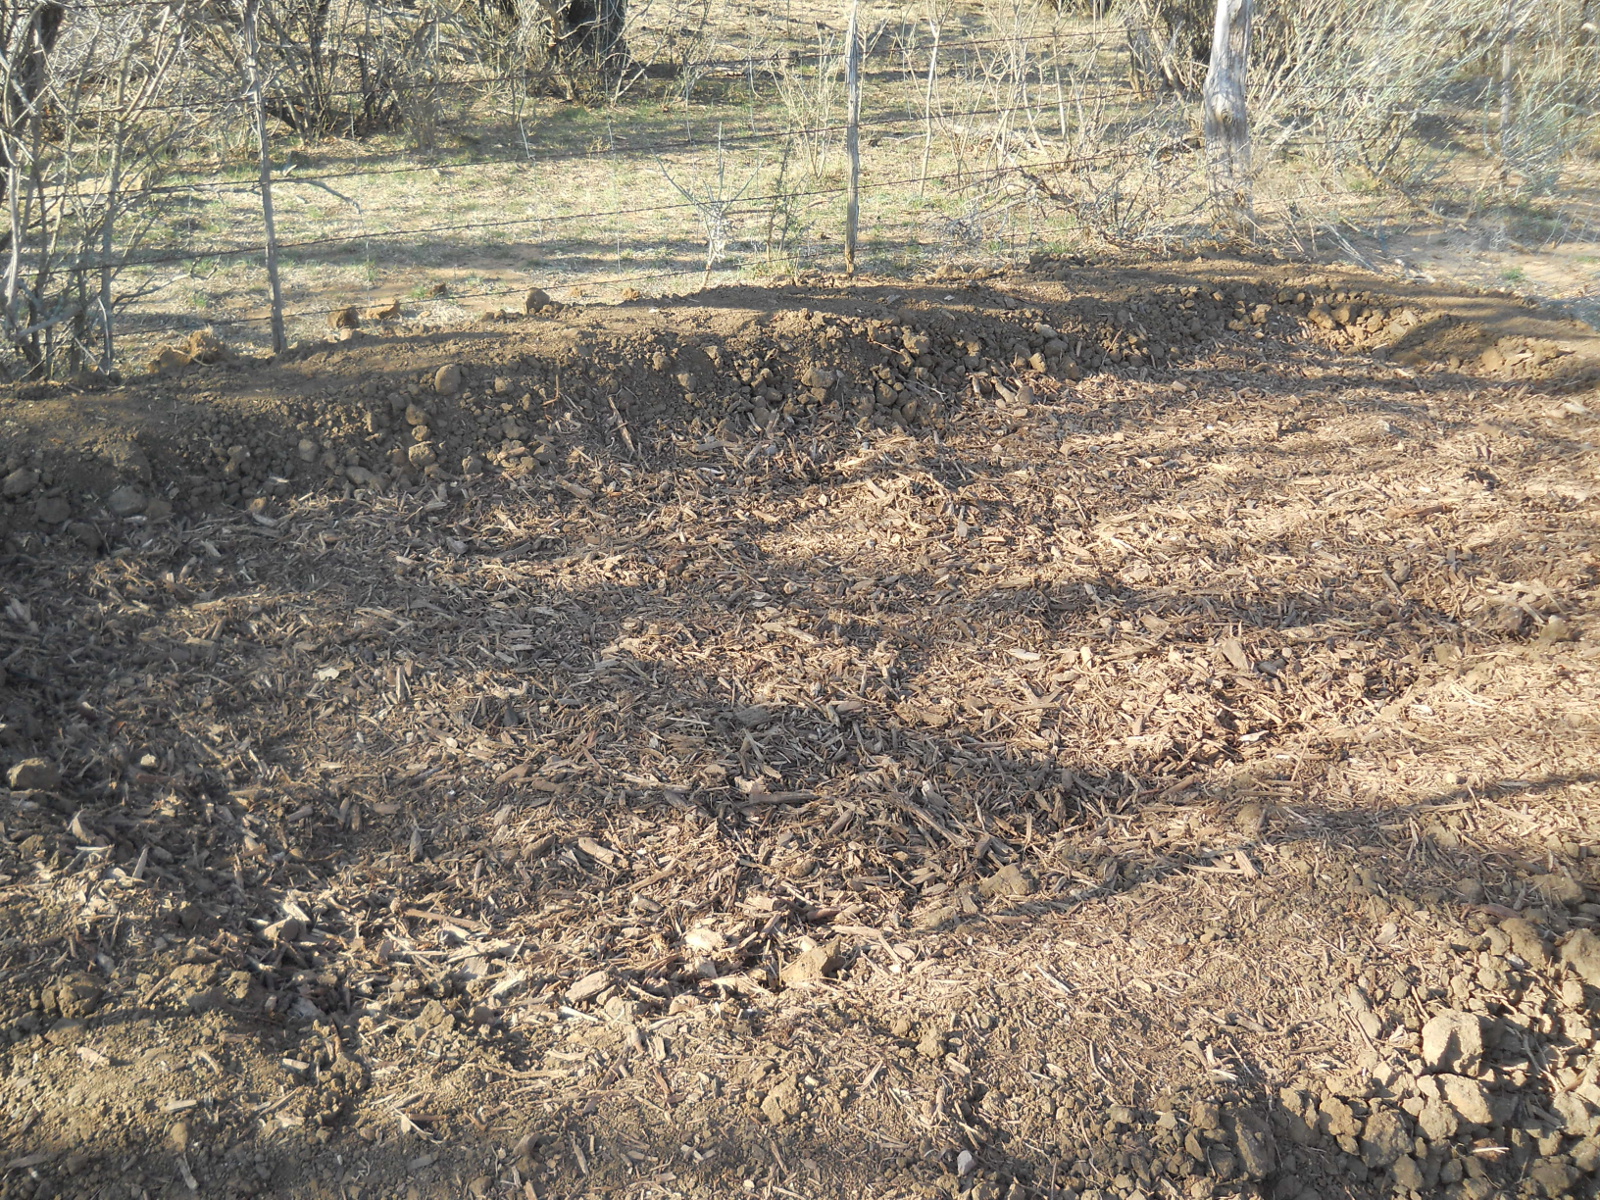
And then the sifting process. I used that long board across the bed for sliding the mulch sifter back and forth:

Sifting Mulch on Hugelkultur Garden Bed

And here it is complete!

Hugelkultur Garden Bed Complete

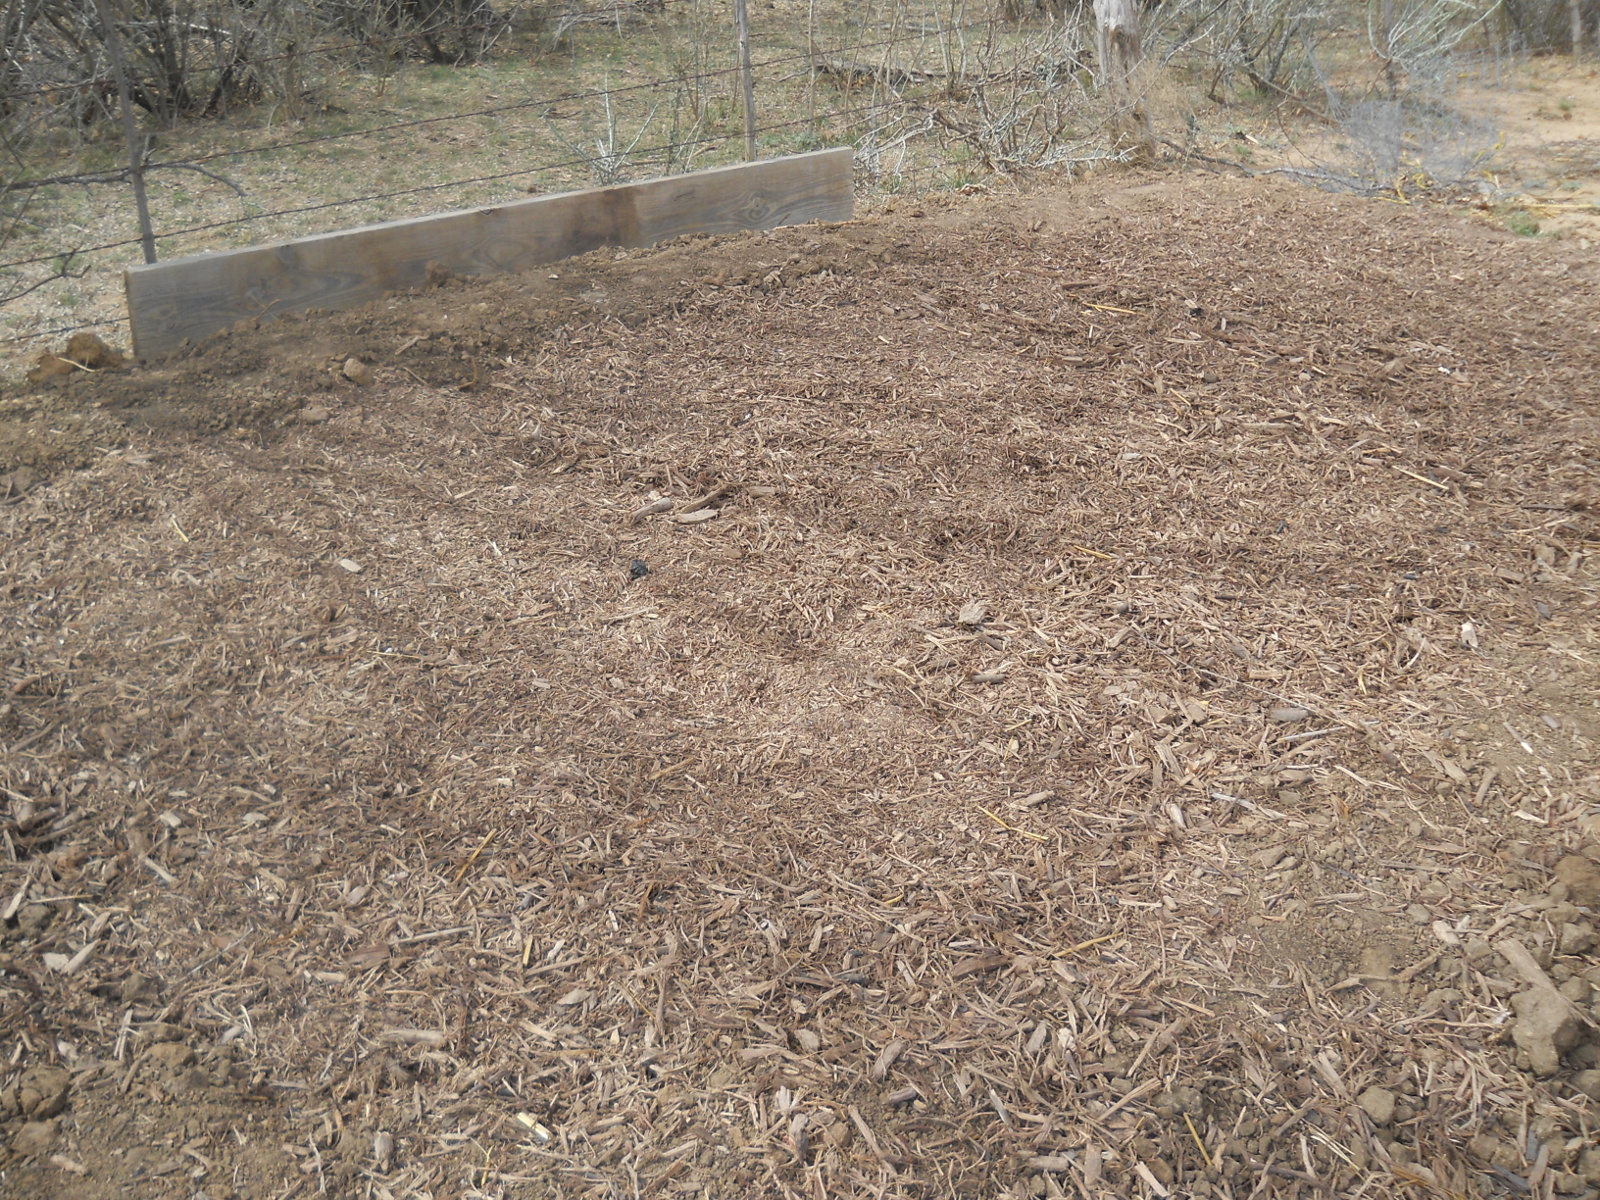
Lord willing, I hope to add another bed in front of this one.

Composting

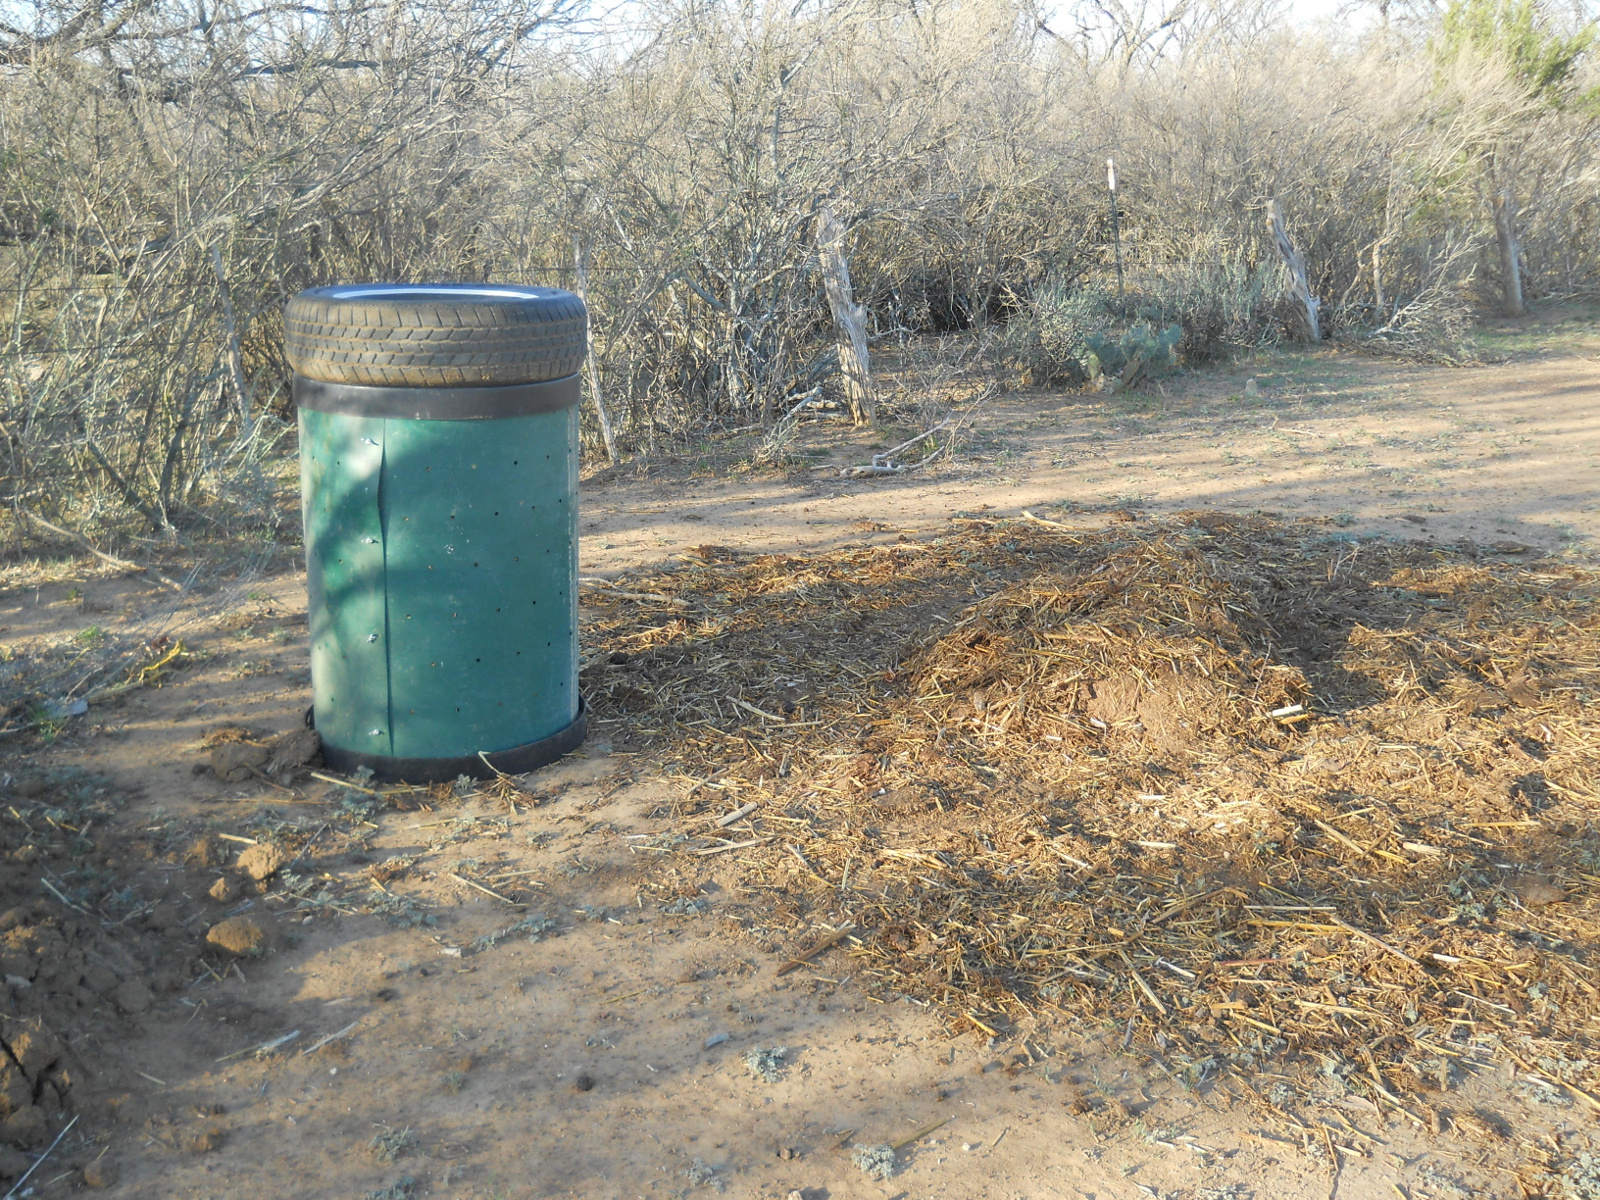
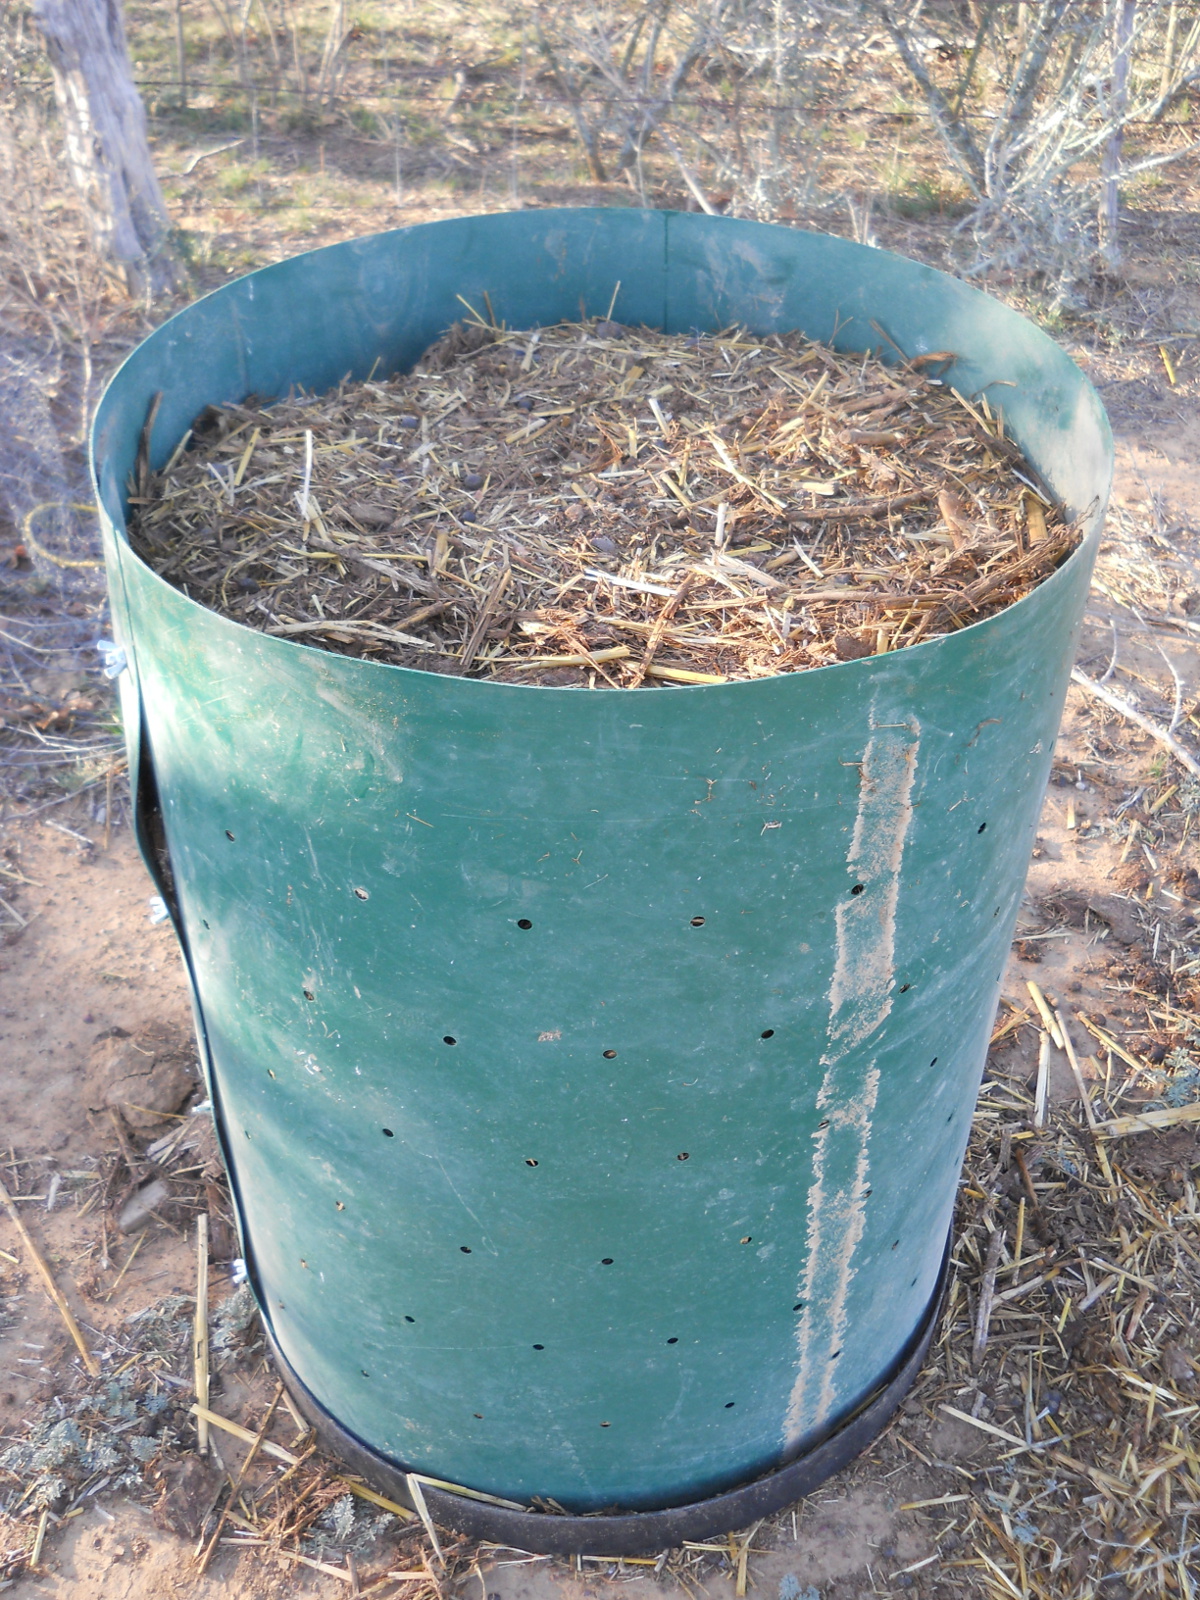
We had recently discovered that the area all around our goat sheds, where we put the hay and goat “evacuations” cleaned out from the sheds, with rain water collecting there, and over time, was composting nicely into this fine, fluffy dirt. Some time ago, we were given a composting container; and so I figured, since this goat material seemed to compost well, it was time to get that process going; and here is the container set up, and then a look inside. The container has holes on the sides and the top and bottom pieces:

Compost Container
Composting Material in the Compost Container

We thank the Lord for granting us the opportunity to continue on the process out here of trying to grow our own food, and for hopefully new and beneficial ideas; and we thank Him for the physical strength and materials to do these things.

— David

Preserving Butter Without Refrigeration, Canning or Freezing

I continue to be pleasantly surprised to find out just how many things can be preserved without refrigeration, canning or freezing. Recently our local market had a great sale on butter, so I bought several pounds to preserve and keep in our root cellar. But the great thing about this preservation method is that you don’t need a canner! And since we don’t run a large storage freezer, this is a great alternative way to preserve large amounts of butter!

I love our goats and the milk God provides through them and have made a little butter from their milk. But the amount of cream contained in goat milk is a fraction of that found in cow milk, as well as more difficult to extract from the milk. A cream separator is low on our “to get” list, so I usually end up buying butter from the store at this point in our lives (although we do use lard as well). I keep a keen eye out for a sale on butter at the local market and then “pounce” and buy several pounds if I am able in order to stock up our pantry in a cost effective way.

The process to preserve butter is so easy and quick that if you blink before you read this entire blog post you might miss it! I started to type out my own instructions but found online the butter preserving recipe I had been given and have posted it below along with my own pictures and a few added notes.

1. Use any butter that is on sale. Lesser quality butter requires more shaking (see #8 below), but the results are the same as with the expensive brands:

Salted Sweet Cream Butter

2. Unwrap all the butter quarters and place them in a pot large enough to easily melt and process your butter:

Blocks of Butter in Pot

3. Place pint jars in a cold oven without rings or seals and turn the heat to 250 degrees for at least 20 minutes. Place the jars directly on the rack or you may find a roasting pan works well for holding the pint jars while in the oven. One pound of butter slightly more than fills one pint jar, so if you melt 11 pounds of butter, heat 12 pint jars:

Warming Butter Preserving Jars

4. While the jars are heating, melt the butter slowly until it comes to a slow boil. Using a large spatula, stir the bottom of the pot often to keep the butter from scorching. Reduce the heat and simmer for a minimum of 5 minutes. A good simmer time will lessen the amount of shaking required (see #8 below):

Melting Butter in Pot

Here’s what it looks like if it gets scorched a little:

Scorched Butter in Pot

5. You will notice a thick foam form at the top. You’ll need to continue stirring for several minutes until this foam begins to dissipate. The foam can get pretty thick:

Foam on Melted Butter
Stirred Foam on Melted Butter

And here it is with the foam dissipating:

Dissipating Foam on Melted Butter

6. In the meantime, place the jar lids in a small pot with water and bring to a boil. Then turn the heat to low and leave them simmering in hot water until needed:

Boiling Canning Jar Lids

7. After most of the foam has dissipated, stirring the melted butter from the bottom to the top with a soup ladle or small pot with a handle, pour the melted butter carefully into heated jars through a canning jar funnel. Leave 3/4″ of head space in the jar, which allows room for the shaking process. Carefully wipe off the top of the jars, then get a hot lid from the simmering water, add the lid and ring and tighten securely. Lids will seal as they cool:

Melted Butter in Canning Jars

8. Once a few lids “ping,” shake while the jars are still warm, but cool enough to handle easily, because the butter will separate and become foamy on top and white on the bottom. In a few minutes, shake again, and repeat until the butter retains the same consistency throughout the jar.

9. While cooling and hardening, shake again, and the melted butter will then look like butter and become firm. This final shaking is very important! Check every 5 minutes and give the jars a little shake until they are hardened in the jar:

Hardened Butter in Canning Jars

10. Preserved butter should store for 3 years or longer on a cool, dark shelf. Preserved butter does not “melt” again when opened, so it does not need to be refrigerated upon opening, provided it is used within a reasonable length of time.

DISCLAIMER: There is information found on the internet claiming this is not a safe way to preserve butter because there is no official supporting information. But if the butter is kept in a cool dry place, it should be kept preserved for a long time. We have had no problems with it in our experience. However, these are my own personal thoughts and opinions. I would encourage you to do your own homework and proceed at your discretion.

NOTE: This form of preserved butter may taste a little more salty because of its condensed form. Use unsalted butter and add salt to your taste if this is of concern to you. I have had much success using it as-is in recipes and in our everyday uses for butter.

We have found this to be a great way to preserve butter in a cost-effective way for any lifestyle!

Susan

This Mite Be Trouble

Some time ago it was evident that one of our newer roosters was having some trouble walking — it would almost goose step. I noticed that its legs had developed a white crust on them, but thought that it was perhaps just a genetic defect or something. I picked off one of the crusties on the leg, and it looked like moist skin, like when a layer of human skin is removed. I wondered what was going on, but at the time, I just let it go. Then, over time, several of our chickens seemed to start getting the same crust on their legs or their scales started to look and feel “odd,” and I noticed that some of them were starting to have trouble walking, even some preferring not to do much of it.

Ok, something appeared to be wrong; and at that point, I figured I’d better investigate.

Here is a picture of the rooster’s legs:

Chicken Scaly Leg Mites Crusty Legs

In searching the Internet, and after finally working out a helpful search term, and after viewing several images, I discovered what I believed to be the culprit: scaly leg. This is apparently caused by a mite that burrows into the legs and causes the scales to protrude or that white crust I was seeing, and can in the end cause lameness. Wow! I was then glad I finally looked into it, although I felt badly for that rooster because I hadn’t researched it earlier.

And so, after further investigation, the simplest way I found to remedy this situation is to get some cheap cooking oil (not motor oil, because of the potential toxicity) and dip each leg in it for a couple of seconds (from an off off-gird standpoint, I assume we could probably use lard, but we just bought the oil instead rather than use up any lard now). This was supposed to be done for at least several days, and needed to be done to all infected birds, as the mite apparently spreads from bird to bird.

What I ended up doing was dipping each bird’s legs at night for about four days in a row, and then switched to every other day for about another week, and a couple more times at three days apart. Because we had so many to do, when I was dipping them every other day, I started alternating days with part of the flock. I used a pint jar so I didn’t have to have a lot of oil used at one time. It took a day or two to get the hang of not allowing the chicken to spill the oil, which I did by also holding the jar with the dipping hand.

Here I am dipping that rooster’s legs:

Chicken Scaly Leg Mites Dipping in Cooking Oil
Chicken Scaly Leg Mites Close Up of Dipping in Cooking Oil

And sure enough, a few weeks later, apparently the mites died, and their legs began to heal. And here is that original rooster:

Chicken Scaly Leg Mites Healed Legs

Nice!

Well, that little therapy appeared to work really well; and since then, it looks like the other chickens have had similar results.

We are thankful to the Lord for allowing us to fairly easily help the chickens, and we are grateful to Him for Him granting the healing that He did.

— David

Goat Milking Stand – Update I

Last year I built us another goat milking stand, and with it tried to add some extra bracing to the uprights, as we’ve had trouble with them getting loose with all of the goat activity while on the stand. Well, even with the extra materials and screws, the wood started to split and still come loose and get wobbly. Here is the split one:

Goat Milking Stand Loose Upright

Hmm….bummer.

And so, here’s what I decided to do to try to help. I thought I’d add 2x4s along the sides of the base and then use plywood corners attached to those 2x4s and the uprights. Here are the cut-out parts:

Goat Milking Stand Upright Bracing Parts

And the 2×4 blocks in place:

Goat Milking Stand Bracing Block

And then the plywood corners attached:

Goat Milking Stand Plywood Corner Brace

Hopefully now this will hold better. Lord willing in several weeks we’ll get to find out, as the results of breeding time are almost here!

— David

The Barn – Update I – The Loft

Part of the original plan for our barn was to have a U-shaped loft inside, where the entire back 20 feet would have a loft, and then moving forward in the barn, the loft would extend 10-12 feet from the side walls for another 20 feet or so of depth.

Well, over a year ago, I was able to start on this process, with the idea of building one half of the back section at a time. At the time, I figured I would have that section done by now, but it was not meant to be; however, I thought I’d show the progress in pieces, starting with where it is today.

Here is the first post hole:

Barn Loft First Post Hole

And here is part of the first post. I decided to use triple 2×12 inch built-up posts, using deck screws to tie the boards together, for the farther internal one, 2×10 inch boards for the center post between the barn-middle post and the barn wall, and 2×8 inch boards for the posts that would sit on the barn side’s concrete footer. I chose to make them this hefty because of potential weight we might have up there one day, like grains, etc., Lord willing:

Barn Loft Built-Up Post

I didn’t calculate the height of the first posts correctly when I bought the wood, and so I needed to elevate the post some. I used a cinder block for that, and string to align the posts:

Barn Loft Post on Cinder Block in Hole

And here is the post braced:

Barn Loft Post Braced

And then in concrete:

Barn Loft Post in Concrete

Here is a post next to the barn structure, attached to the metal barn post, using L-brackets and self-tapping screws:

Barn Loft Post on Barn Footer Attached to Metal Post

And here is one attached to one of the metal purlins, looking from behind the post:

Barn Loft Post Attached to Metal Purlin

I cut away the top of the posts all around the center board to allow the cross beams to be attached with bolts and allow for the center boards of the cross beams to have something to sit on:

Barn Loft Post Top Cutaways Front View
Barn Loft Post Top Cutaways Side View

And here is the first row of posts:

Barn Loft Three Posts Complete

Here is one end of the cross beam. I used 5/8 inch bolts to secure the cross beam to the post:

Barn Loft Cross Beam End

And the first cross beam in place. I used ratchet straps to vertically level the posts and bar clamps to squeeze together the cross beam boards as I screwed in the deck screws:

Barn Loft Cross Beam Installed

Here’s how the first two boards looked installed on the post attached to the barn structure, which required some overhang to cross the purlin to fill in the space all the way to the barn wall:

Barn Loft Cross Beam Barn End Design

And that same end complete:

Barn Loft Cross Beam Barn End Complete

Here is how I attached the back cross beam to the back purlin (some of these L-brackets I would have to install on the post before raising it because of lack of space issues for getting tools in there to install them after the fact):

Barn Loft Back Cross Beam Attached to Purlin

And here is how I attached the posts sitting on the barn’s concrete footer, using concrete screws for this:

Barn Loft Post on Barn Footer Attached to the Concrete

And here are all the beams in place!

Barn Loft Posts and Cross Beams Complete

It’s been like this for some time, but we are grateful to the Lord for granting that we be able to begin constructing the barn loft. We look forward one day, if the Lord wills, to be able to begin installing the floor, even if it’s one sheet at a time.

— David

Community Singing – February 2013

After our last fellowship time of recording Psalms from the psalter we use, we recorded the next set earlier this month, again so those who might be trying to learn them as well might have something to help them if needed.

And here is the next set:

Psalms 22F-24C

Previous Psalms singings:

Psalms 1A-12B (minus 4B)

Psalms 4B & 13-18L

Psalms 19A-22E

We are eternally grateful to the Lord for His word and the opportunity to sing it, learn it this way, and sing together in praise of His gloriousness, His mighty works, and His protecting hand. We again pray He glorifies Himself through this, and that He benefits and strengthens His Church through it.

— David

A House – Update XXI – The Bedroom

In continuing with our house we’re working on, back in the fall, I was hoping to be able to start working on finishing the bedroom so that we could be at least sleeping in there for the winter, with maybe even a small wood burner in place that we plan to have in there. But, resources didn’t really allow for that to come about, although we are grateful to the Lord for allowing us start to make some progress on the bedroom.

I believe it was back in the fall when I was able to get the insulation required for the walls, and here it all is installed:

This is the south wall:

House Bedroom Insulation South Wall

And the west wall:

House Bedroom Insulation West Wall

The north wall:

House Bedroom Insulation North Wall

And the east wall:

House Bedroom Insulation East Wall

And then, just this last community work day (which are the first Wednesdays of each month), the men came over to help put up the ceiling material, which was next on the agenda. I spent some time trying to price out the best deal that also might look kind of nice, and that could be installed fairly quickly; and so, I decided to go with what’s called “rough shod” plywood, which is a less expensive form of “T1-11”-looking siding.

It took three of us on ladders, with two helping below to hand us the plywood and screws (I decided on tan-colored Deck Mate screws, so that they would hopefully hold better than nails and would also blend in color-wise).

Here is the first row done. We decided to starting in the middle and work our way toward each side, in hopes any error in the squareness of the room would show less than if we started on one side, which might cause gaps between sheets and between sheets and walls to become cumulative as we went along. It’s actually kind of hard work holding up that sheet while trying to place it properly:

House Bedroom Ceiling First Row

And here is the ceiling after the day’s work, facing southeast. You can see that we got everything done except that last row to the left:

House Ceiling Facing Southeast

And facing southwest:

House Ceiling Facing Southwest

And then one of the men graciously offered his time on the next Lord’s Day community visitation day to help me put up the last row (which included much smaller pieces width-wise, so just the two of us were able to handle it):

House Ceiling Complete

Much gratitude to the community work day ceiling crew!

House Ceiling Community Work Day Crew

And then it was time for the community work day fellowship meal. Everyone says “hello”, by the way: 🙂

Community Work Day Fellowship Meal

We are once again very thankful to God for granting progress on the house. He’s gracious and merciful in allowing it to continue, and for allowing us the fellowship of the brethren here, in general, in serving one another. It is Sue and my prayer that she and I especially (and of course all of us) grow more in servanthood to Christ and His people.

— David

« Older posts Newer posts »