When we bought some new chickens late last year, two of them were game hens. Well, apparently they’re good setters, because we’ve now had a second one go broody (here was the chick from the first hen); and the Lord graciously granted some new chicks to be hatched!
And here they are:
This is something of a big deal to us, because, in our desire to separate unto God and His direct providence, if we’re to have animals and their products, we need them to perpetuate; and having chickens that do that has been spotty at best, because most of the ones we’ve had don’t sit.
And so, we are thankful to the Lord for His granting of these new chicks and hens that are good setters; and we pray the female chicks pick up the sitting trait so they can continue to propagate here on the farm, according to God’s will.
In owning cattle, and other animals, sometimes you’re going to not want them to be able to reproduce. For us, we’ve handled that by pen rotation, keeping bulls we didn’t want with the females away from them. However, if we want to use them for meat, it’s apparently better to castrate them as they should put more weight on that way.
And so, this is our first adventure into the process of turning a bull into a steer via castration. The calf, which came from a cow owned by Mr. Woods, is owned by Mr. Plumley, who watched some videos on the Internet as to how to do this, and proceeded in the following way, which, from the research done, is actually less painful and more successful than “banding” (which was tried here unsuccessfully a couple of years ago as we believe the banded bull reproduced):
Castrating a Longhorn Bull Calf
We’re grateful to the Lord for being able to learn this process and for it being successful (the calf seems to be doing just fine a couple of weeks later), for granting this calf to Mr. Plumley, and for a safe delivery; and we pray the calf will grow to become what God has in mind for it, for His glory and the benefit of His Church.
Recently, Wilma, our gilt started to look very pregnant; so I put the farrowing “runners” in the shed; and we looked forward in anticipation to the day.
Well, this past Monday evening, I went out to feed the pigs; and lo and behold, a little piglet was running around:
Wilma the Duroc Sow in Labor
We were excited the process had begun. However, minutes went by, then hours, and no other piglets. We started to look online to try to investigate the situation: some sites said they should be coming out every 15 minutes or so, some said up to and hour, some longer. After several hours (which included the several it looked like had passed before we even found the piglet, as the piglet was very dry, and its umbilical cord was already dry), we decided to try to check if we could find a piglet in the birth canal and pull it out. We found it about five to six inches in, but were unable to grab onto it in any way. We solicited help from the Bunkers, who have dealt with pulling animals before; and they worked for a couple of hours trying to pull the piglet out, but could not. We even tried using salad tongs. When we couldn’t get it out, we thought we’d leave her for the night, and see how things were in the morning, as maybe she would pass it. We also pulled the born piglet out of the pen and took it with us, so it would be warm (as there were no other piglets and her mother was incapacitated and in labor) and not get squashed or that other harm might come to it.
The next morning, there was no change. I called the vet, and he suggested we either need to get the piglet out, or bring her in for a C-section, or euthanize her. He also suggested that by then, the unborn piglets were probably dead. We weren’t going to bring her in for a C-section (he even suggested we not do that for economic reasons); and so we tried various other things, including pliers, to try to get the piglet out, all to no avail.
At this point, there wasn’t much left. We spent several hours going back and forth, trying to decide if we let things be and see what happened, because maybe she’d pass it; or butcher her, losing the sow we had thought maybe about having for a couple of litters. After prayer and lots of indecision, we made a decision. This video could be a little rough if you’re not used to this. Sadly, this part of the process didn’t go as we had hoped — it usually goes better than this:
Slaughtering Wilma the Duroc Sow
As I mention in the video above, the plan was to kill her and quickly get to the unborn piglets, in an attempt to get them out and breathing. Here was that process, which I believe no one around here as done before (at least with the people participating). If you’re squeamish, this one is pretty intense:
C-Section of Wilma the Duroc Sow
And then it was to the butchering station:
Butchering Wilma the Duroc Sow
It was a rough couple of days. Sue was up about every hour the first night (and has been similarly since) tending to the piglet, and the whole ordeal was fairly stressful.
But, the Lord, in His graces and mercies, allowed a successful butchering, which appears to have yielded quite a bit of meat and fat; and He has graciously granted a new piglet — His providentially perpetuating the species. The new little piglet didn’t have to be the first one out — she could have been behind the stuck one, and so we are very grateful.
And yes, I said “she” — it’s a female piglet; and because her sire’s name was Fred, and her dam’s name Wilma, we’re calling her Pebbles. And here she is:
Wilma the Duroc Sow’s Piglet Pebbles
I know some of these videos could be somewhat shocking if you haven’t seen or been around these kinds of things before, but I wanted to include them so you all could see some of the experiences that are part of life here on the farm.
Another aspect about being here on this farm is that we are part of a community of like-minded brethren. I was able to put out a short-notice solicitation for help with the processing of Wilma the pig, and many folks showed up, representing every household that had someone available. That is a lot of the reason we are all here: Christians serving their (spiritual) family.
Finally, once again, we thank the God of creation for His graces and mercies, and allowing us the provision of this new piglet; and we pray that He might grant this little piglet to grow and be a productive part of the homestead and community, as He might will.
In our desire to live separated from the world, we need methods of food preservation; and one of the methods is via sugar. One of most practical ways we could obtain sugar is from honey, which of course comes from bees. Well, in our hopes to be able to produce honey, for its preservation use and for its health benefits, we needed a bee hive. We had heard top-bar hives were better than regular stacked hives, in ease of use for us and the bees; and so rather than purchase one, I found a design on the Internet, and decided to try to build one. The following is the process based on the design provided by at Backyard Bee Hives.
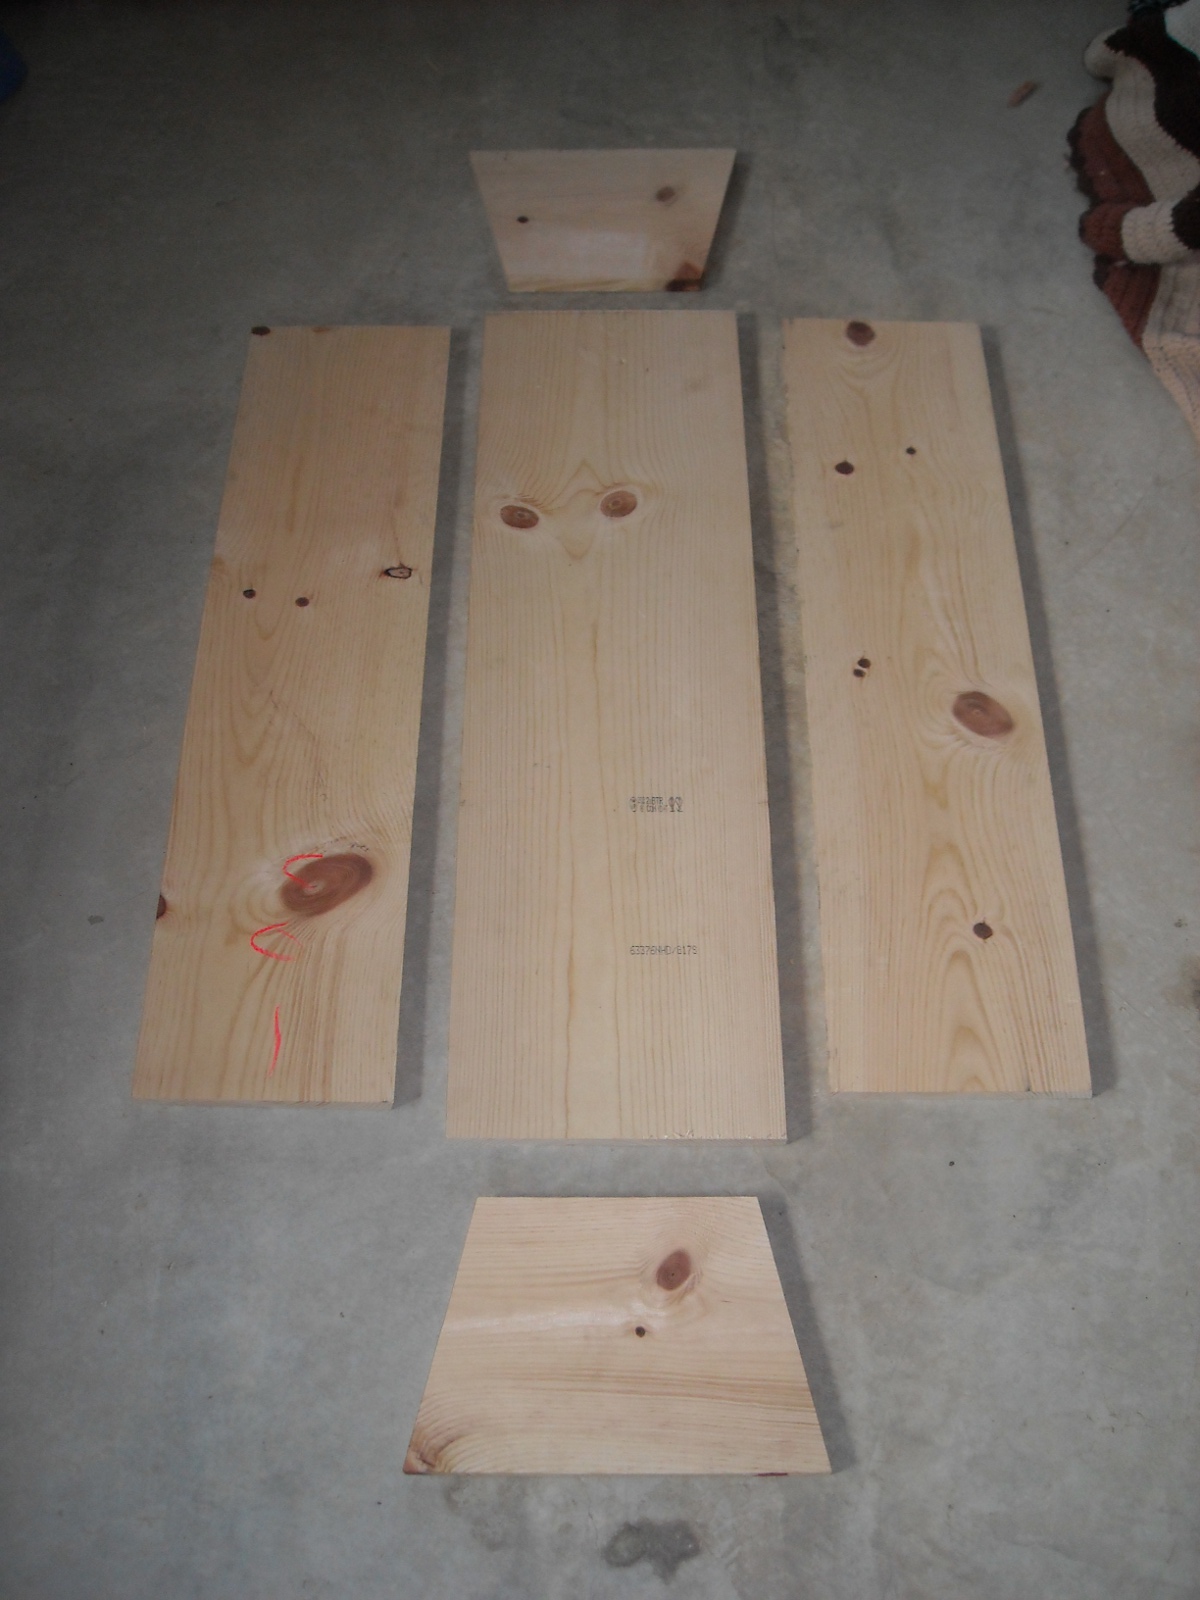
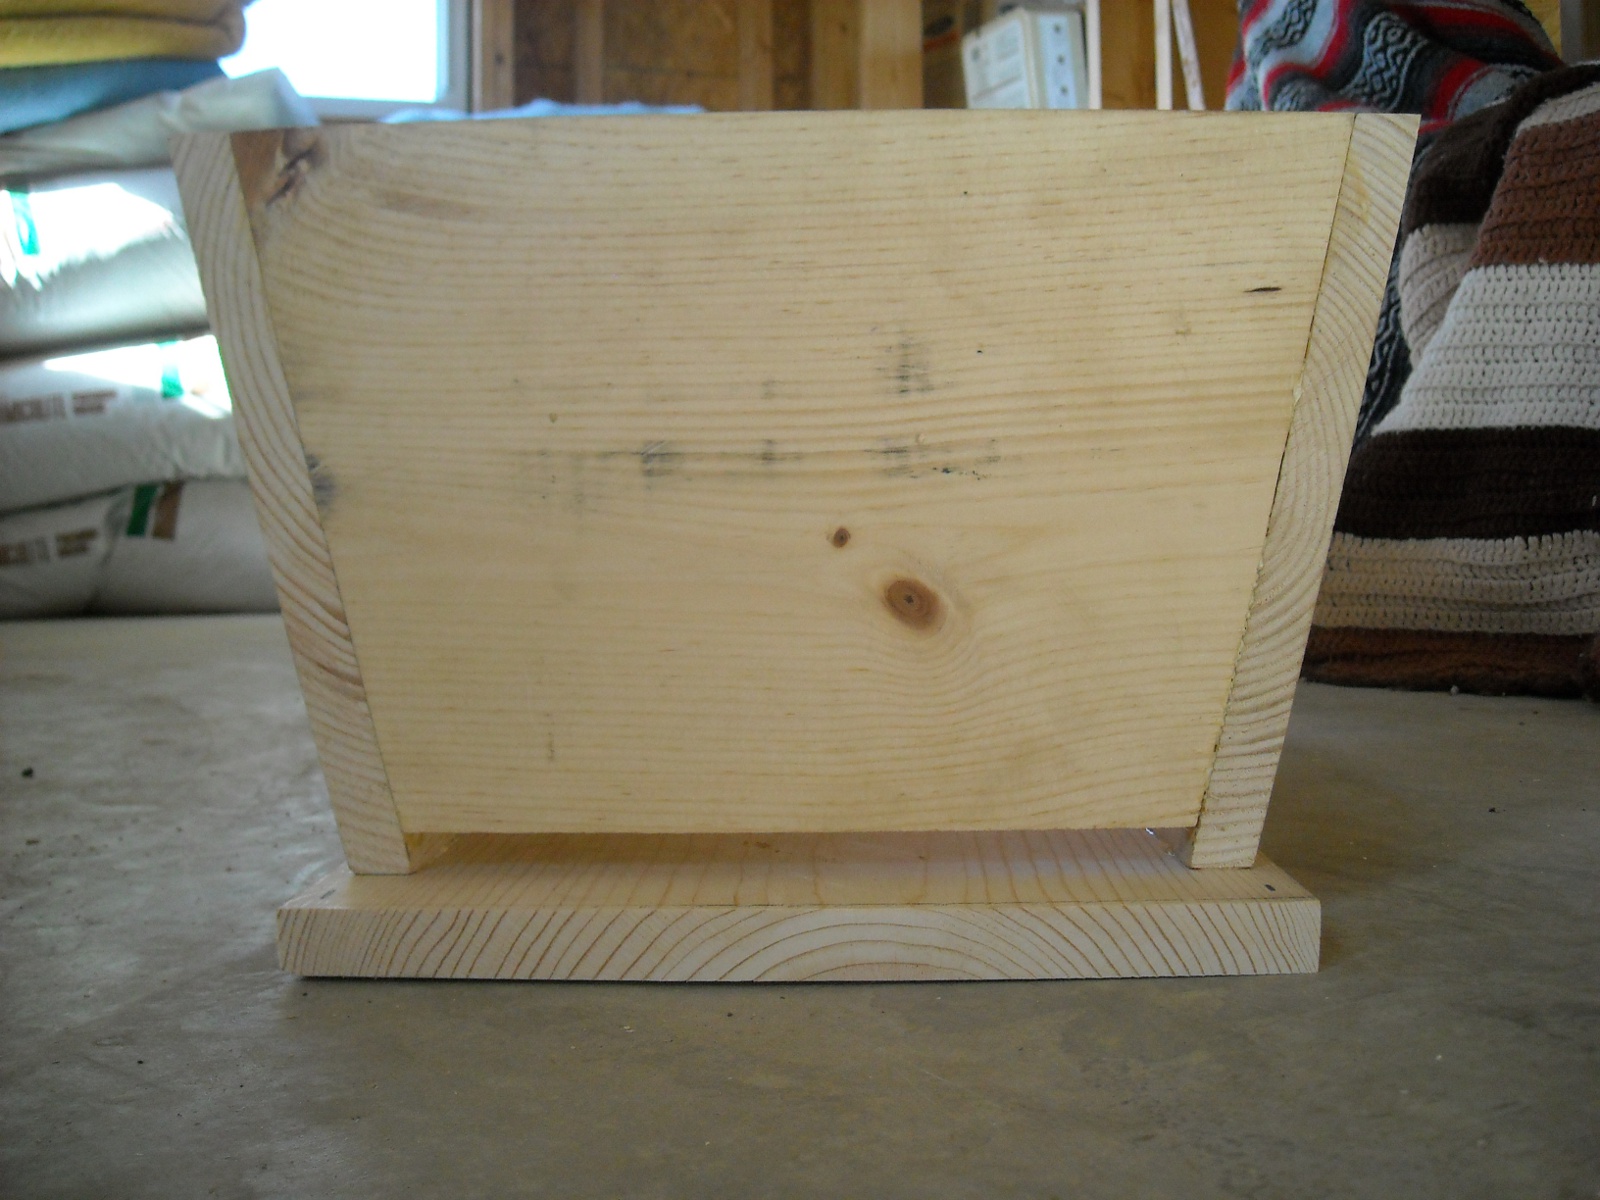
Here are the sides and bottom. As per the instructions, the angles were 13 degrees:
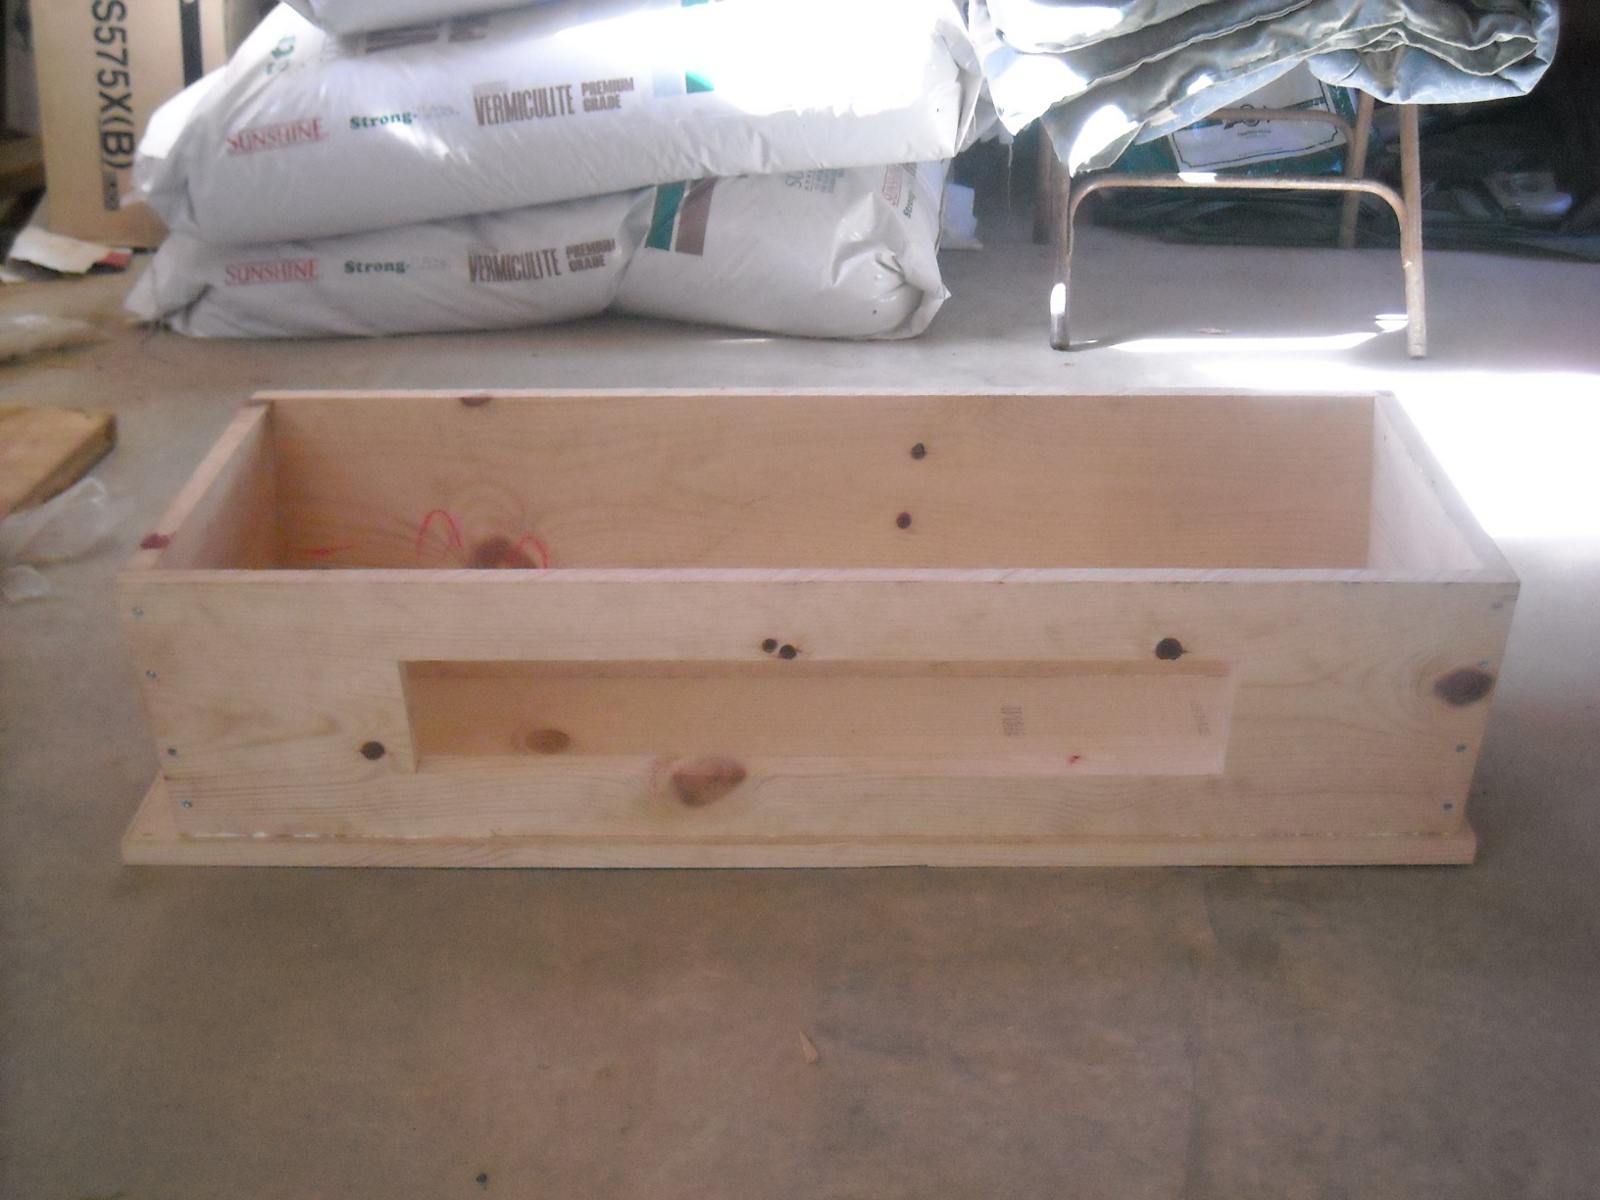
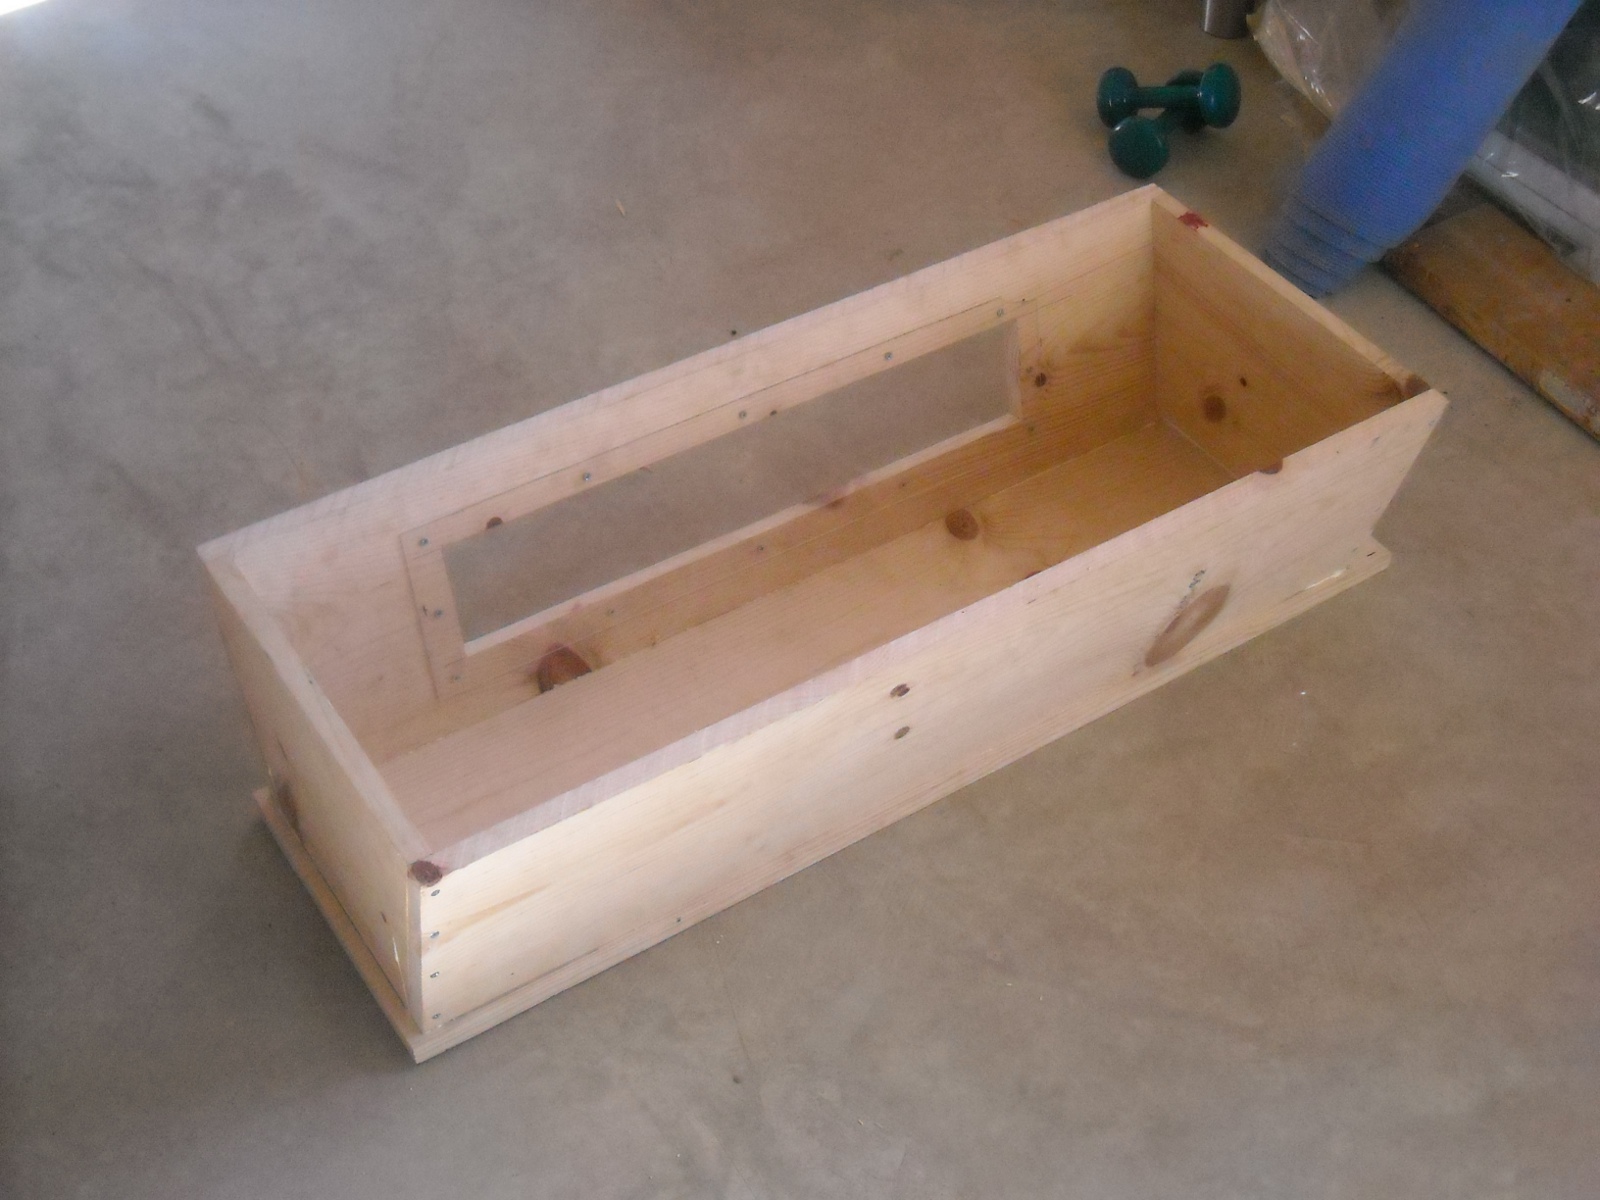
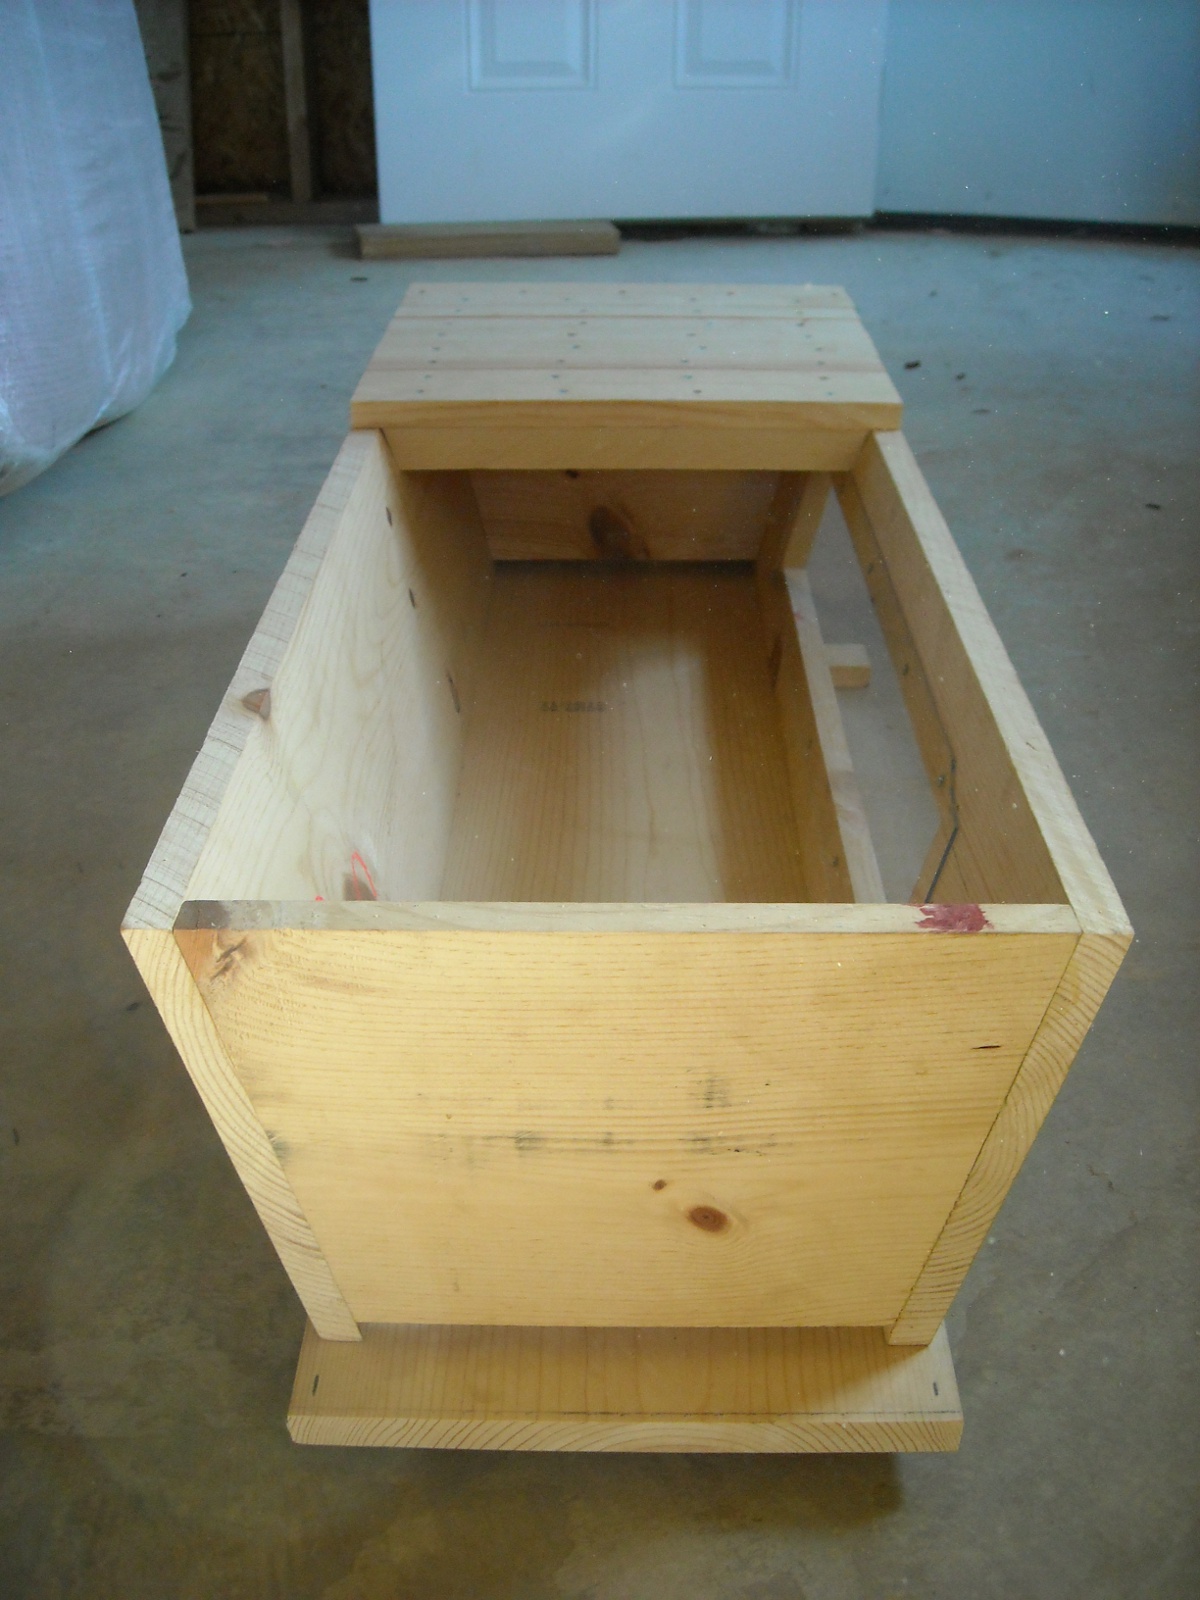
And here are the sides and bottom put together. I used 1 1/2″ wood screws and wood glue. Also, notice the window hole — I cut this out before joining everything together:
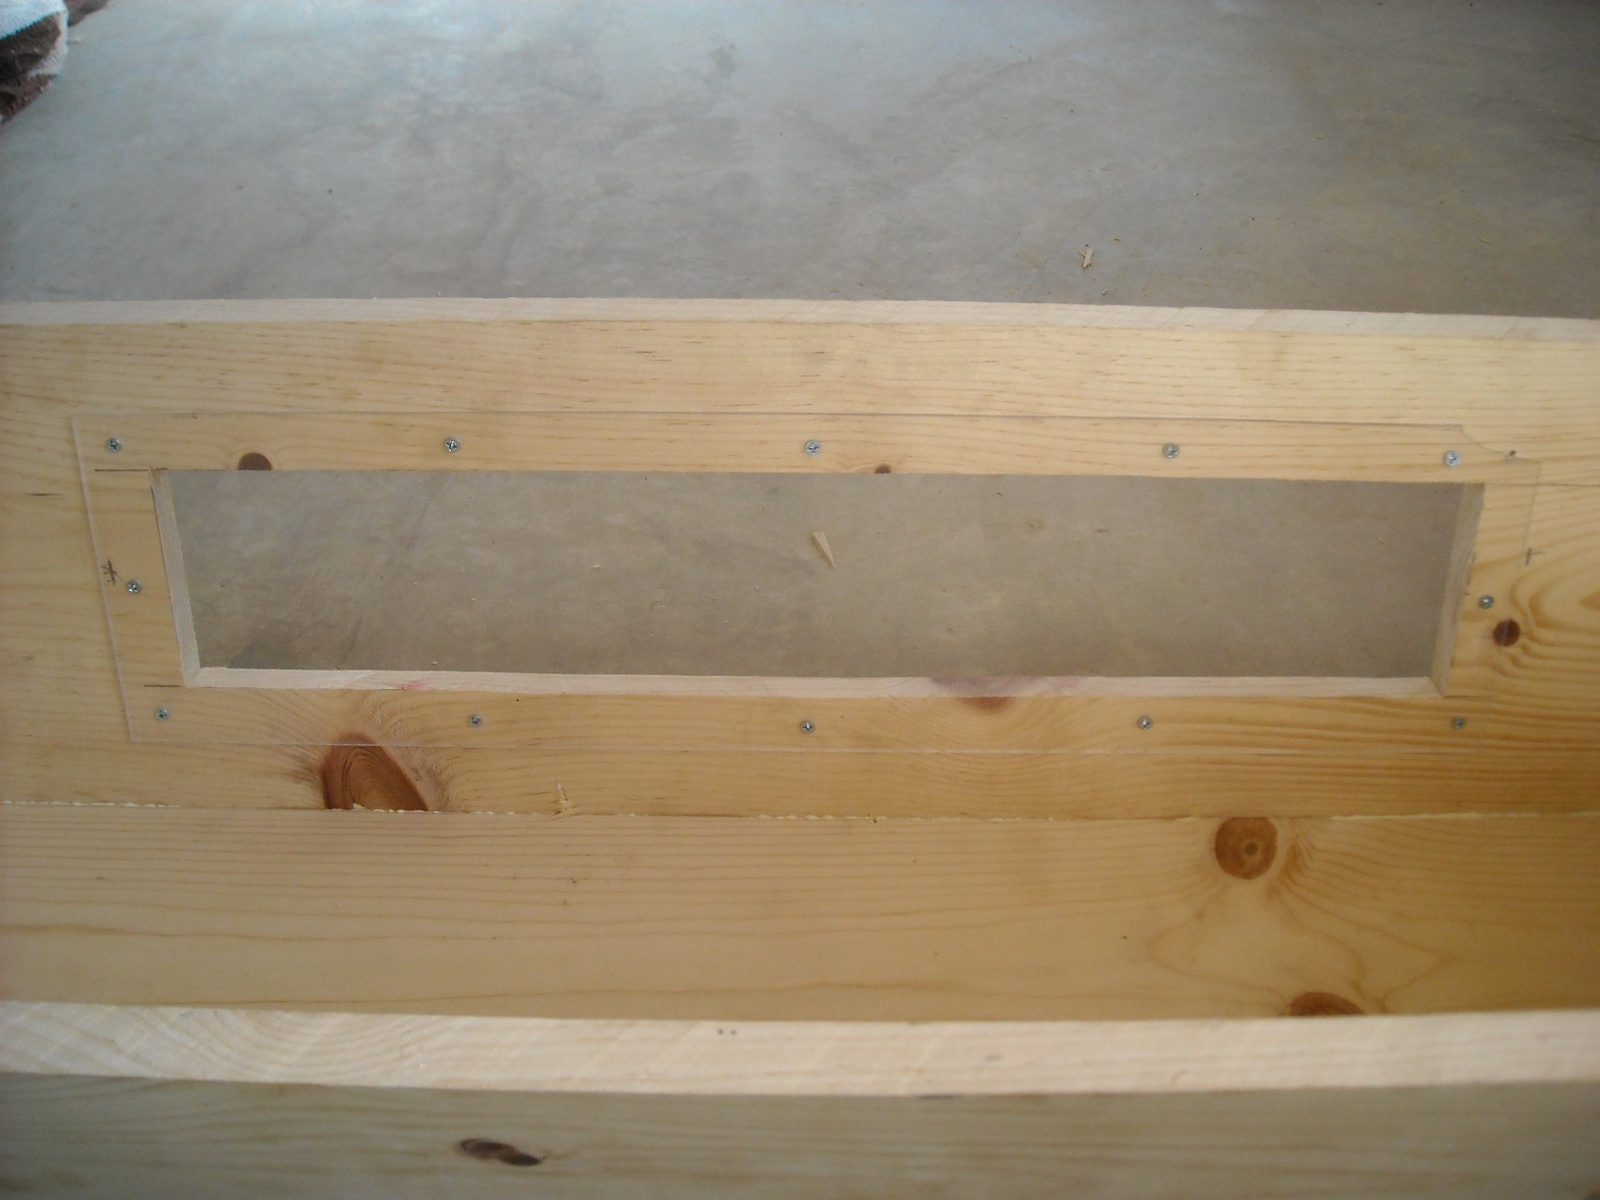
For the window, I cut a piece of plexiglass to fit over the hole (I used similar plexiglas to what I used on our solar food dehydrator). In working with the plexiglas, I pre-drilled a small hole, and then bored it out just slightly using a larger drill bit, the same size as the head of the wood screw, to allow the declining angle of the head of the wood screw to fit almost exactly in, making the top of the head of the screw flush with the plexiglas:
And here’s a close up:
This is a view of the front side, where you can see the entrance area at the bottom:
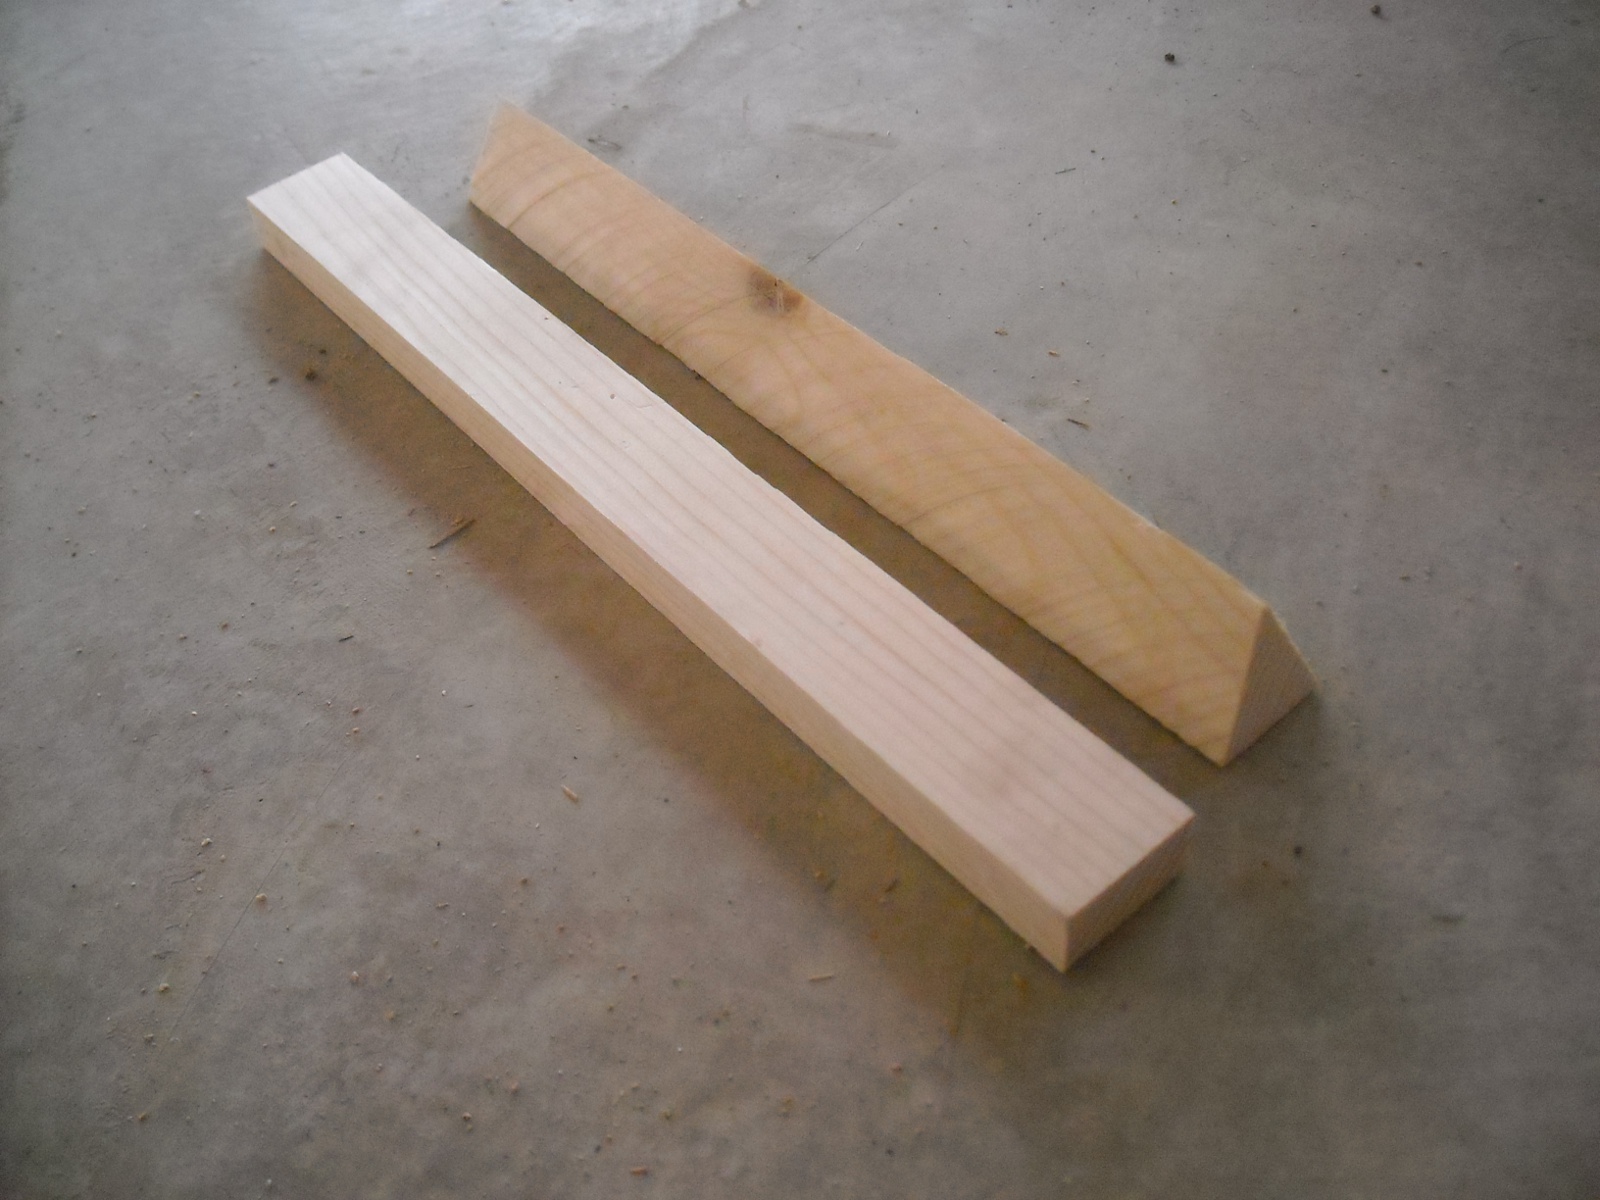
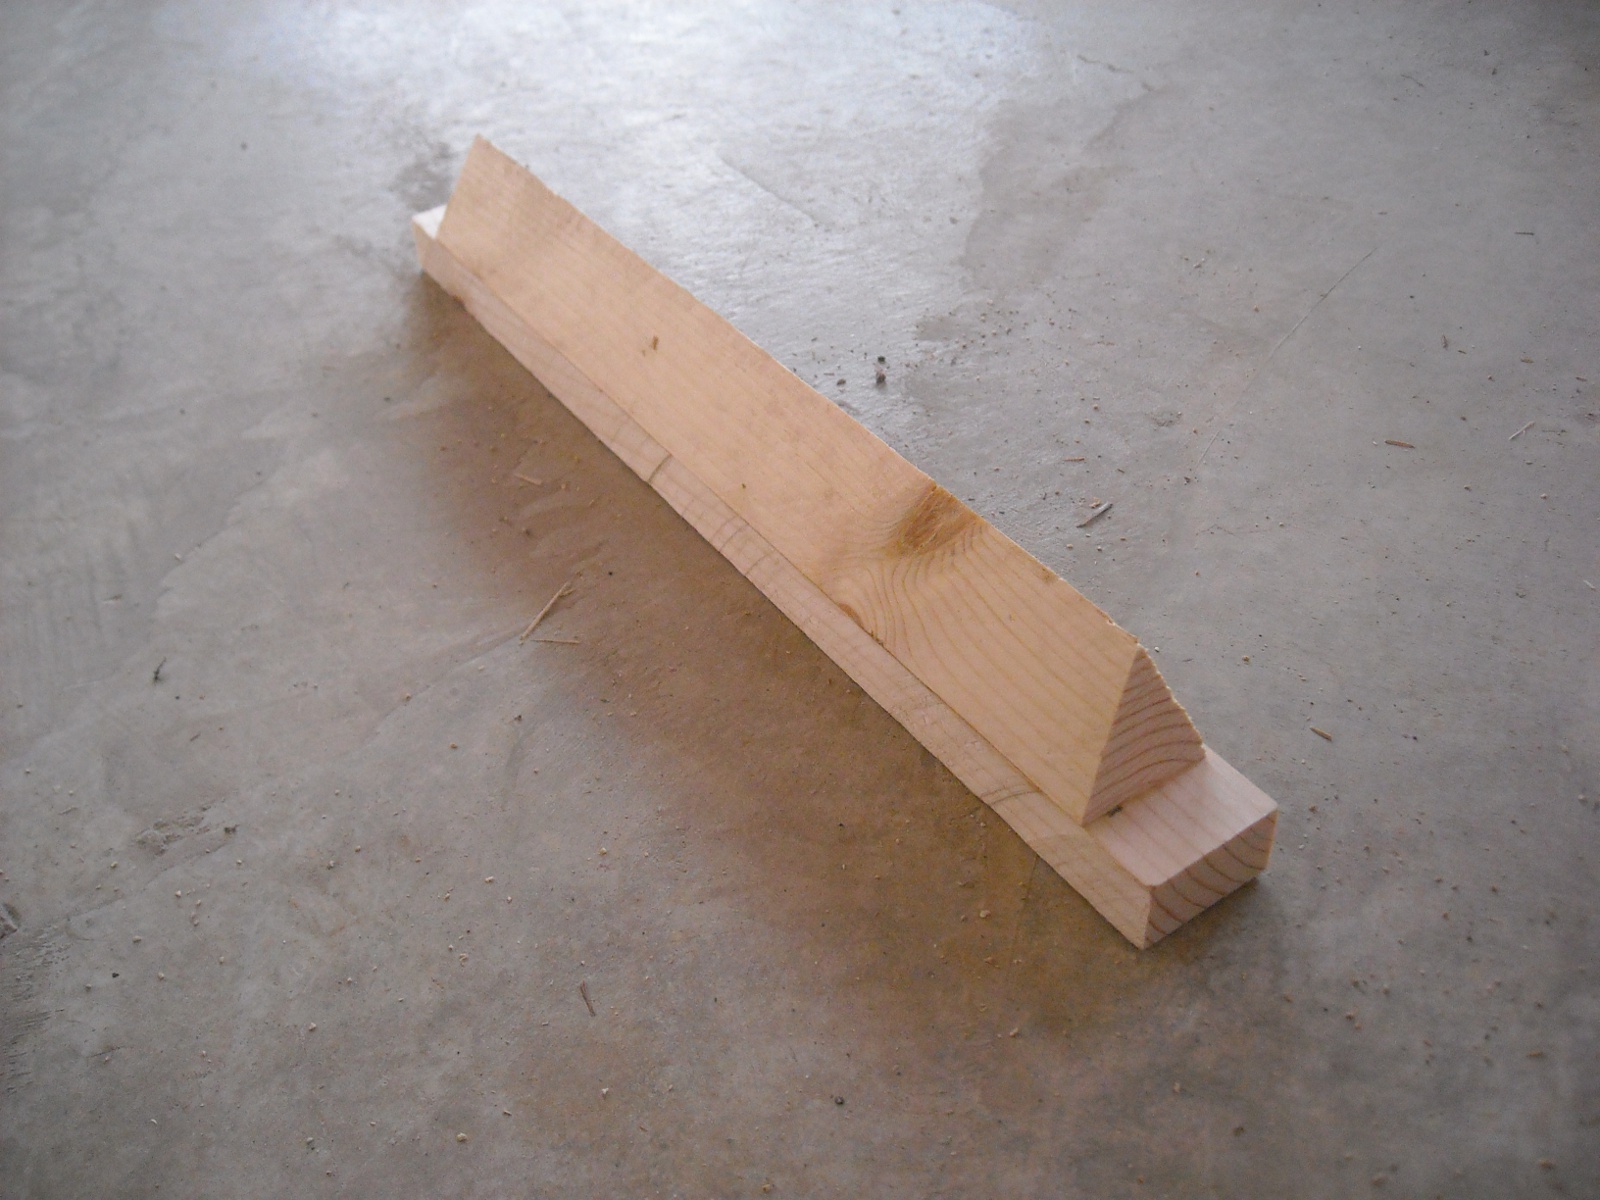
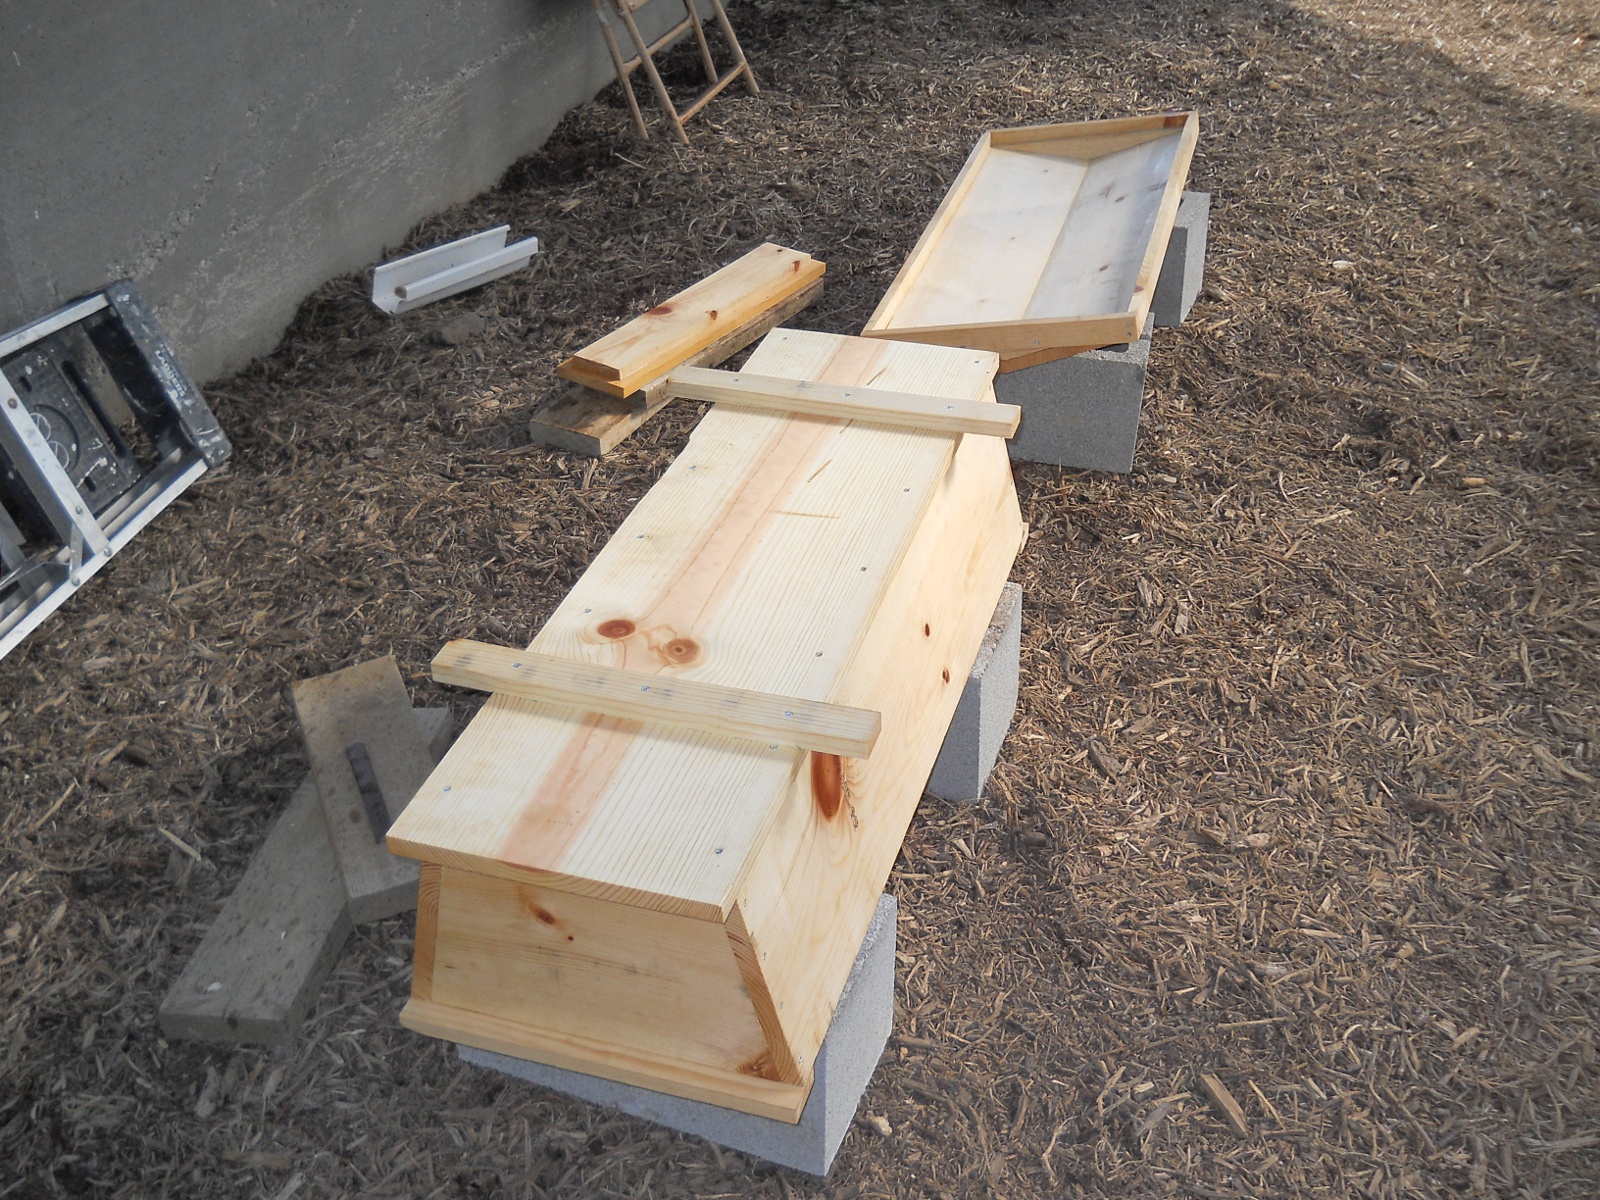
After getting the main box together, it was time to build the top bars. To make these, I ripped (using a table saw) 1x4s to the width of the top bars, and then cut those “strips” of 1×4 to the width of the hive box. These would be the top of the top bars. For the bottom of the top bars, I ripped 2x wood at probably somewhere around 26.5 degrees I believe for a 1 1/2″-wide top bar (you would need to figure the angle out based on the width of a top bar) down one direction and then down the opposite way, which basically created long strips of the pointed top bar bottoms (with the point running down the middle of the top bar); and then I chopped the end of those at 13 degrees (beveling each in opposite directions) to be able to fit inside the top of the hive box, accounting for the width of the sides of the hive:
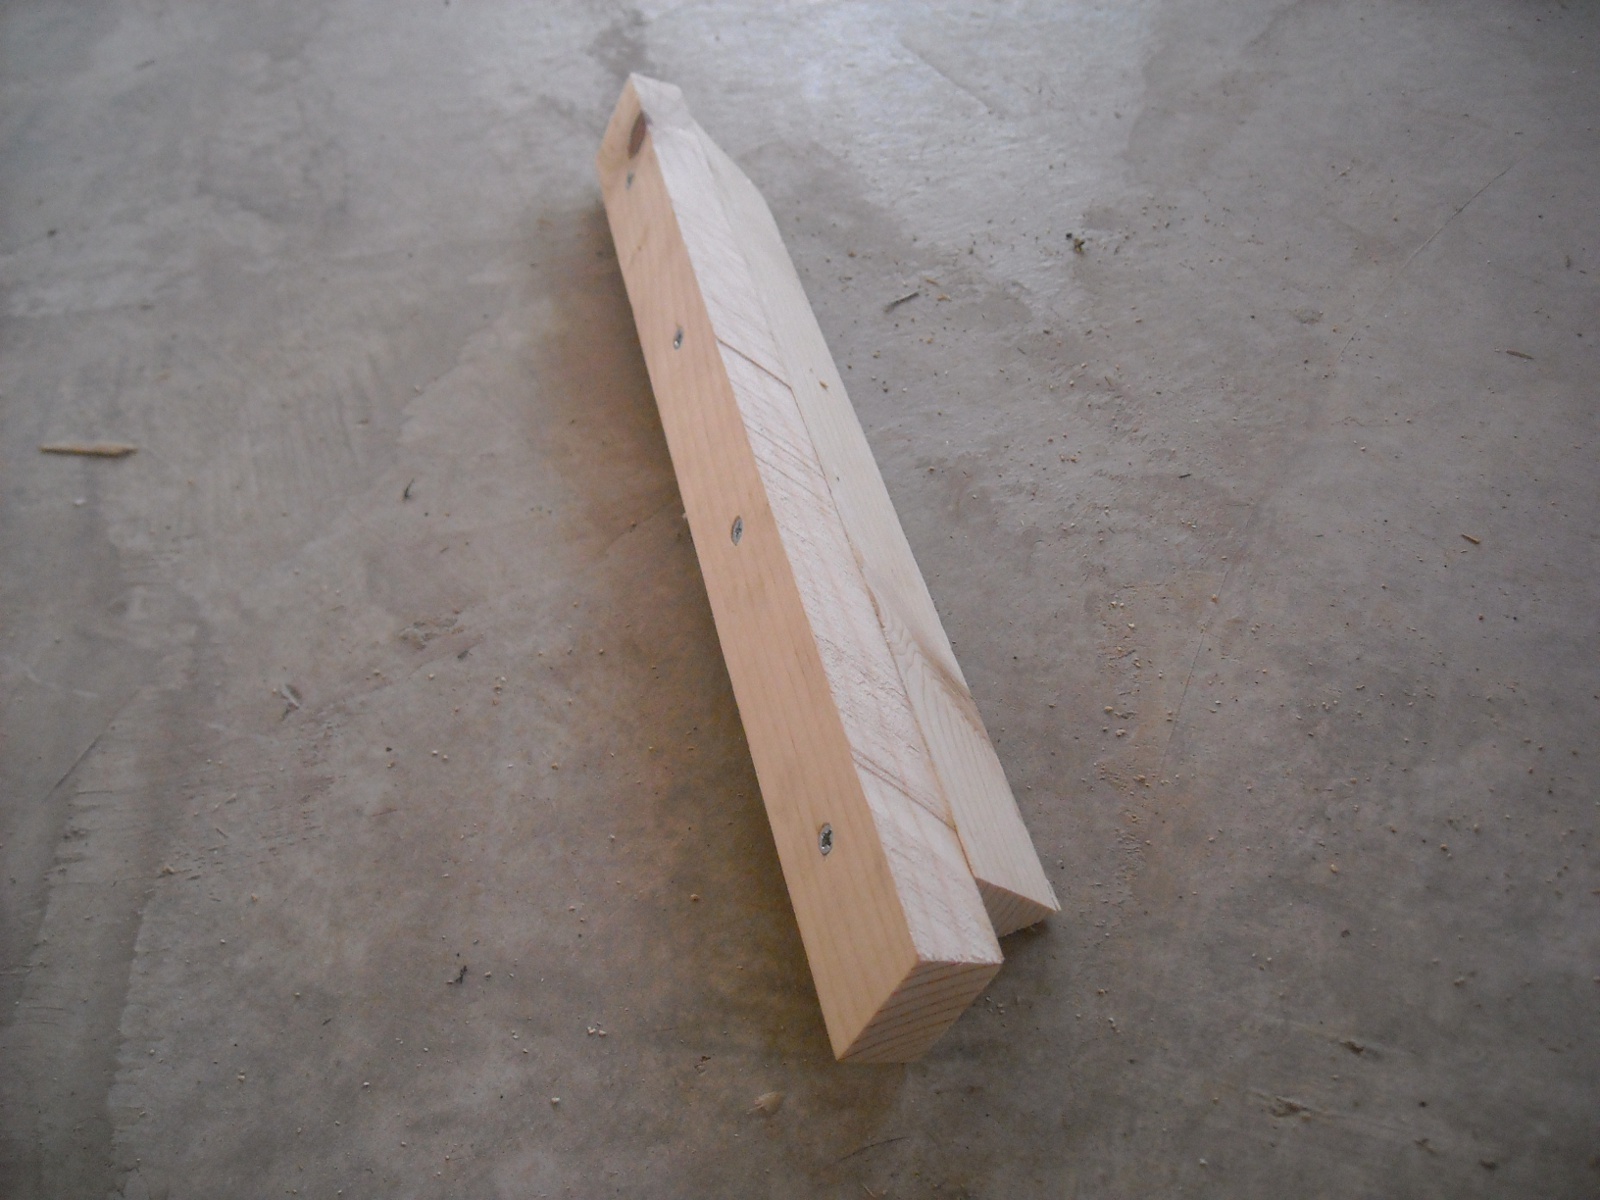
And here they are put together. I glued them and used wood screws:
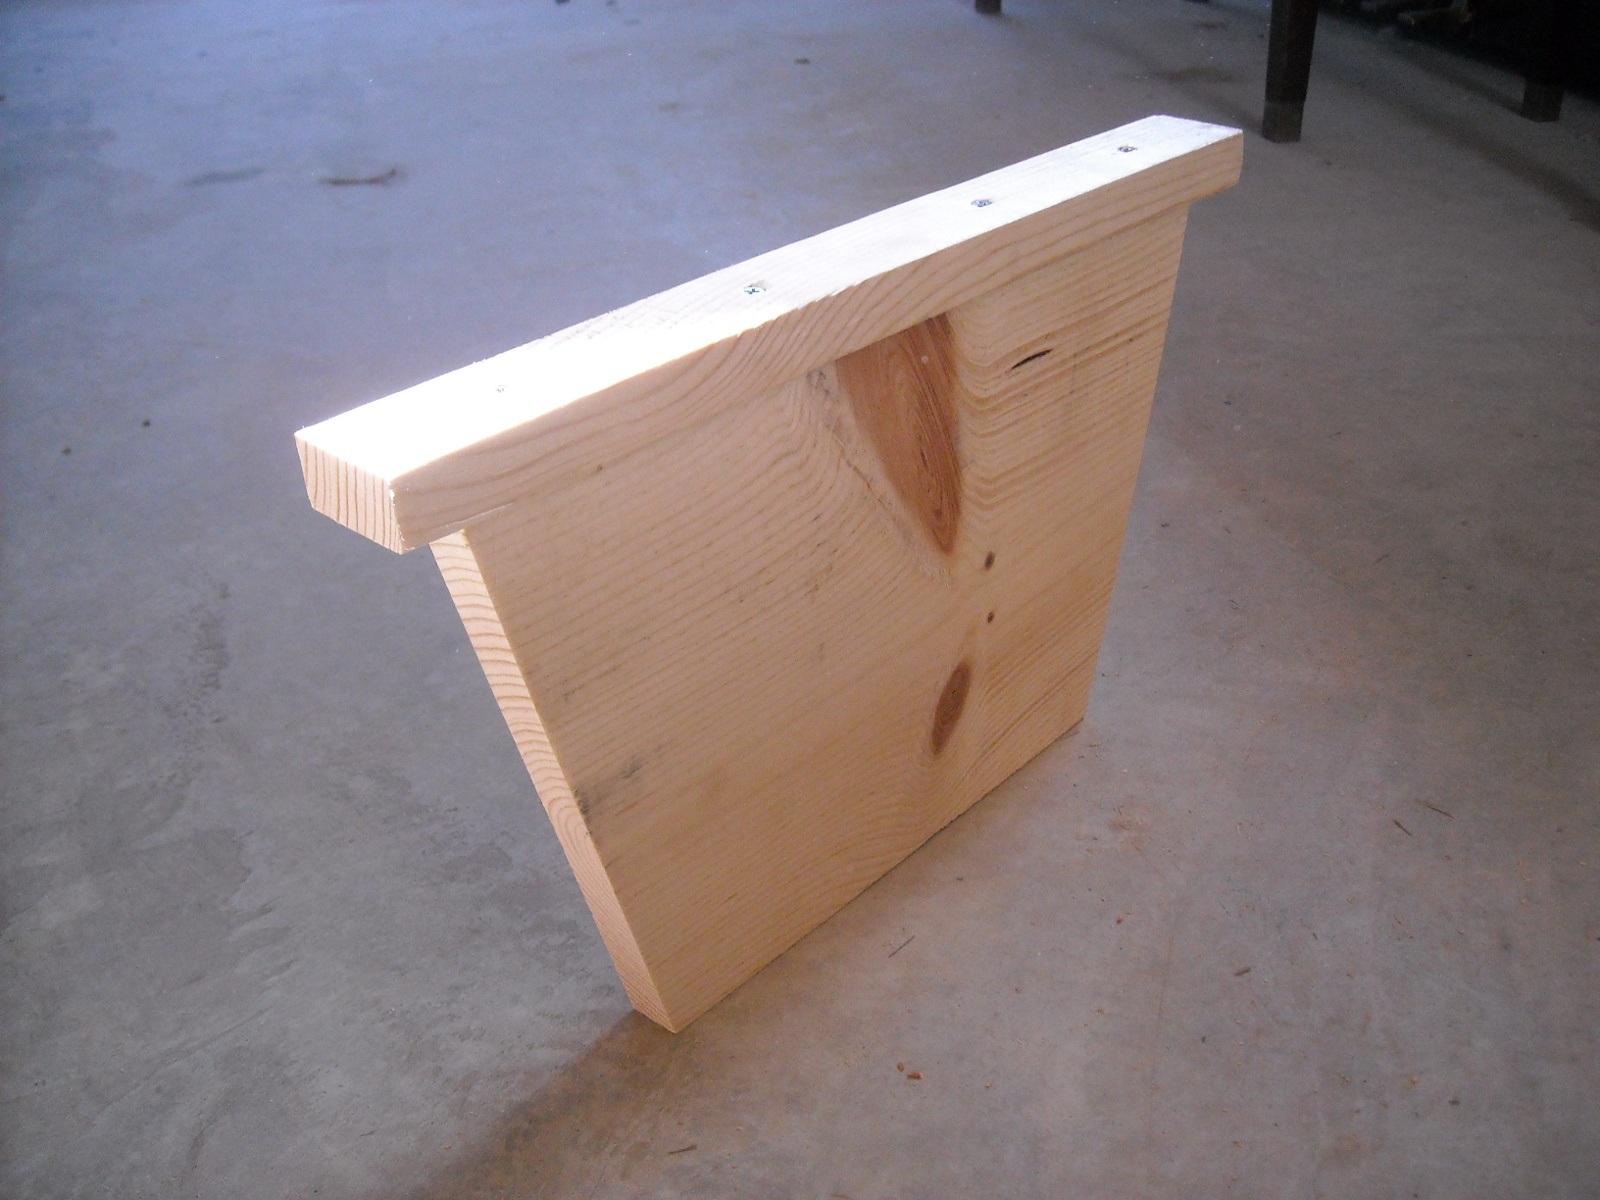
Here is the false back that’s part of the design. Moving the false back up to the last bar with comb on it during the Winter creates a smaller space in the hive to help the bees stay warmer:
And here is the false back and some of the top bars in place. I had to file down some of the bottom parts of the top bars to get them to fit into the sides of the hive box:
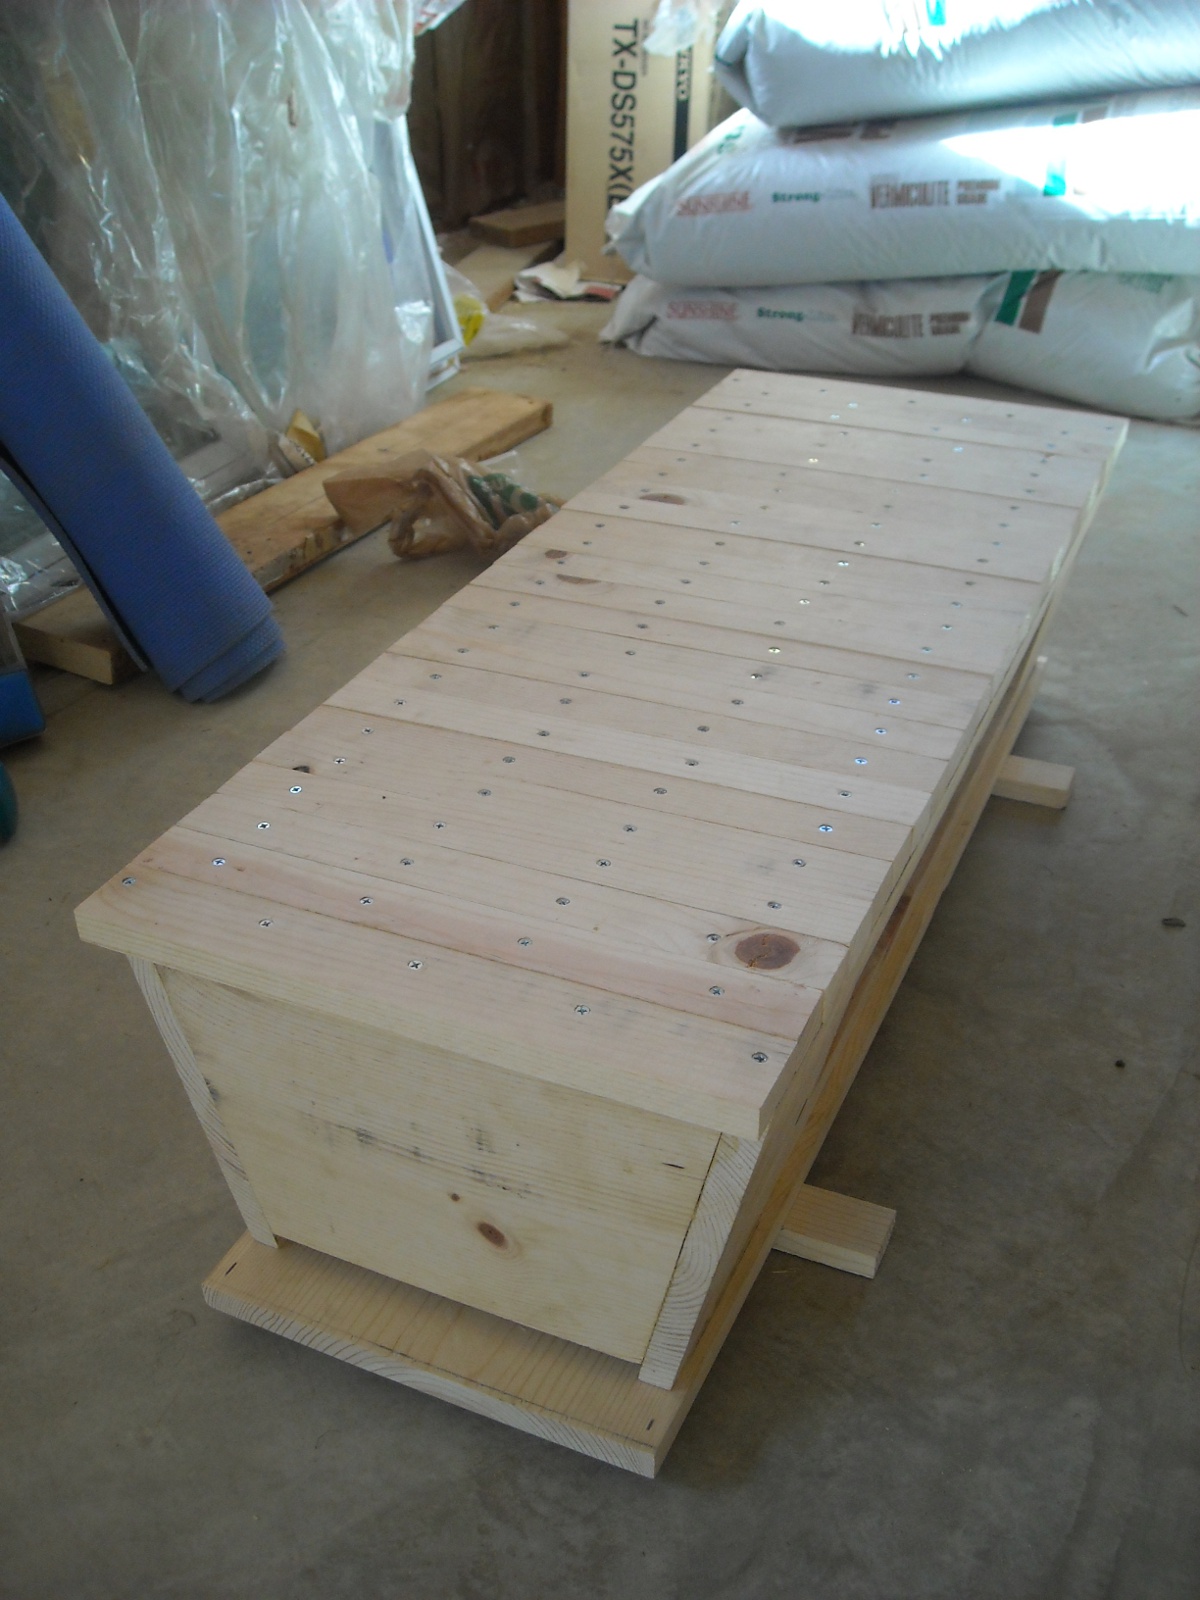
And then here is the hive with all of them in place, including the front and back handles that book-end the top bars. For those, I installed one handle first, placed all of the top bars in place not too tightly, and then installed the other handle up against the top bar next to it:
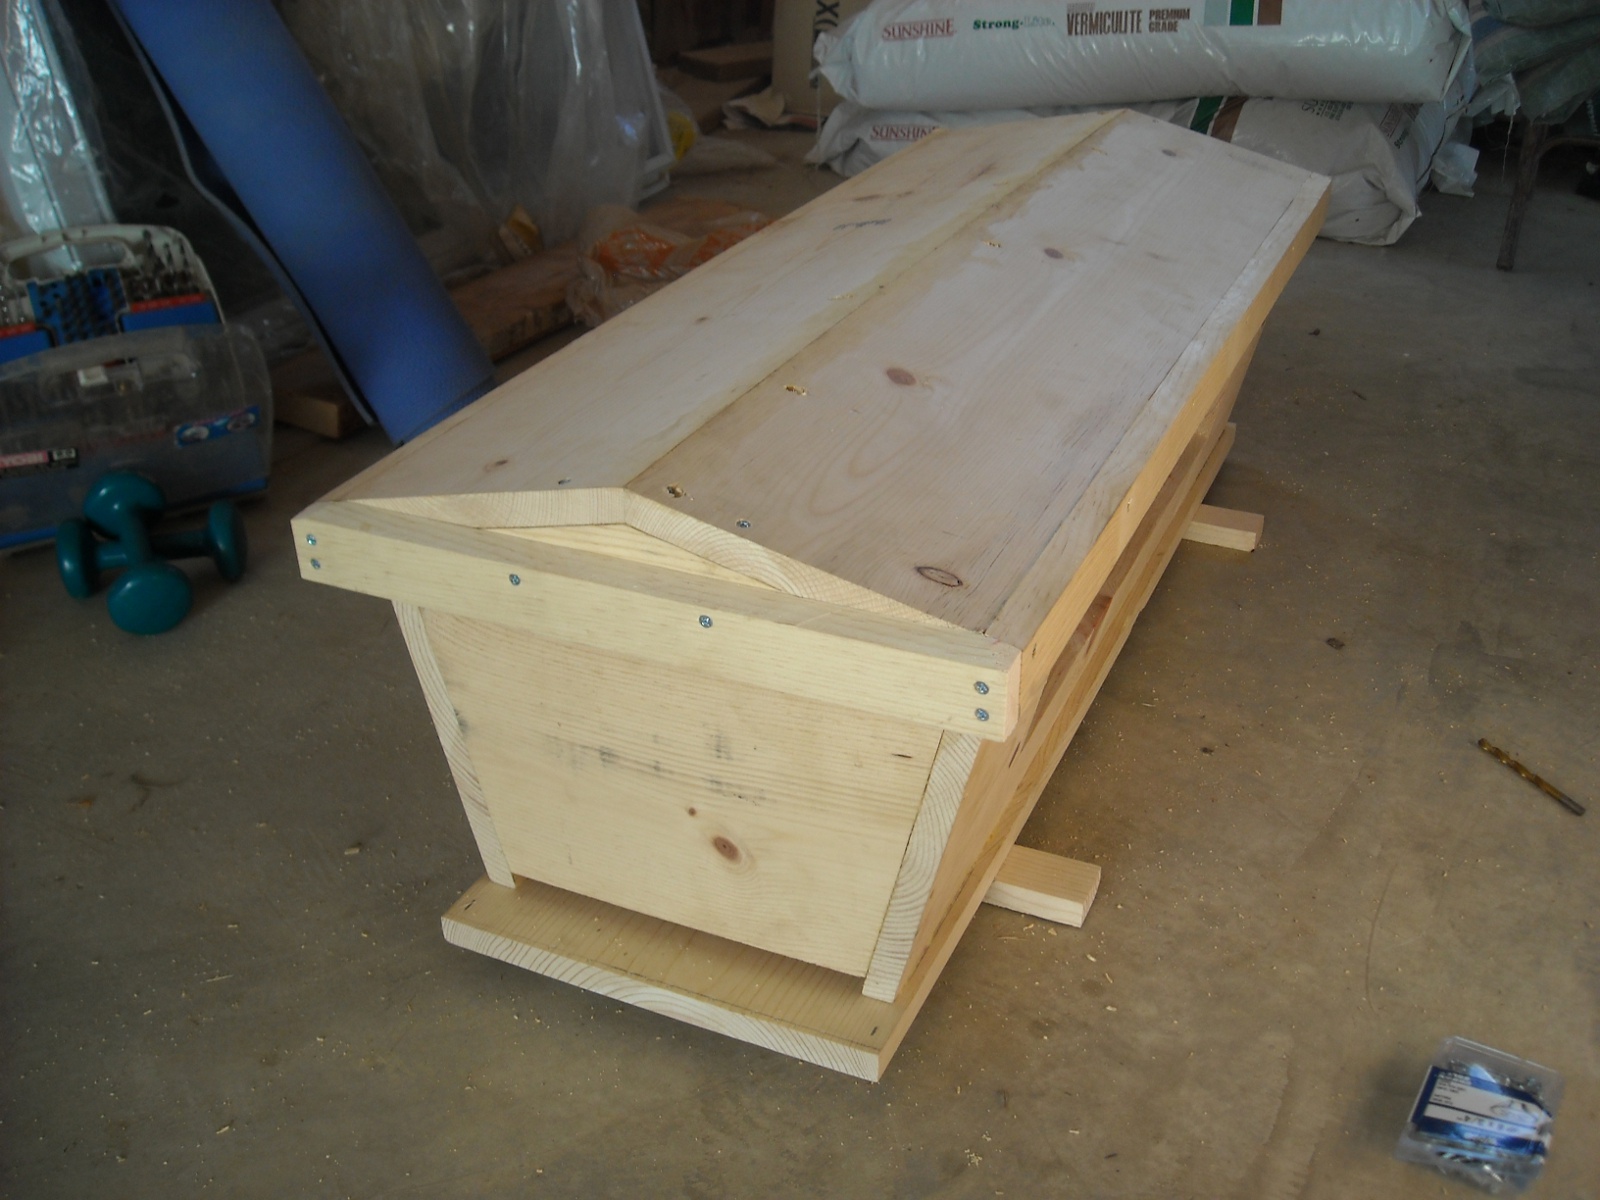
I changed the lid design a little, making it gabled instead of just flat. This was more complicated, but allows for the use of 1x wood for the top instead of plywood, and hopefully will allow the rain to run off easier:
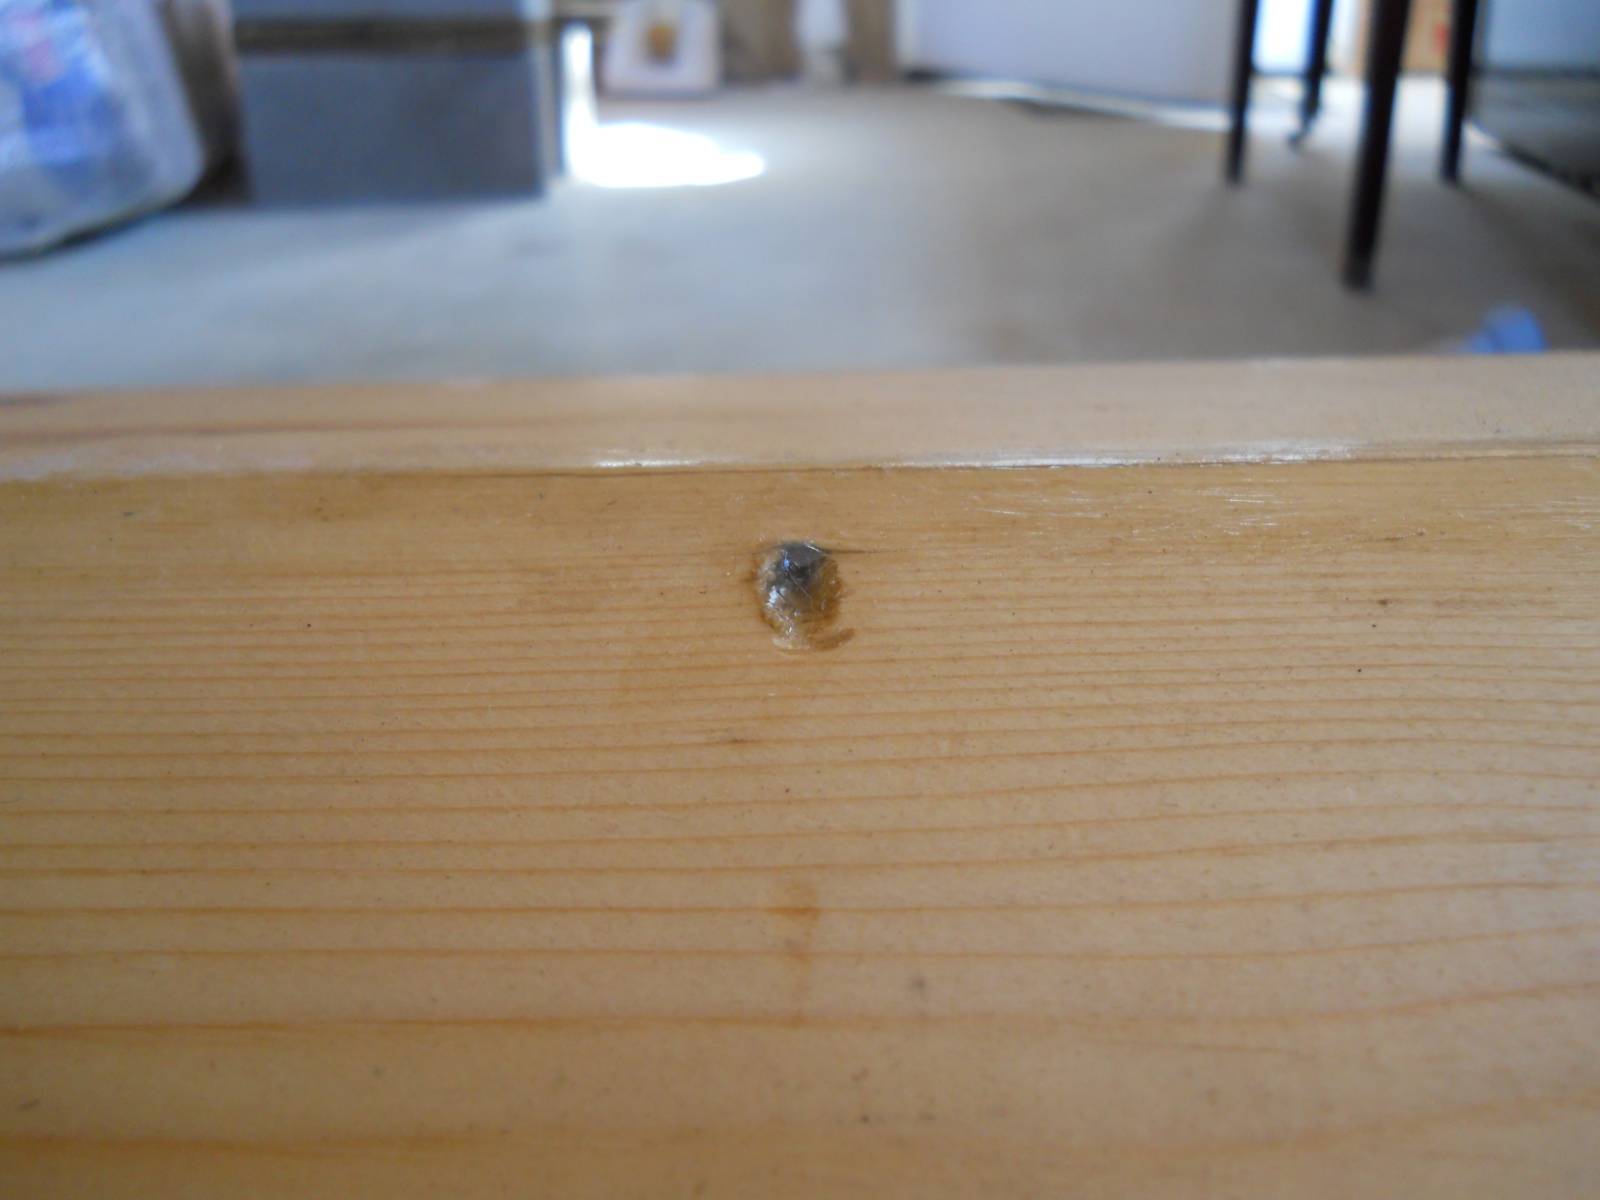
In joining the boards at the roof peak, I drilled pilot holes from one board to the other, and drilled out the hole a little more with a larger bit to allow the head of the screw to sink farther in; and for this part, I used 3/4″ wood screws:
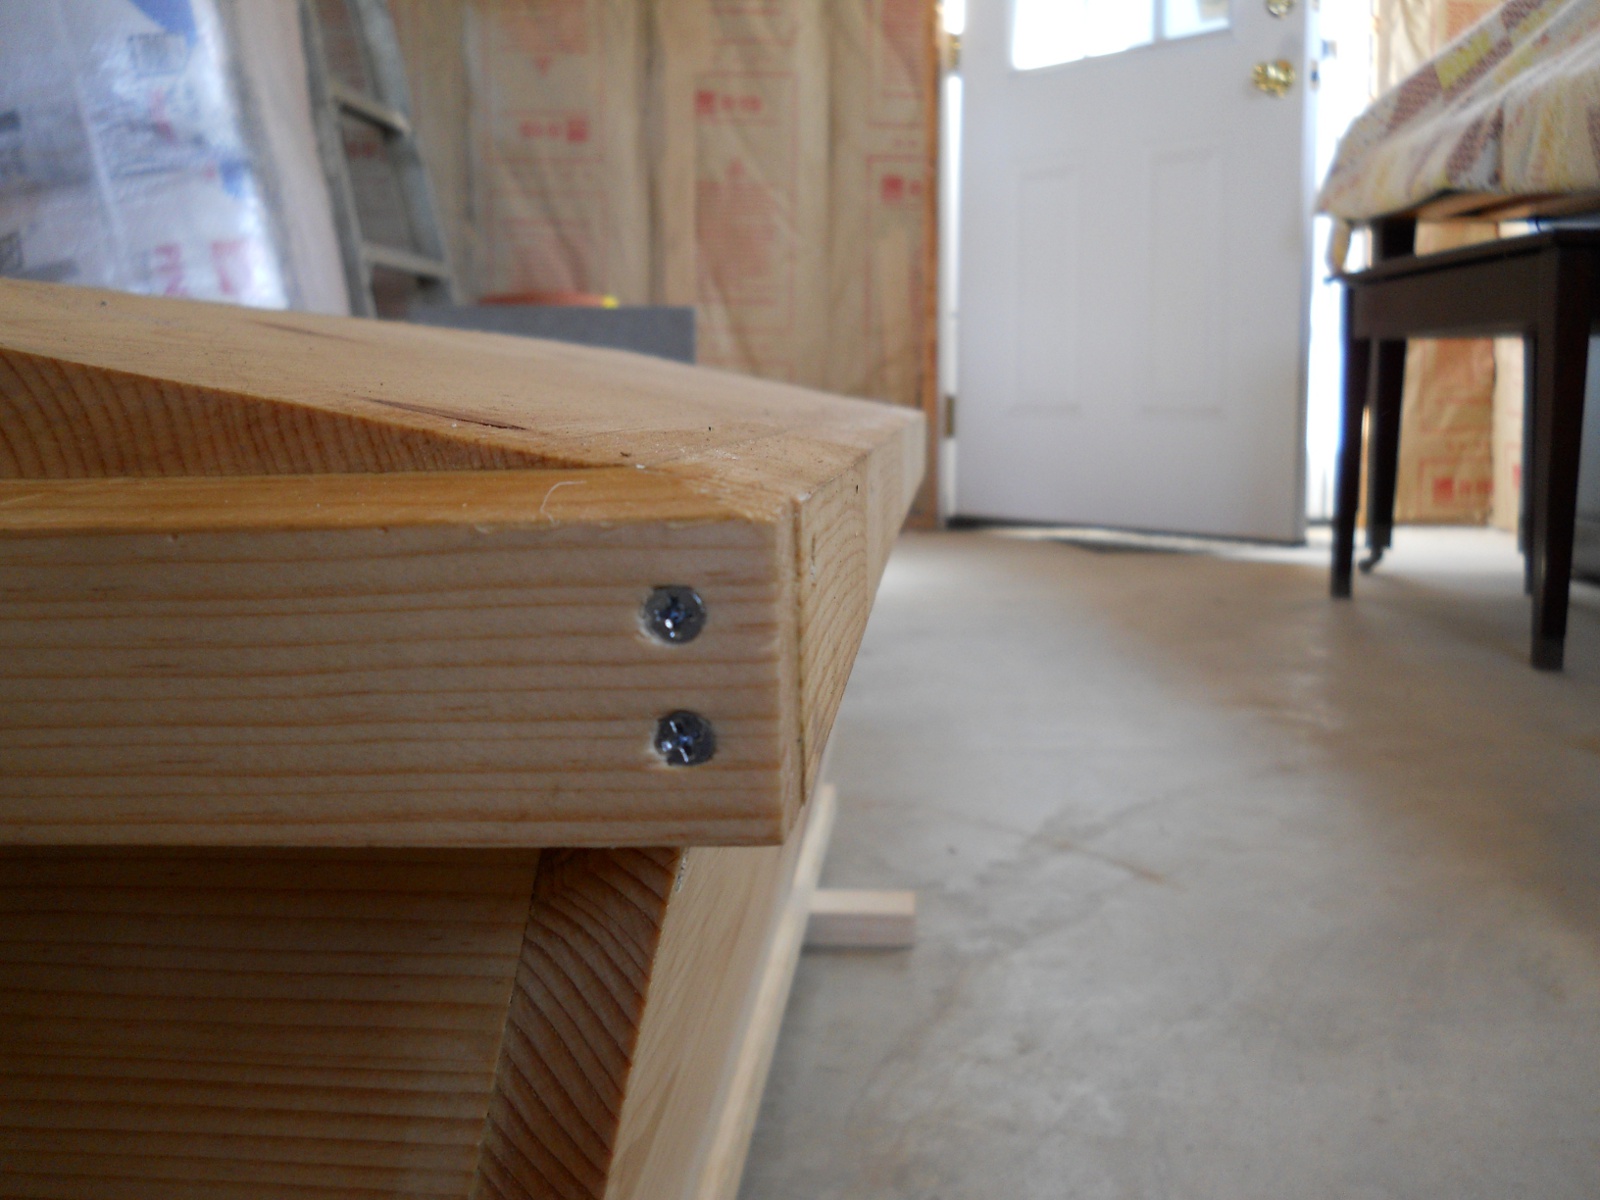
I also angled downward the tops of the edge pieces of the hive top to allow for better water run-off:
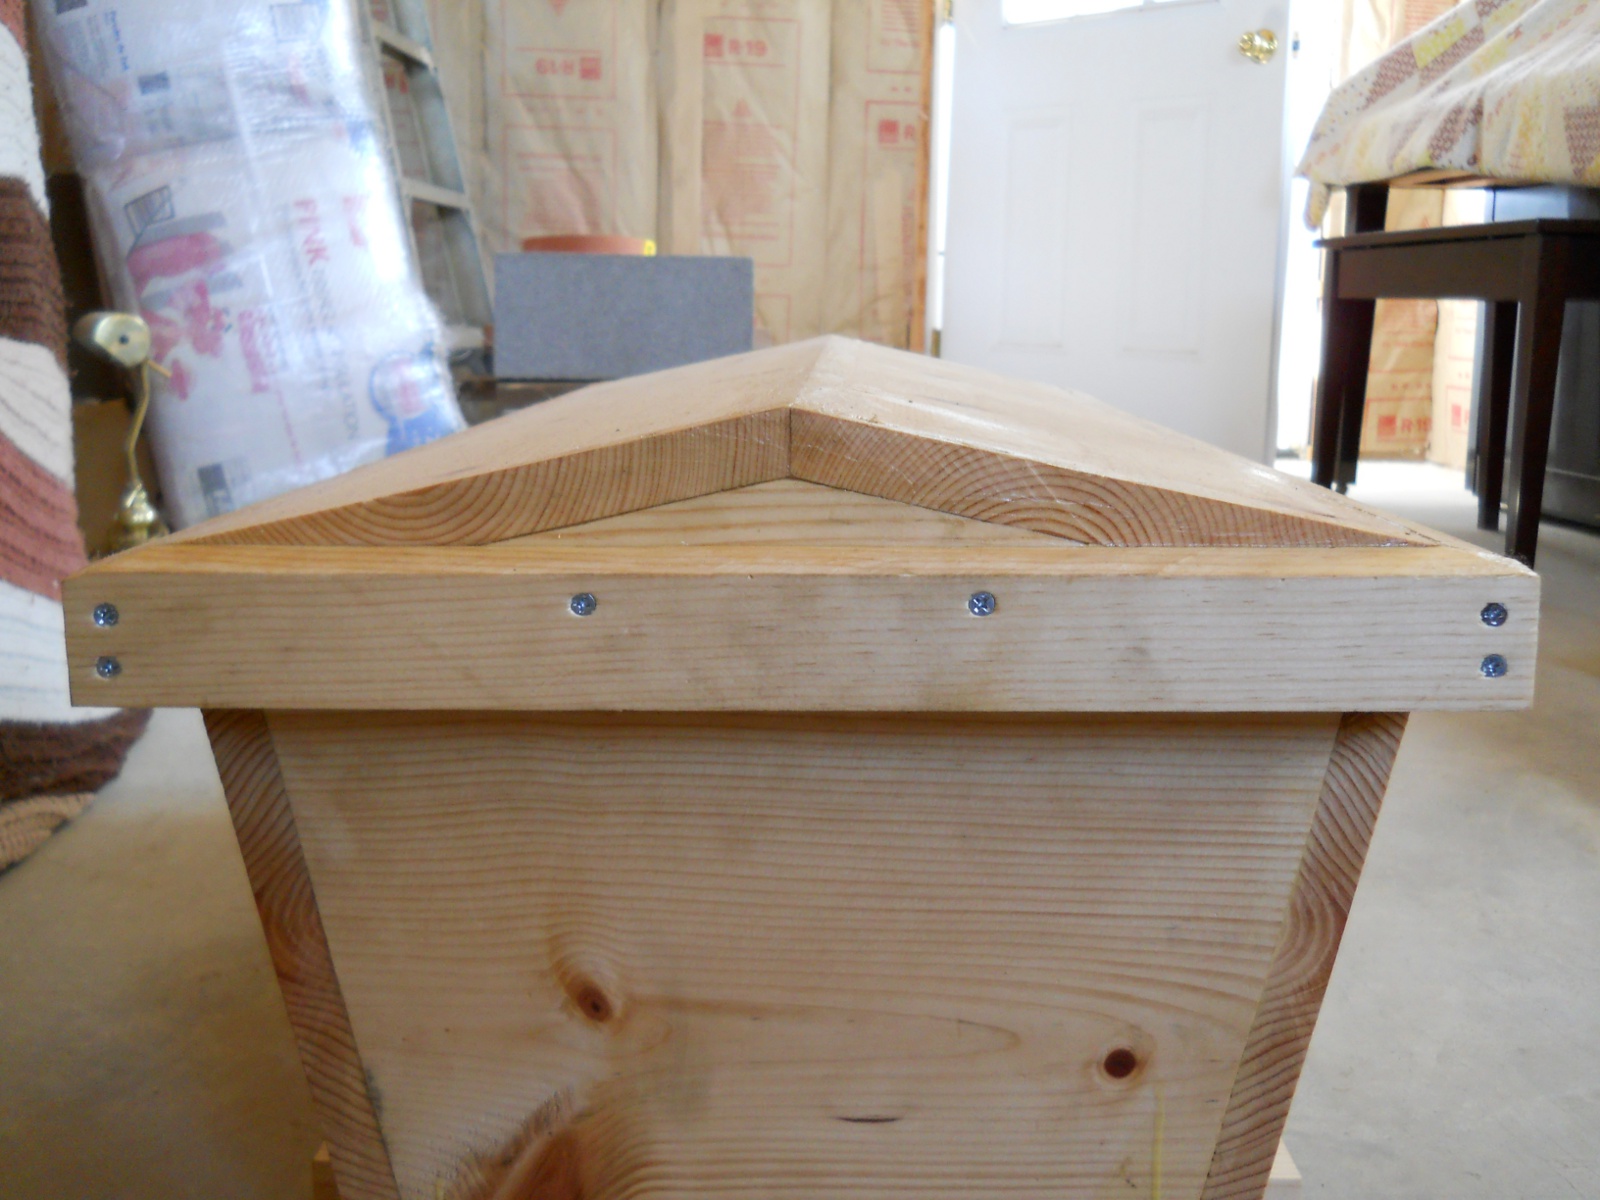
And here’s a picture of the end of the lid:
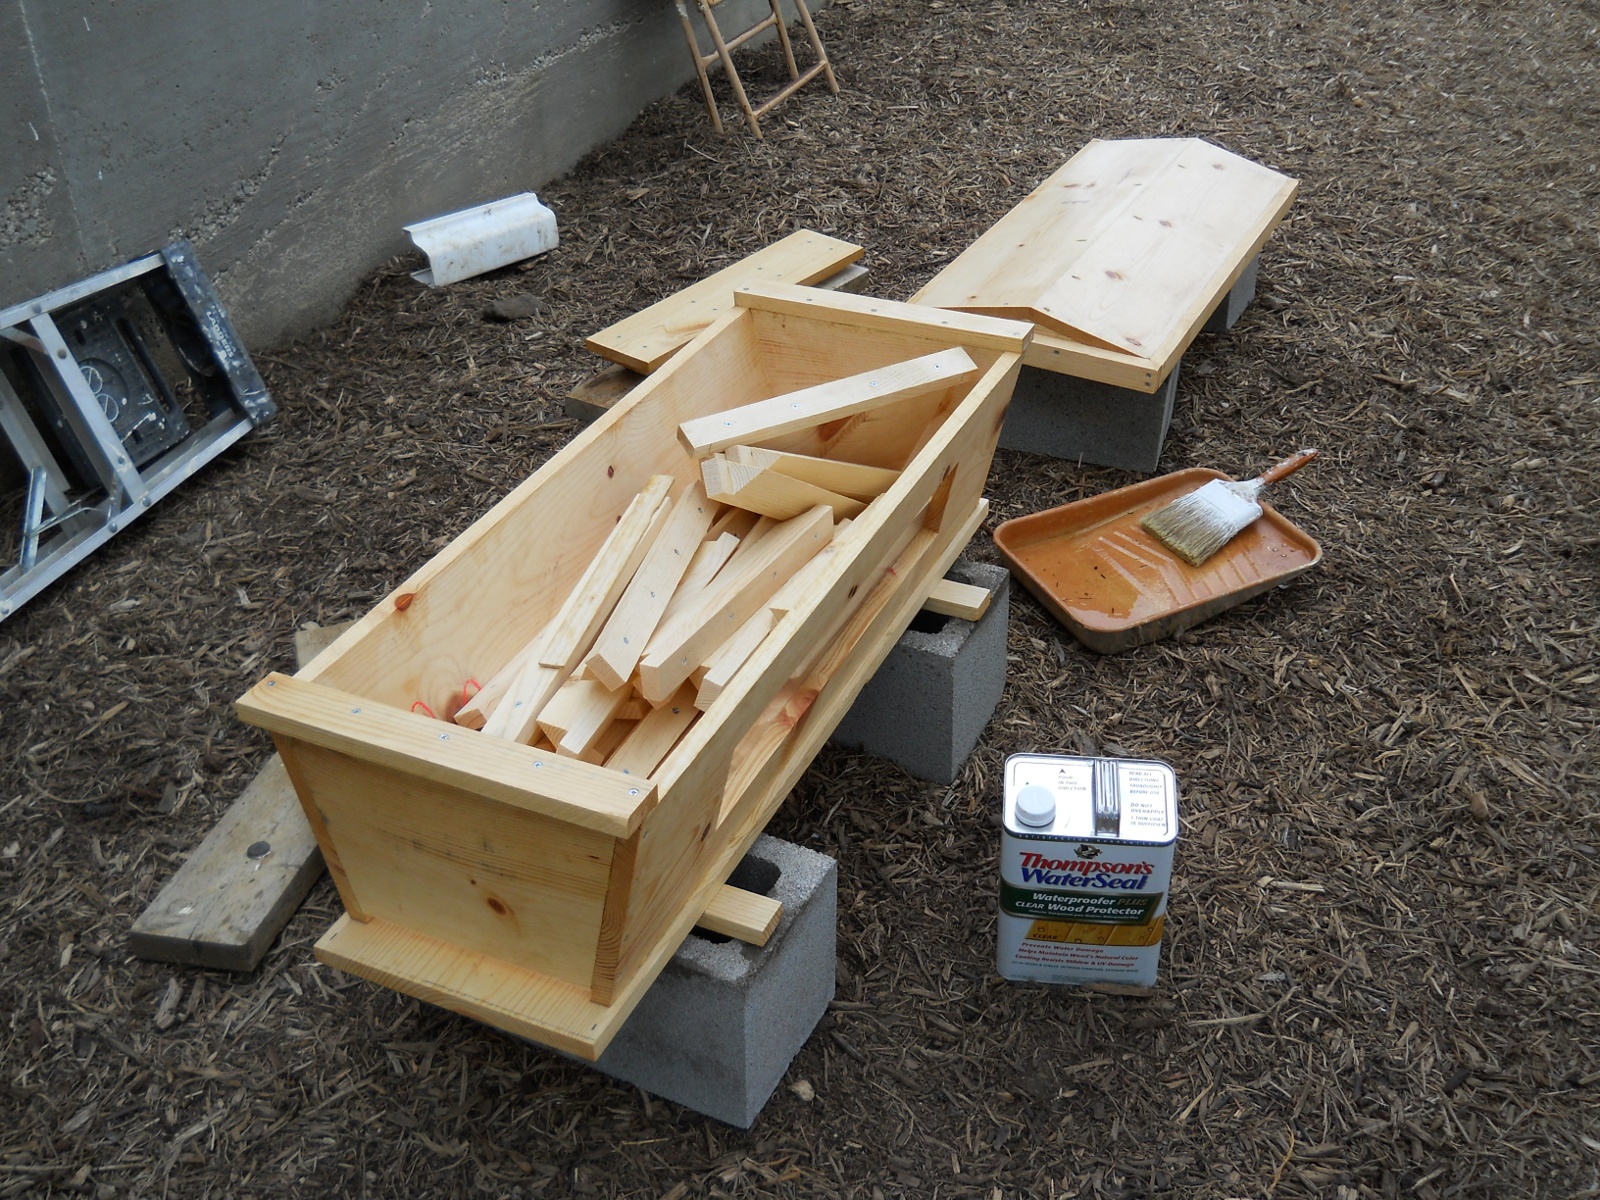
Once built, to weatherize it, I painted all of the external parts with water sealer. After that was dry, I caulked the lid on the outside and inside to help keep water from getting into the inside of the hive:
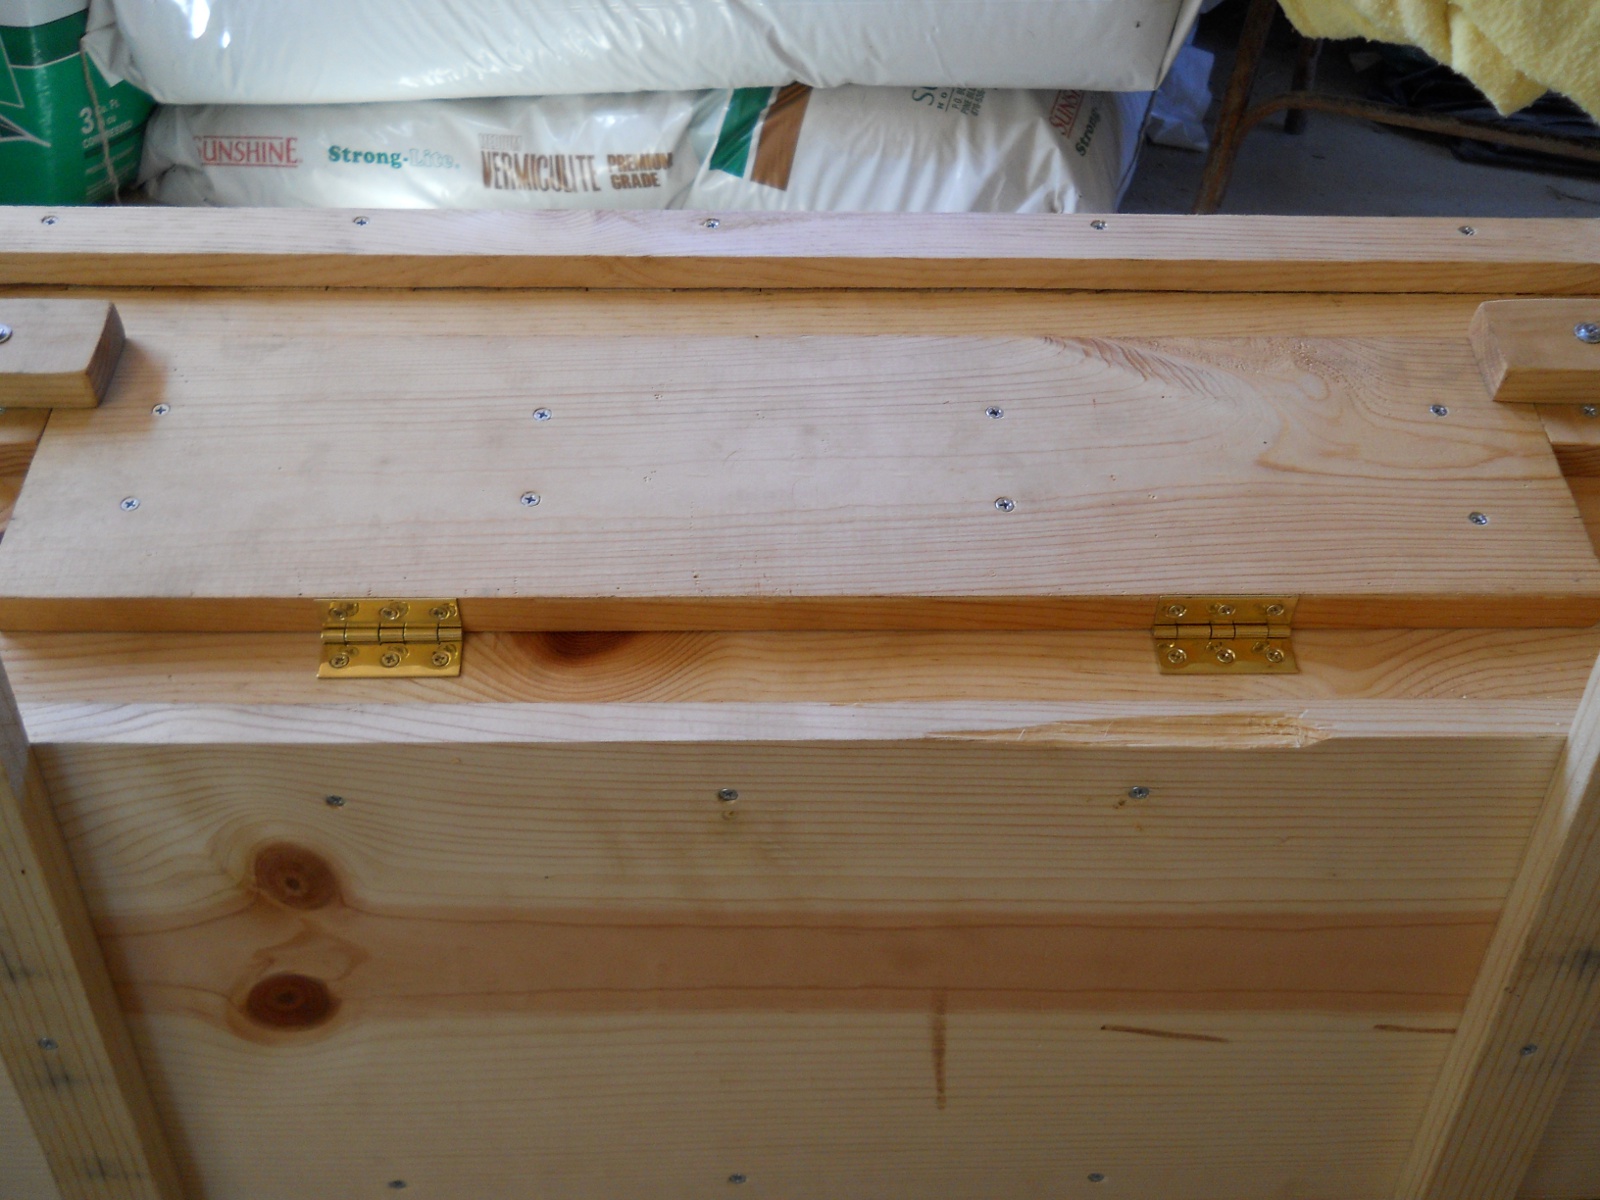
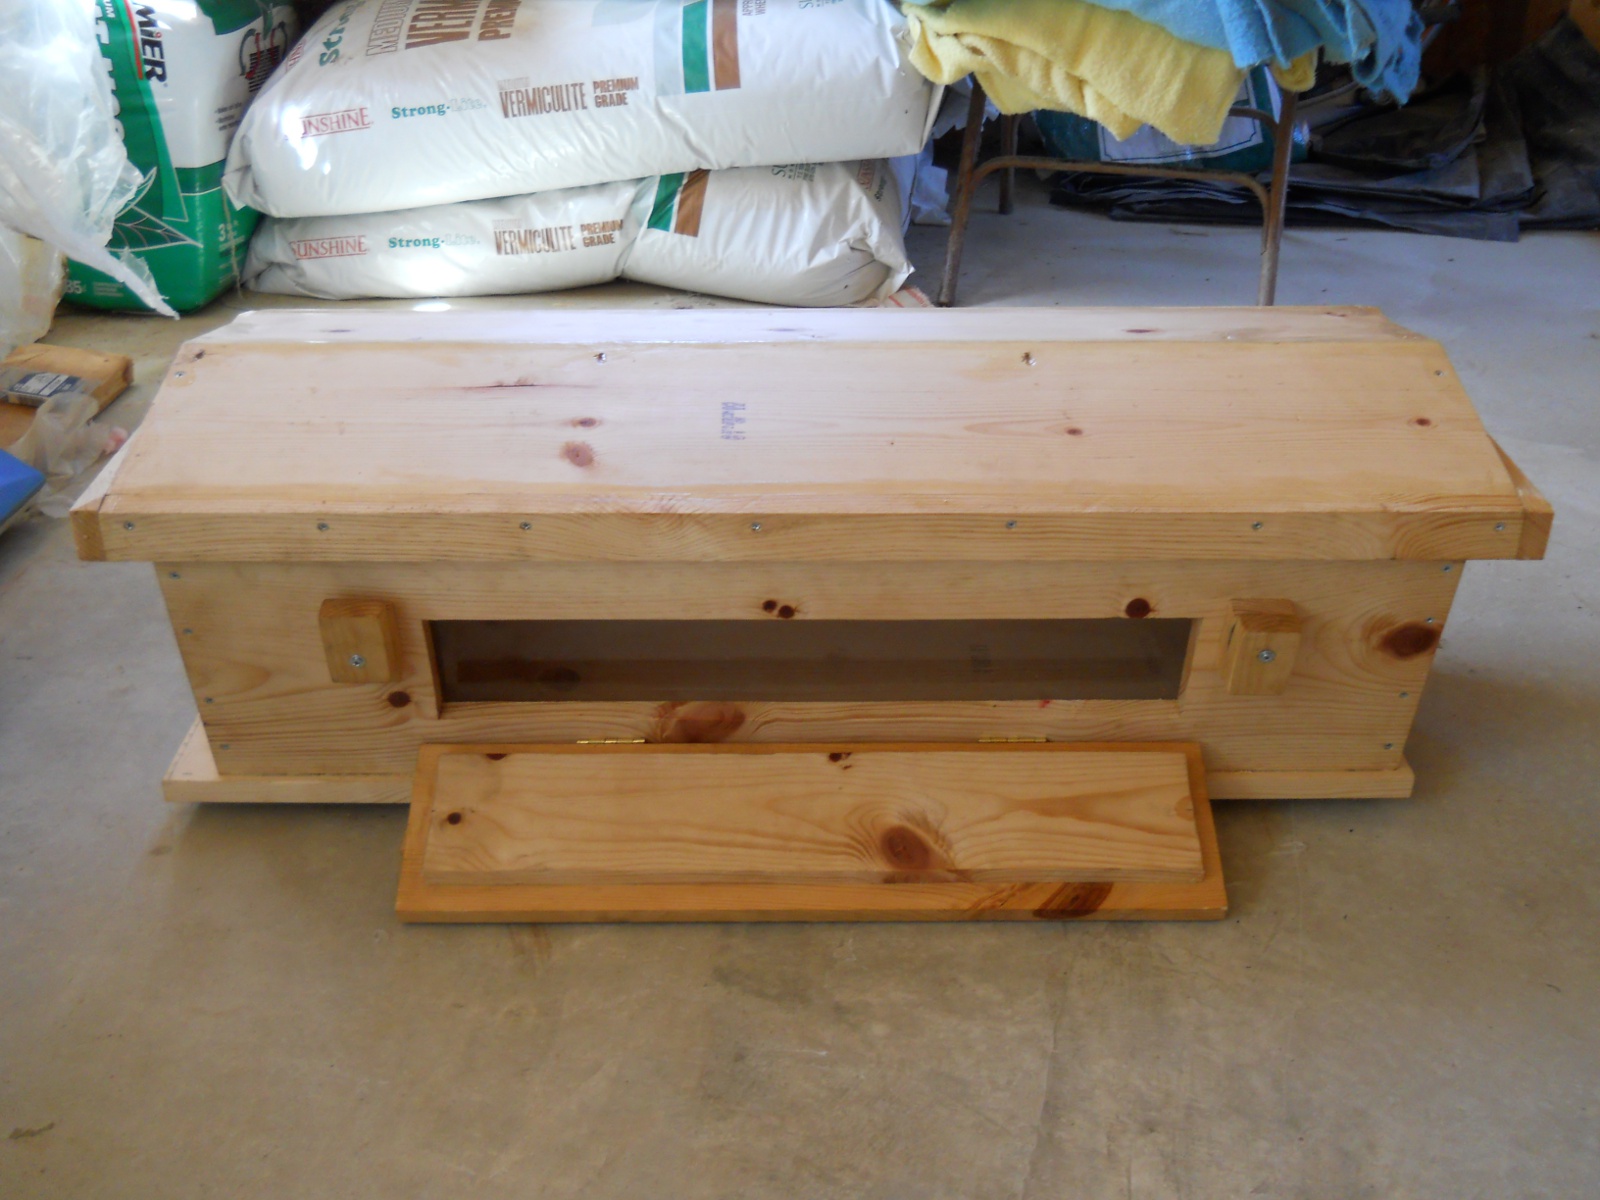
Once painted, I attached the window cover with hinges:
Here it is open:
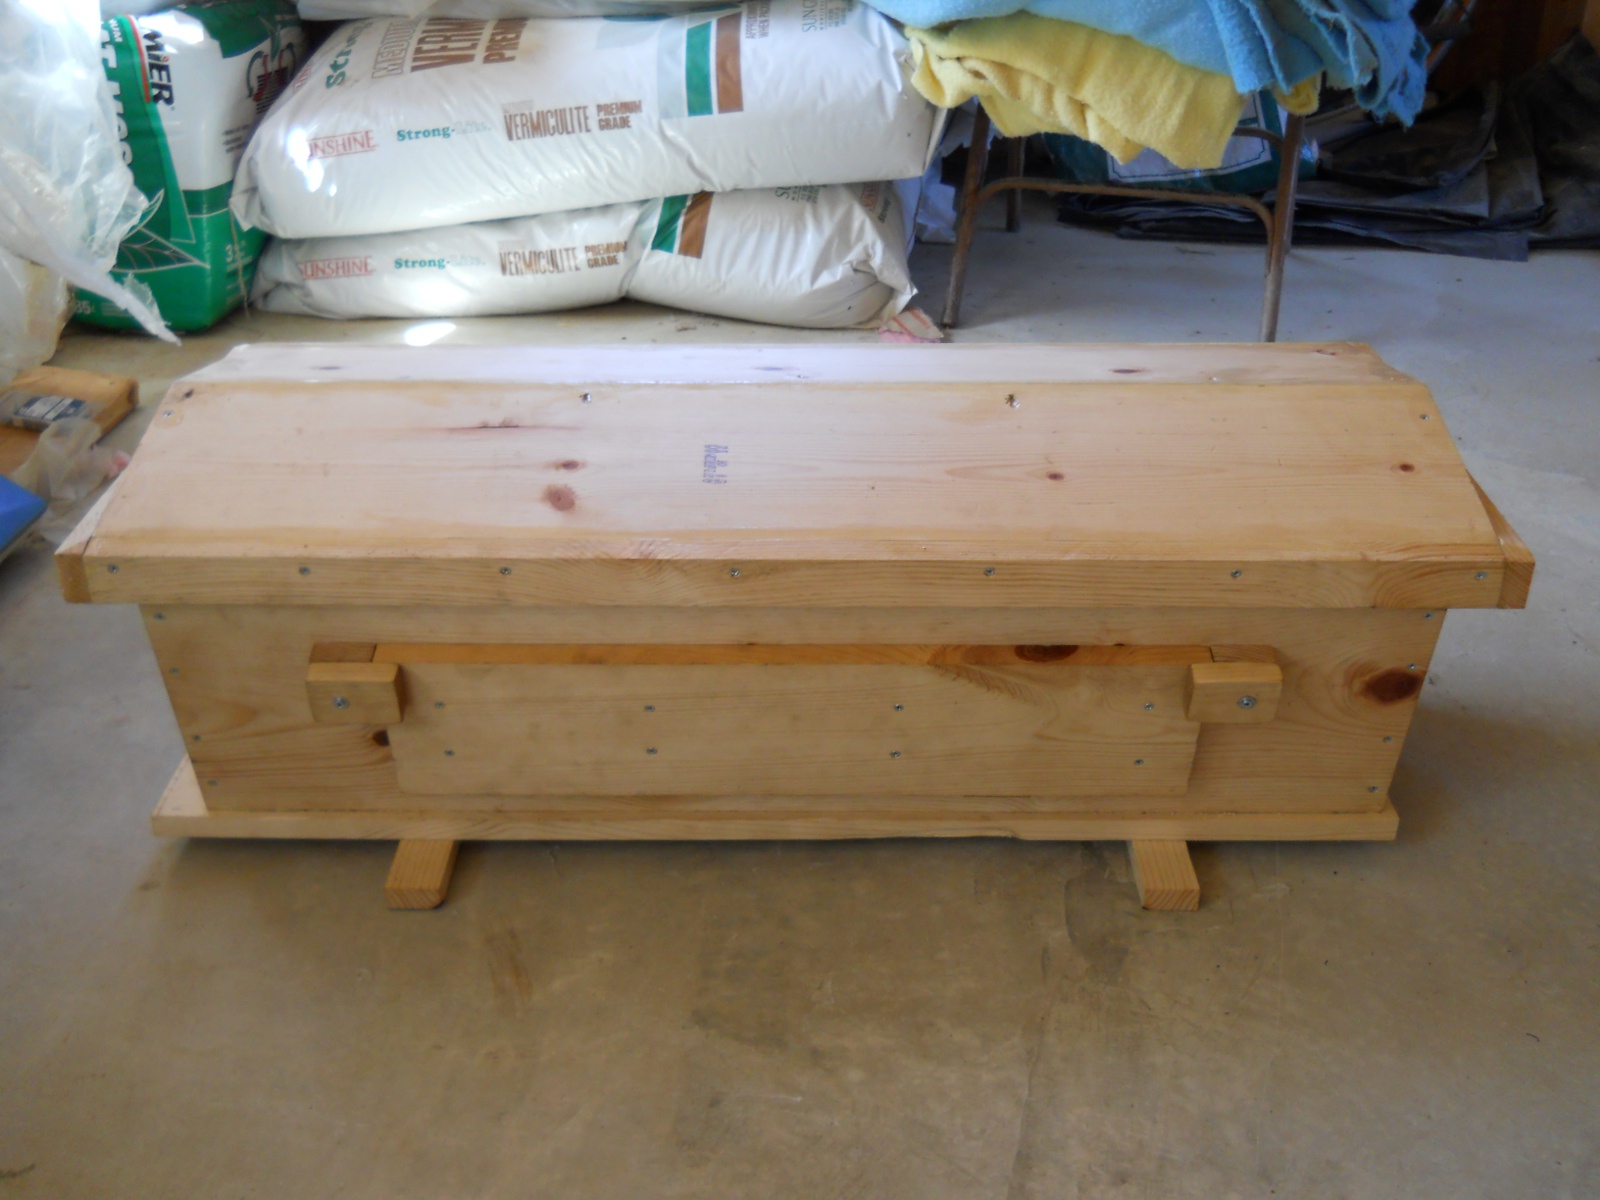
I also added wood latches I cut to keep the door closed. I originally tried aluminum butterfly latches, but those were pretty flimsy and bent easily:
We are grateful to the Lord for allowing the provision of this hive; and we pray we are able to husband bees well, to His glory, for preserving food, and having more bees to keep our gardens and trees pollinated.
Before the fall: Gen 2:15 – “And the LORD God took the man, and put him into the garden of Eden to dress it and to keep it.”
After the fall: Gen 3:19,23 – “19 In the sweat of thy face shalt thou eat bread, till thou return unto the ground; for out of it wast thou taken: for dust thou art, and unto dust shalt thou return. 23 Therefore the LORD God sent him forth from the garden of Eden, to till the ground from whence he was taken.“
Who invented Industrialism?
Answer: Man
Jer 17:9 – “The heart is deceitful above all things, and desperately wicked: who can know it?”
Prov 4:23 – “Keep thy heart with all diligence; for out of it are the issues of life.”
Prov 14:12 – “There is a way which seemeth right unto a man, but the end thereof are the ways of death.“
Agrarianism or Industrialism: it’s God’s way or the highway.
Our neighbor, Mr. Bunker, planted his large field (about 5 acres) in black-eyed peas this past Spring. It was no small amount to purchase the seed and pay to have the ground plowed and planted. He had every right to keep it all to himself for his family and to have a cash crop. Instead, he graciously opened up the field to our community to come and tend it and reap its harvest together along with his family. We greatly appreciated his offer and spent many hours over several weeks in the Summer sun weeding and then picking the beans when they grew to maturity. It was a great opportunity for our community to learn what it means to come together for a common cause and share God’s bounty as a group. It was also the first major crop for the community to cultivate, so this was a new experience on multiple levels.
I learned many things through the experience. The women and children devoted several community work days towards weeding and tending the field, which turned out to be rich times of work, fellowship and getting to know each other better. Working in the field introduced me to the joys of blisters from the Blister Beetle; and I received my first wasp sting, not to mention the potent burning sting of the Stinging Nettle plant. It also forced me personally to come out of my own little homestead world to focus on a larger cause, and required additional discipline to go out into the field even when I didn’t “feel” like it or when I was really busy with other things.
The Lord did a little weeding of my own heart during this process as well. The Bible says we are to mortify (kill) the flesh (Rom 8:1-13), the carnal (non-spiritual) man of sin, which means we need to examine ourselves for sins of the flesh. At times when I was tired or really hot and sweaty wanting to quit, I had to reel myself back in and remember to be thankful for this opportunity and provision, and to work for Christ’s sake and as unto Him and nobody else. Just as with God’s grace, this provision was being offered undeserved as a gift; but I still had to beat down the flesh and submit myself to what was required to persevere to the end (the harvest). The field was so big it felt very overwhelming at times, when the weeds were growing so fast it was impossible to keep up with them. I could usually only get through one half to one row in a one to two hour time period. During the times when it was just me in that big field, my flesh would say, “It’s just too big. You’re not making a bit of difference. The weeds are going to take over this field, and there won’t be any beans left to harvest.” It was easy to forget that other members in the community were out there at different times doing the same thing, and we were all in it together. I also found myself at times to be even a little resentful that the entire community couldn’t put in more time and were jeopardizing the crop and some deserved more than others because of the different investments of time. The Lord had to remind me (strongly) that this was a REALLY good opportunity to step outside of myself and practice meekness and selflessness. I had to repent of that and remember it was not for myself but for the good of the community. I was saddened and surprised at how quickly my flesh had wanted to take over my spirit.
When it came time to harvest, there was plenty for everyone; and I learned the beans that weren’t picked could be turned back into the soil to nourish it. So no part of the whole process was wasted — another reminder that even when I don’t see the big picture, God does, and is in control and all knowing of every aspect of the situation. I believe the spiritual weeding of my heart truly paralleled the physical, and I praise the Lord for His patience with me to teach me these things. It was a valuable lesson in so many areas of my life, and I’m grateful to Mr. Bunker for his personal sacrifice in order for our community to grow spiritually and physically on individual and corporate levels.
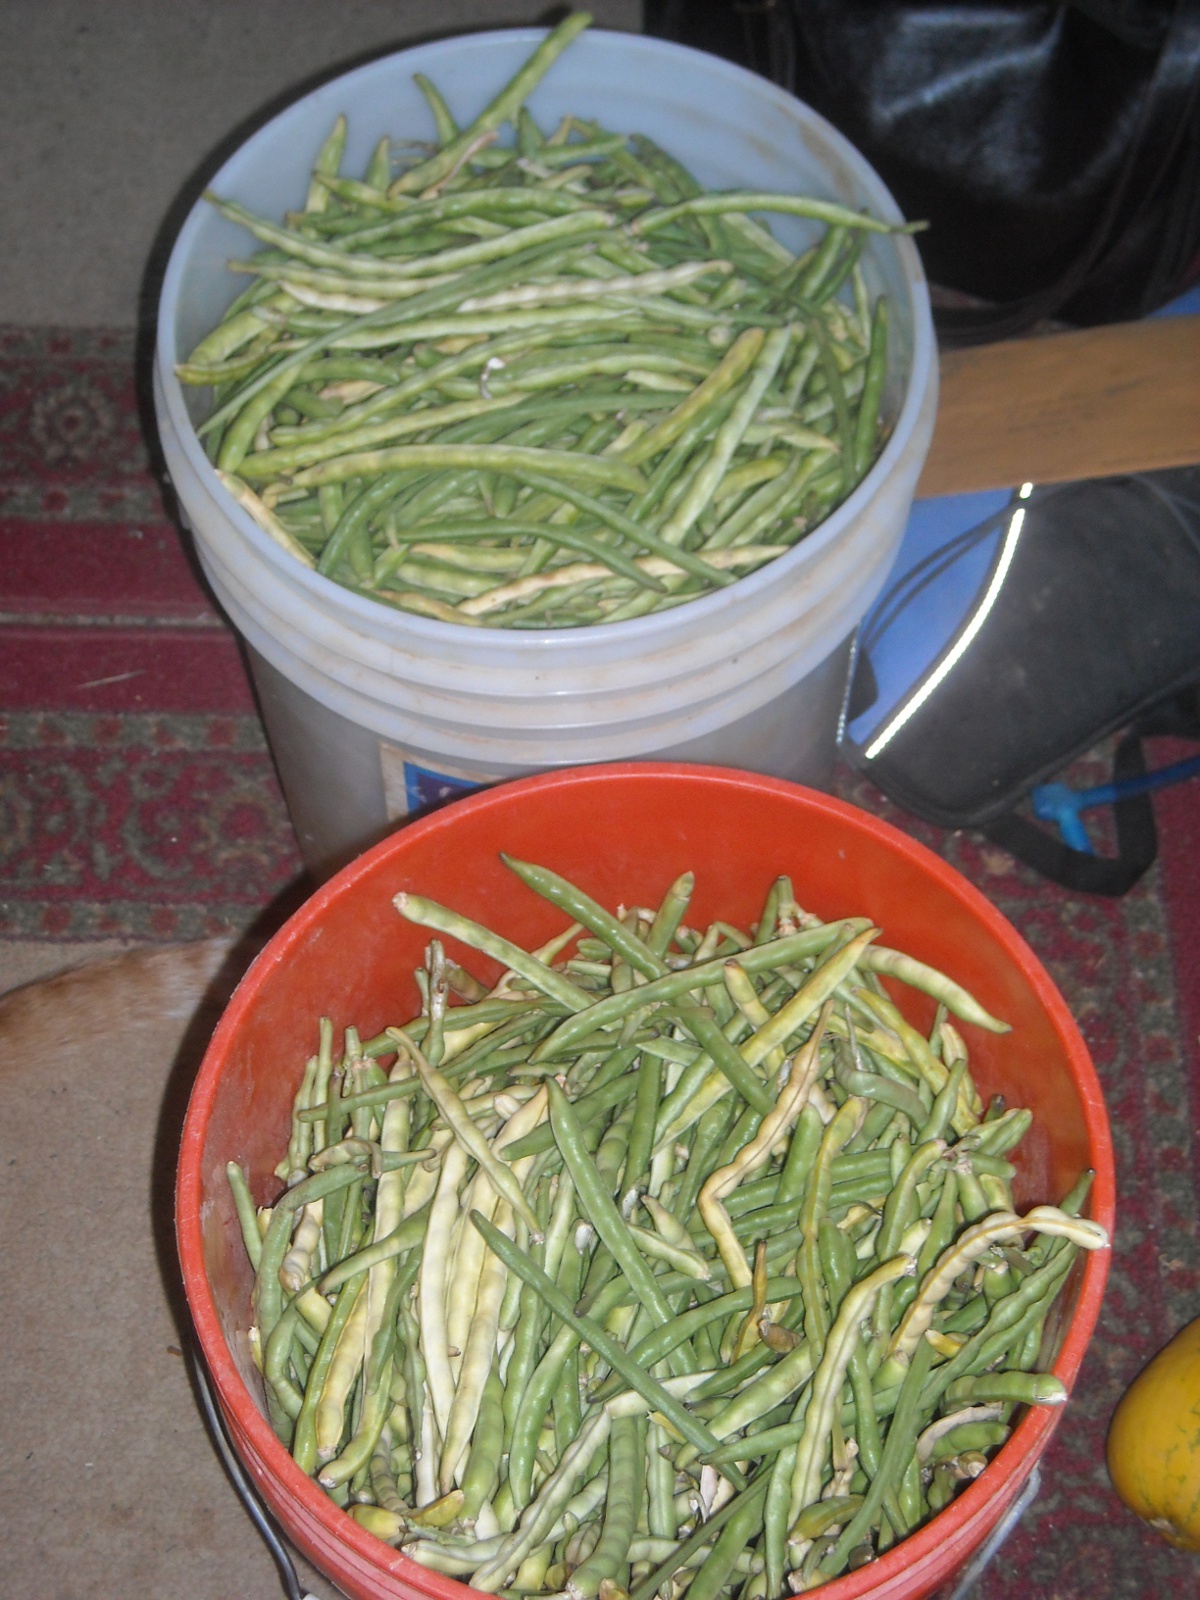
I had not eaten black-eyed peas much growing up in California; it seems like more of a southern food. But I am now sold on growing them to harvest and preserve. Did you know it is a three-for-one crop: in that the first harvest produces long, tasty green beans; the second when they are a little dry, the moist bean could be shelled and preserved; and then at the end of the harvest when the bean pods have all dried up, you can go through again and pick the dried pods to shell and keep the black-eyed peas as a dried bean until you’re ready to cook them, or use them to re-plant. Wow!
Here are a couple of five-gallon buckets from the first green bean stage harvest:
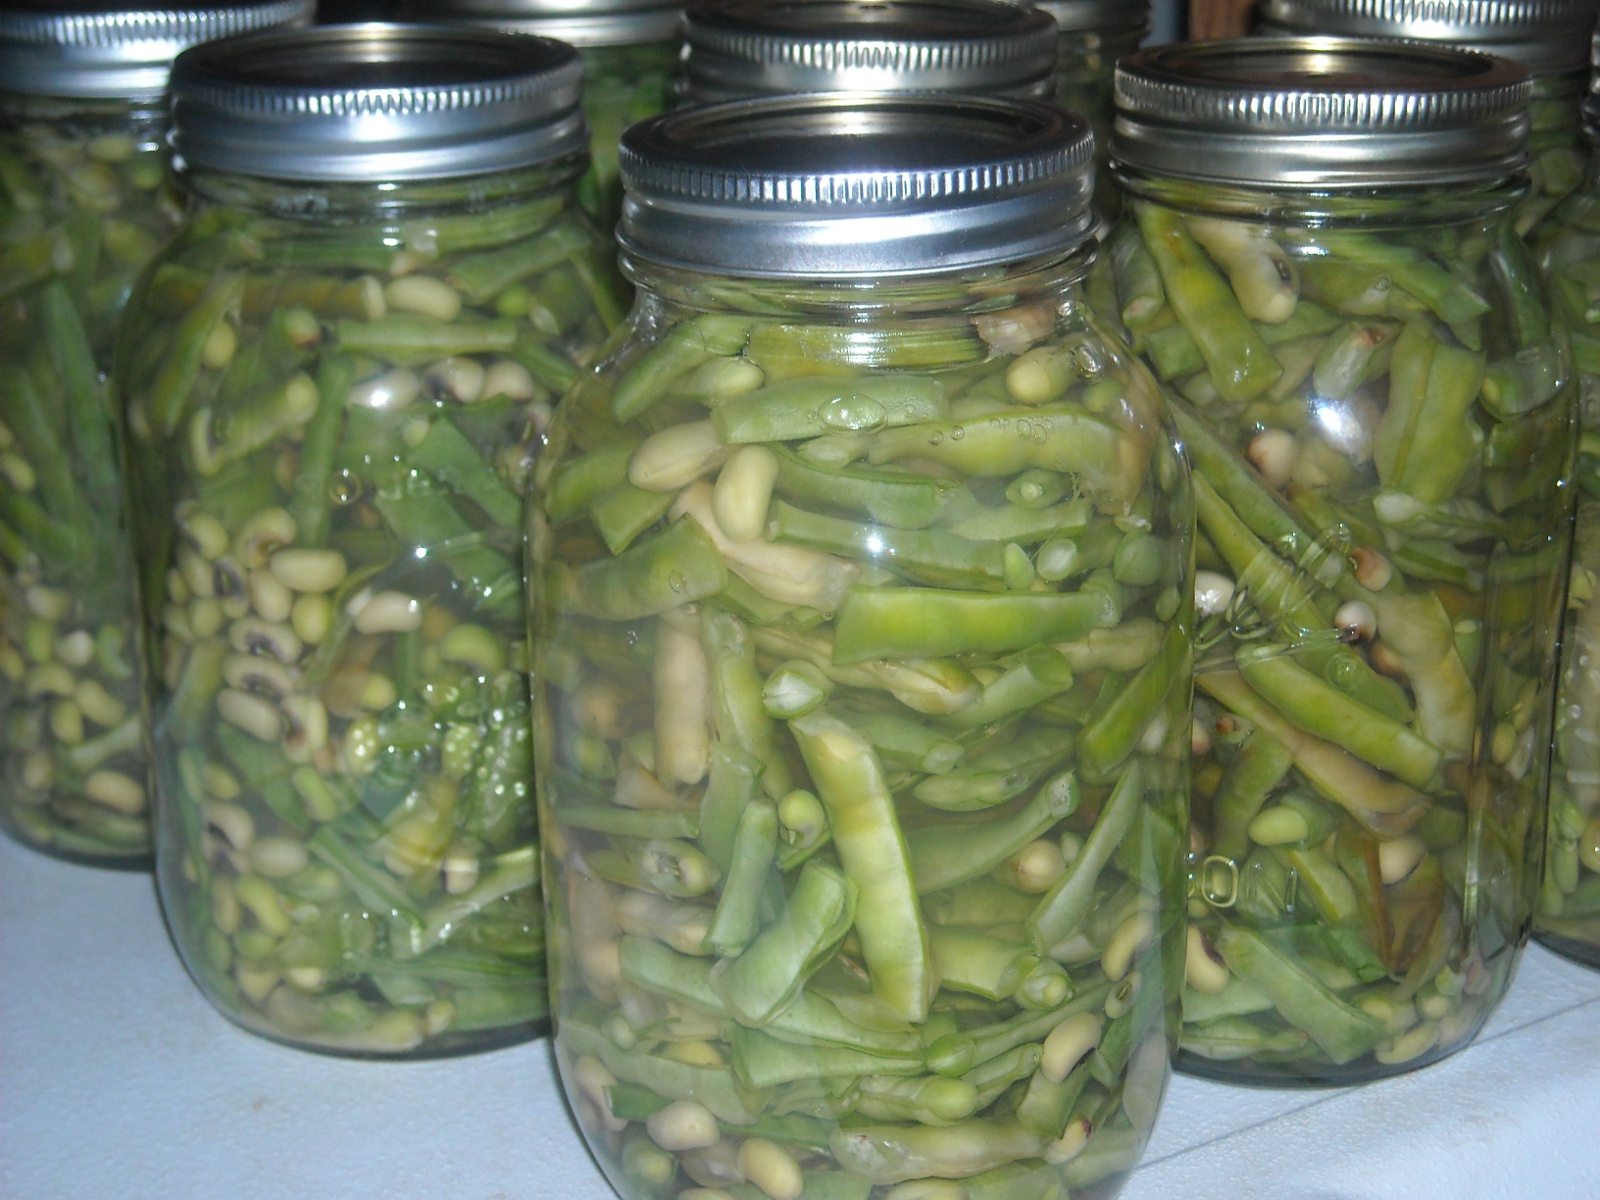
I was able to pressure can over 20 quarts:
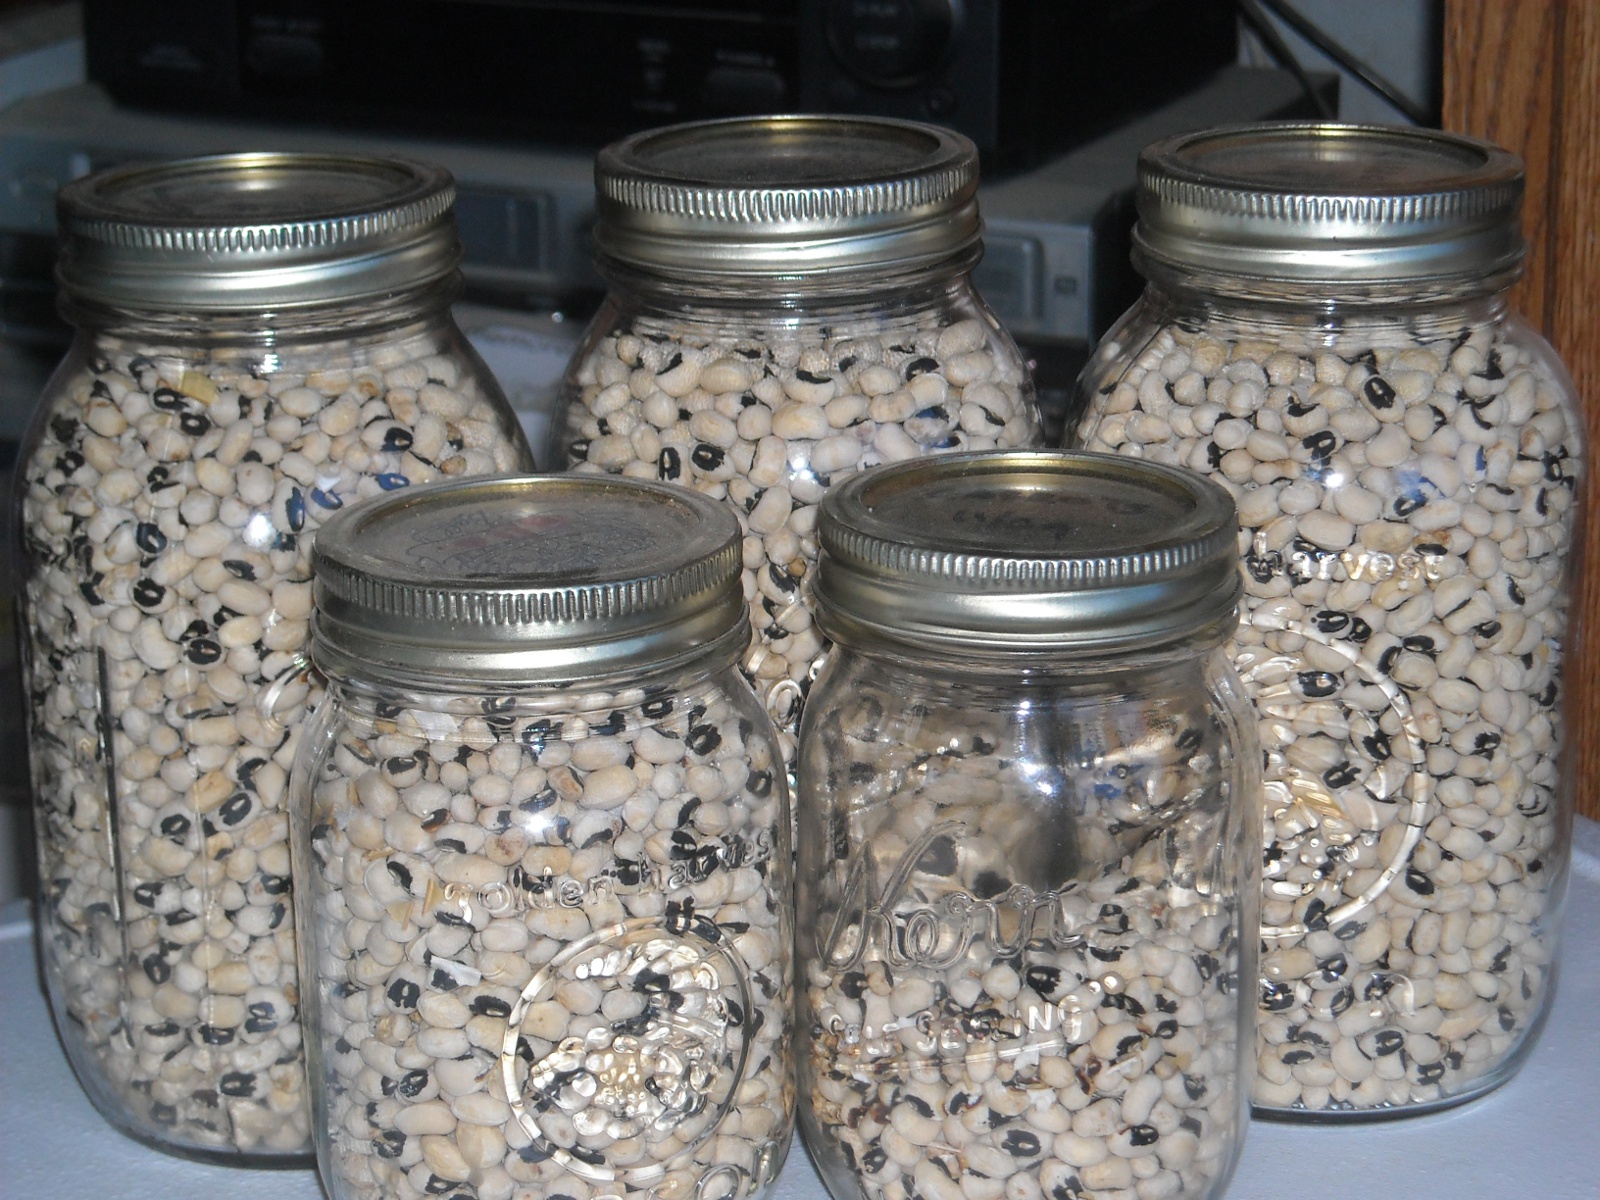
And here are the dried beans we harvested. It doesn’t look like much, but this represents a lot of food for the two of us:
We thank the Lord again for His direct spiritual and physical provisions and lessons from the experience of this first community crop. I hope I will have grown in spiritual maturity the next time, Lord willing, and pray for God’s blessing on Mr. Bunker and his family for their sacrifice and love for the community.
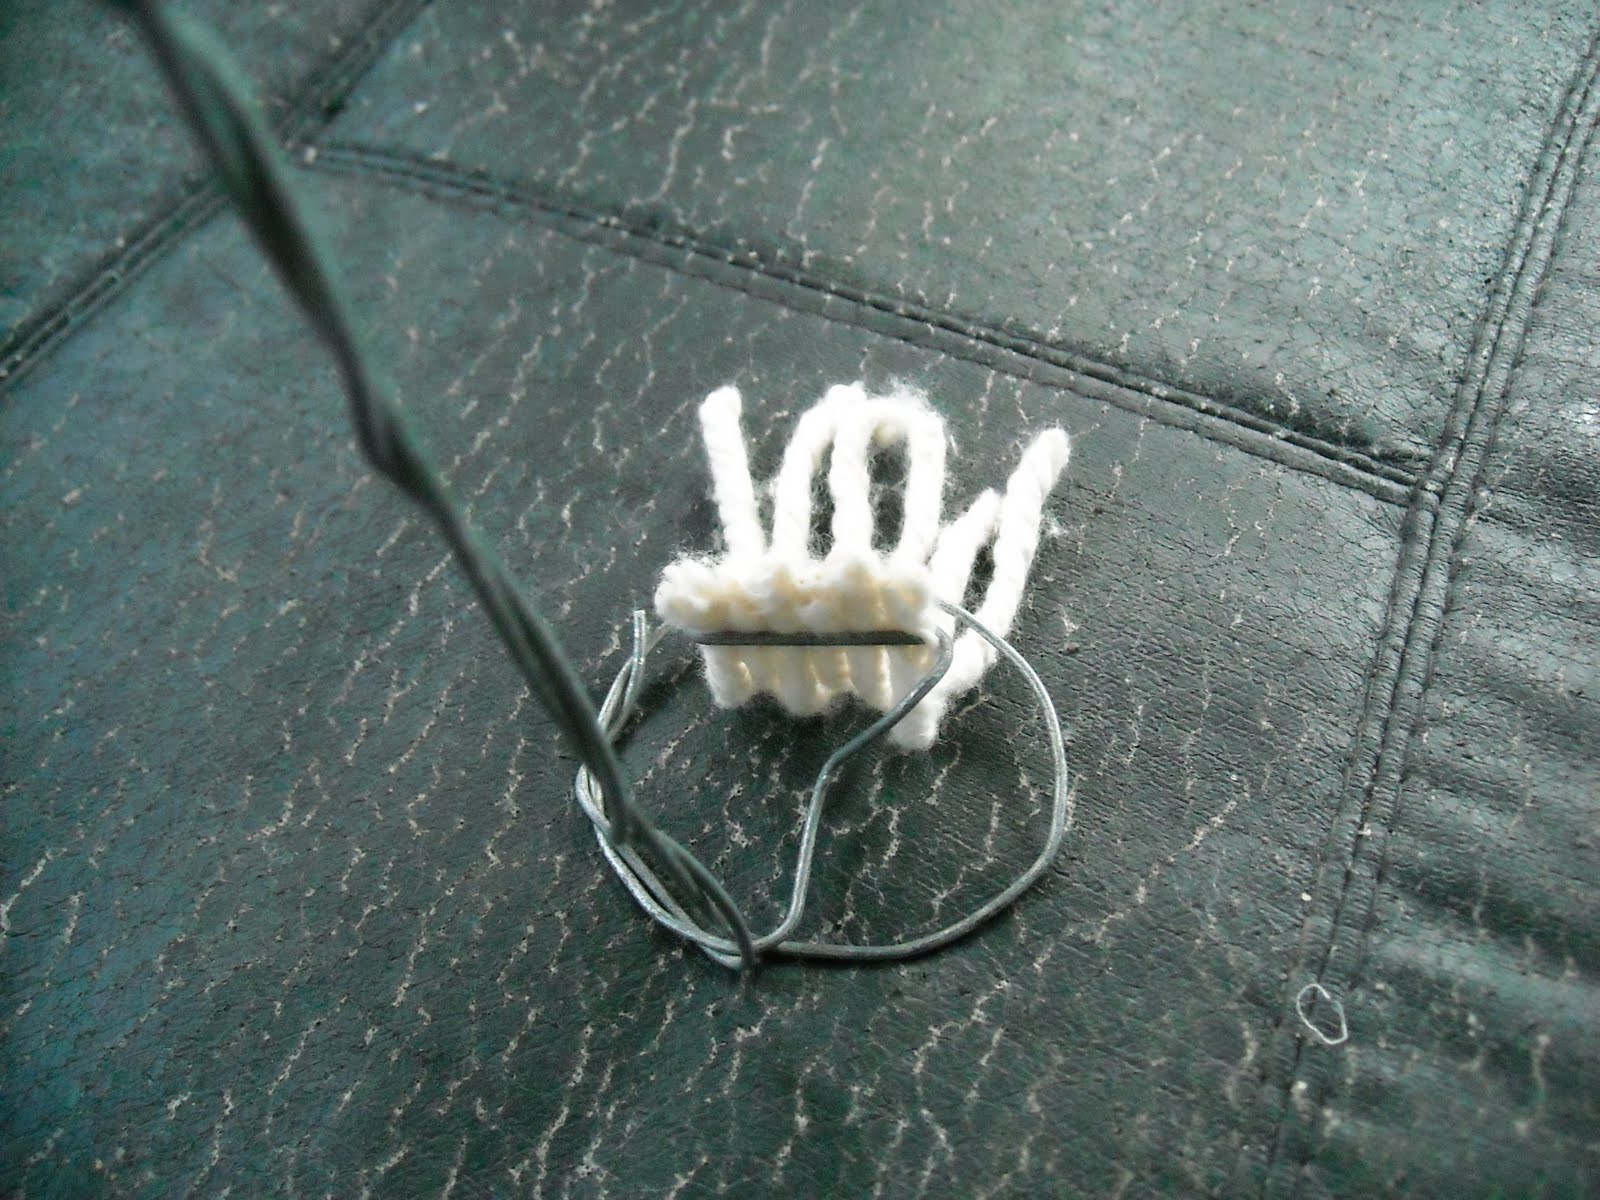
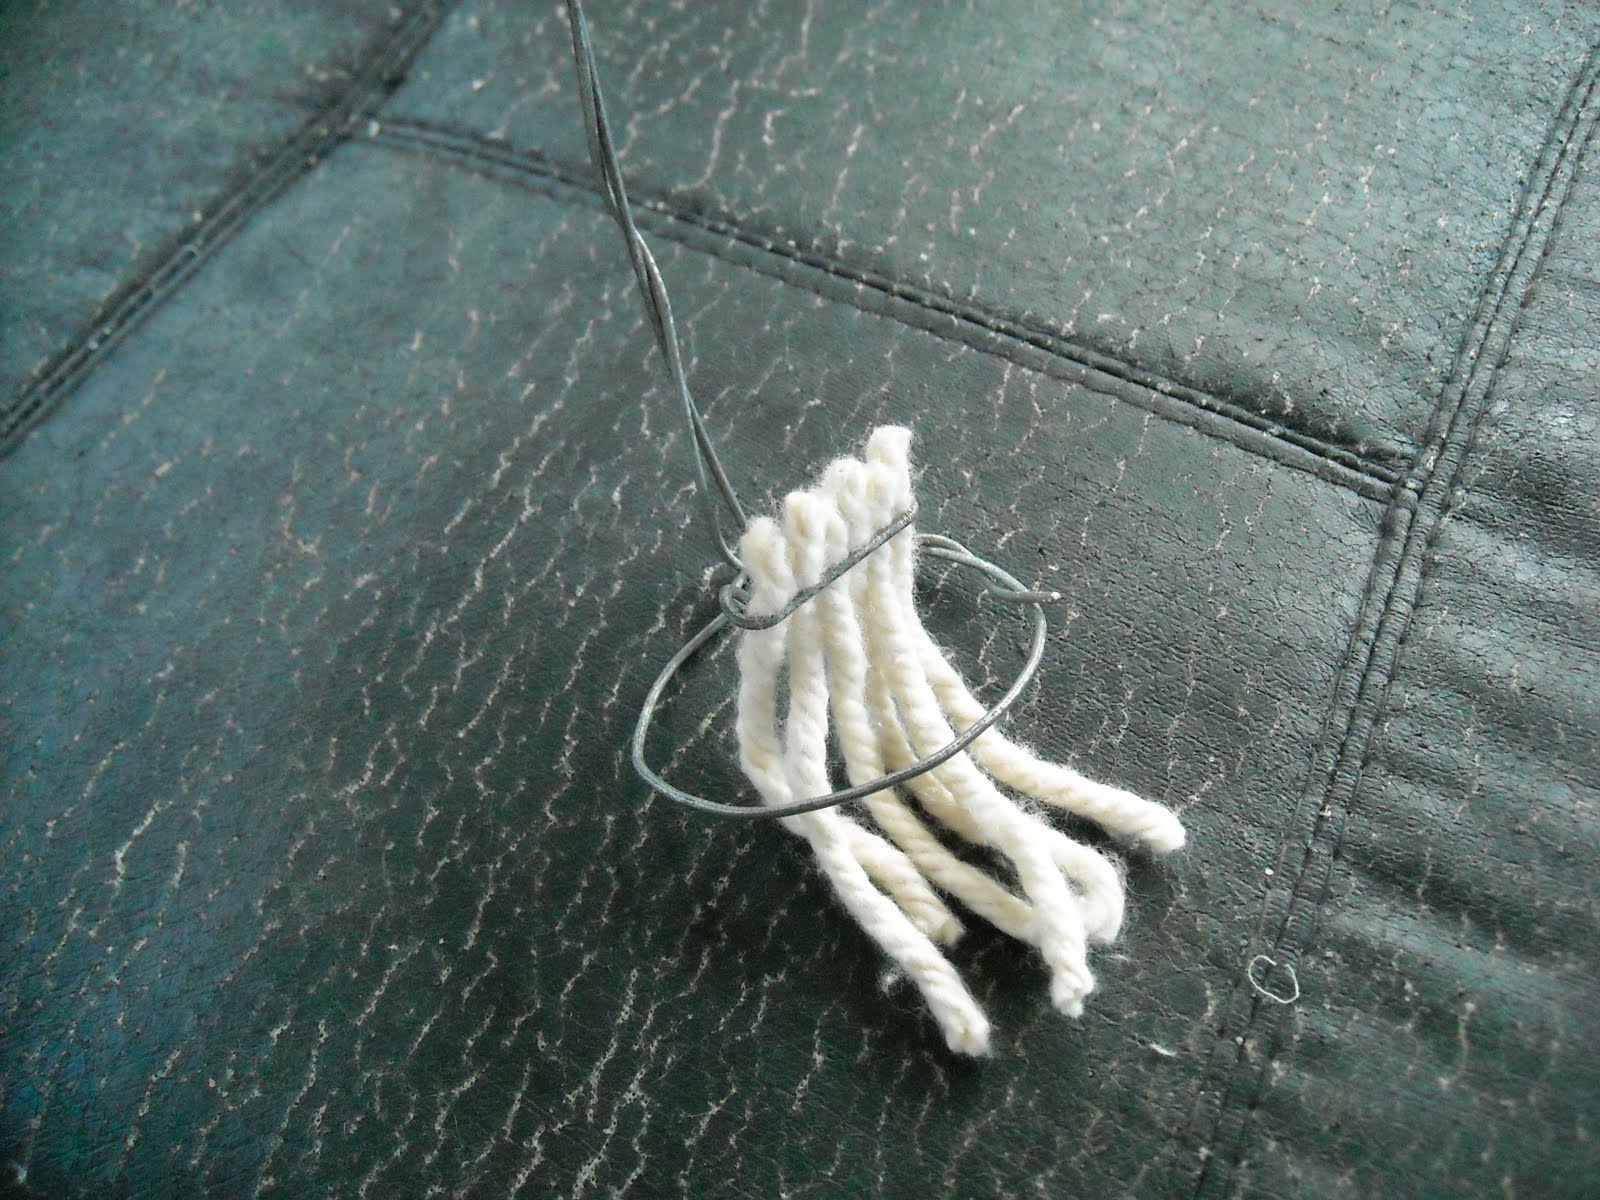
After being able to fashion a homemade fat lamp with a wick consisting of one rope of a cotton mop head, I thought it would be interesting to see if I could form a wick holder that would hold multiple rope strands so that the wick would be more similar in width to a common lamp wick, and thus produce more light.
And here is my attempt to do just that. I bent a single, elongated loop to surround the rope strands:
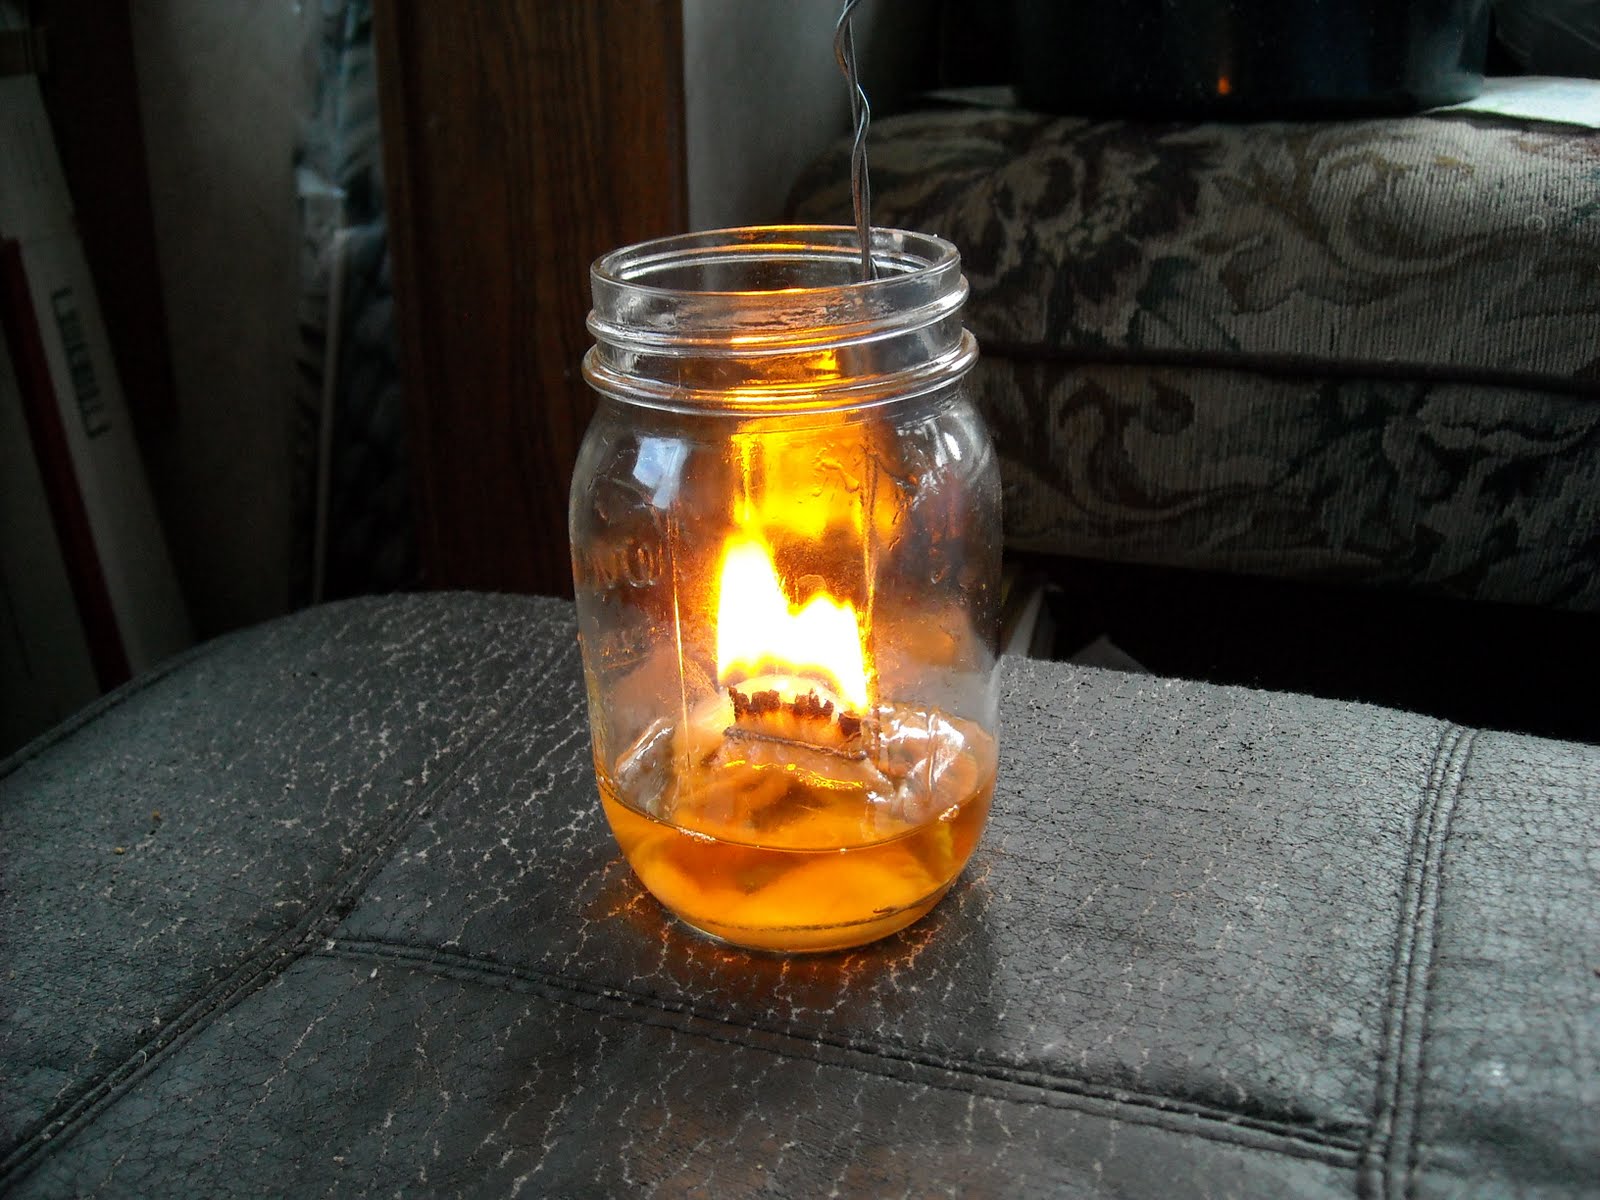
Well, it appeared to work pretty well, and produces quite a bit more light!
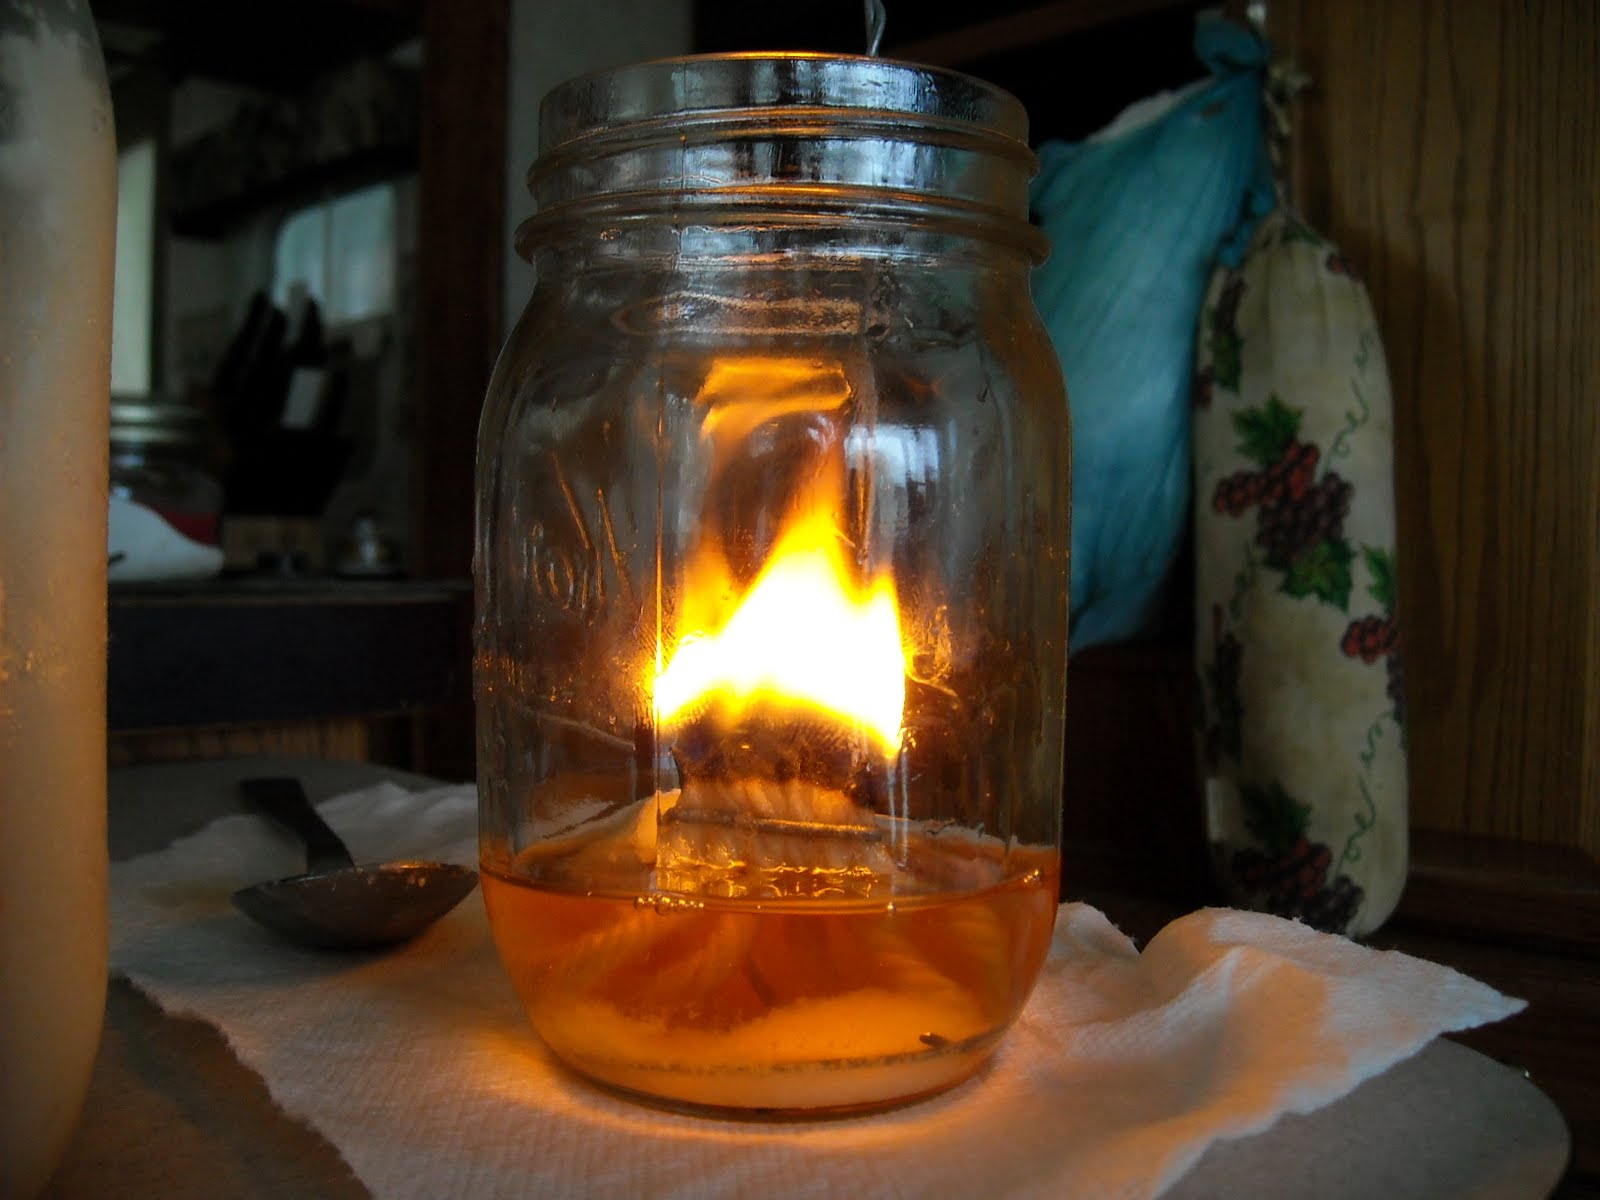
With the extra light comes extra heat, so I tied a cord around the mouth of the jar; and now it functions as a lantern:
We thank the Lord once again for granting resources and provisions to continue to learn the old paths, may He increase His light within us daily, and may we shine brightly His light to the world.
Heb. 11:8-10 - "By faith Abraham, when he was called to go out into a place which he should after receive for an inheritance, obeyed; and he went out, not knowing whither he went. By faith he sojourned in the land of promise, as in a strange country, dwelling in tabernacles with Isaac and Jacob, the heirs with him of the same promise: For he looked for a city which hath foundations, whose builder and maker is God."
Receive New Blog Posts by Email
Usually only 1-3 a month. We will never share your information nor solicit you.