Our journal of what we pray is our sojourn of life along the narrow way, even the old paths, submitting to the Bible as a light unto both.

Category: food (Page 33 of 35)

Providence’s Providential Provisions: Wild Hogs

Around 6PM two evenings ago, a couple of the men spotted some wild hogs hanging around our (Sue and my) domestic ones. Well, we rounded up a couple more of the guys, and the hunt began! We were able to nab three of the four; they didn’t go easily, some being shot several times before a finishing shot to the head was required.

And then the butchering began, with 7 or 8 folks involved. It was probably about 45 minutes to an hour before sundown, and so we all put it into high gear, trying to get them skinned, gutted and quartered before dark. With all of the practice we’ve had, we were able to get it done pretty much with no problem.

Apparently, the wild hog population is exploding and becoming a real problem, which is bad in that they can be destructive to land and animals, but good in that there’s a bunch of free meat running around.

And so, we are very grateful to the Lord for granting this food. He is most gracious and merciful.

1 Tim 6:8 – “And having food and raiment let us be therewith content.

— David

Cheese Waxing

Our neighbor mentioned one day that the local market was having a great sale on cheddar cheese. Dave suggested we buy several pounds to take advantage of the price. I include cheese in many of our meals but not enough to consume that much before it would start to go bad. Then during one of our church get-togethers, another neighbor mentioned that you can preserve cheese in wax. I had seen wax-covered cheese in the deli’s and grocery stores all my life but had never thought much about it. I thought it was a marketing gimmick or something.

We decided to buy a five pound block of red cheese wax from New England Cheesemaking Supply Company, and it arrived in just a few days:

The instructions called for a double-boiler in order to not burn the wax, so I dutifully went out and bought one. That was my first mistake. They said you should have dedicated utensils and containers because working with wax pretty much ruins them for other uses. I then asked myself, “What was I thinking. Why would I want to ruin a brand new double boiler for this use??!” I decided to keep the double boiler because I didn’t have one and it is an integral component of good kitchen utensils. So I ended up putting water in the bottom of the double boiler and setting in it an old stainless steel bowl which ended up working just as well. I hope to find a used large saucepan at a thrift store in which to put the steel bowl for a makeshift double boiler in any future cheese waxing:

I cut a small block of wax off of the large block and placed it in the bowl to start melting:

It really didn’t take long for the wax to melt at a low heat:

At first I tried using tongs to hold the cheese as I dipped it, but that seemed to be a bit slippery, and the cheese ended up being dropped. Also, we had purchased a cheese wax brush to dip and brush the wax onto the cheese. That was my second mistake. The brush proved to be pretty useless because it didn’t provide for a thorough coating, and the process was very time consuming. Dave suggested perhaps cutting the cheese (alright, enough snickering) into smaller sizes and dipping them in half at a time with clean hands, letting that dry, and then dipping the remaining half. That seemed to work really well:


The instructions called for two to three coats of wax, but since this was my first time, I wanted to coat them really well; so I ended up dipping them about four times. It took only seconds between each dipping for the coating to dry:


Here is the final product ready to be stored for several months!

We figured in storing the cheese it would be best to keep it as far away as possible from any potential mice, so we purchased a few inexpensive hanging baskets and hung them containing the cheese in our root cellar:

I have used a few blocks of the cheese so far, and the wax has proven to work beautifully. It comes off very easily and can be washed, melted and re-used. I highly recommend this method of cheese preservation and thank God for His continued provisions.

Susan

Apple Cider Vinegar

Once again in an attempt to learn how to store food without canning or freezing so as to further separate from our dependence on the world, I thought it would be interesting to try to make apple cider vinegar, for the preserving method, for the health benefits, and since we have several apple trees in our orchard.

The recipes on the Internet basically said squeeze the apples for the juice, add a little already-made apple cider vinegar that has “the mother” in it, and let it sit for 3 to 4 weeks. Some said to add yeast, but I was trying to use as few outside ingredients letting creation and the yeast that is naturally in the air handle it. It apparently ferments and then turns to vinegar.

And so we purchased some apples and used our lard press on them. One apple cut in half with the halves face down seemed to press the best:

Here I am pressing:

And here are the results:

This is what was left after pressing:


(On a side note, sadly, the cast iron plate of the lard press cracked in half, I guess from tightening too hard; so, using it wasn’t a great idea. I suppose we might have to try a cider press for future attempts.)

After we were done pressing, Sue poured the juice through a piece of paper towel (as a filter) into the non-metallic containers (because of the acid produced) where they would ferment, and so we used canning jars. The first time, it took about 6 pounds of apples to make two 2/3 pint jars full; the second time we got 5 pints from 9 pounds:


Sue then added a couple of table spoons of already-made apple cider vinegar to act as a “starter”. From there they sat for several weeks. Each day I would tighten the caps, shake the jars and loosen the caps again to allow for any pressure out and some more air (with yeast hopefully) in.

After 6 weeks, the alcohol didn’t seem to be dissipating very quickly, and Sue did a little more research, and she discovered we probably should have just covered the jars with cheese cloth or a towel. I had figured it didn’t really matter much as long as some air was getting in there, but apparently it needs constant air availability.

And indeed it did what it was supposed to do: the apple juice is now vinegar!

We marvel at the Lord’s workings in His creation and how He has included these things to help us in the temporal matters of sustenance, and we thank Him for these provisions.

— David

Garden 2009 – Spring


Well, it’s that time of year again, and the Lord has granted us provisions to be able to plant a garden. This year we’ve followed Michael’s recommendations that he researched as to how to put together a good top soil, which was one part vermiculite, one part peat moss, and one part compost. While the vermiculite is rather pricey, it and the peat moss only need to be included in the first-year blend, with each year following only requiring compost.

In a hopefully further improvement, because our beds were sloped, I added raised barriers and leveled out each of them so the water wouldn’t just run off the beds:


As you can see, I also put bark all around the outside of the raised beds to allow us to walk in those areas after any rains. Plus, after starting the project last year, I finished putting two-foot chicken wire around the garden area to help keep out rabbits and other such critters.

Jumping the Gun

We had a very mild Winter this year, and so I decided to plant soon after what is technically our last freeze date of April 15 or so. Well, a week to a week and a half after our planting, a couple of cold nights with heavy winds came along, the second night being a freeze watch or warning night. We covered our plants with thick, white plastic sheets, and left them on during the day time between the two nights because of the difficulty with the winds. That between-day was sunny and in the 50s-60s Fahrenheit, I believe. I don’t know if it was the cold, the wind, the sun during the between-day, or a combination of them, but the day after the second night when we removed the plastic, just about all of the plants were wilted very badly, enough to where it looked like they all needed to be replanted. And so I went ahead and did just that; I’m just hoping now we don’t have another freezing night. Also, given this experience and that we’ve had freezing days in early April in years past, we have decided that from now on we will probably make somewhere around April 15th each year our new, personal, last freeze date.

And so, the garden is mostly planted again now, and we are looking forward to the potential of God’s provisions for us this year in the area of vegetables, according to His will.

— David

Providence’s Perpetuation Provisions: New Kids “Athos”, “Porthos”, and “Aramis”

The Lord has granted that our doe Winnie give birth to triplets, all males. Please meet Athos, Porthos and Aramis. This is Winnie’s second litter, and our pure-bred Nubian buck Shatner is the sire:

Here’s an introduction to them:


And the next evening them getting around (I’m a little out of breath at the beginning after running to get the camera):


We are once again grateful to God for His provisions of these goats, and the health He has graciously granted them and Winnie thus far.

— David


Garden 2008 II Update II – Sauerkraut

We had a drought last Summer and Fall which really affected the quantity and size of many of our garden vegetables. The time came to harvest our red cabbage from our 2008 Fall garden, and the heads were small and did not really look like cabbage heads but more like a bunch of leaves loosely wrapped around or falling away from each other. Dave said we had to at least try to do something with them. Our neighbor, Michael, mentioned you could make sauerkraut with cabbage, so we thought that might be the best way to go.

I looked up the simplest recipe I could find and hoped for the best.

Here is the cabbage in our garden waiting patiently to be harvested by its novice owner (pick me, pick me!!)

I washed all the cabbage leaves and cut them up with a knife because they were too loose to shred with a shredder or grater. I put the leaves in two 9×13″ pans, added the proportionate amount of pickling salt, and mixed well with my hands. There wasn’t much moisture to be drawn out of the leaves, so I had to add a lot more water when putting them into canning jars. After about 24 hours +/-, I prepared pint canning jars and filled them up with the cut-up cabbage leaves adding water, leaving 1″ head space, and screwed on the lids. I followed the instructions to put the jars into a pan (or lined box in my case) because as they started to ferment, there was some (not much) overflow leakage.

Then I stored the jars at room temperature for six weeks and turned them upside down several times over the course of those weeks to distribute the brine and keep everything moist.

At the end of the six weeks, I opened up all of the jars and emptied them into a large sauce pan, simmering them for about five minutes. Yep, it smelled and tasted like sauerkraut, although it was very dark green and more coarse than the kind you buy at the store. Although turning the cabbage into sauerkraut is a preservation method in itself, I proceeded to can the pints of sauerkraut and put them down in our root cellar in order to preserve them for as long as possible. Since we are not generally sauerkraut eating folks, I needed all the time I could get to figure out more ways to fix it!

Wow! I couldn’t believe that we were able to make sauerkraut and preserve it from what appeared to be pretty lifeless leaves. What a wonderful blessing! I’m very thankful to be learning these valuable lessons in food preservation and to be able to witness God’s direct provision from planting to our table.

Susan

Providence’s Providential Provisions: Wild Hogs

Again, one of the reasons we moved out here was to try to remove ourselves from dependency upon the world and its systems and place ourselves directly under God’s providence. Well, as I mentioned with water, the Lord’s faithfulness continues to be shown.

An acquaintance of one of the men on the land here informed us that he had been catching wild hogs, and quite a few of them. This being brought to Michael’s attention, he thought it would be of great benefit to the community to take advantage of this gift of meat from God. And so, he put together a plan, which involved building a pen to hold them. We built the pen, bought the wild hogs for a very nominal fee, and began to raise them. The whole community has been involved and has benefited from this provision from the Lord. We have since been able to gather several more pigs the gentleman has captured.

However, with this has brought the processing of the pigs from the very beginning to end, which for Sue and I has involved a new venture for us in the realm of farming: slaughtering and butchering. For me personally, this has been interesting, given what I said in a previous David’s Digest; however, as we continue to progress into more proper, biblical perspectives, the Lord has shown us that He has granted us dominion over these animals and has provided them as food.

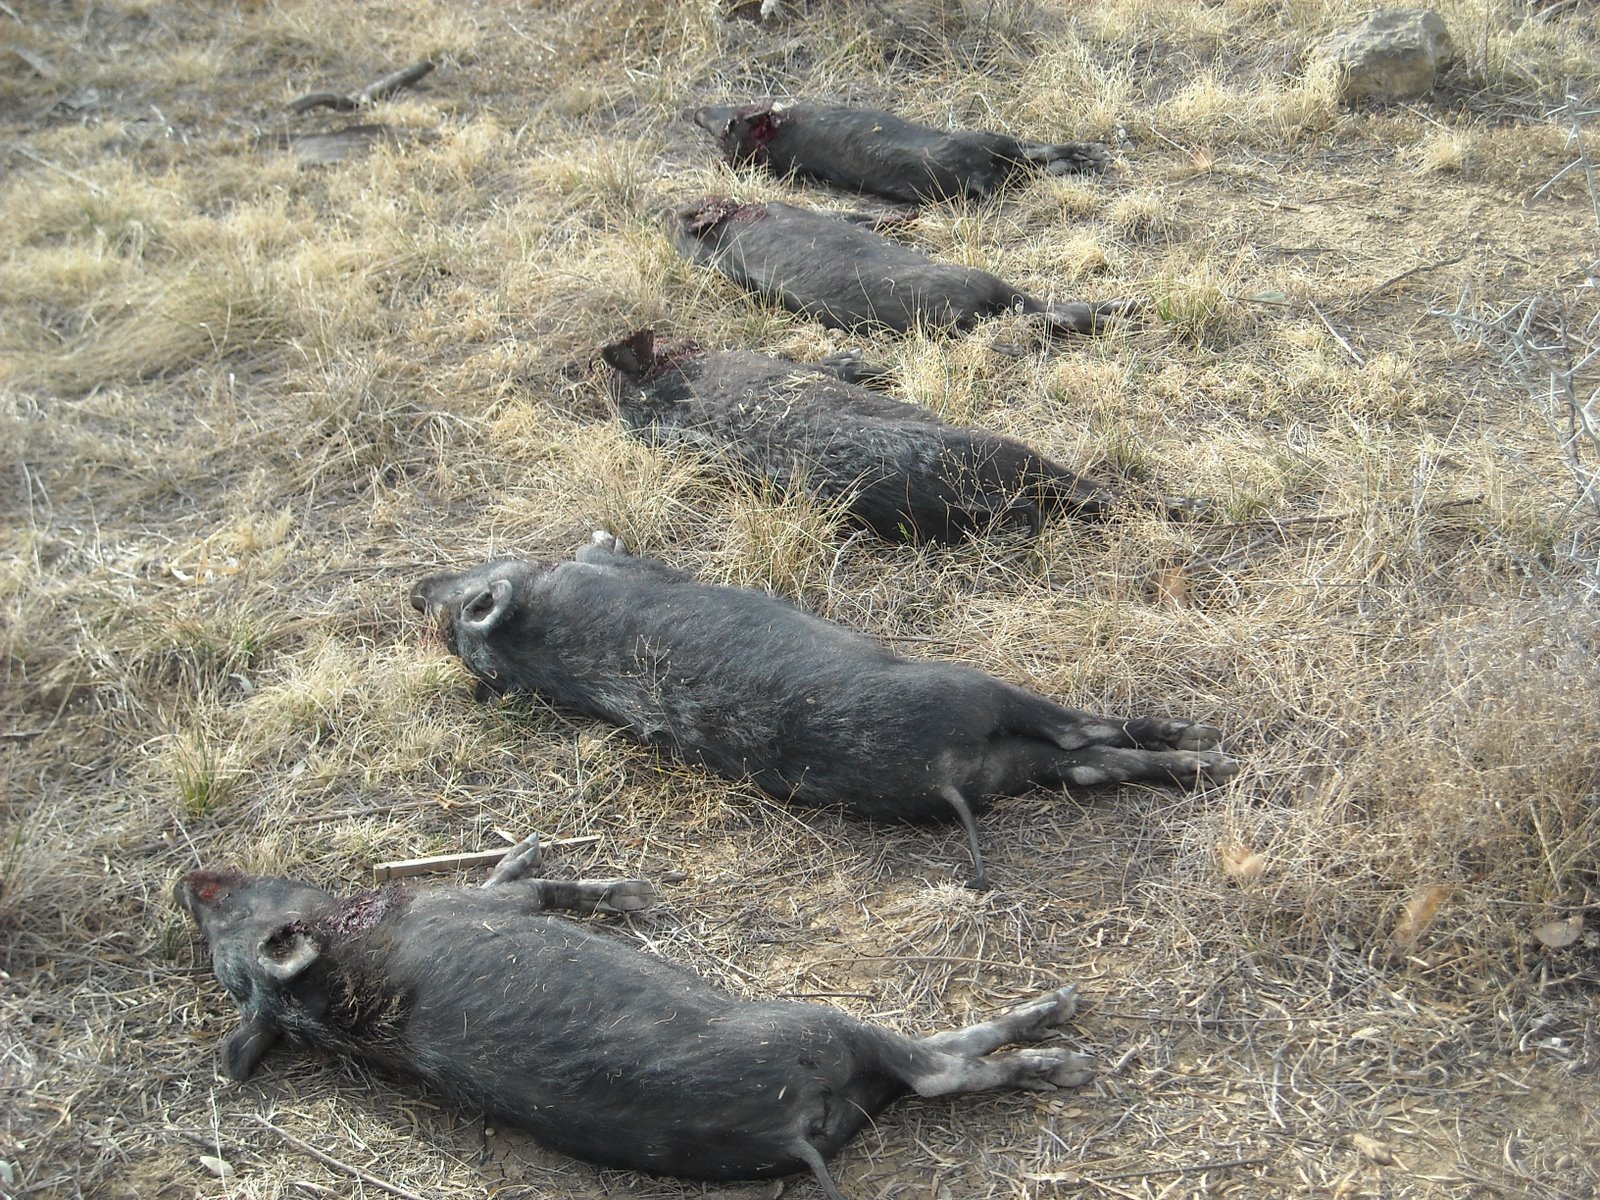
And so, it had come time to do what needed to be done. Here are some pictures (for those that aren’t used to seeing this process, it may be a little discomforting).

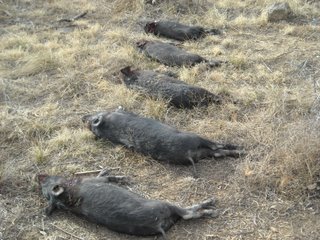
Here are several after being shot in the head with a .22 caliber rifle (meaning they were basically instantly dead) and their throats being cut to bleed them out:

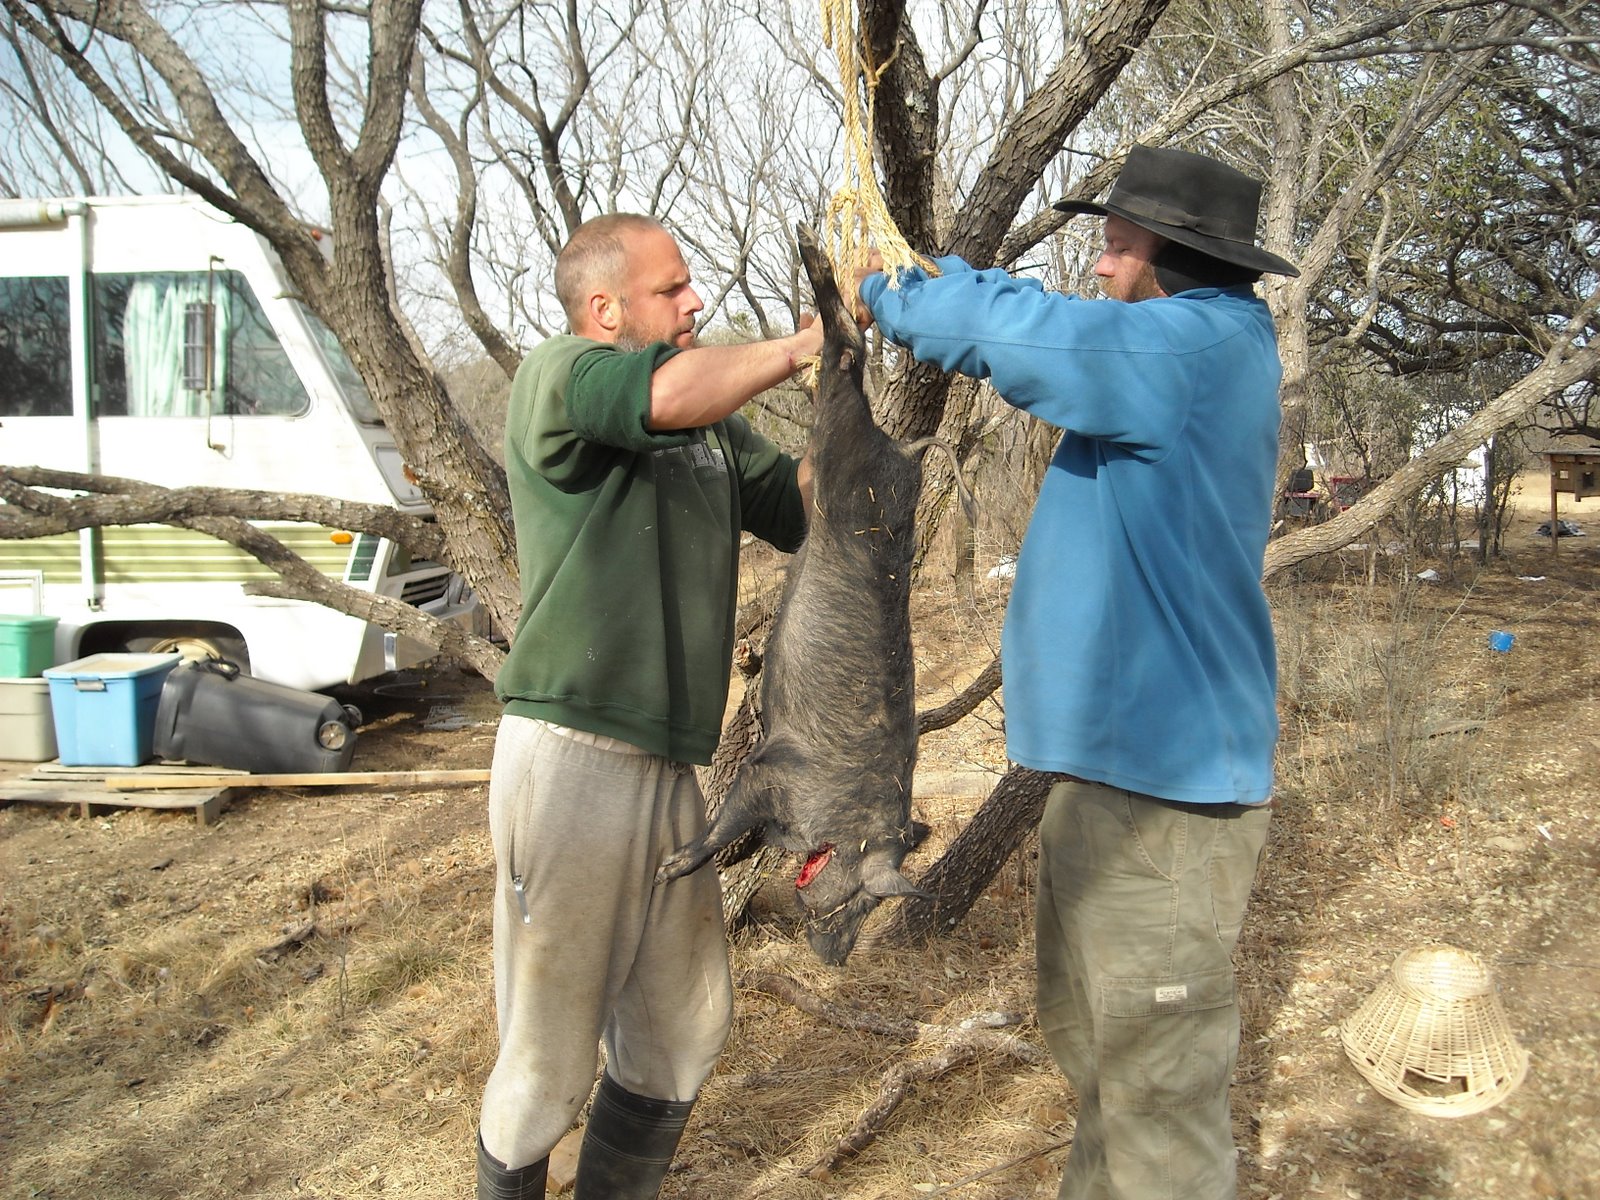
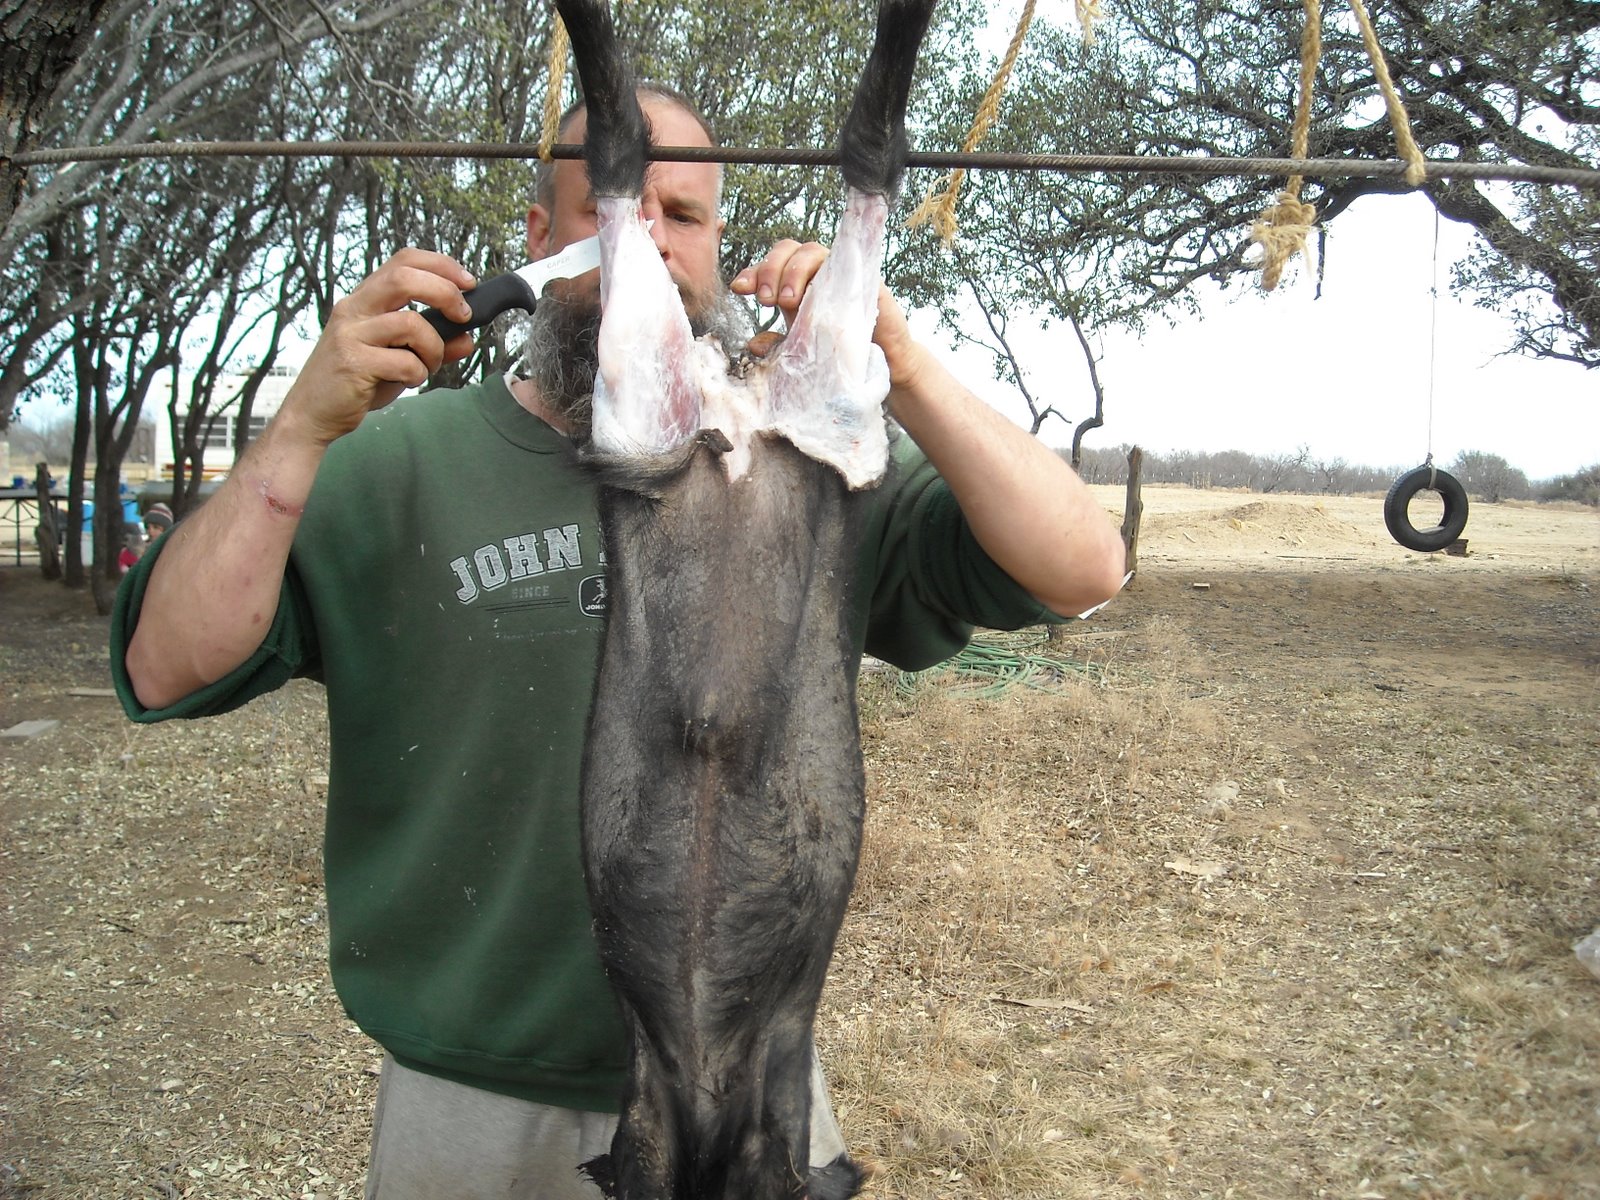
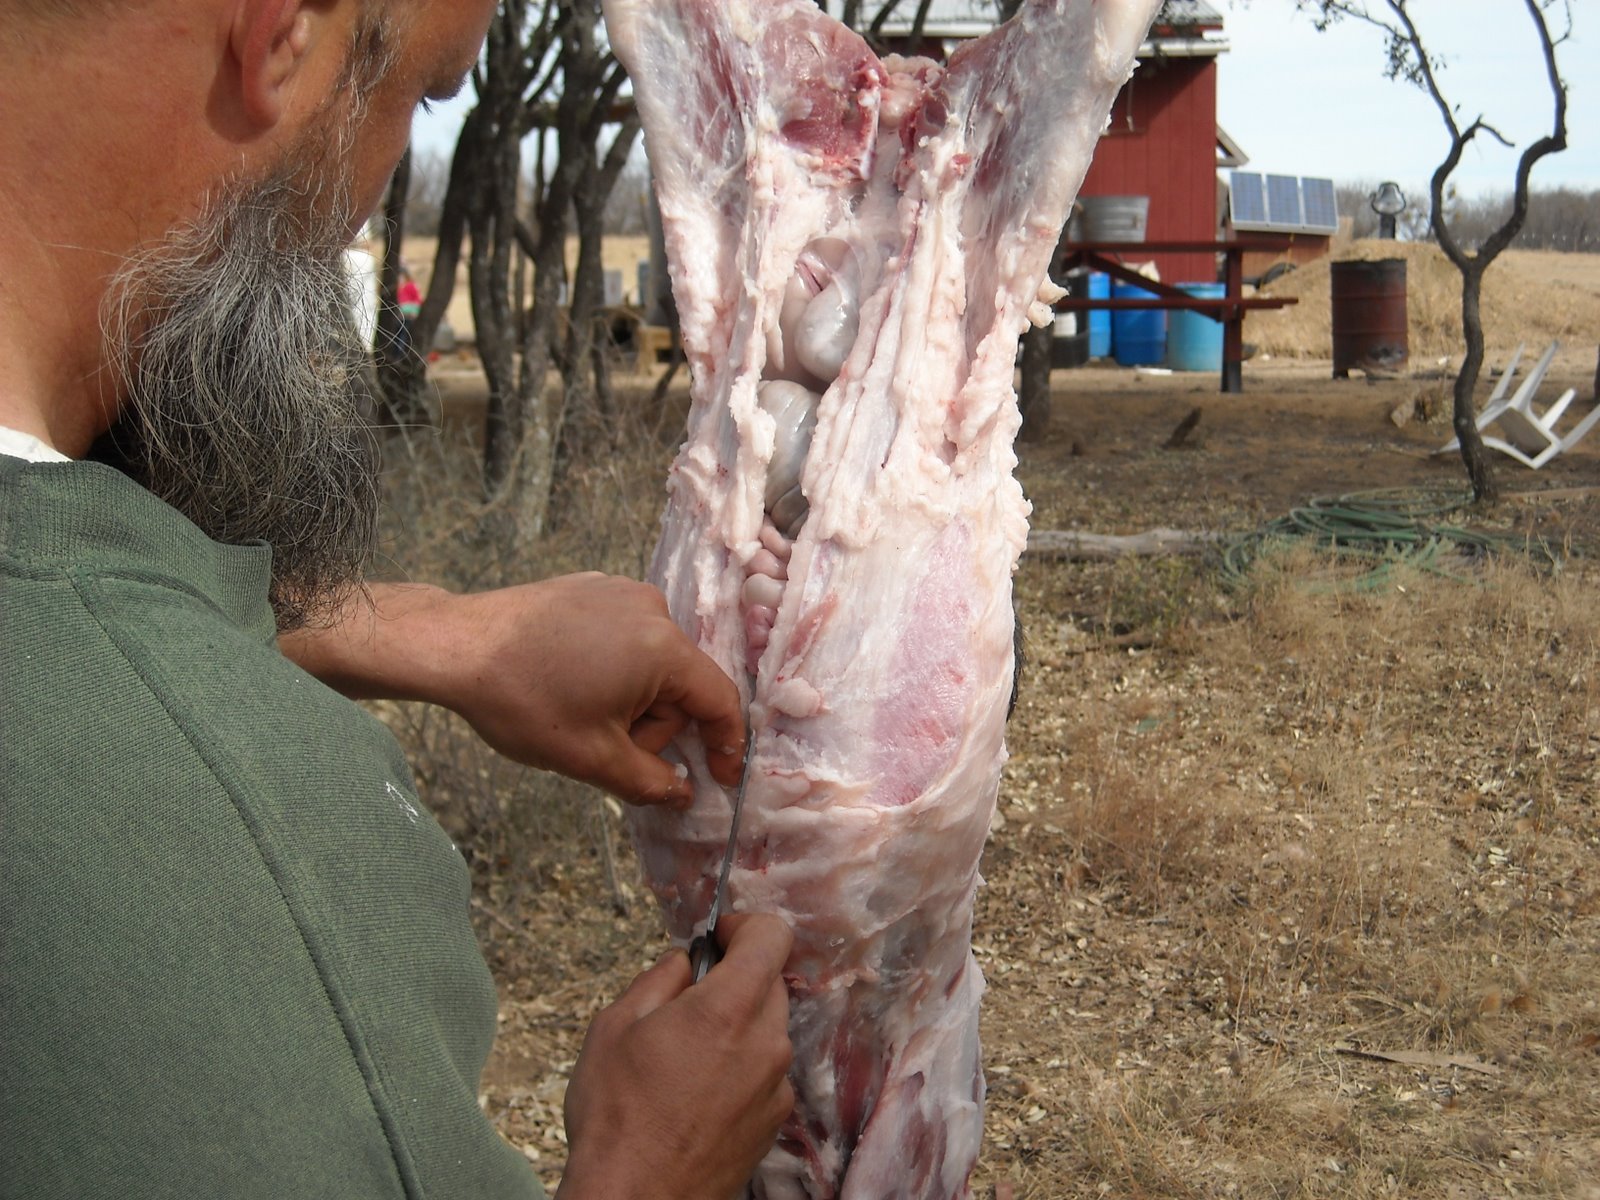
And then the butchering began:


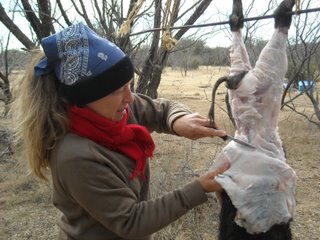
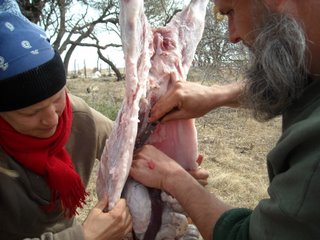
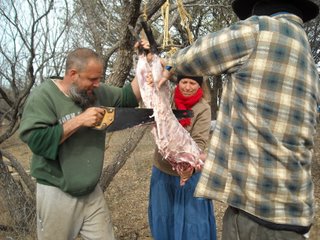
In reality, it wasn’t too bad. And for me, once you get the skin off, it really just starts to look like meat from the store. Also, now after participating in this process several times, it is not as shocking as it was at first.
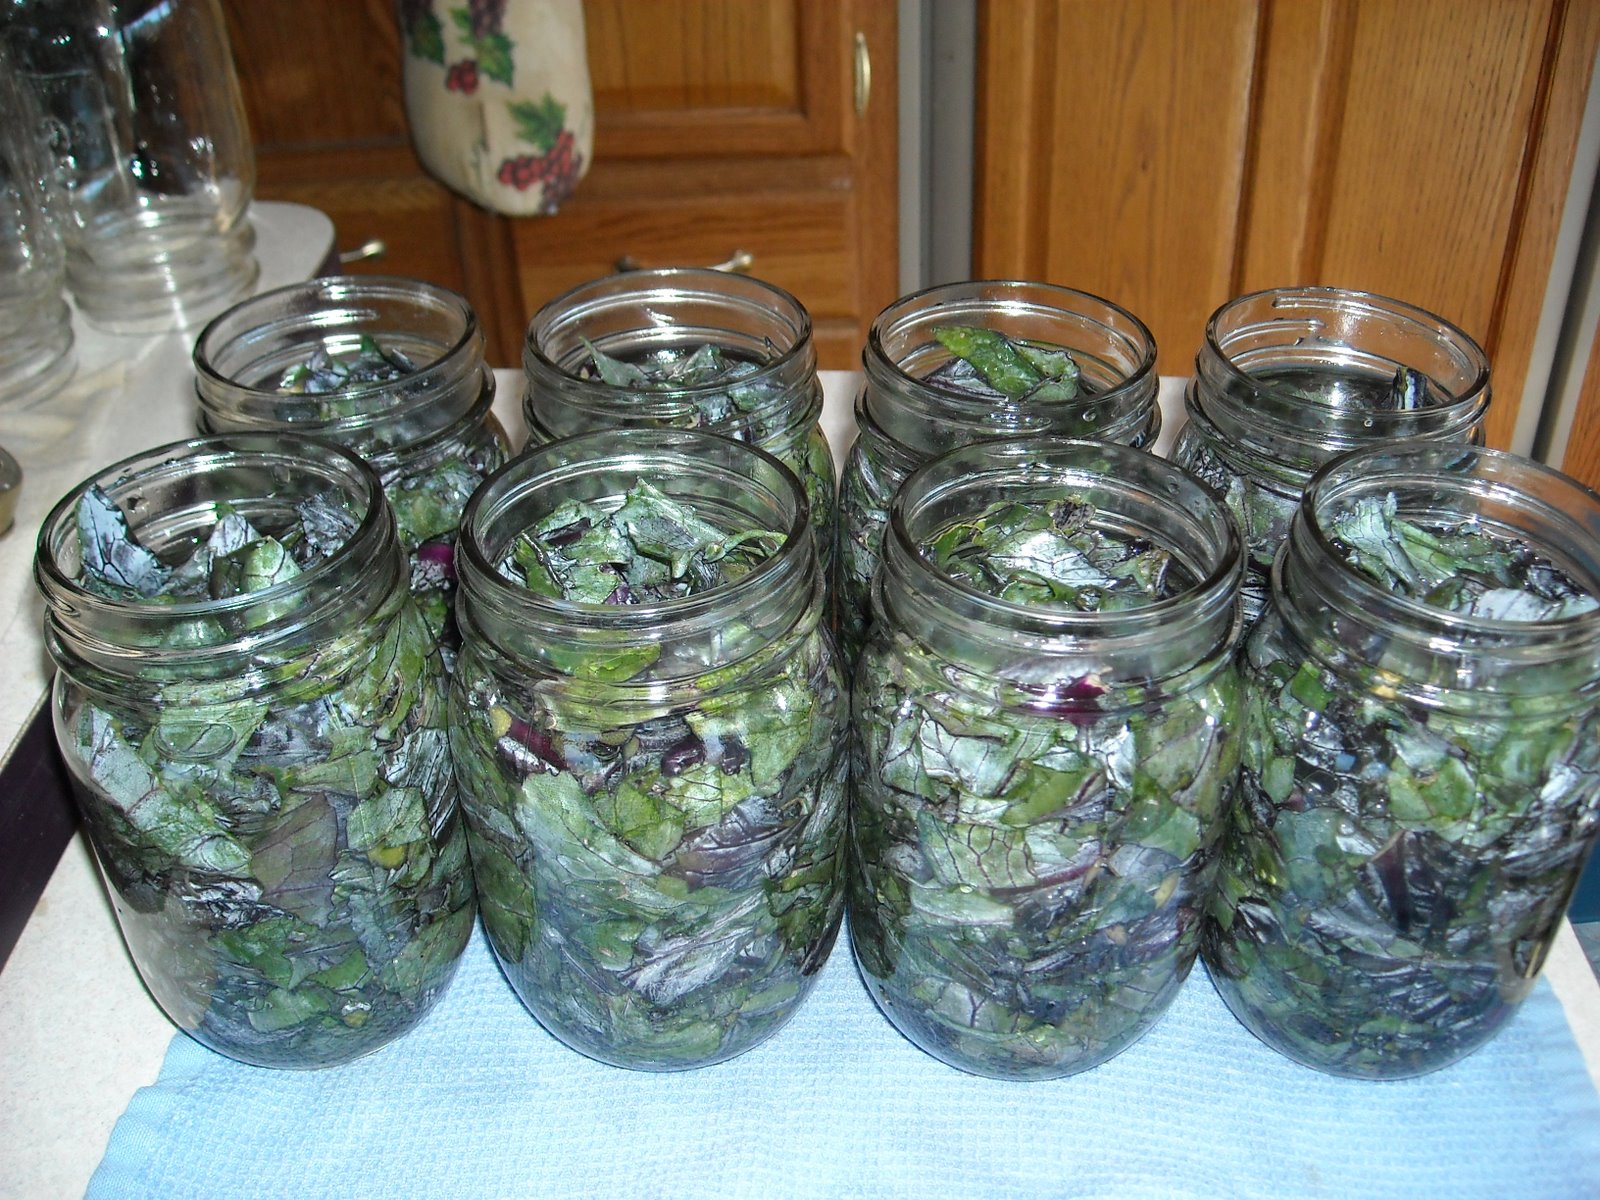
Preserving

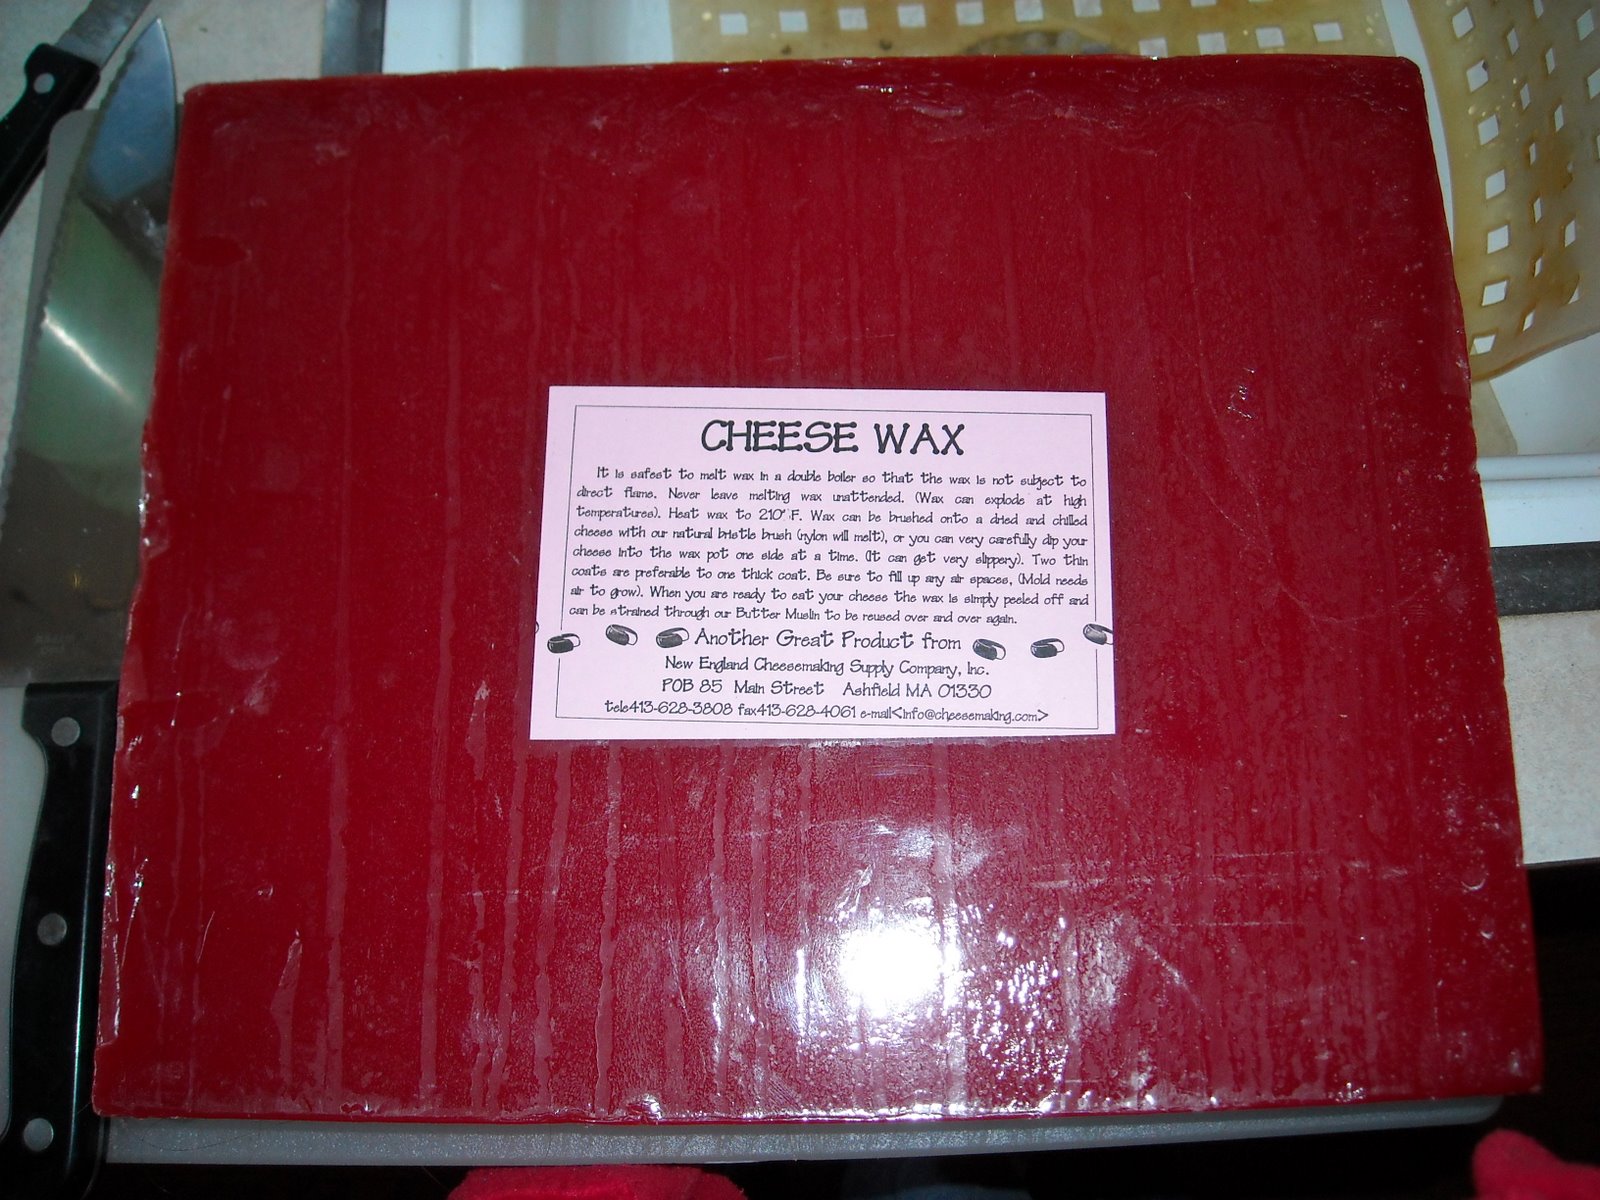
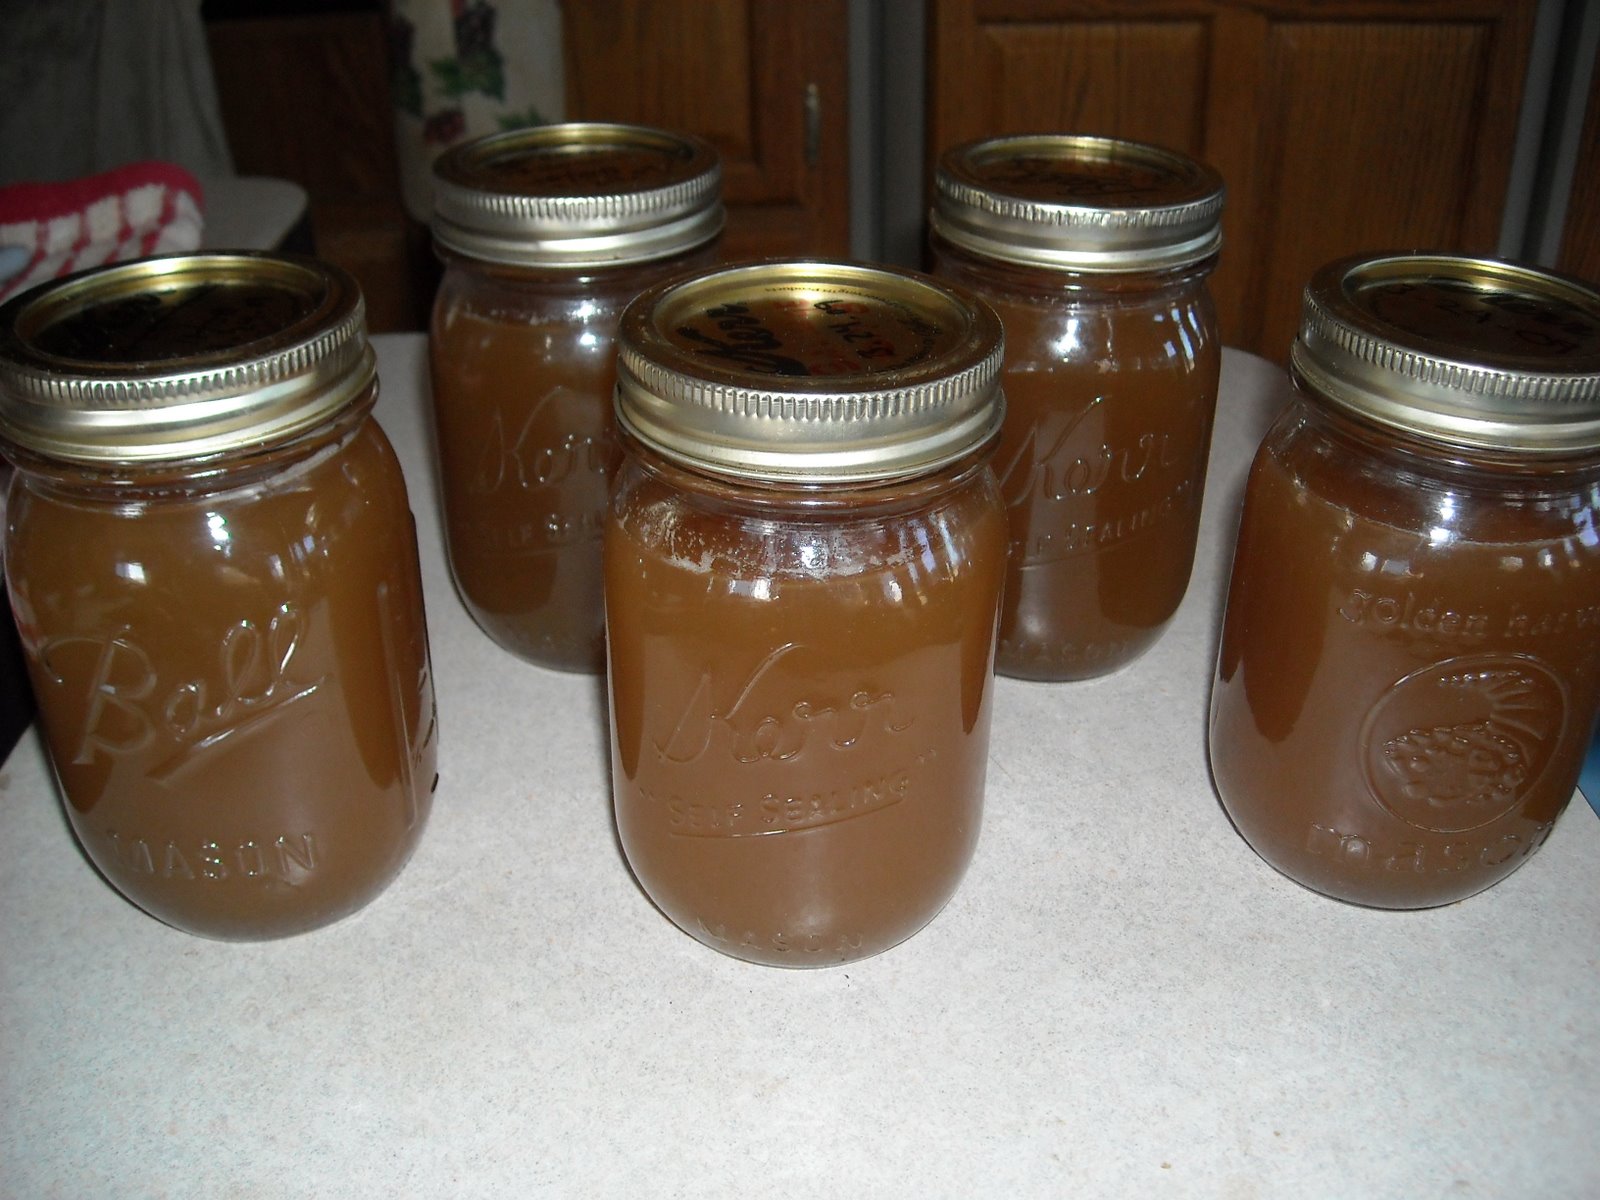
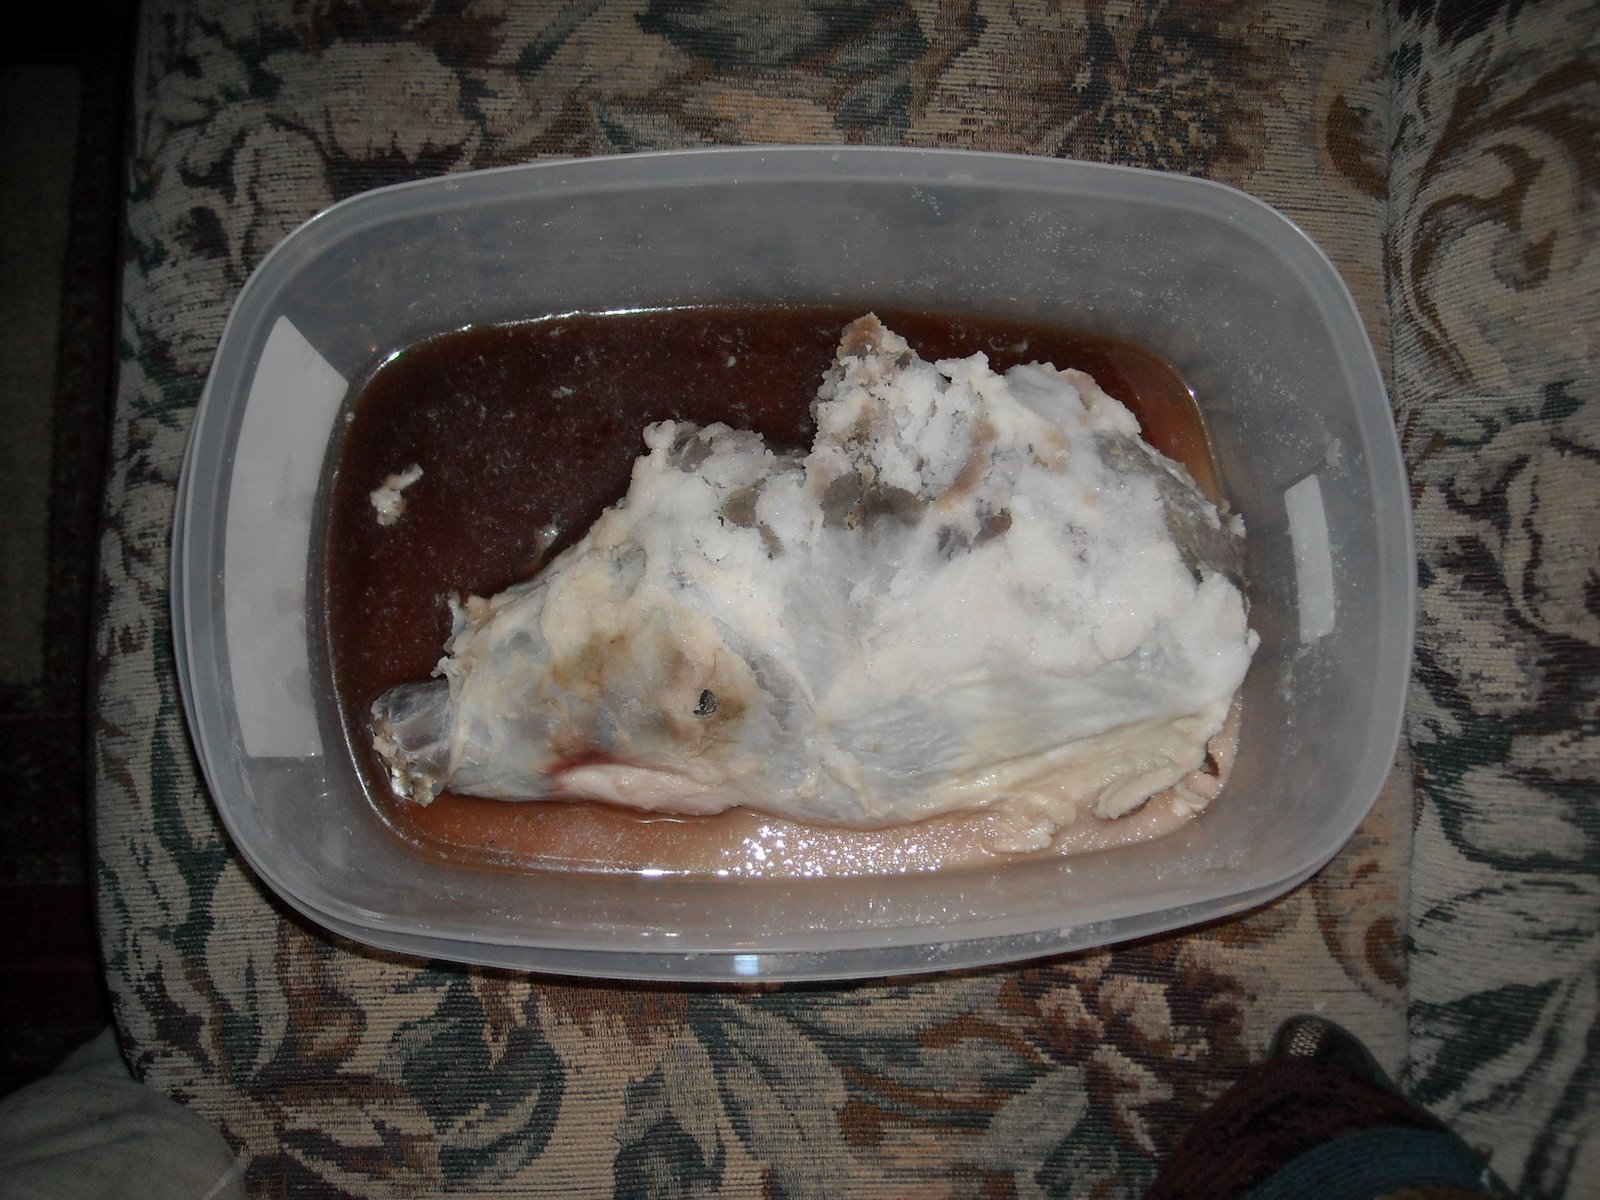
Typically with our pigs in the past, we would simply can the meat in all of its various forms (bacon, sausage, chops, etc.) after getting it back from the meat processing place. This time though, in hoping to continue our education in the old paths, which includes reducing our dependency on the world for its canning supplies, I wanted to take one section of the meat obtained from one of the pigs, and dry cure it by hand. And so, Michael gave us a recipe, which started by rubbing the meat all over with a mixture of salt, sugar and salt petre, followed by covering it with a cloth and storing it in the root cellar for a week, after which time the container is cleaned and the rub-down step is repeated. This sits in the root cellar for 1 week per inch of meat thickness. After that, it is washed and soaked for an hour in cold water, is drip dried, and then it sits in the container for 2 weeks to “equalize” the meat, which helps permeate the curing mixture throughout it. And then technically that’s it; it’s ready to be cooked to eat, and should stay preserved in the root cellar for some time. Here is a picture of the ham with the dry cure mixture on it:

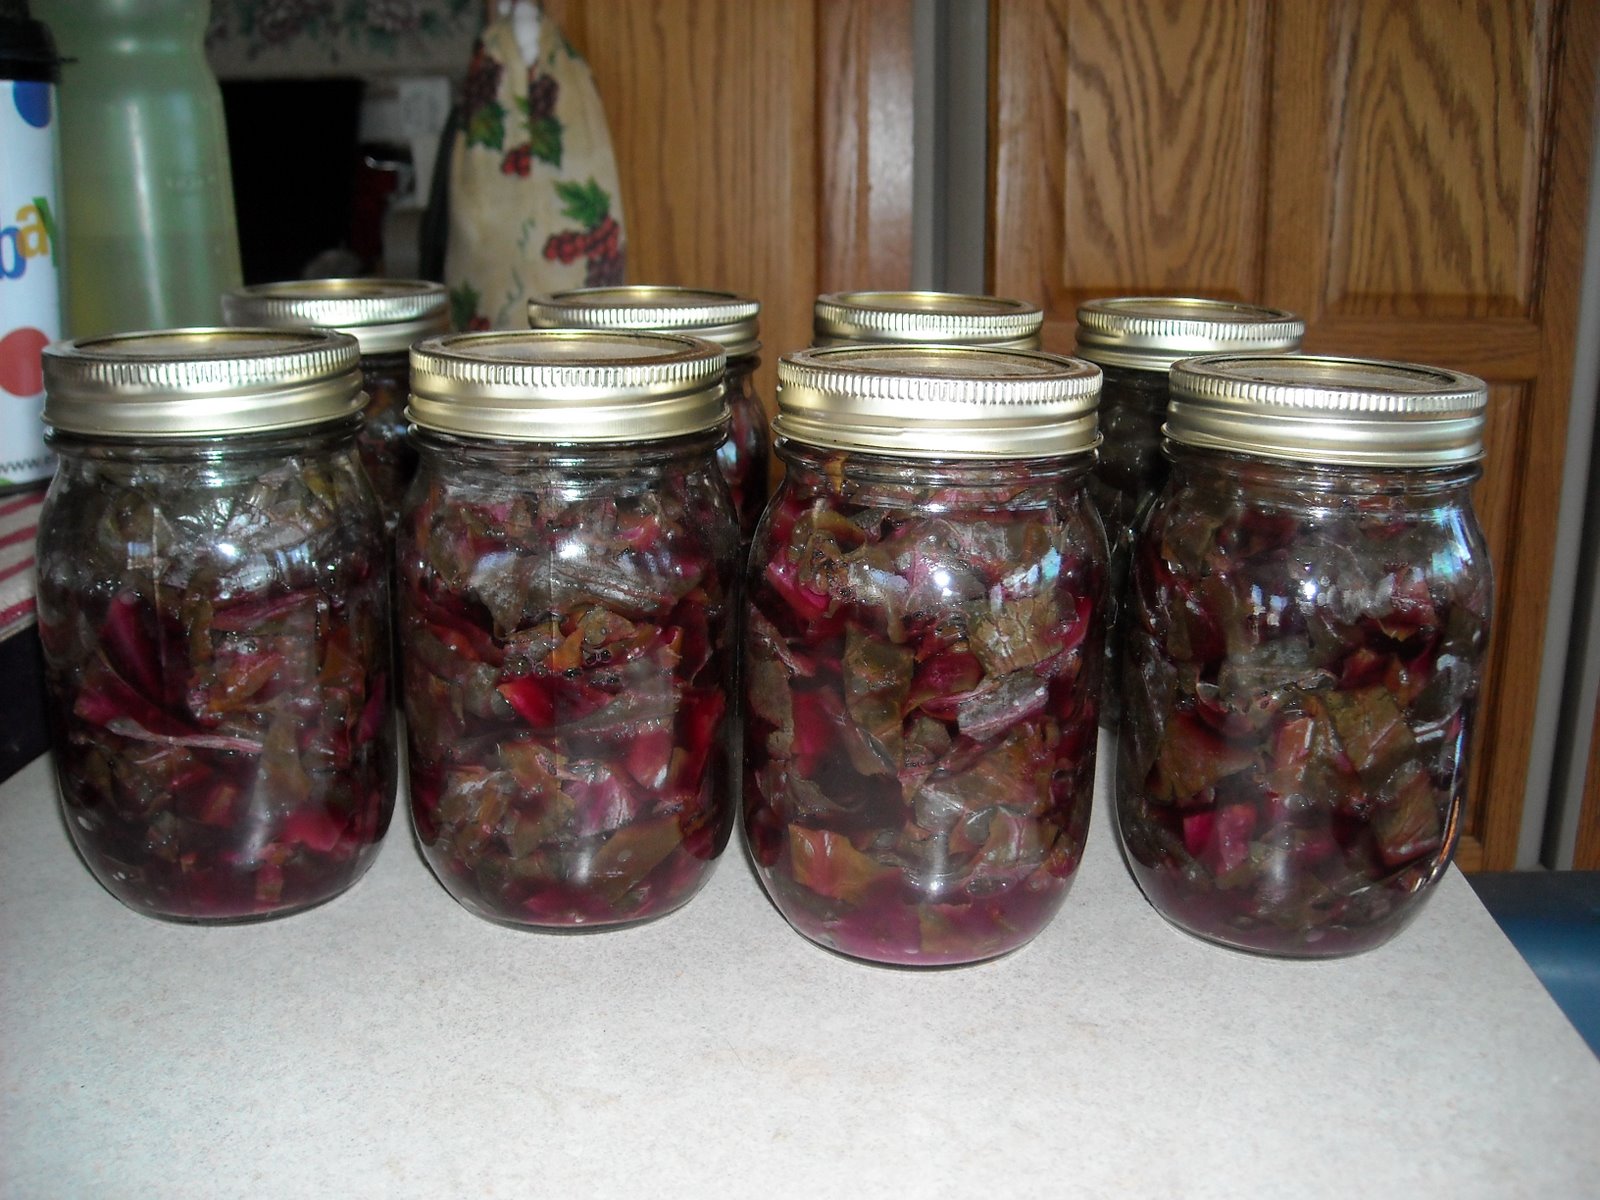
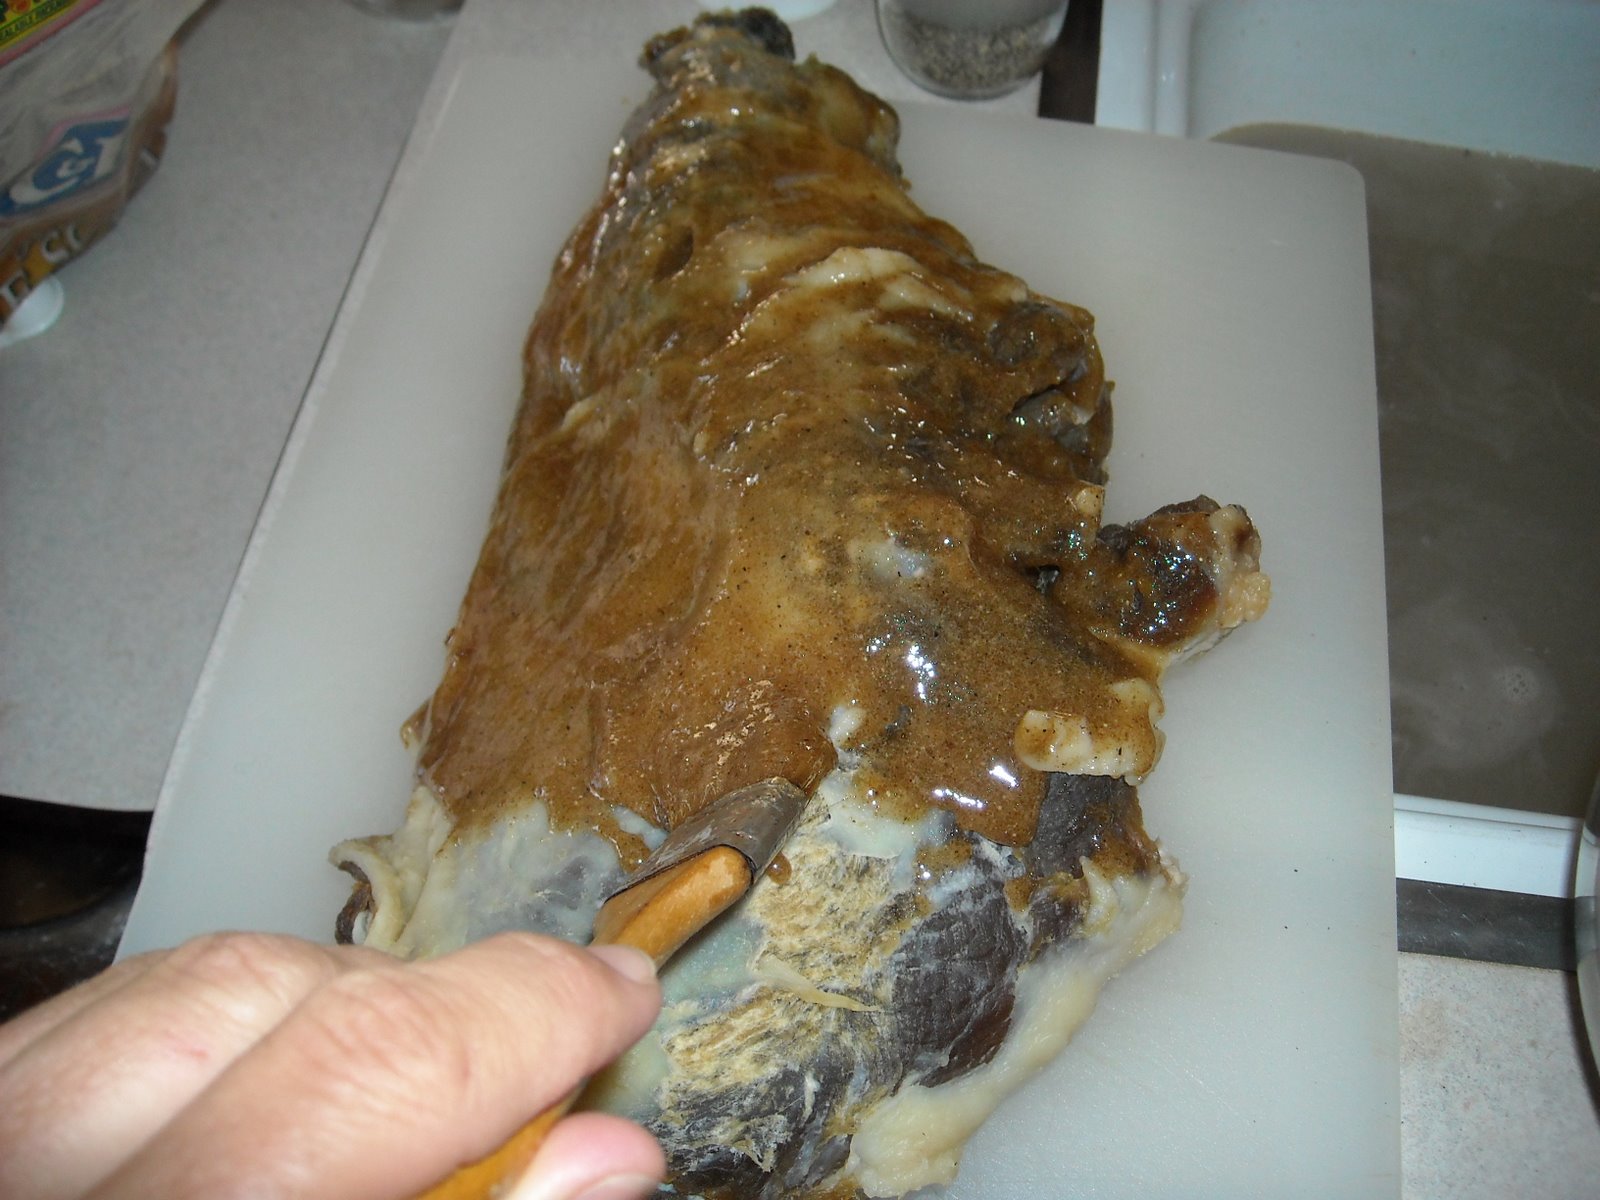
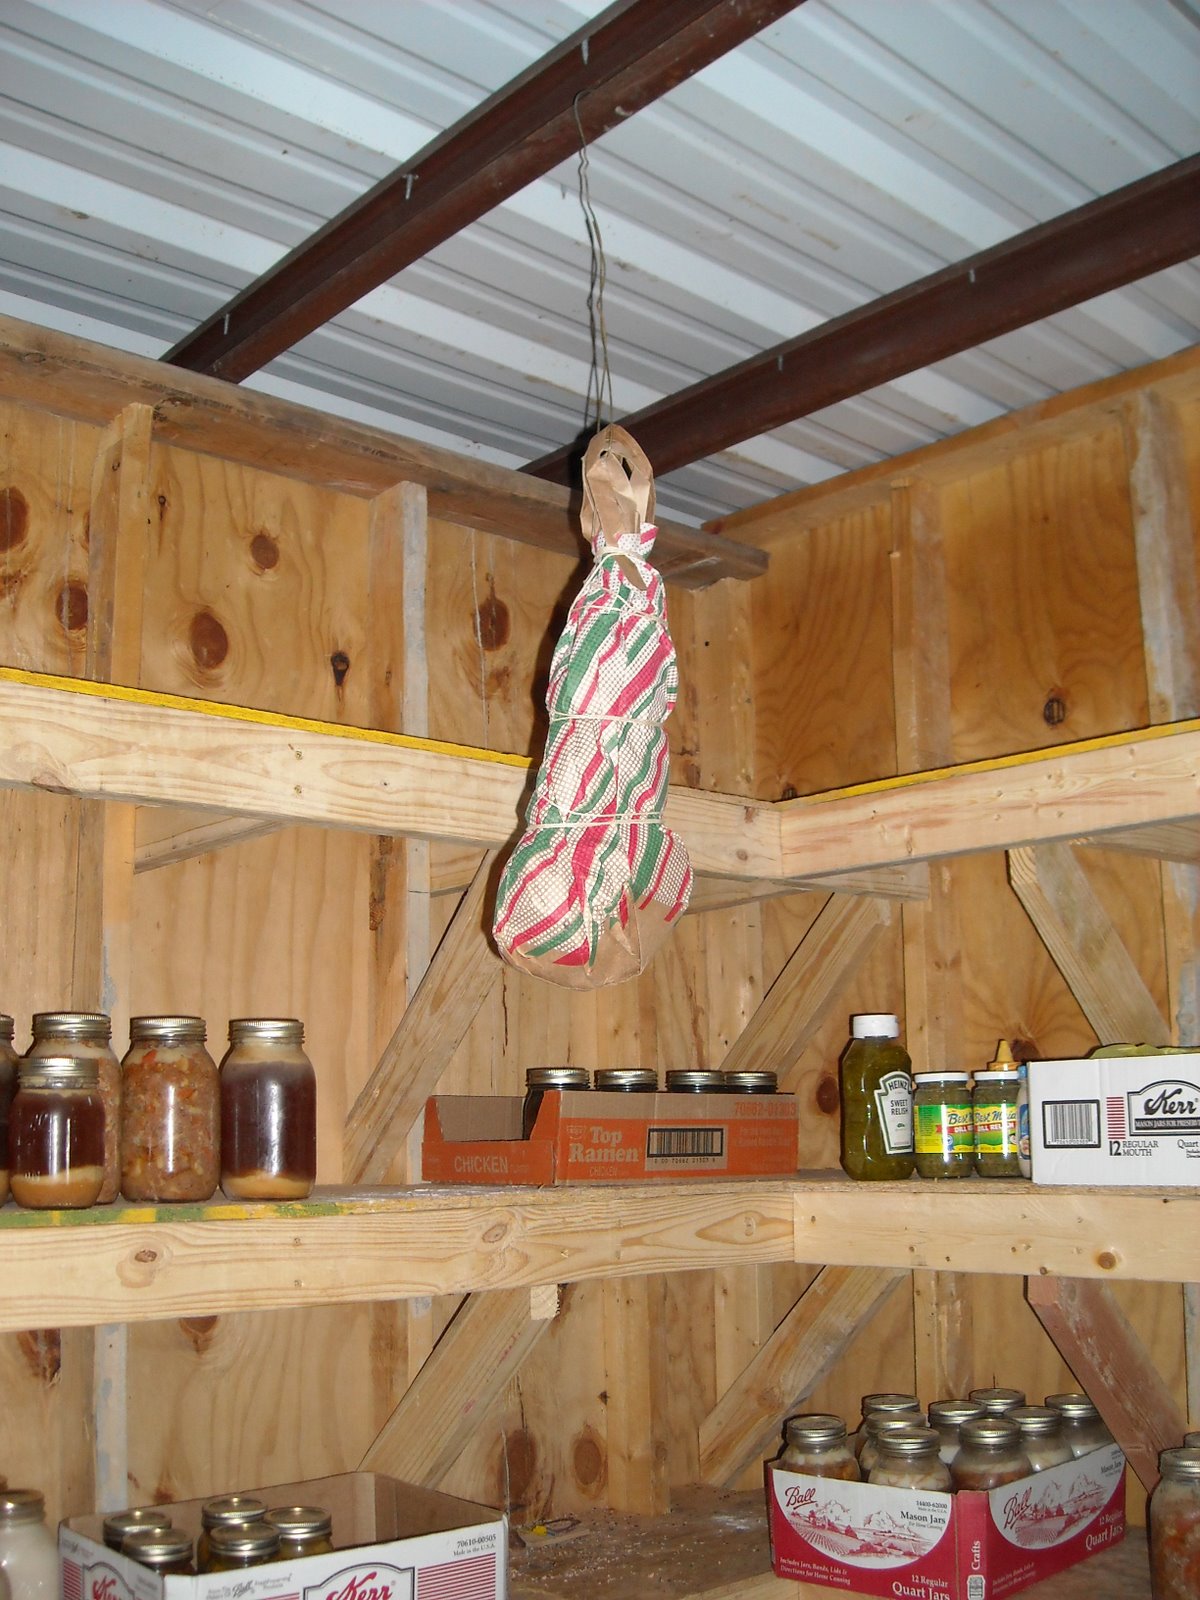
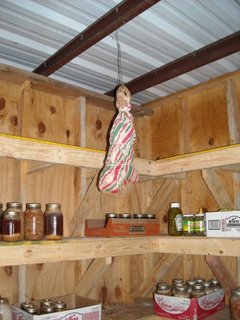
Before final storage, Sue “painted” on a flavoring mixture of brown sugar, honey, pepper and salt petre, and we hung it in the root cellar for future use:


We pray the Lord continue to teach us His ways and grant us His continued provisions, in accordance with His will. And we are most grateful to Him for both.

— David

« Older posts Newer posts »