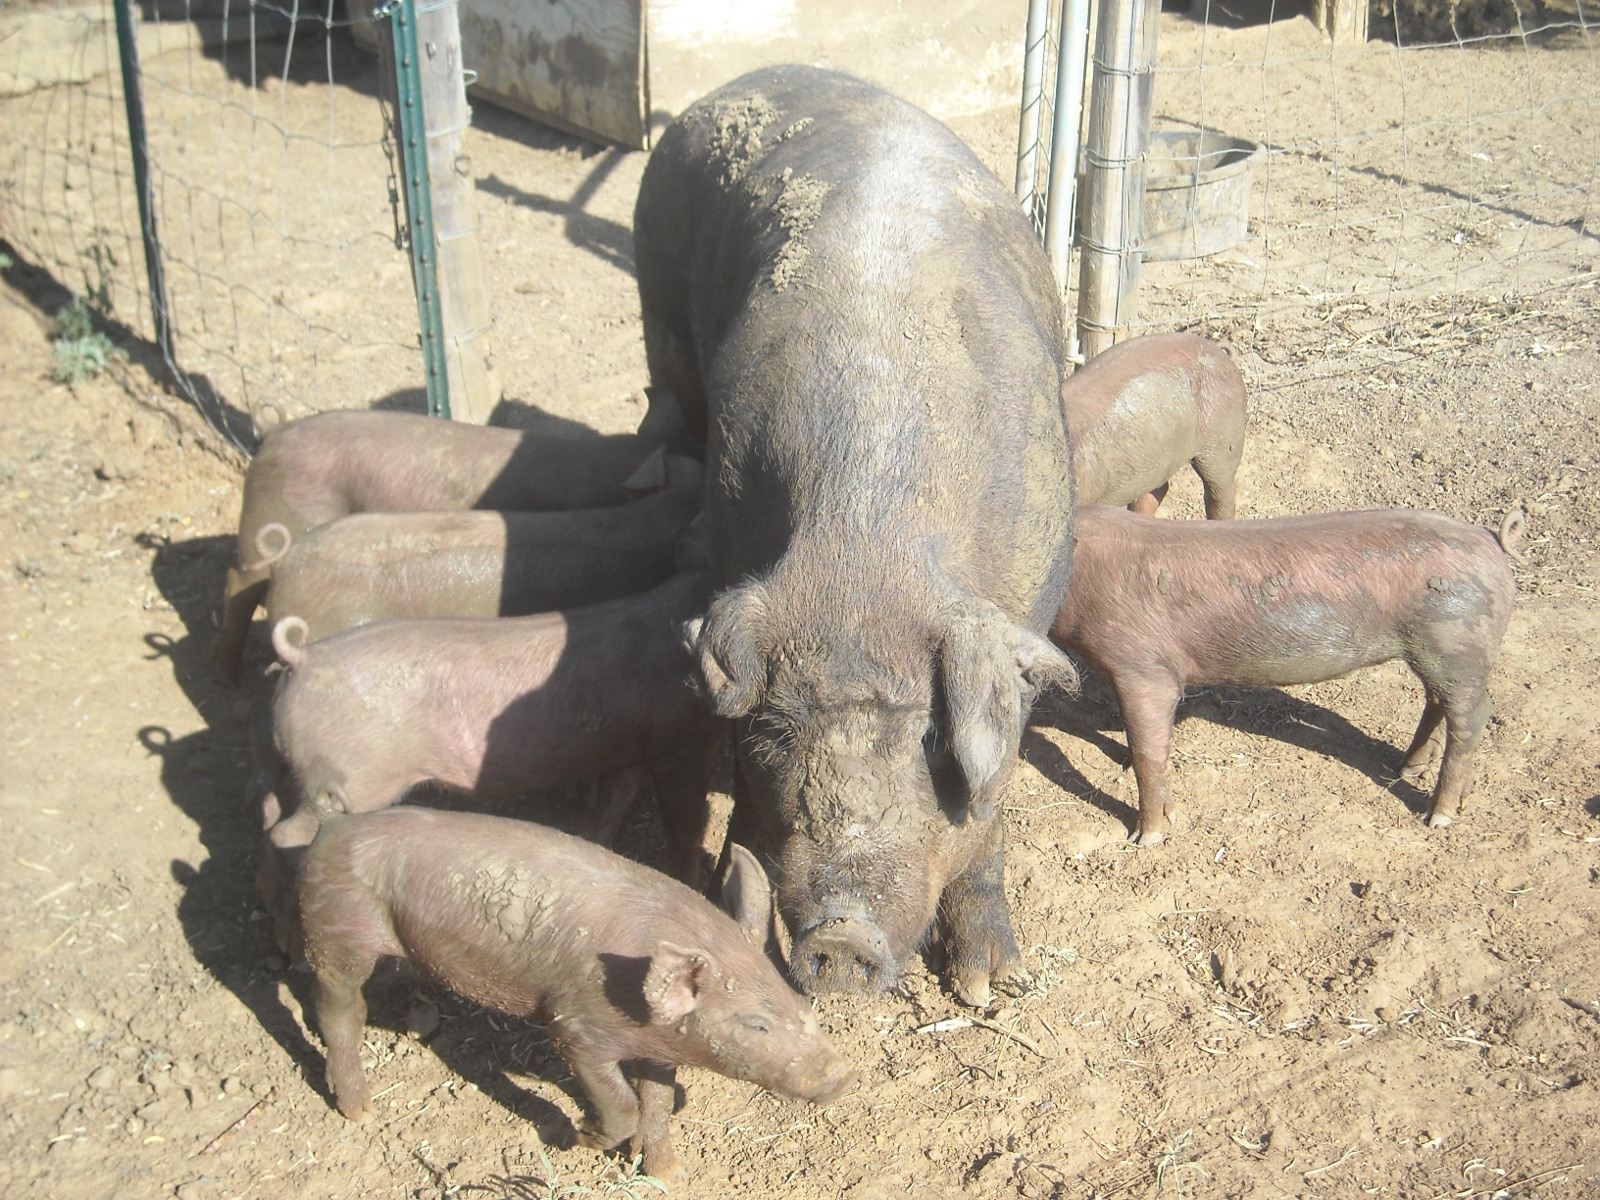
As most of you know recently we had our sow, Missy, butchered. The butcher gave us all of her fat. which I rendered into lard. I thought I would share that process because it’s so easy, and people don’t think of lard as a great source of healthy fats anymore.
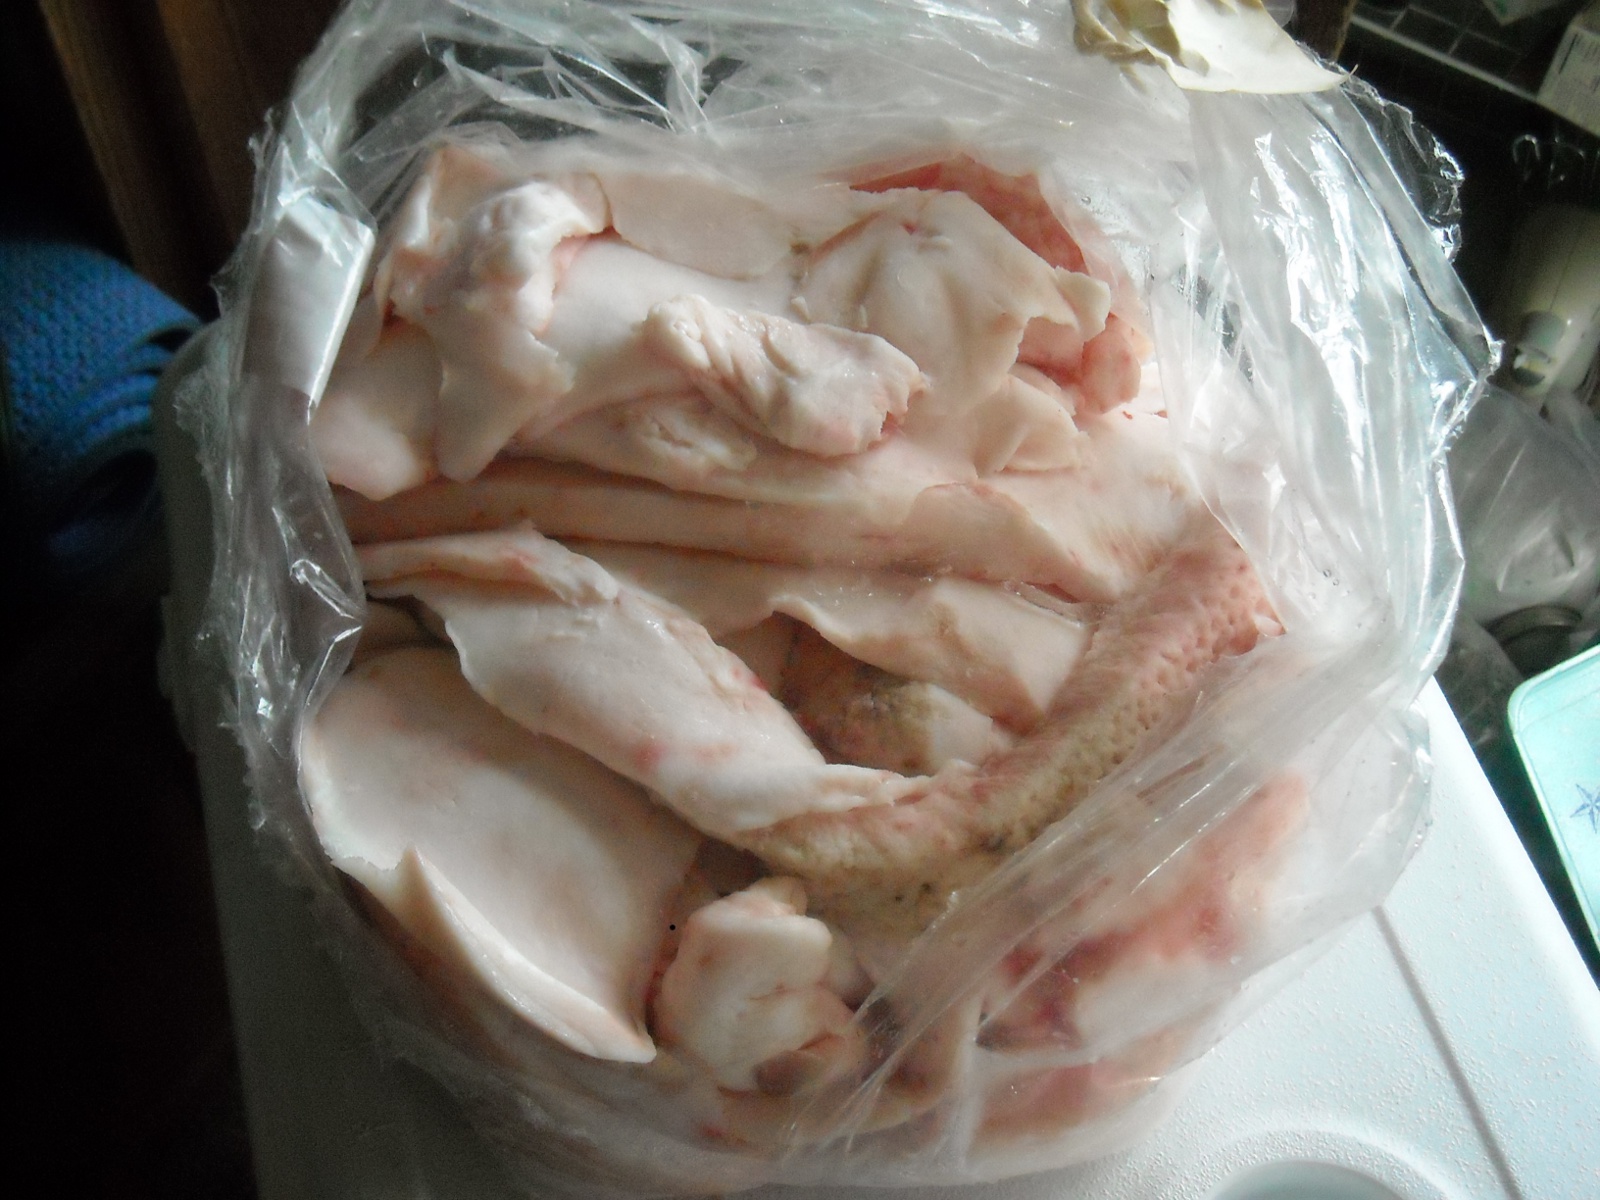
The fat usually comes in bags of large, thick, strips:

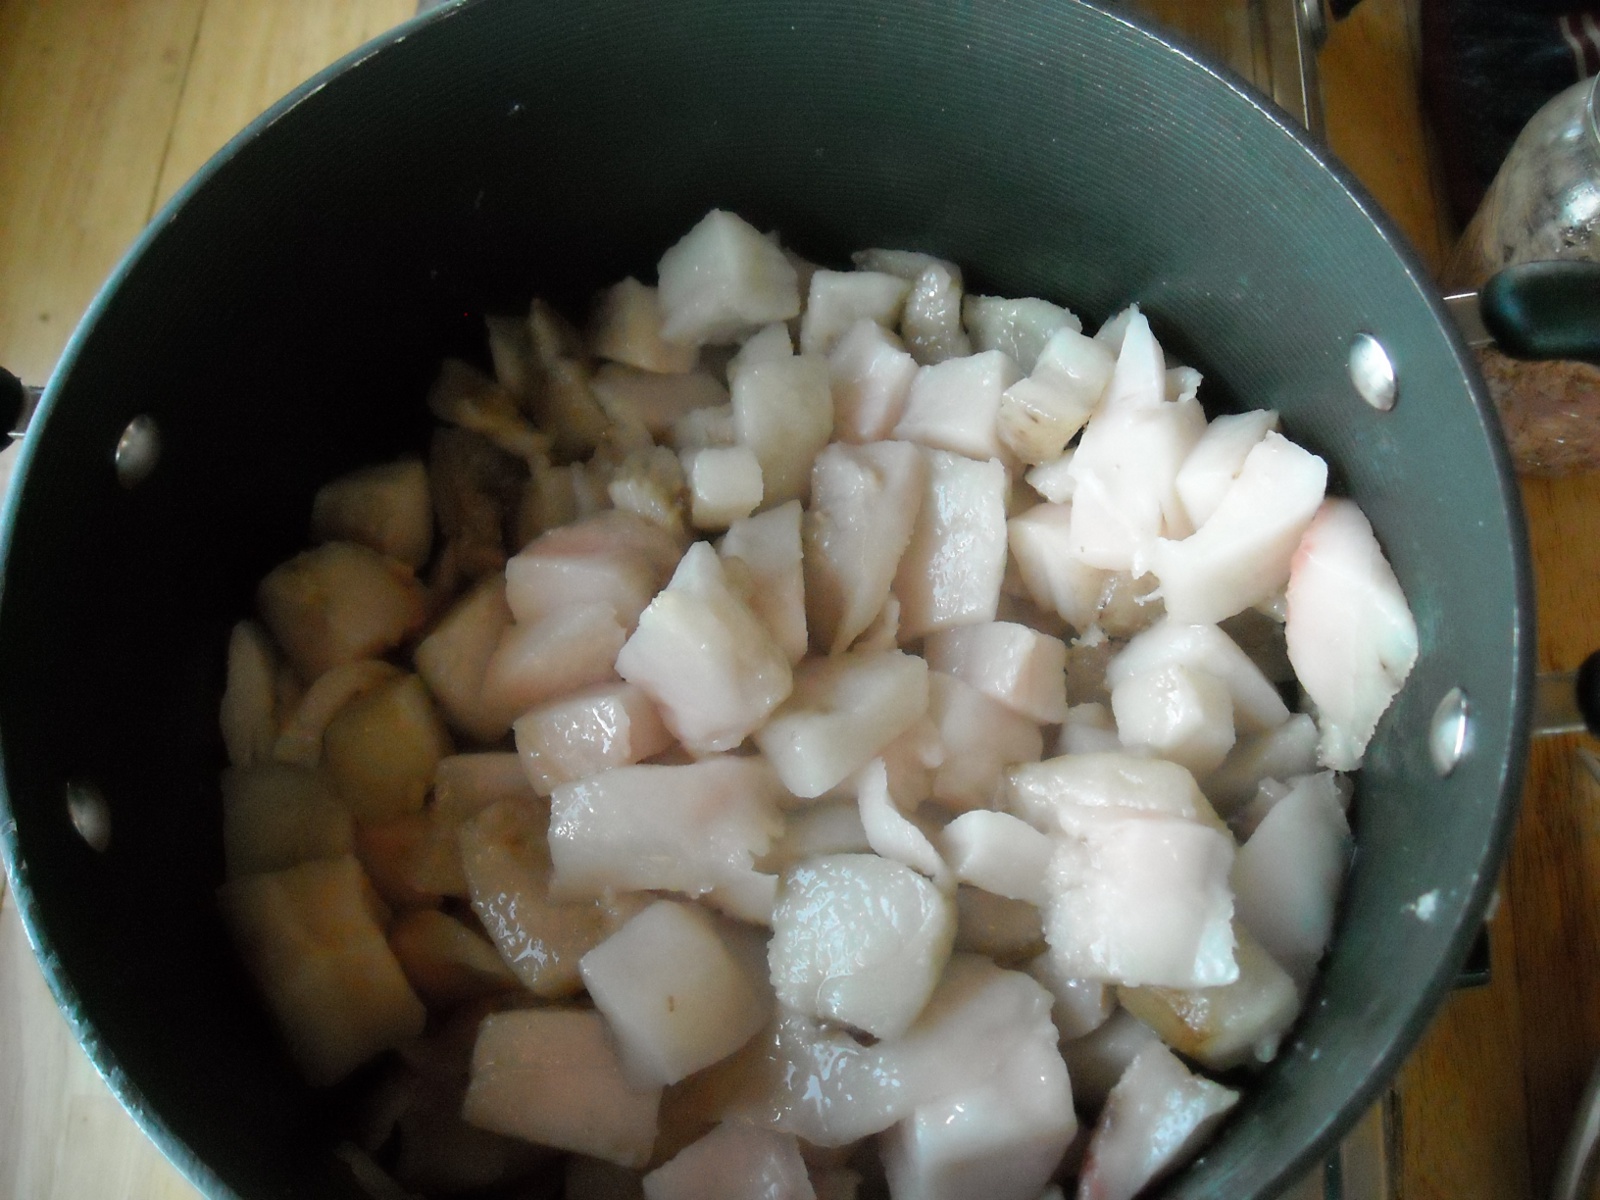
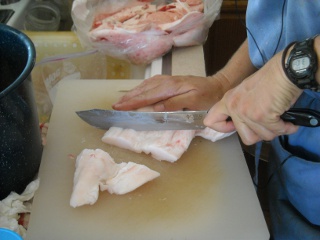
To enable the fat to melt quicker, I cut it into 1-2 inch pieces. It seems to cut better and easier if the fat has been chilled and is less rubbery in consistency:
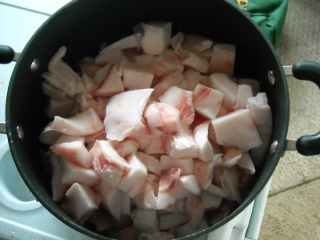
Then I put it all into one or more simmering pots. (Any stock or soup pot or even large sauce pan seems to work fine):
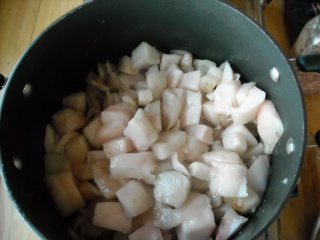
I place the pot onto a burner and turn it to the lowest setting. Some people might prefer to put a heat diffuser under the pot to more evenly distribute the heat and protect the fat from burning. I don’t have one yet, so I just put the pot right on the burner. As the fat heats up, it will turn rubbery and creamy white in texture and appearance:
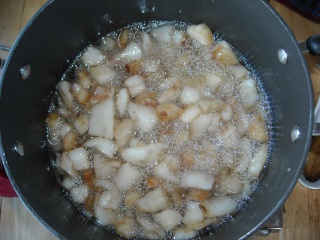
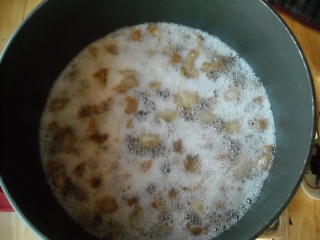
As the fat continues to melt, it will become increasingly bubbly. Rendering fat is not something you can start and come back to in a few hours. Due to the fact that it is very hot and can burn easily, you want to stir it fairly often (not constantly, but you want to be nearby enough to keep an eye on it). Also, please be careful not to look directly down into the pot as the fat is extremely hot and can pop up into your face and burn. I also don’t usually put a cover on the pot, as the condensation drops down into the fat and causes more popping if I do. But do whatever you prefer and feel is safest:
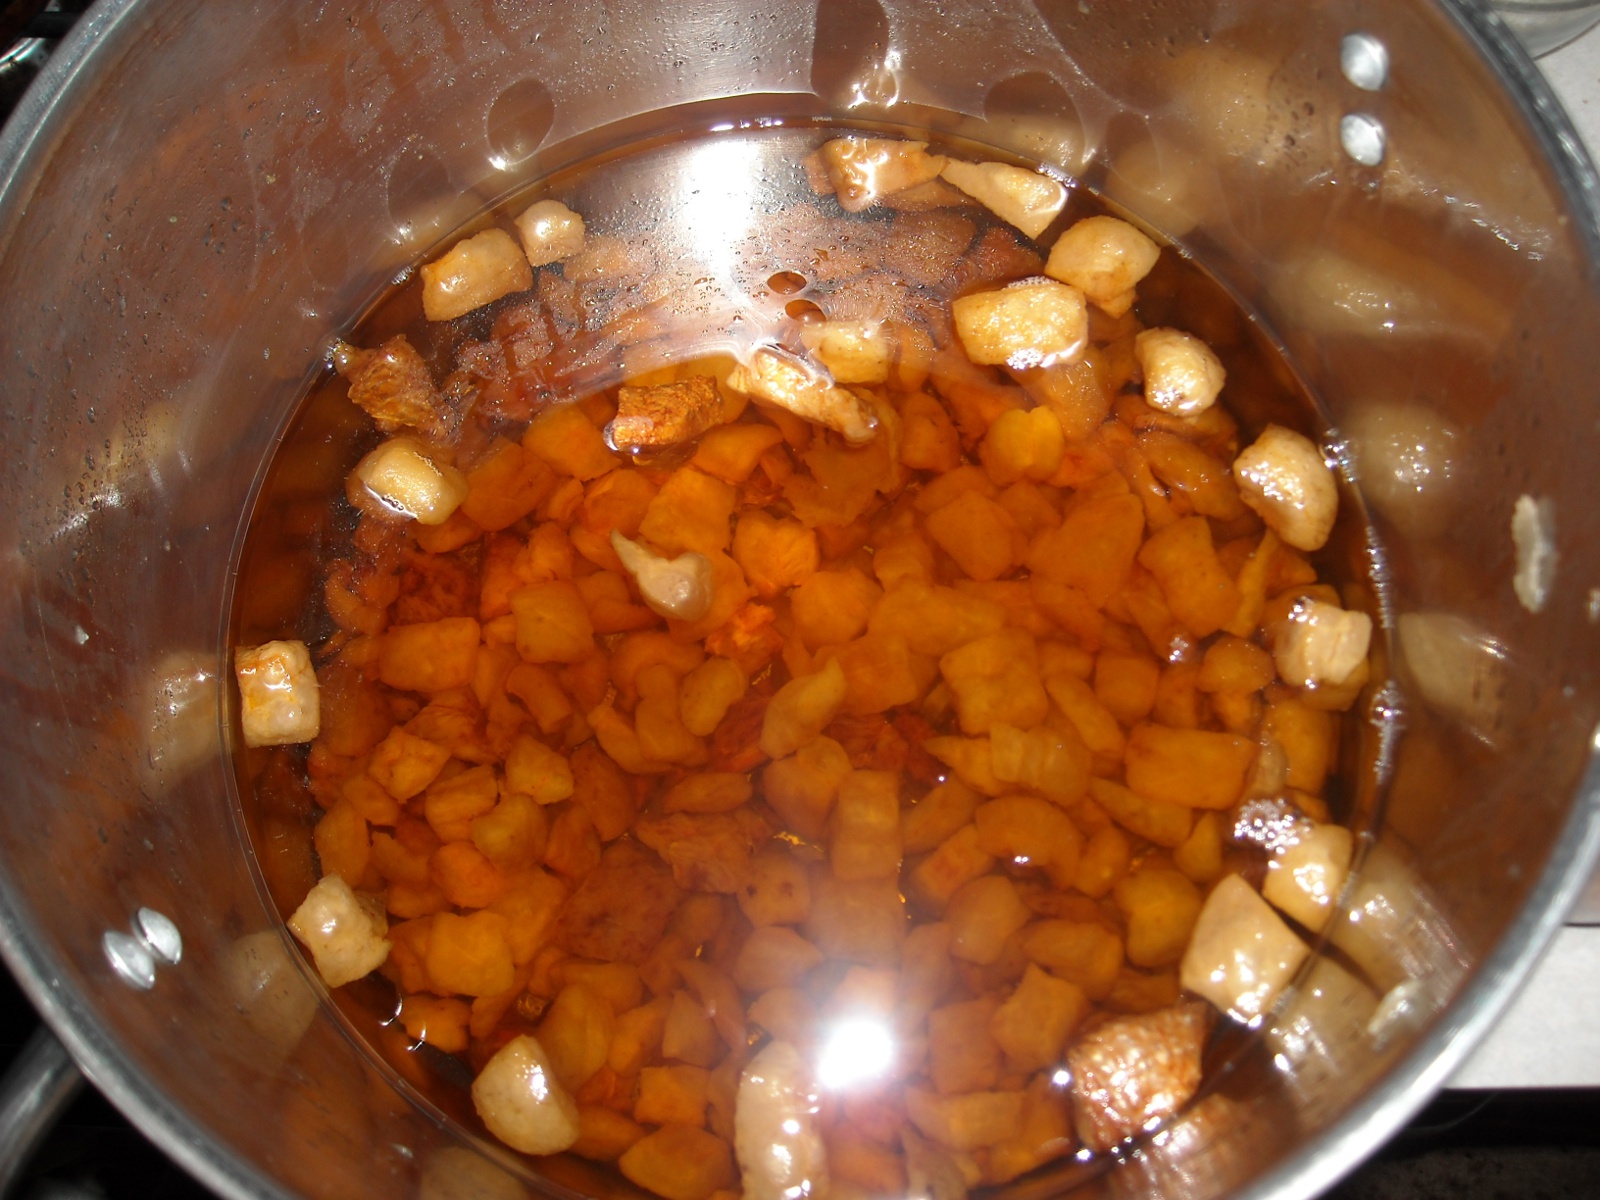
There will be a point where the bubbling will start to subside after a period of time (a few hours in my experience):
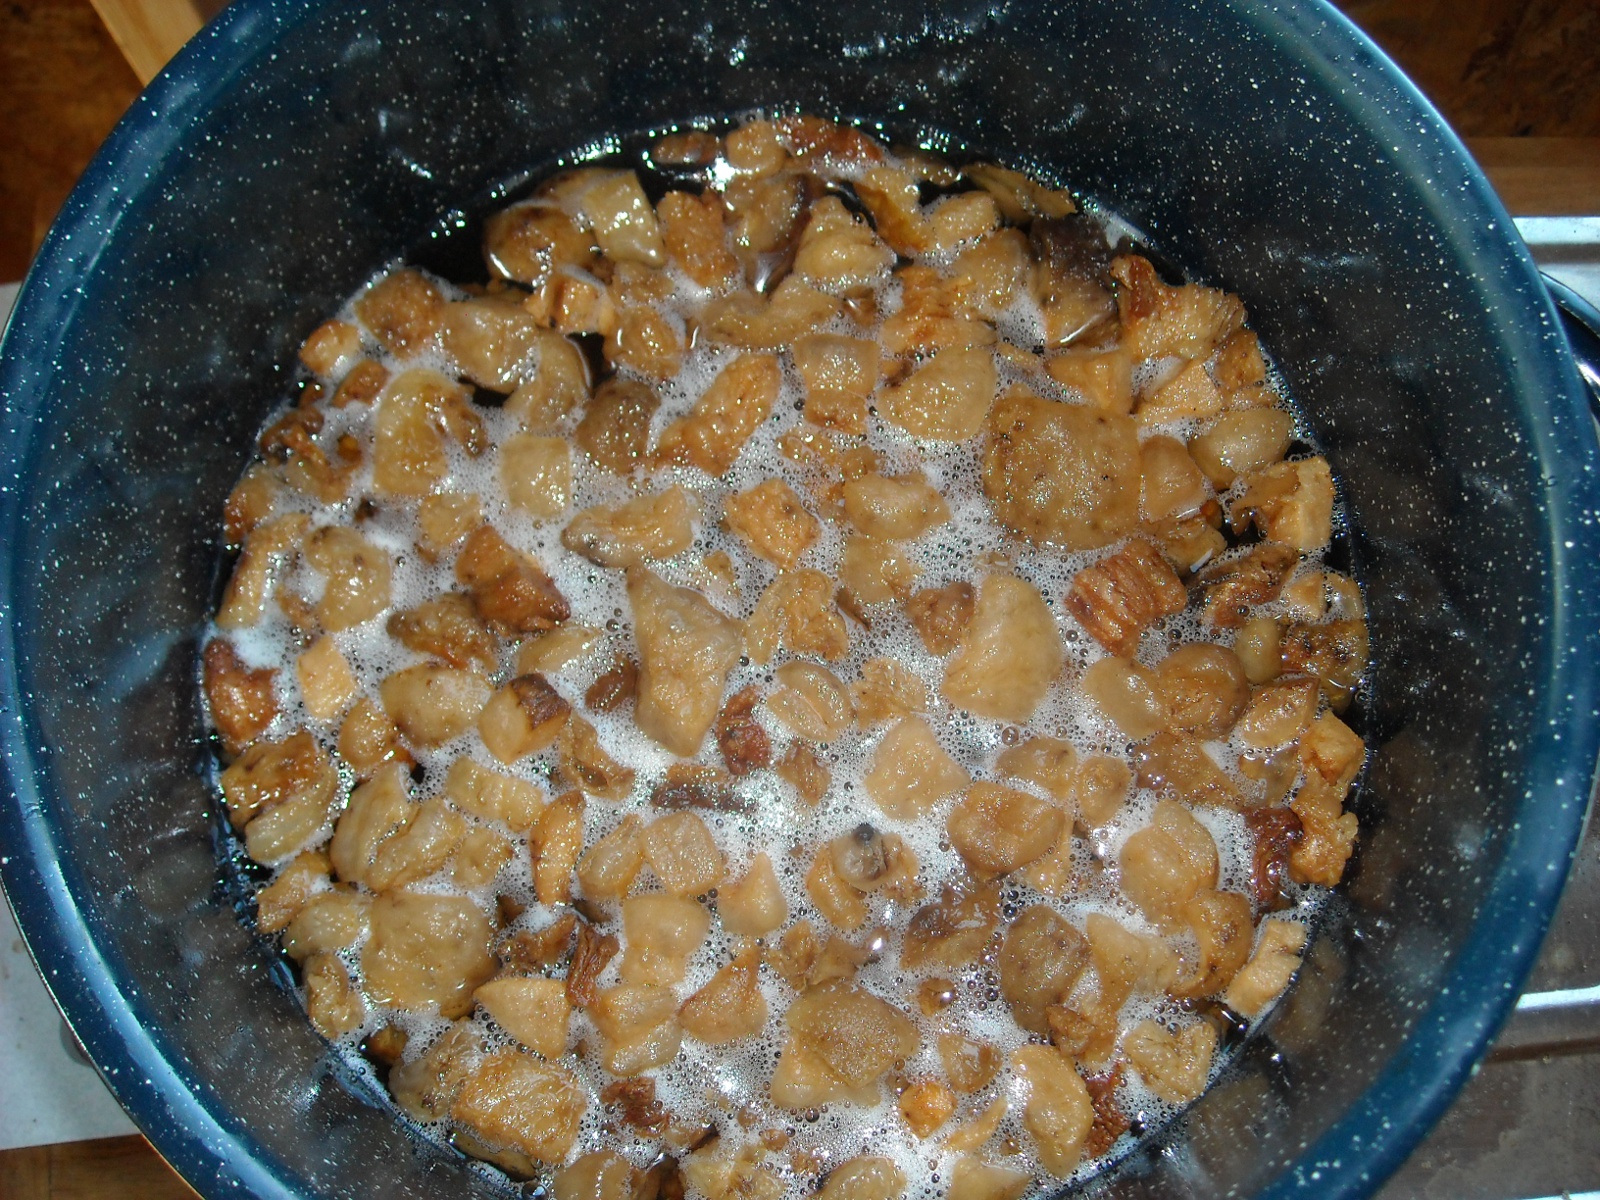
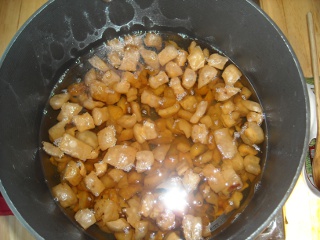
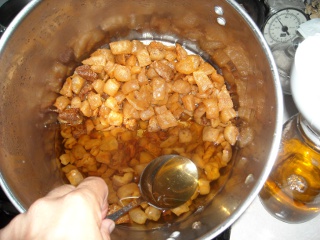
After the bubbling subsides a bit, you will see the pieces of cooked fat called “cracklings” floating in the liquid fat. At this point, the rendering process is close to complete; and you want to watch to make sure your fat doesn’t start to smoke or the cracklings scorch. This makes for burnt lard, which is still usable but not desirable:

I have learned it is better to turn off the heat sooner than later to ensure no burning of the lard. When the bubbling has mostly stopped, I turn off the heat; and the cracklings start dropping to the bottom of the pot:
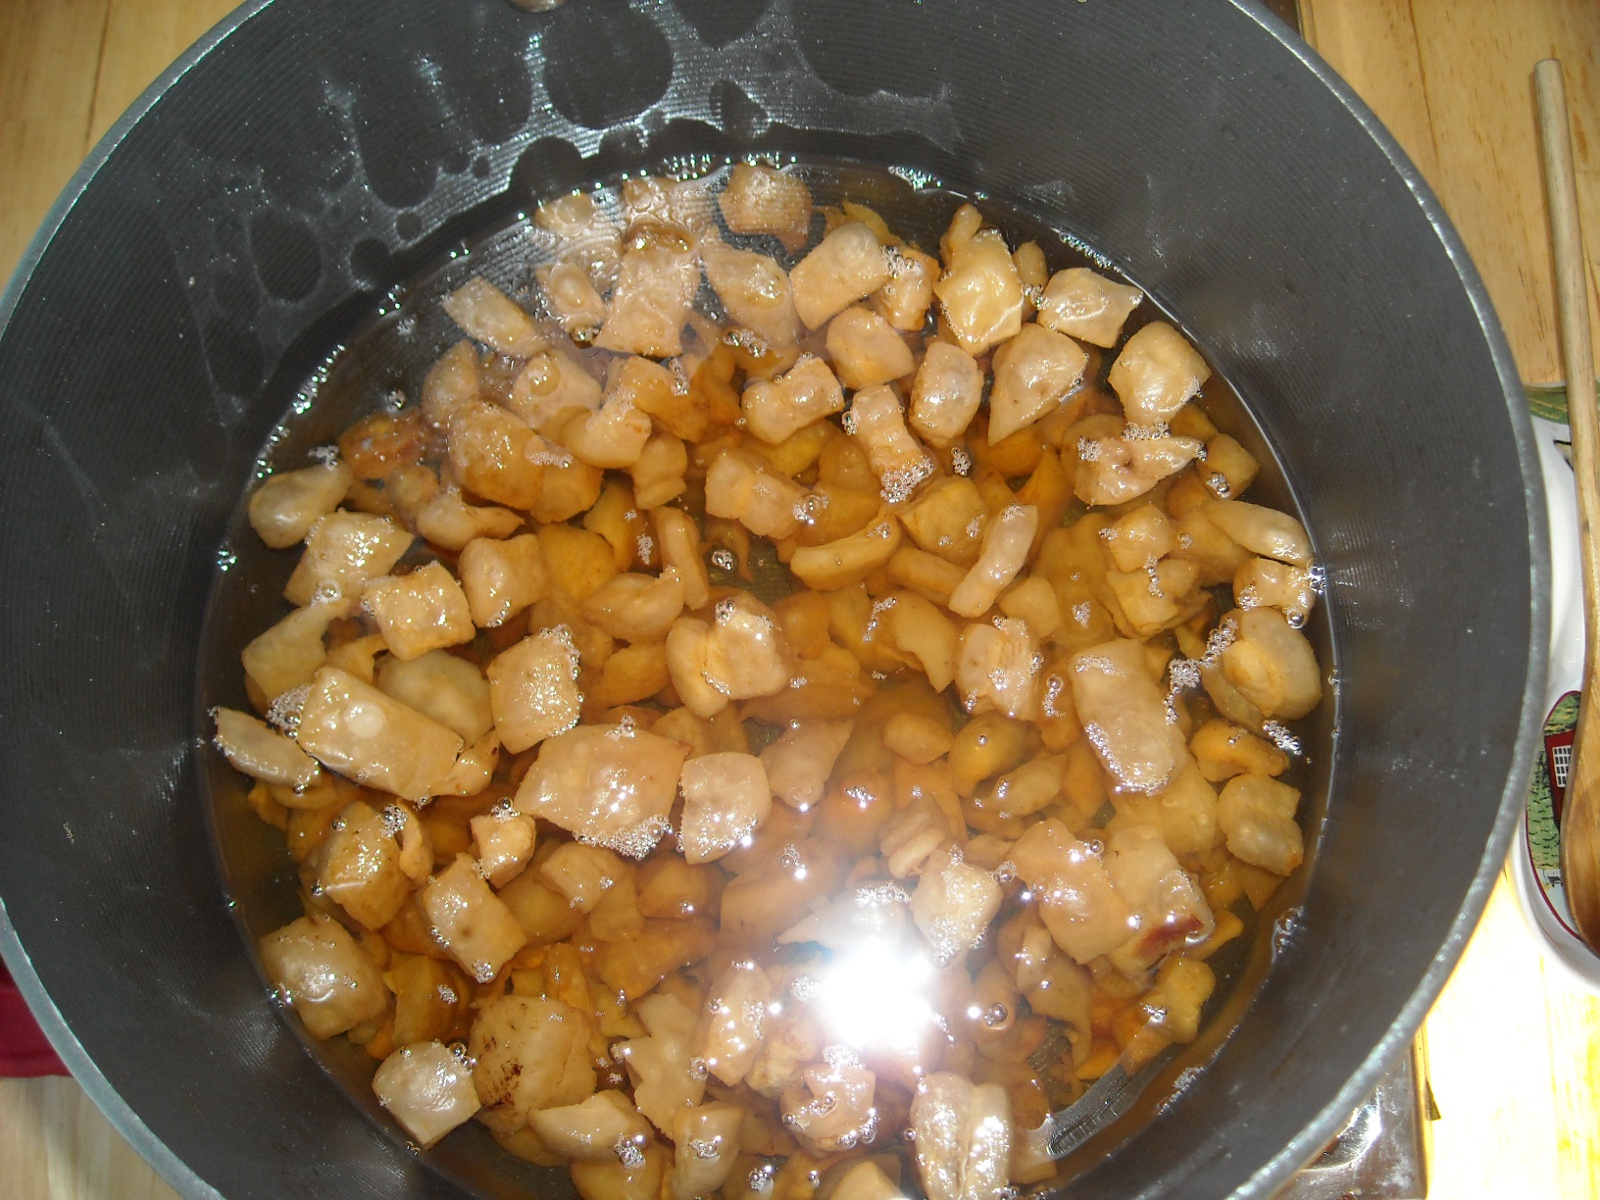
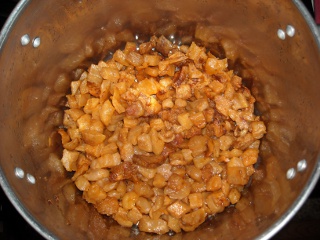
After a short time, most of the cracklings should sink to the bottom of the pot leaving pure liquid fat waiting to be spooned out and put into hot jars. Some resources will say this process can take up to 18 hours, and maybe I’m doing it wrong, but the method I use seems to only take a few hours per batch. Perhaps I’m not getting all of the liquid out of the fat pieces, but right now I don’t have the luxury of more time, and I’m not sure how one could get much more from letting it simmer a lot longer. And mine always starts to smoke if I leave it longer anyway. So, whatever method works best for you is the best method!

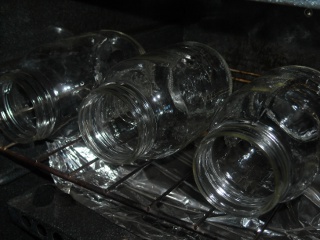
Since the melted fat is EXTREMELY hot, it is best to heat up your jars before spooning the fat into them. I take clean jars, place them on the rack in the oven, and turn it on to warm or a little higher, and let them heat up while I’m prepping everything else. Then when I am ready for the jars, they will be nice and warm/hot to accommodate the very hot liquid:
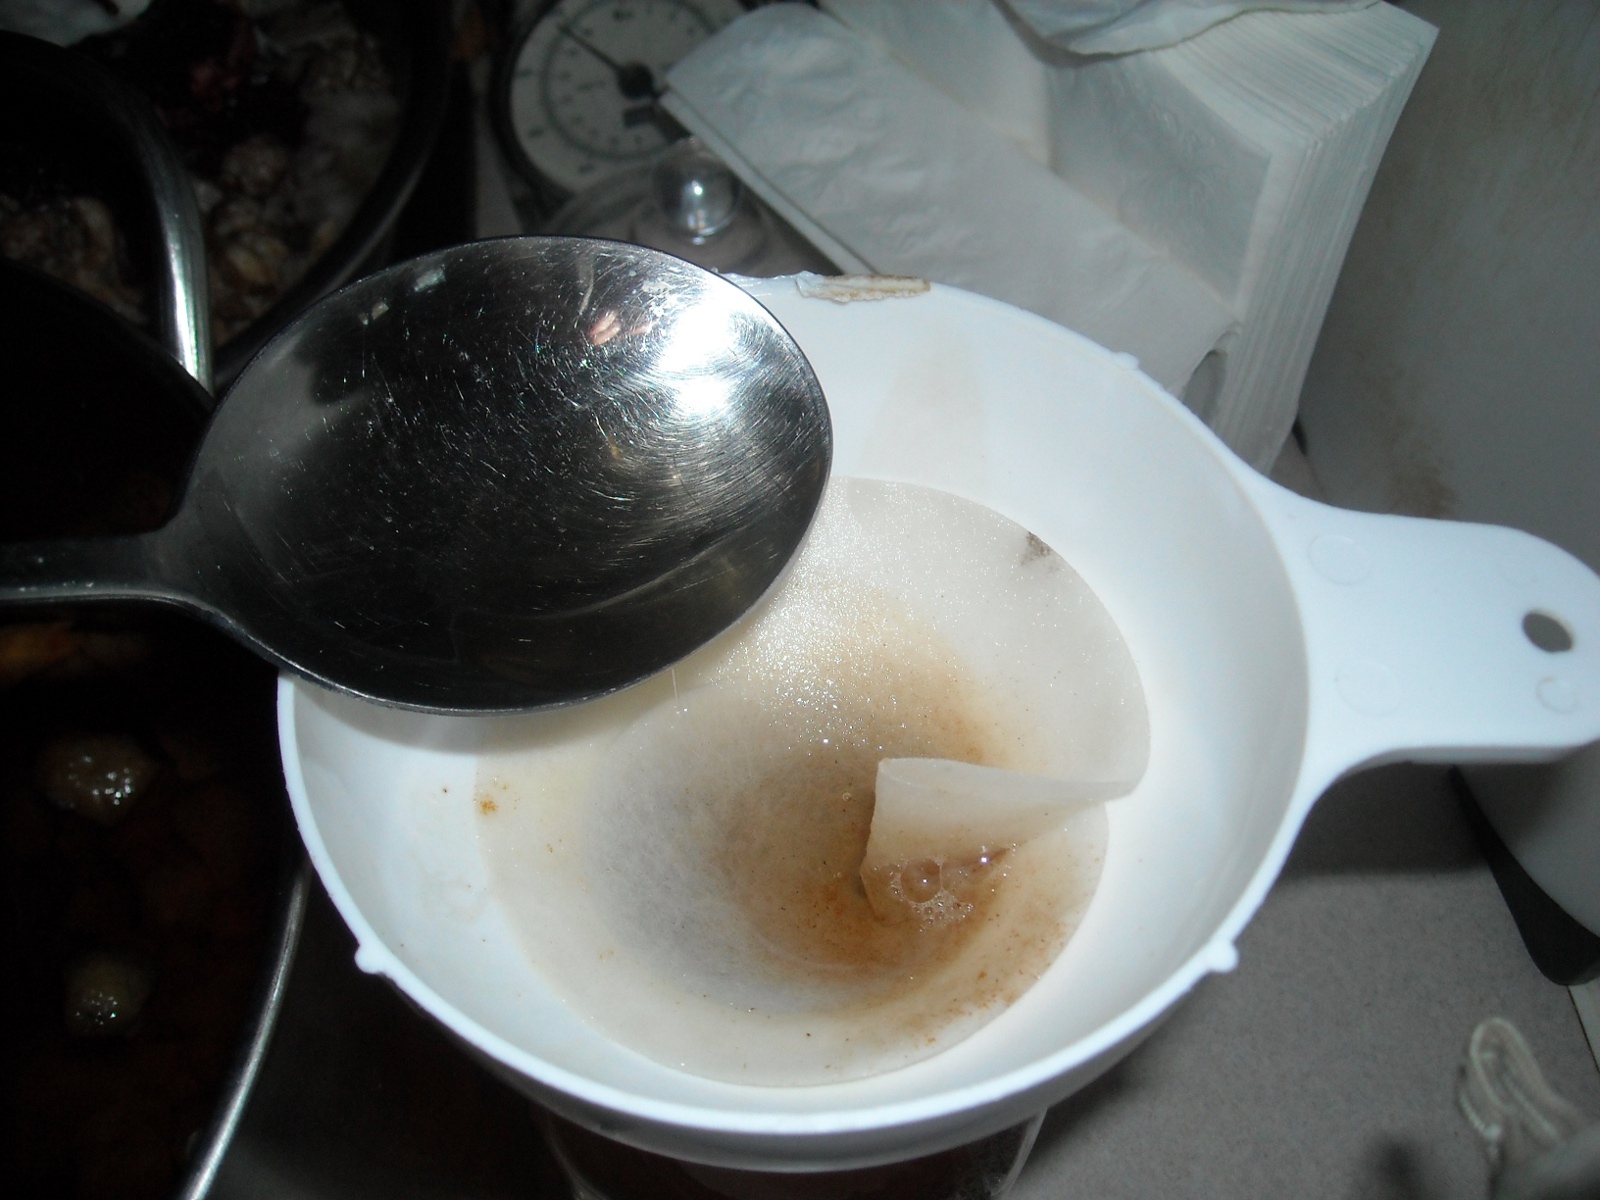
To prevent little tiny particles of cracklings to get into the lard, I filter the liquid while spooning it into the jars. You can use whatever method works best for you (cheesecloth, paper towel, mesh strainer with cloth, etc.) I recently found that a goat milk filter works great, so I’ve adopted that method. I place the filter into the canning funnel that fits into the mouth of the canning jar, and it makes a nice filtering setup:

Since most of the cracklings have sunk to the bottom, it is very easy to ladle out most of the liquid fat into the jars:
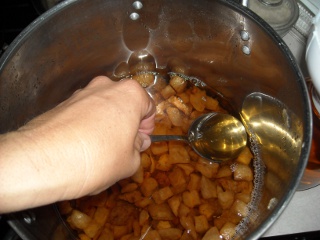
I tip the pot to get the last of the liquid out:
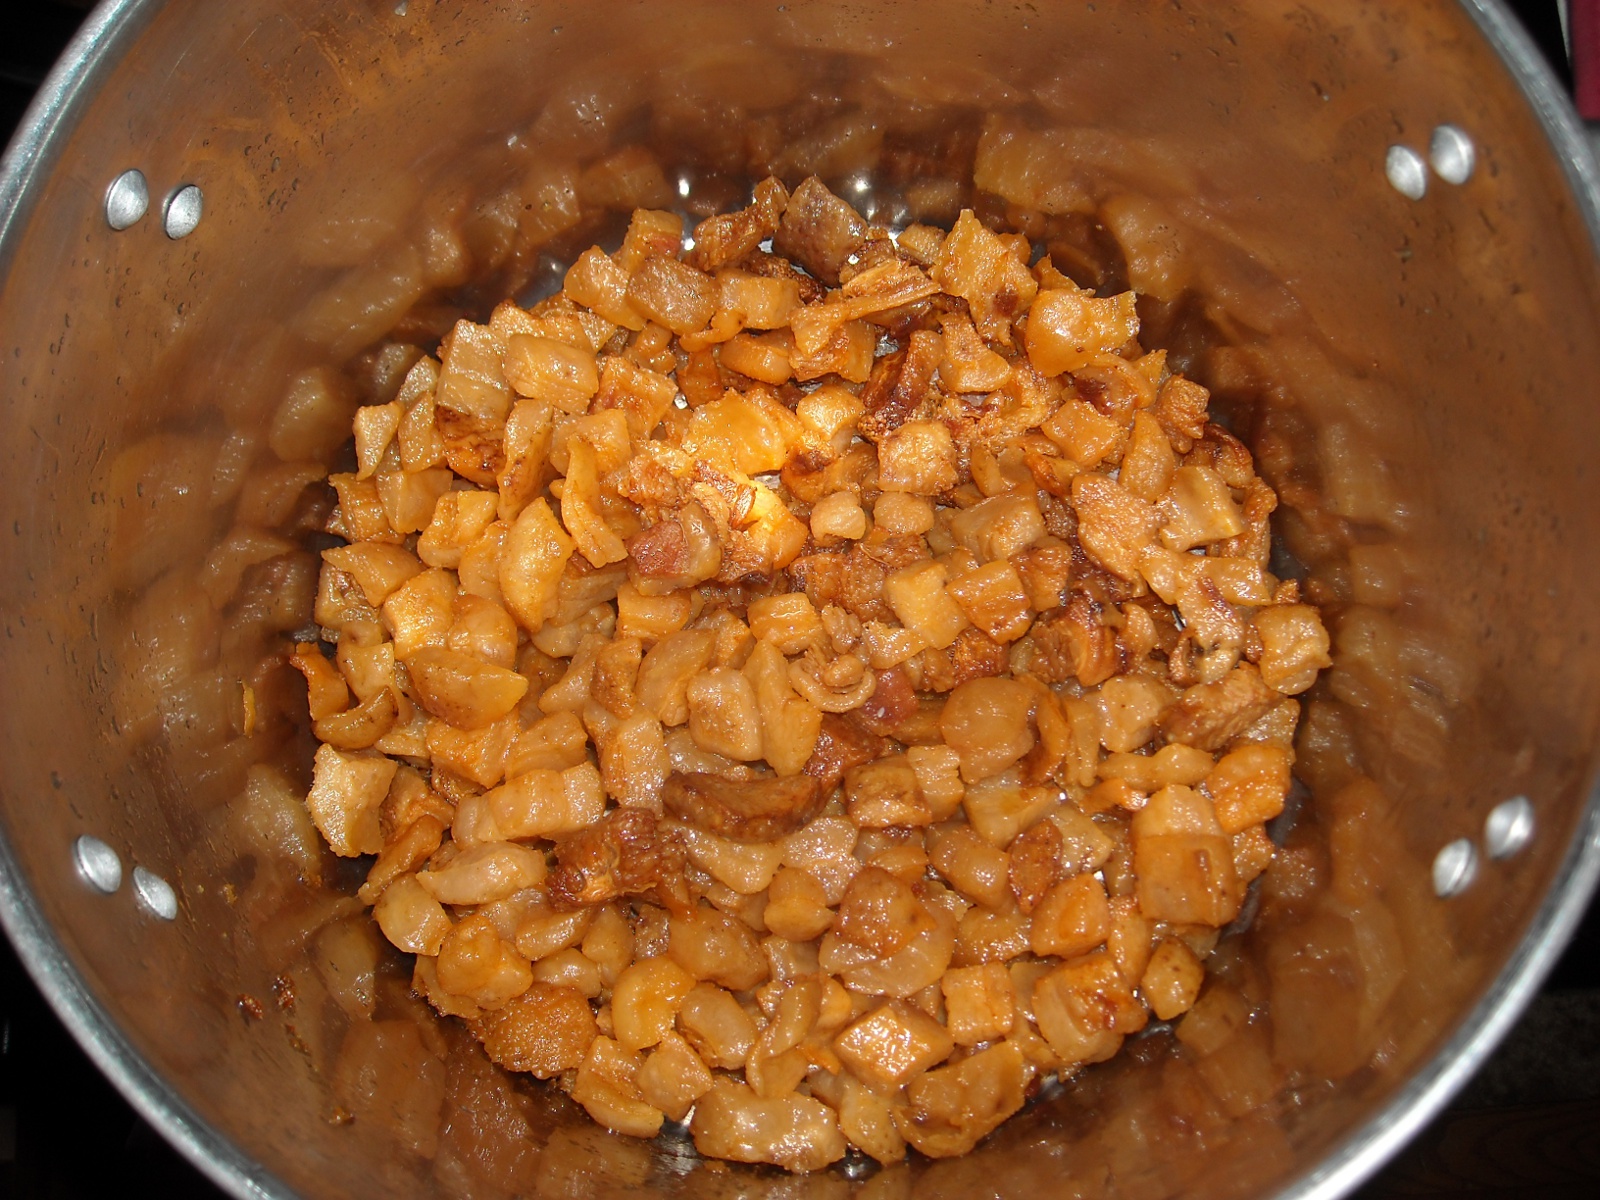
All that is left are the cracklings after spooning out the liquid fat. I munch on a few as I process the fat but don’t usually do anything with them except feed them to the chickens. However, some people I’m told put salt and seasonings on them for a tasty treat.
I try to press out as much fat from the crackings as I am able, but there is still a bit left in them. I used an antique lard press a few times but came to the conclusion that the amount of extra fat I was getting was not really worth the mess the press made and the resources required for clean-up. But some people may be very loyal to them. It’s certainly a personal choice:
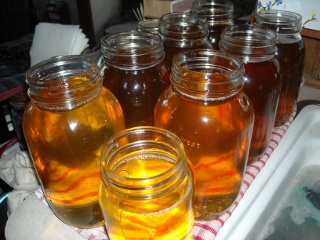
And here is the rendered fat ready to be sealed and either stored in a cool place or canned and stored. I usually end up yielding several quarts of lard when we butcher a pig, and since Dave and I don’t go through it quickly, I like to pressure can it. I was surprised that there is VERY little information on the Internet about canning lard. I probably way overdo it, but I can it for 90 minutes as if I were canning meat, because I can’t find any reliable information otherwise. So I can it a lot to ensure its safety. If you can reliably provide additional information from your own lard canning experience, I am all ears and would greatly appreciate it. Until then, I’ll play it safe. I have not experimented to see how long an uncanned jar of lard will last down in our root cellar but hope to remember to try it next time. But I would hate for all those quarts to go rancid from not canning them before we are able to use them. This way they are good for years.
The rendered lard hardens up and turns white (or a little darker depending on the type of fat rendered and if it got burned in the process). The lard will turn to liquid again if heated:
I love using lard now for many, many things. I use it to pop popcorn, on bread for grilled cheese sandwiches and toast, as an oil in recipes and baking, etc. It may sound icky but it’s a wonderful and tasty organic animal fat. My friend Shannon, once again, has a great blog post on healthy fats, and lard is right up there at the top of the list. I had to be re-educated on the benefits of healthy animal fats, and I’m assuming most people think it’s very unhealthy, but I believe we truly need these healthy fats in our diets. I hope you take a few minutes to research it for yourself.
Also, I’m sure most people may not have a freshly butchered pig “hanging around,” but I’m told many local butchers and processing places will either give away or sell their fat, so you may want to check that out in your area.
Lastly, if you don’t have a copy already, I highly recommend the Encyclopedia of Country Living by Carla Emery to get you started on rendering lard. It is truly a survival book for those of us just starting out on our domestic, animal husbandry adventures.
We also currently make homemade fat lamps with our lard, and I hope to experiment making soap from lard as well and will let you know how it goes, Lord willing. You can also render lard out of beef tallow (fat), so maybe sometime we’ll be able to butcher one of our Longhorns and I’ll be able to share that adventure as well. As always we are so very grateful for God’s provision to have this homemade healthy fat resource.
Susan
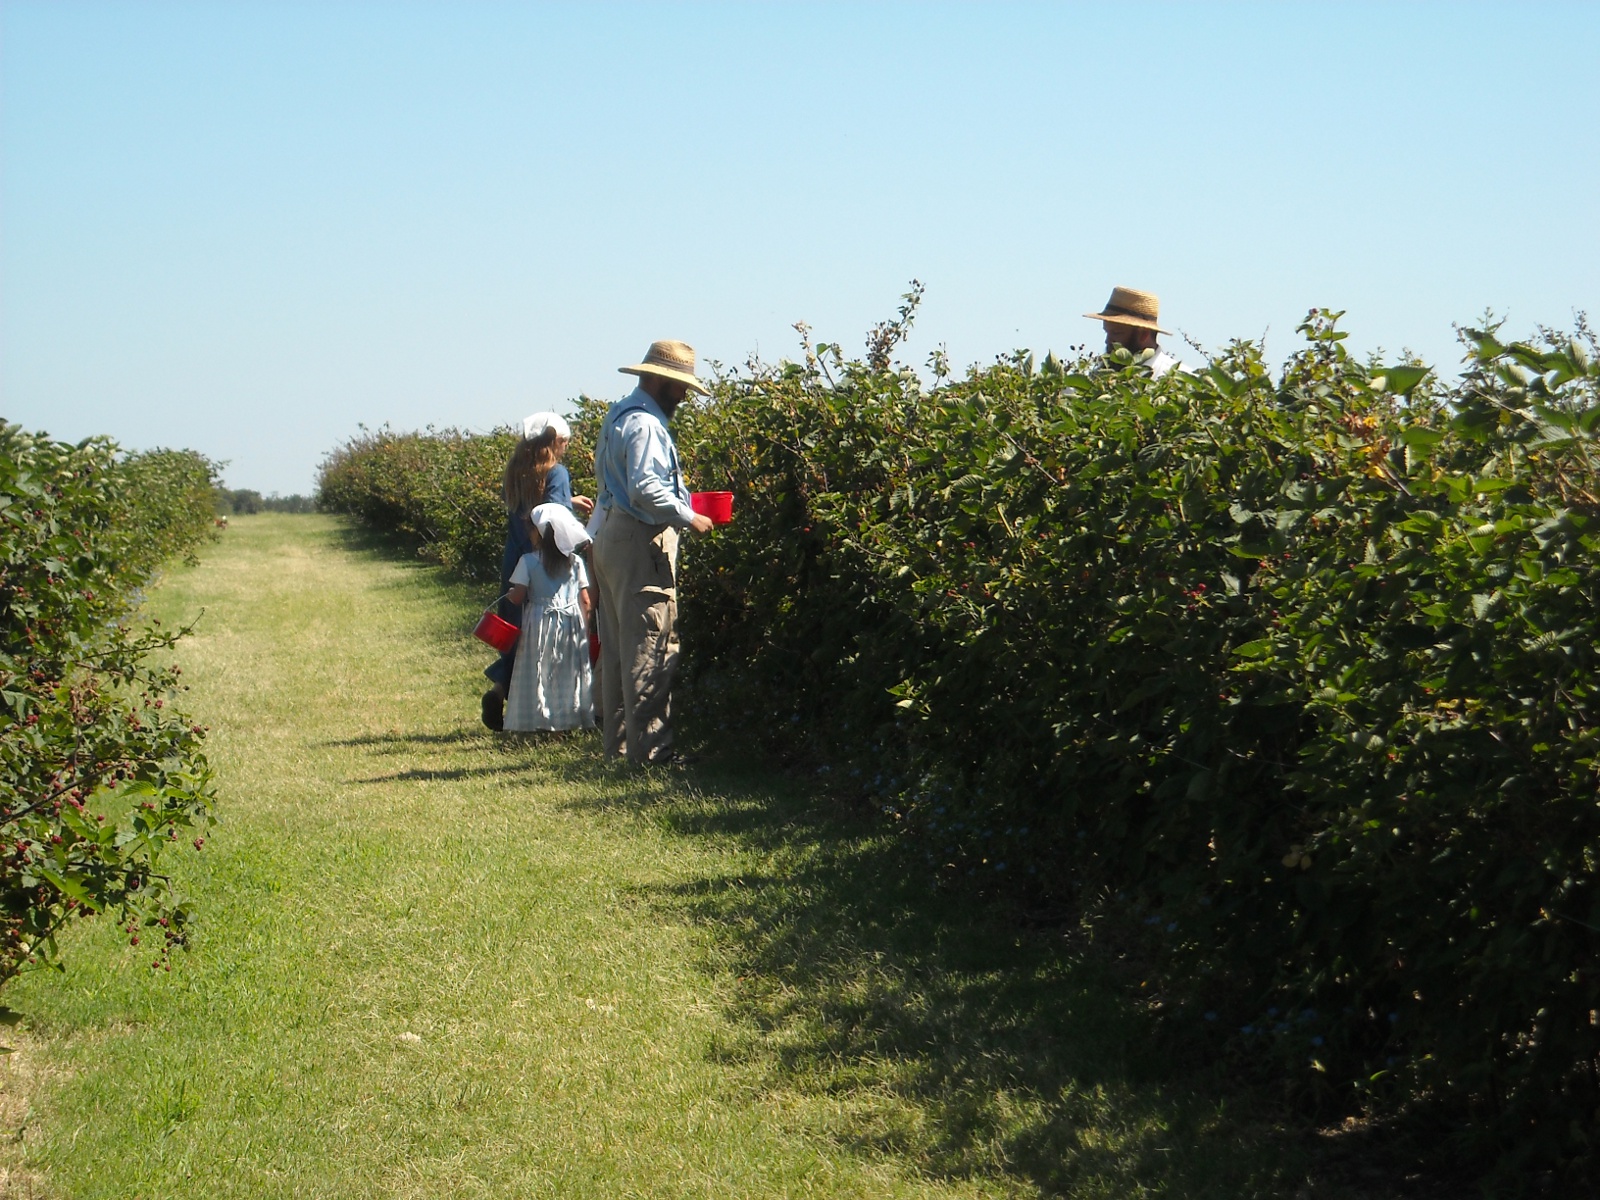
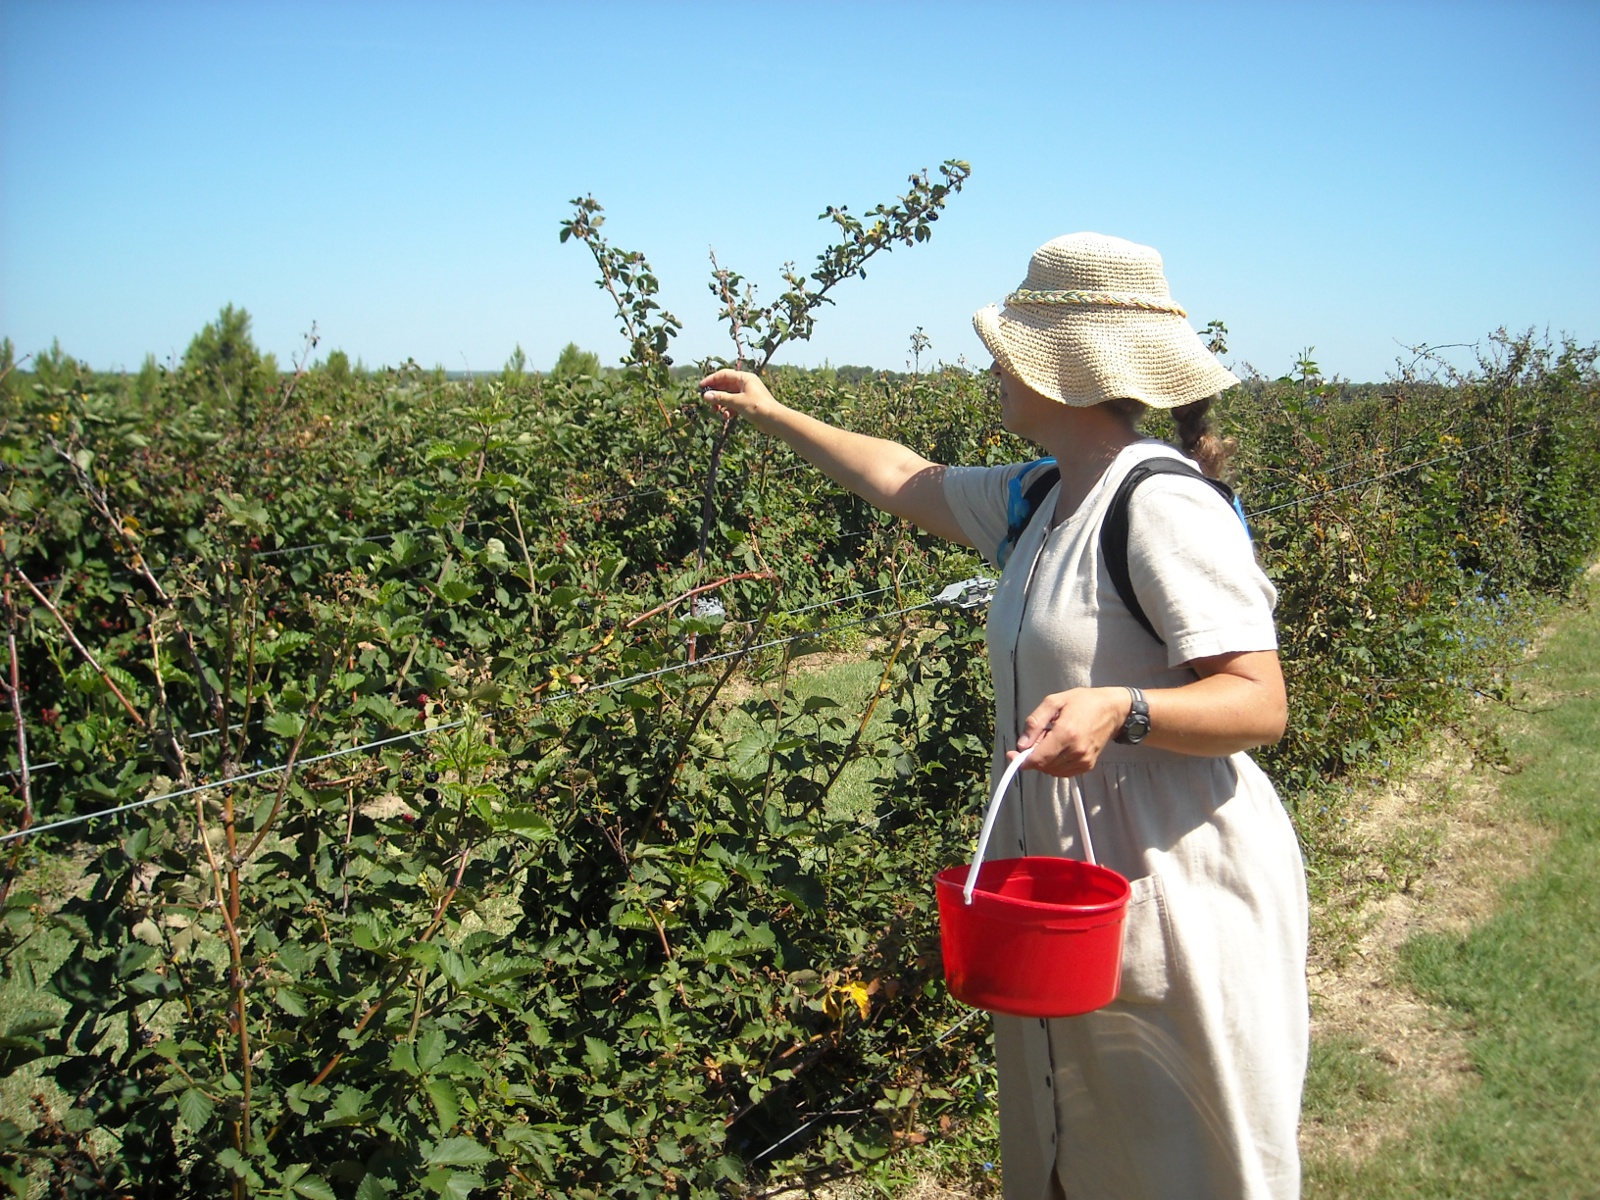
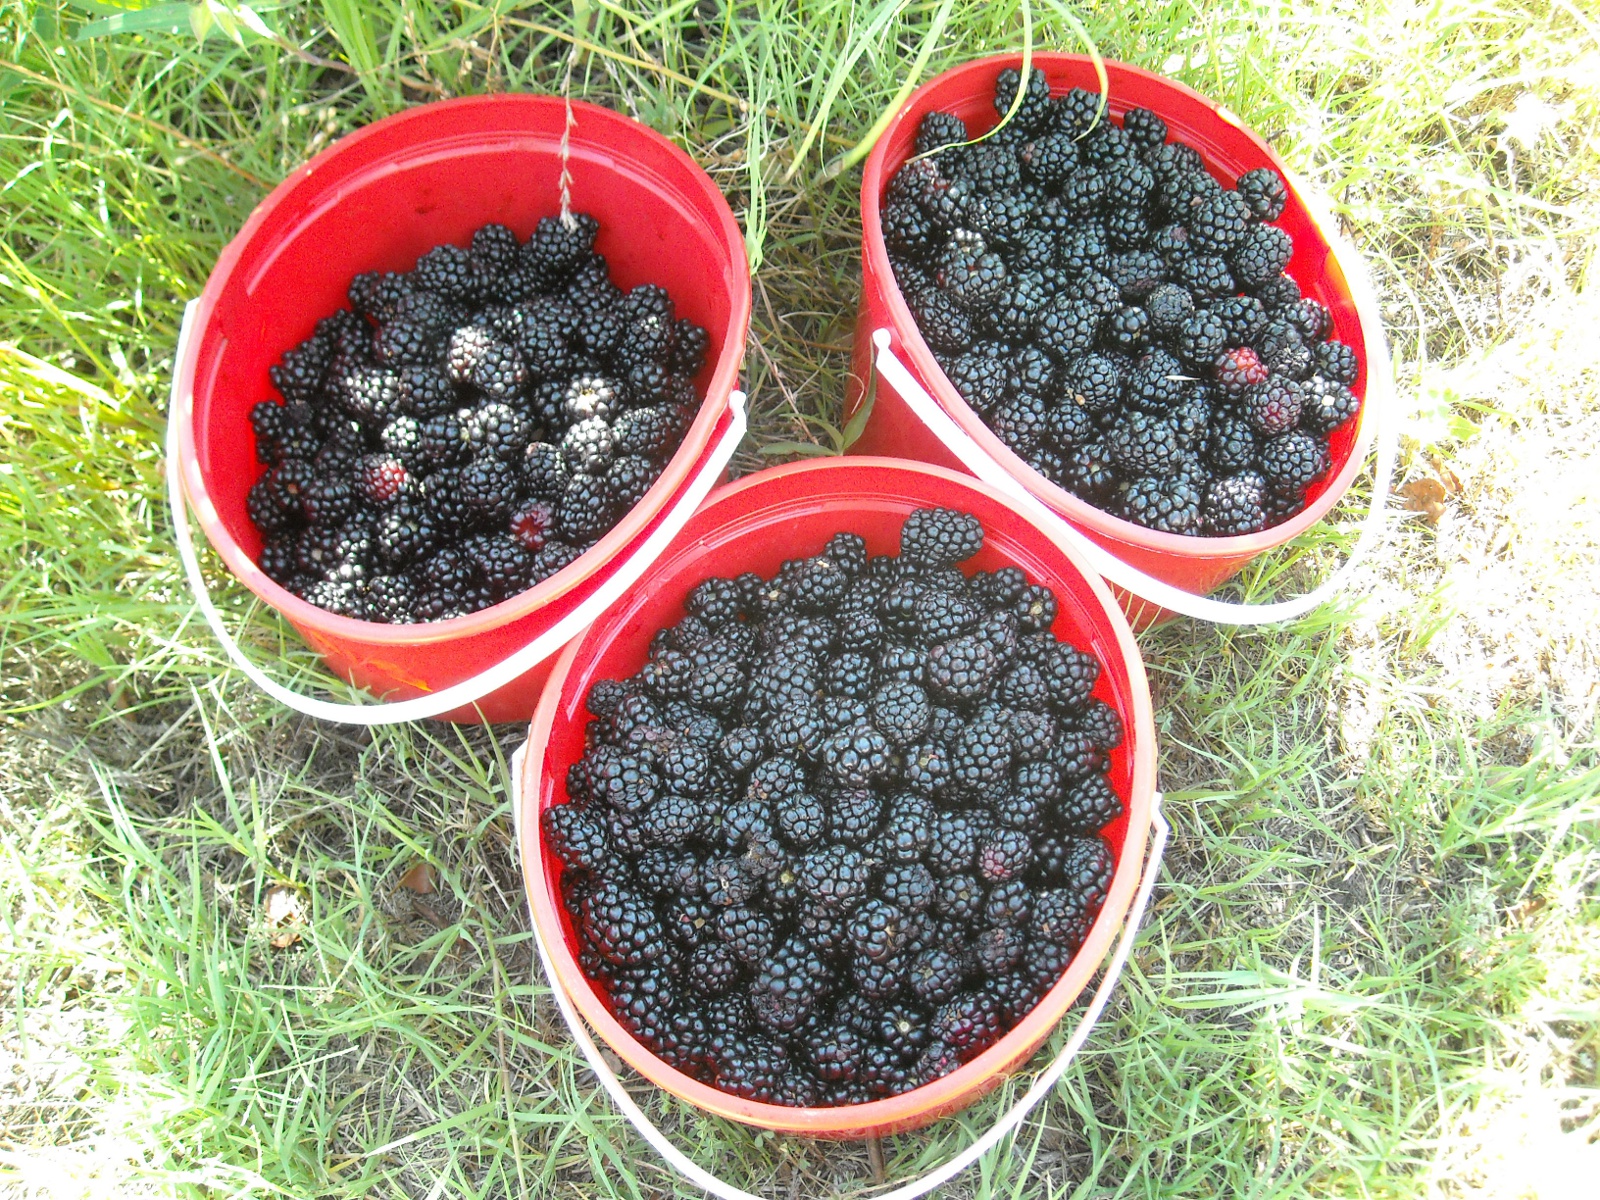
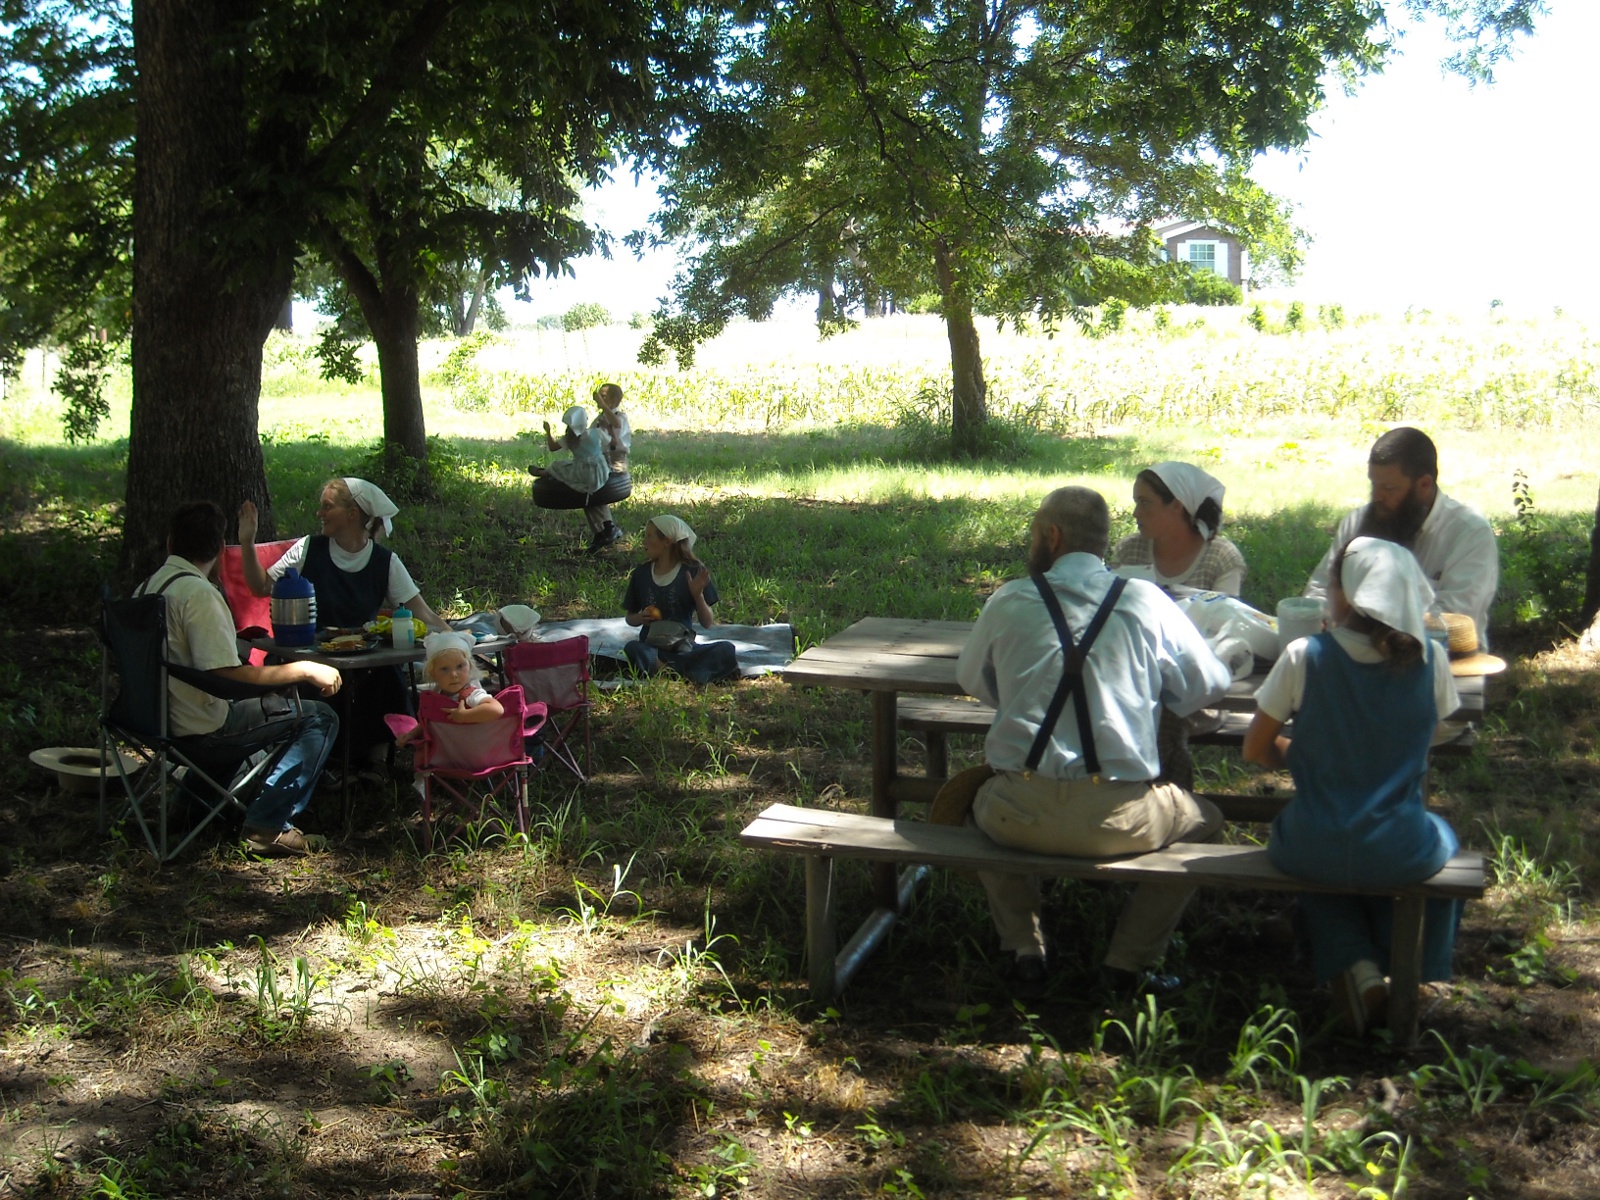
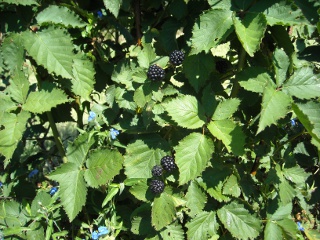 It was about 25 degrees outside this morning, so I thought no better time to think of the warmth of the sun and our trip to a blackberry farm last Spring!