This is our journal of what we pray is our sojourn of life (Hebrews 11:8-10) along the narrow way (Matthew 7:14), even the old paths (Jeremiah 6:16), submitting to the Bible as a light unto both (Psalms 119:105). It is our prayer that these documented moments in our earthly time benefit whom God might choose to edify, but ultimately that God glorifies Himself through them.

Category: food preserving (Page 3 of 5)

Garden – Spring 2012 – Update II

Throughout the summer, even with us entering into a drought situation again, the Lord has granted that we be able to keep the garden going, sometimes by watering from the cistern, and now watering by bucket bailing and hauling pond water in a cattle trough. While the pond water process takes some effort, God has granted, by His mercies, that it start to pay off.

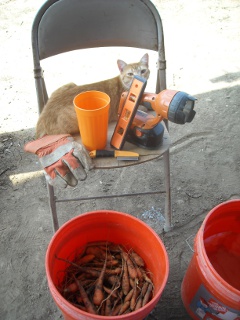
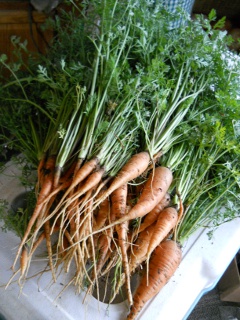
Here is our carrot haul from this year from earlier in the summer. For some reason, the carrots just didn’t work out too well this year. Not sure what the difference was, but we are thankful to have received these:

Spring Garden 2012 Carrots

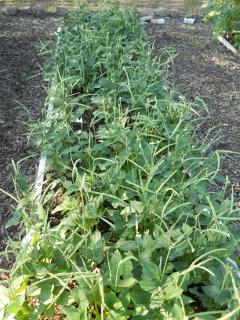
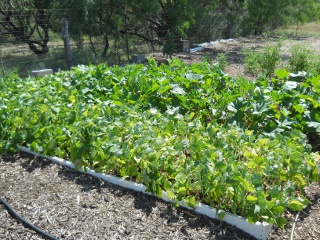
And here is where things are now approaching the end of summer. These are the black-eyed peas:

Spring Garden 2012 Black-Eyed Peas
Spring Garden 2012 More Black-Eyed Peas

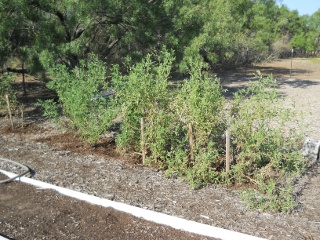
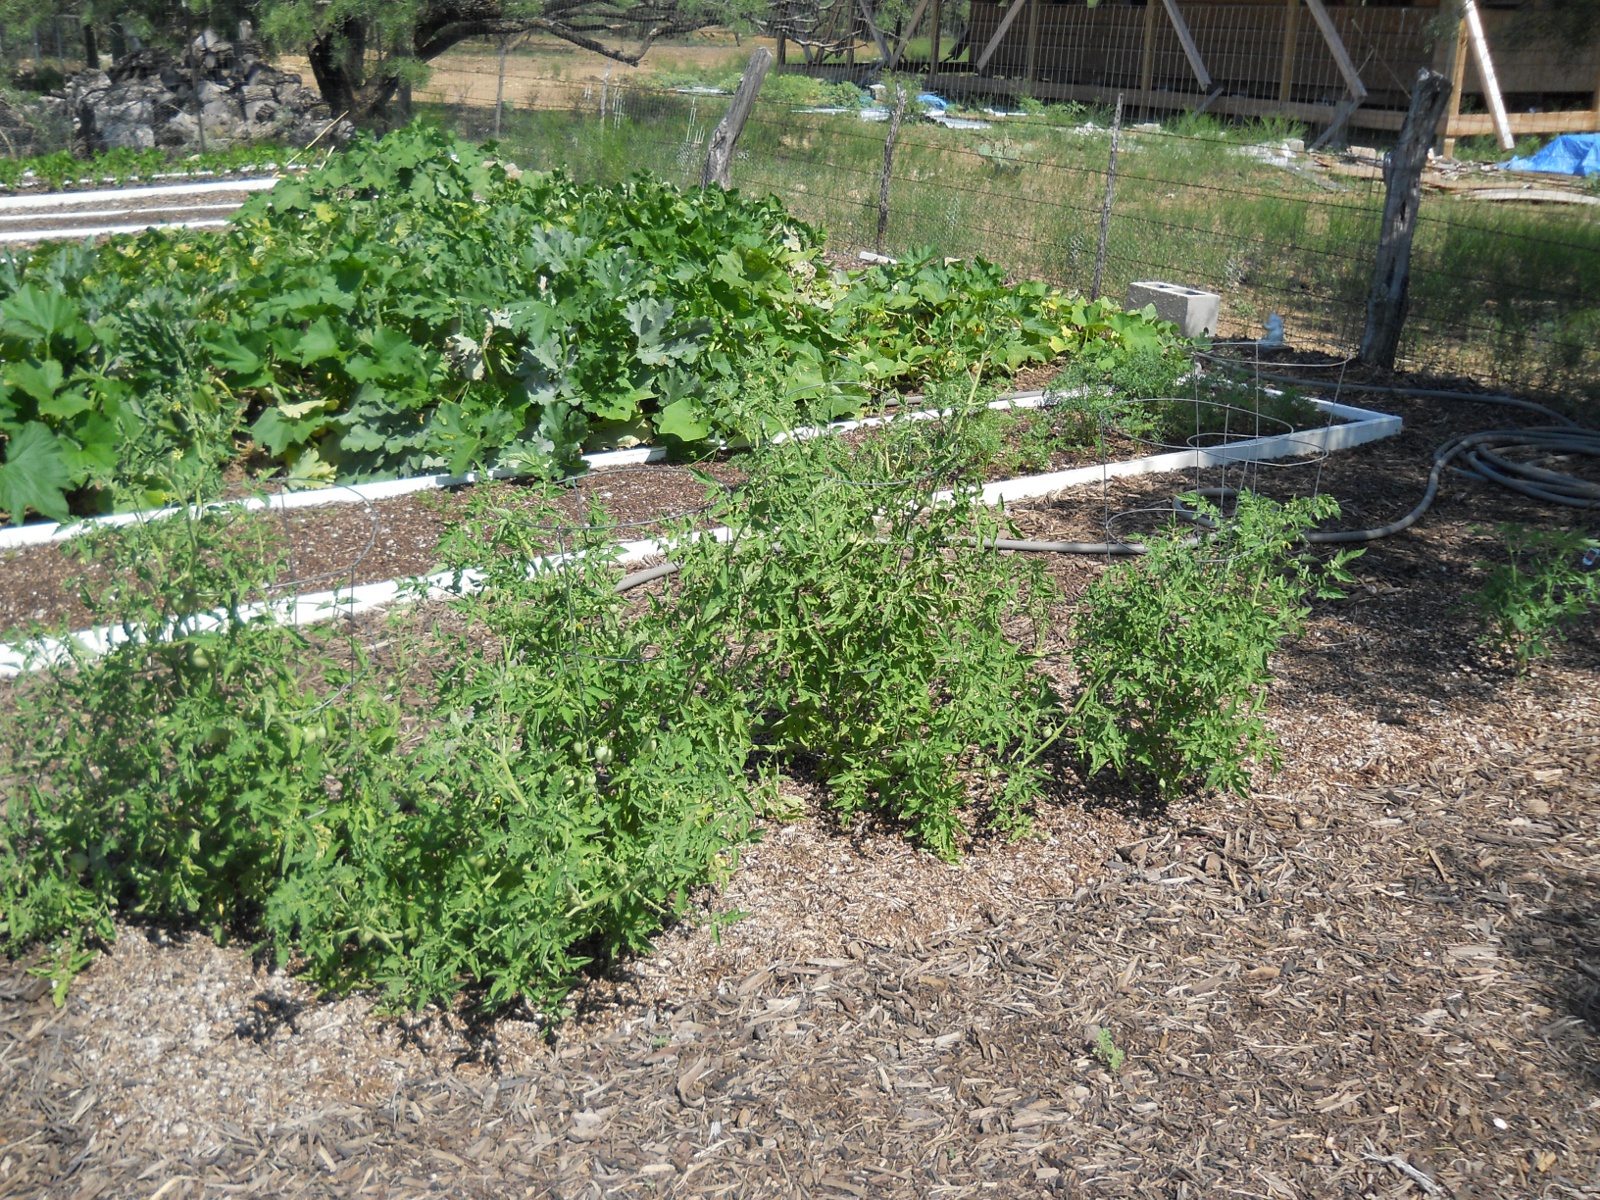
And here are the tomato plants. We’ve had a decent amount of tomatoes come from them throughout the summer, although they ended up being cherry tomato size…it could be due to the lack of rain, but I suppose I might have accidentally bought cherry tomato plants. 🙂 However, they’ve just started to blossom and start to show fruit again, so we are looking forward to those, if the Lord wills:

Spring Garden 2012 Late Summer Tomato Plants

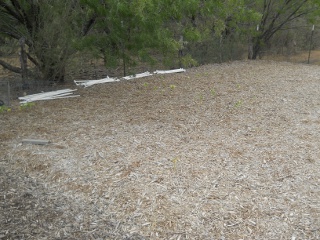
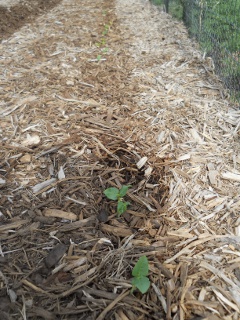
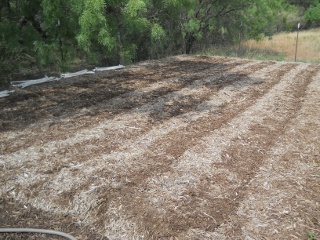
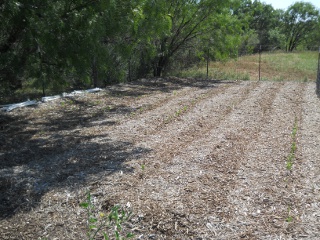
Finally, here is the mulch gardening bed I planted in black-eyed peas and I mentioned in our last garden update. I tried watering them for a while, but just couldn’t continue to spend the time or water resource on them. There are a few there, but I don’t believe we’re going to see any beans from them:

Spring Garden 2012 Late Summer Black-Eyed Peas in Mulch Gardening Bed

We are very thankful to the Lord for granting the provisions for the garden and provisions from the garden this year, and we pray for those continued through the fall, according to His will.

— David

The Orchard – 2012 Harvest

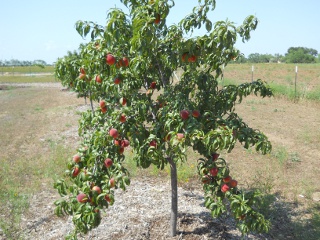
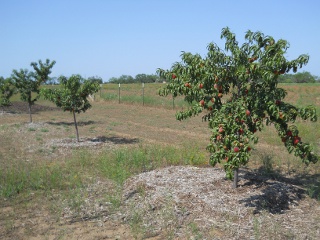
Orchard 2012 Nectarines on Tree

After last year’s drought, we didn’t really get anything in the way of fruit from our orchard, other than the few I mention in that blog post.

However, this year, the Lord saw fit to grant us quite a few peaches, plums and nectarines!

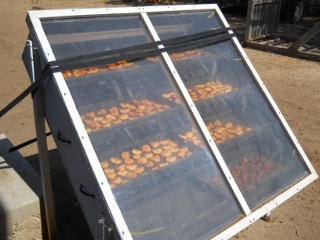
Here are some peaches cut up on the solar food dehydrator:

Orchard 2012 Peaches Cut Up on Solar Food Dehydrator

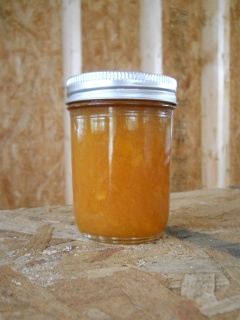
And here is some peach jam Sue made, ending up with about 12 1/2-pints worth:

Orchard 2012 Peach Jam

Some time later, the nectarines started coming in. The first picture above and this one are the nectarines:

Orchard 2012 Nectarine Trees

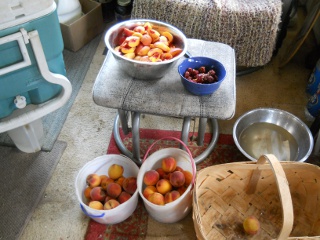
And here are some of them cut up (along with some plums in the bucket), ready for the dehydrator:

Orchard 2012 Nectarines and Plums

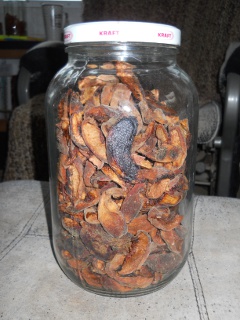
And here is some of the dried fruit. We ended up with around three large containers full:

Orchard 2012 Dried Fruit

Sadly, with drought conditions returning this summer, it looks like we’re starting to lose a few of the trees again, even after putting large piles of mulch around them. But, we’ll see how many make it in the end, and we pray for the Lord’s mercies on the rest of the trees, and rains to recover, according to His will.

We’re very grateful to God for granting this perennial food this year, and for allowing us to tuck it away for long-term storage without the use of worldly means of food preservation.

— David

Garden – Spring 2012 – Update I

After our garlic was harvested this year, I had planned to replant those beds with black-eyed peas we had harvested from Mr. Bunker’s field a couple of years ago, because late spring is about the time to start planting them, and they work well in the heat.

But, the garden beds needed to be prepared with some new soil. We’ve recently started using mulch for actual garden beds, but, even though the mulch we get has composted dirt in it, it also has too many larger wood chips; and so, other folks around here have been sifting their mulch to remove those larger chips; and I decided to follow suit.

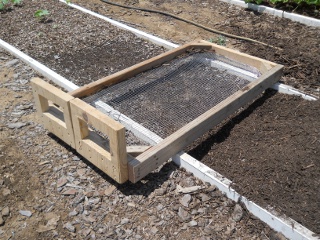
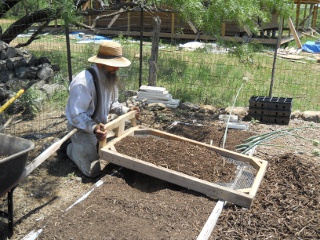
Here is the mulch sifter I put together with scrap stuff I had laying around:

Mulch Sifter

And here I am doing the sifting:

Sifting Mulch

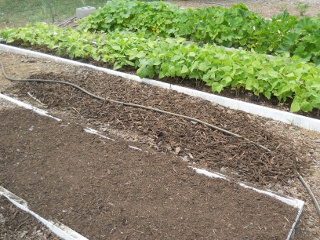
Here, you can see the results in the raised bed; and the left-over wood chips can be used for walkway covering:

Mulch Bed and Walkway Mulch After Sifting

And here are the black-eyed peas growing after being planted!

Sifted Mulch Bed Black-Eyed Peas Growing

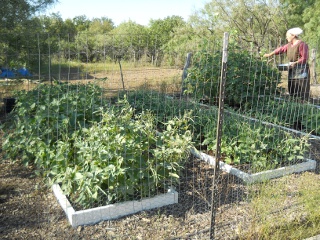
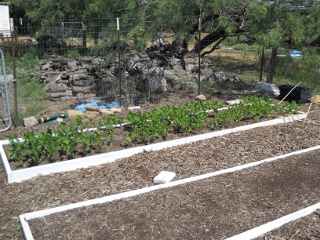
So, going around the horn, here is how the garden now looks….

This is the okra:

2012 Okra

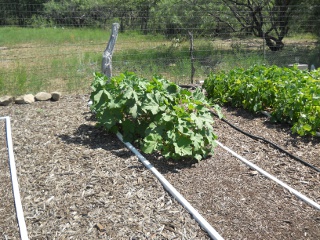
And the green beans (in the front bed) and the squash and zucchini (in the bed in back):

2012 Green Beans, Squash and Zucchini

And the tomatoes (in the front bed) and the carrots (in the bed in back). Usually, our carrots do really well; but for some reason this year, not too many grew. I did try planting a little scarcely, because usually the carrots are very packed and smaller; and I ended up trying to replant a couple of times too; but it just wasn’t to be this year:

2012 Tomatoes and Carrots

Now, in that previous blog post above about the new mulch gardening, one of the folks here had already tried planting in their mulch-gardening area with some success; so I thought I’d give it a whirl too, to see if anything might grow. I planted some more of the black-eyed peas in half a row as a test case, and lo and behold they started growing!

Mulch Gardening/Eden Black-Eyed Peas Growing

With those results, I went ahead and planted the whole area:

Entire Mulch Gardening/Eden Bed Planted with Black-Eyed Peas

And here, if you look closely (you probably have to click the image), many of them have started to grow too:

Black-Eyed Peas Growing in Mulch Gardening/Eden Bed

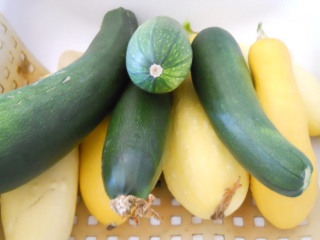
Here is some of the produce the Lord has graciously granted:

Squash and Zucchini from the Garden

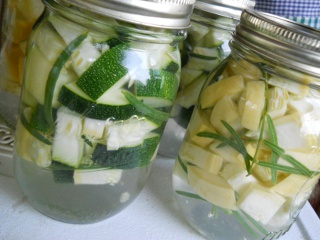
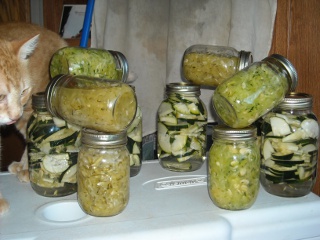
Instead of pressure canning it, we’ve wanted to try to use the more healthy preservation method of lacto-fermentation. Here is some squash and zucchini in a brine solution, with some mesquite tree leaves that are supposed to help keep the vegetables crunchier:

Lacto-Fermenting Squash and Zucchini

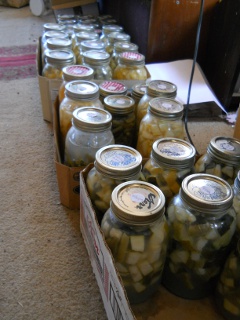
And here is our lacto-fermenting section in the camper. We initially put the jars down in the root cellar, but the lacto-fermenting process actually needs a warmer environment to process correctly. Also, the vegetables would float in the brine. And so, we figure with the combination of the cooler temperatures of the root cellar, and the floating vegetables, they started to mold on top. Well, we picked off the moldy pieces from off the top, brought them into our very warm camper, tried weighing the vegetables down but didn’t find a good way to do that, and instead began to turn the jars upside down and then back right side up every 12 hours, burping them at the same time (to release the gas build-up from the lacto-fermenting process):

Lacto-Fermenting Garden Produce

Once again, we are very thankful to God for the provisions from the garden He has granted, and for the processes He built into His creation to preserve the produce without man-made methods of preservation (like canning, which destroys nutrients, or freezing, which causes dependence on the world for electricity and freezers).

— David

Meat Dryer – Update I

In a previous blog post, I showed a meat dryer I had put together. This was for the purpose of brining and drying meat as a method of food preservation that didn’t require freezing or canning. We are always looking for ways to do this, as freezers and canners require dependence on the world systems for continuing supplies (fuel, electricity, parts, etc.).

The final picture of that blog post showed meat from one of our Longhorn bulls that had been butchered hanging and drying.

After a few weeks, at which time the meat looked about dry, I had collected the meat off of the dryer and put it in a plastic bucket and covered it, just as a place to contain it as I wasn’t exactly sure what to do with it (we’ve never processed meat like this before, you know 🙂 ). Well, since it was in plastic, which doesn’t breathe, I was a little worried that moisture, which is a seedbed for bacteria, had got in the bucket perhaps; and so I put the pieces back on the dryer again for a couple more weeks (they probably didn’t need to hang that long — I sort of just left them out there). This actually seemed to dry them out further.

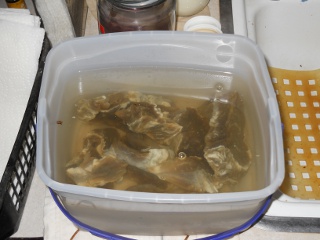
And then, all that was left, was to try out the goods! We soaked them in water for 24 hours, as after 12 hours the meat still wasn’t very pliable. Even after 24 hours, they weren’t much more softened; but I didn’t want to leave them out in the open in water like that too much longer for fear of bacterial growth, although the water was probably somewhat salty, which perhaps would have prevented any problems:

Meat Dryer Dried Meat Soaking in Water

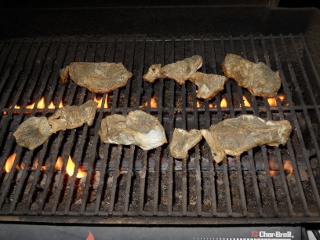
And then I cooked them on the grill:

Meat Dryer Dried Meat on Grill

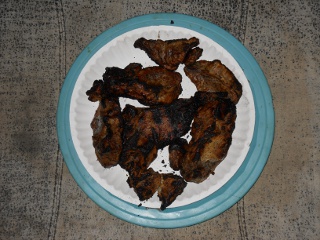
And here they are all cooked:

Meat Dryer Dried Meat Cooked and Ready

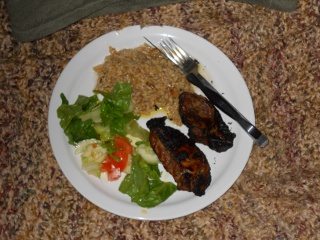
And here is the meal that Sue prepared for it:

Meat Dryer Dried Meat Ready to be Eaten

Drum roll please….

Well, obviously by the fact that I’m writing this, we didn’t die, which we thought was a plus on the whole experiment. 🙂 (Did I mention we’ve never preserved meat like this before, and being so colonized in our thinking that things MUST be frozen to keep, it was hard not to worry.)

At any rate, it was a little dry and a little tough to chew, but just tasted like well-done steak. It wasn’t salty, was certainly palatable, and except for the chewiness, was pretty good actually.

It did seem to stop up “the system” a little, but shortly things “moved” along as normal.

All in all, it wasn’t too bad, for meat that had never been processed the way the world says to do it. Perhaps we’ll try soaking it in a meat-tenderizing marinade the next time, Lord willing. Anyone have any recipes?

We are very grateful to the Lord for granting the knowledge of this food preservation method; His creation that graciously allows for the survival of man (eg. salt killing bacteria); His granting of a successful experiment in living according to His order of things; and for this step away from the world, we pray, as unto Him, for His glory.

— David

Meat Dryer

In continued efforts to separate from the world, unto God, one of the things that keeps us currently tied to it is how we process the meat after butchering the animal. At this time, we typically fire up the freezer, running off the generator, and then Sue pressure-cans it all. Processing the meat this way has two main problems: 1) running a generator and an electrical appliance, both which require ongoing maintenance and can break; and 2) using a canner, which also can require maintenance, and for us requires propane. Now, one can pressure-can using a wood burner; but it’s apparently not very easy to do correctly; and still, the canner can lose parts or require replacement ones.

And so, how was it all done before there were these things we use today? Or even, how is it done by people today who don’t have them either?

If you’ve studied this at all, you’ll know that salt is typically used for preserving meats; but what do you do with it after that, especially when dealing with larger quantities of meat? Again, with further study, even today, especially in countries where freezers, etc. aren’t available, the meat is hung in the wind to dry — the air helping pull out the moisture — the seed bed of bacteria — out of the meat. And this can be done any time during the year.

Excellent!

And so, I wanted us to start heading down this direction. With all of the insects we have during the warmer months, I really wanted our place of drying to be enclosed in some way; but in looking for ideas on the Internet, there really weren’t many I could see — it appears in the countries where they process meat like this, they just simply hang it up in the open air. Still not really wanting to do that, I started to try to put a design together myself. And so, the plan was to have something that had removable doors, was screened in, and allowed the hanging of lots of meat of all different lengths.

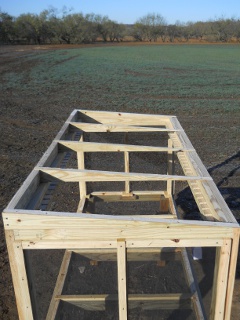
Using left over sections that were cut off from our house porch posts, I made a base frame using them and treated 2x4s. The overall plan was to use as little wood as possible, being able to fit the dryer’s frame under one piece of plywood as a roof, allowing for a little bit of roof overhang all around. I had originally thought about making a large dryer, but then figured I wouldn’t use that many more materials if I made multiple dryers instead as needed, and they would be somewhat portable:
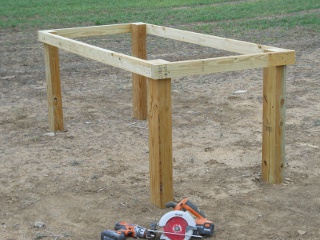
Meat Dryer Base

And then added the main frame and bottom frame joists:
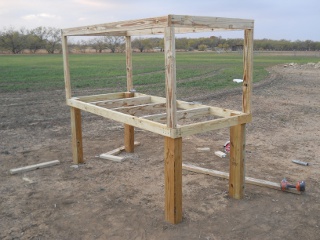
Meat Dryer Main Frame

And I planned for the removable doors to fit inside a frame, which is shown here:
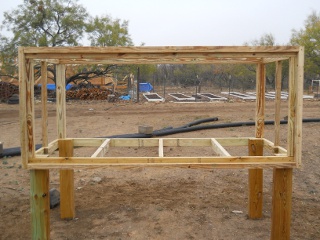
Meat Dryer with Screen Door Frame

Here is the bottom of the meat dryer with the screening in place:
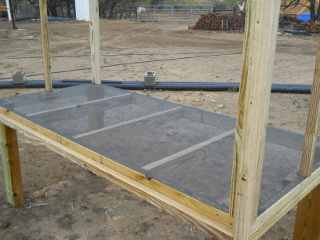
Meat Dryer Screened Bottom

And frame strips in place to hold on the screening. The strips are made by ripping the 2x4s into 4 strips each and then cutting to size. They are held by screws, as I wanted to be able to remove them to replace the screening if necessary. I also cut them to size to run counter to the bottom frame/joists connections (the strip would overlap where the joist butted up to the frame), to make it stronger; but next time, for expediency sake, I may place them in the same directions as the frame and joists:
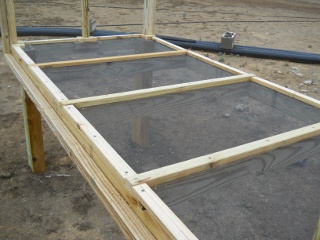
Meat Dryer Screened Bottom with Frame

I thought to use rebar on which to hang the meat hooks. I was going to hang rebar from wires that were hanging from the roof rafters; but one of the men here suggested I take a 2×4, drill holes along it, rip it in half, and us the half circles as the rebar holders. Great idea!
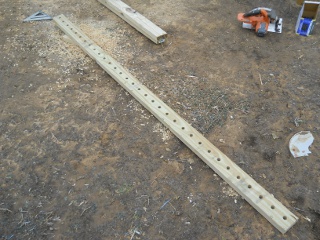
Meat Dryer Rebar Holder Before Being Ripped in Half
Meat Dryer Rebar Holder in Place

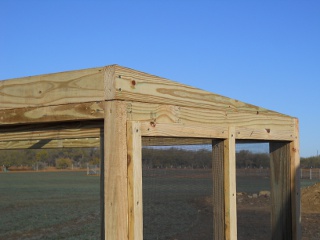
Here are the roof rafters and blocks in place:
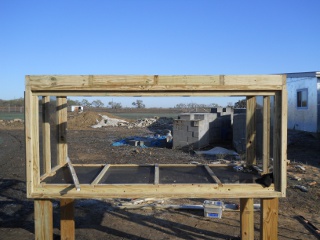
Meat Dryer Roof Rafters/Blocks, Front View
Meat Dryer Roof Rafter/Block, Side View
Meat Dryer Roof Rafters/Blocks, Top View

With the bottom screening in place, the one thing I told myself was, “Do not drop anything on it.” Well, that didn’t last too long:
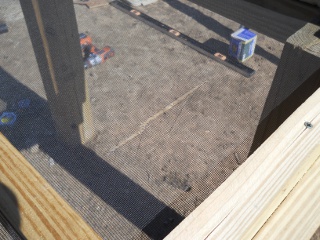
Meat Dryer Hole in Bottom Screening

Oops. It was the thin corner of the roof rafter that got away from me. And so, I caulked it:
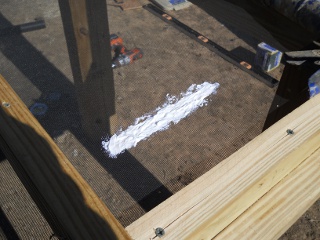
Meat Dryer Hole in Bottom Screening, Caulking Applied

And here it is pretty much dry. I purposely designed everything (with screws, etc.) so that I could fairly easily replace the screening if I ever need to:
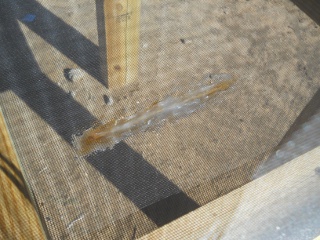
Meat Dryer Hole in Bottom Screening, Dry Caulking

With Gary, the goose we use to have, being gone and no longer able to supervise as foreman, our cat, William, has apparently taken over:
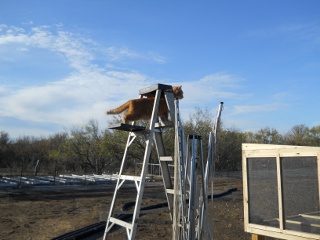
William the Cat Supervising Meat Dryer Construction

Here is the first frame of the removable screen door with the screening stapled in place:
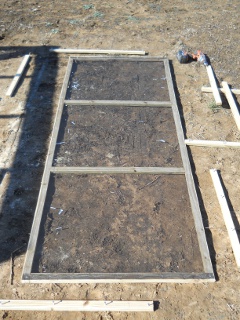
Meat Dryer Screen Door Screening in Place

And then the other frame pieces were placed on top a piece at a time, secured with wood screws, in pilot holes:
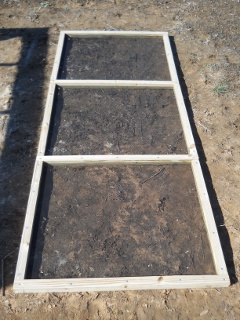
Meat Dryer Screen Door Full Frame in Place

Each frame piece was cut to overlap the pieces of the other frame (like the strips over the bottom frame joists):
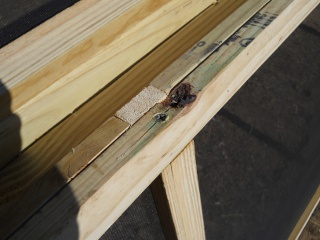
Meat Dryer Screen Door Full Frame in Place

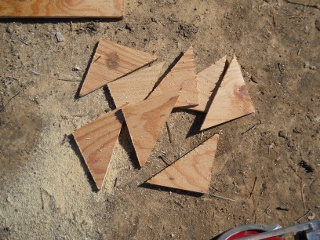
I wanted to make sure the door was fairly square and a little stronger, and so I thought to add plywood corners. Here is a scrap piece of plywood, marked for cutting the corners:
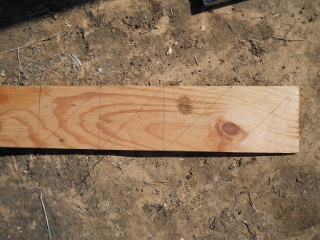
Meat Dryer Screen Door Plywood Corner Braces Marked Before Cuts

And then with the corners cut:

Meat Dryer Screen Door Plywood Corner After Cuts

And here is the removable screen door in place on the dryer, showing the corners attached, handles in place, and wood latches on top and below, holding it in place:
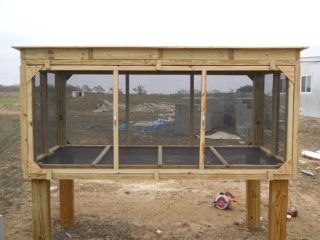
Meat Dryer with Screen Door and Screen Door Handles, Corners, and Latches in Place

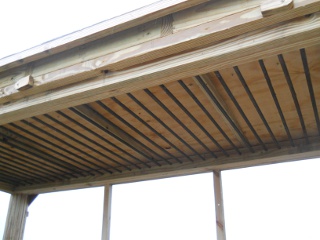
Here’s a picture of the plywood roof in place:
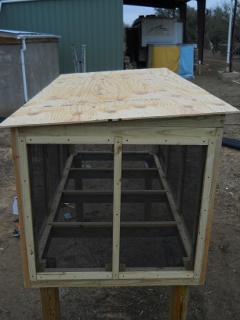
Meat Dryer Plywood Roof

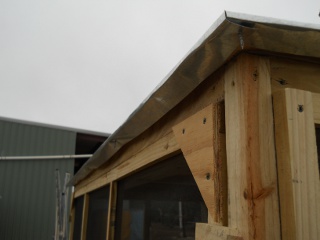
I decided to use flashing for the roof:
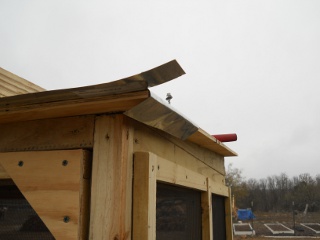
Meat Dryer Installing Roof Flashing
Meat Dryer Roof Flashing, Two Sides
Another Angle of Meat Dryer Roof Flashing, Two Sides

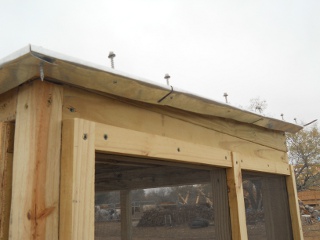
On the low side of the roof, I had to move the screen door latch to the side, because I had planned to attach strips of wood under the overhang that the grommeted screws would attach to (which would also help hide the screws so they wouldn’t become a skin or clothing hazard):
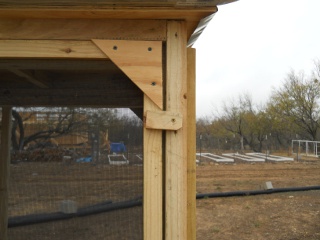
Meat Dryer Screen Door Latch Placement for Low Side of Roof

And here is the roof with the flashing installed:
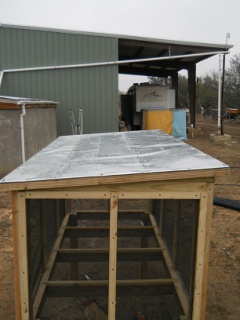
Meat Dryer Roof Flashing Installed, Top View

And here are the flashing overhang supports/screw covers:
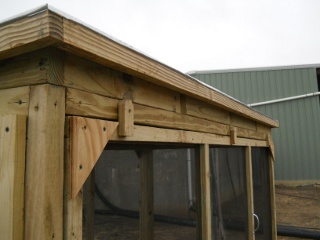
Meat Dryer Roof Flashing Supports

Here are the rebar hangers in place:

Meat Dryer Rebar Pieces in Place

And some meat hooks bent in shape. I used a coat hanger, cutting the ends to be pointed, and I sanded the paint off. I needed an extra one after the coat hanger was used, and so I thought to use a piece of galvanized electric wire, because it appeared the coat hanger hooks were rusting some. In the end, I might need to have stainless steel ones:
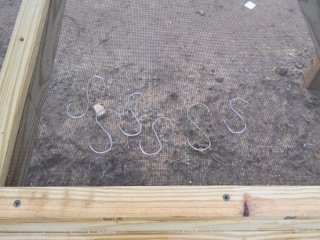
Meat Dryer Meat Hooks

Here they are hanging from the rebar:
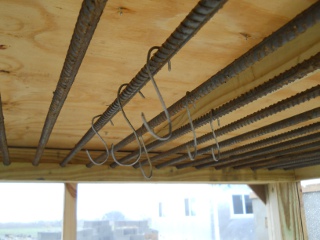
Meat Dryer with Meat Hooks Hanging

I initially had the meat dryer facing broadside to the north and learned the hard way that the dryer wasn’t very aerodynamic — a strong wind not only tipped it over, but flipped it upside down. Nice. So, I turned it to be long-ways north and south and staked the legs to the ground:
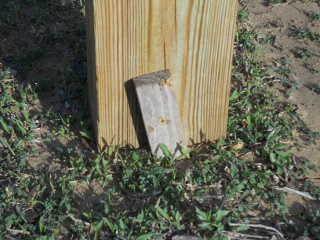
Meat Dryer Leg Staked to the Ground

And finally, voila! Brined/spiced meat hanging in the meat dryer!
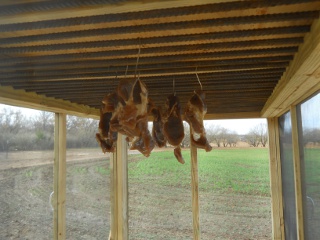
Meat Dryer with Brined/Spiced Meat Hanging

We’re still waiting for it to finish drying; and Lord willing, we’ll report on that process at a later time.

We are grateful to the Lord for His provisions, and showing us how to handle those He’s given us in a way that He has invented (with salt and air) instead of using man’s enslaving methods.

— David
End of the Garden Tomatoes (Red and Yellow, Green and Bright, They Are Precious in Our Sight)

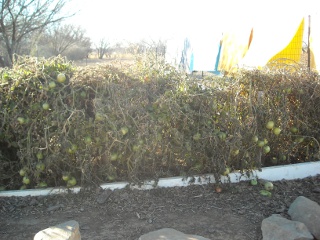
Our 2010 Spring garden was faced with much adversity, in that, it was plagued with grasshoppers and overcome by drought. We had very few tomatoes to harvest over the entire Spring and Summer months. But thank the Lord for His graces and mercies: come Fall, the grasshoppers began to die out, cooler temperatures came, and God sent a couple of good rains. We were thrilled when we started to see flowers start to bloom and eventually grow fruit all over our six, overgrown, previously empty, tomato plants:

Spring Garden 2010 Fall Tomato Crop on the Vine

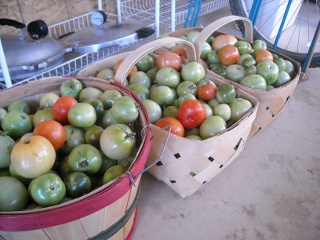
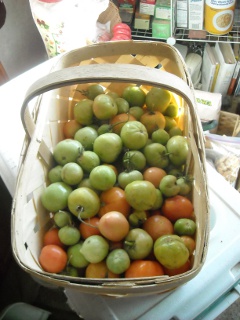
As Autumn progressed, we started to put blankets over the tomato plants but could tell they were probably not going to be able to ripen on the vine with the prevalent cooler weather patterns. I was able to harvest three large baskets of unripened tomatoes and put them in our summer kitchen building:

Spring Garden 2010 Fall Tomatoes in Baskets

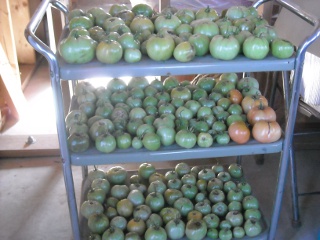
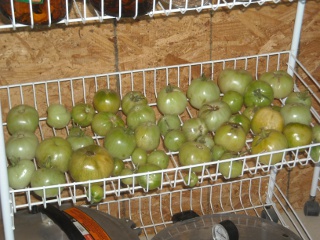
I knew they would rot if I left them as-is in the baskets, so I spread them out wherever I could find room. Here…….

Spring Garden 2010 Fall Tomato Crop on Rolling Cart Shelves

Here……

Spring Garden 2010 Fall Tomato Crop on Another Rolling Cart Shelf

And more here!

Spring Garden 2010 Fall Tomato Crop on Table

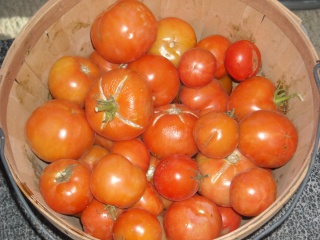
I checked on the tomatoes pretty much daily and grabbed the ripened ones to use in salads, sandwiches and other dishes. Man, there is nothing like the taste of a garden tomato! I had to keep a close eye on them because they can rot when you blink! And if they are touching in any way, it seems the rotting can be contagious. Our pigs ended up eating their share of rotten tomatoes, but at least they didn’t go to waste:

Spring Garden 2010 Fall Tomatoes Ripened in Basket

When I had a goodly amount of ripened tomatoes, I went ahead and preserved them by making some tomato-apple chutney. Yum! For anyone who is interested, here is the easy recipe from the Ball Blue Book of Preserving:

Tomato-Apple Chutney (yields about 6 pints, but you will probably yield more if you are generous with the ingredients)

2 1/2 quarts (about 12 large) chopped, peeled, cored tomatoes (I did not peel or core mine)
1 quart (about 5 medium) chopped, cored, peeled apples (I did not peel mine)
3 cups brown sugar
2 cups (about 1 large) chopped cucumber
1 1/2 cups (about 1 1/2 medium) chopped onions
1 1/2 cups (about 2 medium) chopped sweet red peppers
1 cup raisins
1 hot red pepper, finely chopped (I used a jalapeno pepper)
1 clove garlic, minced
1 tablespoon ginger
1 teaspoon salt
1 teaspoon cinnamon
3 cups vinegar (I used apple cider vinegar)

Combine all ingredients in a large sauce pot. Simmer until thick. Stir frequently to prevent sticking. Ladle hot chutney into hot jars, leaving 1/4-inch head space. Remove air bubbles. Adjust two-piece caps. Process 10 minutes in a boiling-water canner. (Be sure to check for any time or weight adjustments based on altitude)

(Recipe variation: For a milder chutney, remove seeds from hot pepper)

(Note: When cutting or seeding hot peppers, wear rubber gloves to prevent hands from being burned)

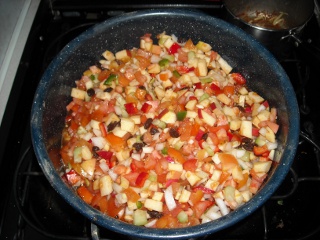
Here are all the ingredients combined and ready to be simmered:

Tomato-Apple Chutney Ingredients Ready for Cooking

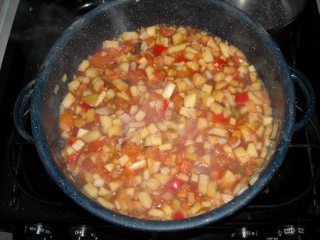
And here it is after simmering, ready to be poured into clean, hot canning jars.

Tomato-Apple Chutney Simmering in Pot

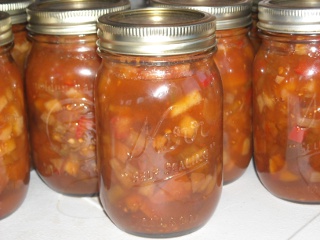
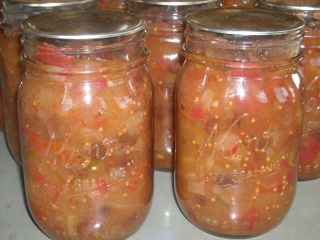
I have found chutney is really tasty with rice dishes, as a garnish or topping to meat or anything to which you want to add a sweet/sour savory tang or “pizazz.” I am thankful to have found these chutney recipes to assist in preserving many of our garden veggies and orchard fruits:

Tomato-Apple Chutney Preserved in Jars

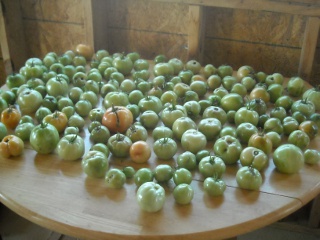
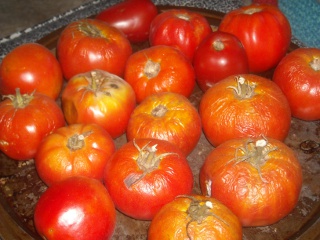
There came a point in the Winter where the rotting was increasing and the ripening was taking a long time, so I decided to attempt lactic fermentation with the remaining green tomatoes:

Spring Garden 2010 Fall Tomatoes Unripened

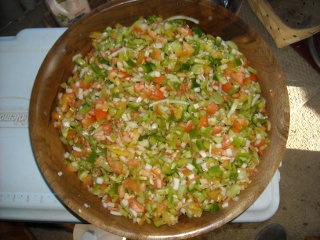
I combined the green tomatoes, chopped onion, chopped garlic and chopped green peppers (I think those are all the ingredients I used). You can put most any combination of garden veggies together for lactic fermentation:

Spring Garden 2010 Fall Green Tomatoes and Vegetables Chopped Up for Lacto-Fermentation Preservation

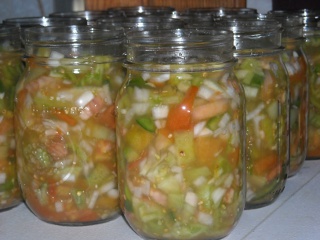
I put it raw in canning pint jars, along with two teaspoons of canning salt in alternating layers, and filled the jars to within one inch head space with water. Then I put the tops on and……..that’s it! Lastly, I placed them down in the root cellar. Over the course of days to weeks, it develops that tangy fermented taste that is sooooooo good for your gut. It actually makes a great salsa, and we also put it on our salads.

We thank God for His perfect timing in providing this late tomato harvest and for His faithful provision:

Spring Garden 2010 Fall Green Tomatoes and Vegetables in Jars for Lacto-Fermentation Preservation

Susan

Garden – Spring 2010 – Update I

You may be wondering why I’m talking about our 2010 Spring garden now instead of several months ago. Well, our garden seemed to have a mind and time line of its own this past year; and I just recently finished processing the last of our tomatoes. I plan to write a separate blog post on those but am just now getting down to chronicling the rest of the garden in an update. I figure for us gardeners, what better time to dwell on Spring, gardening, new growth and warmth than in the thick of Winter!

Onions

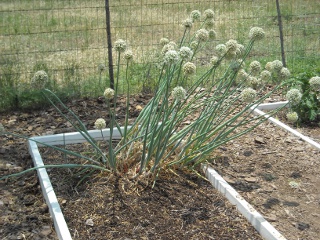
Believe it or not, these onion plant blossoms are from our 2009 Spring garden! But they have faithfully kept producing, so we decided not to pull them and continue to let them grow. The underground onion bulbs are rather small, but I have been able to pull and use them in many meals over the past couple of years:

Spring Garden 2010 Mature Onion Plant

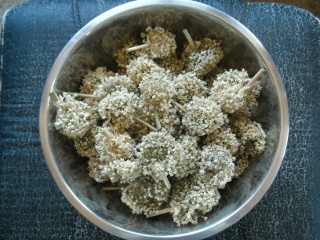
I clipped the plants down to the ground but left the bulbs in case they would continue to produce green onions (which they have as of this update). Here is a bowl full of the blossoms I am saving to plant again in our Spring 2011 garden to see if they will reproduce:

Spring Garden 2010 Onion Plant Blossoms

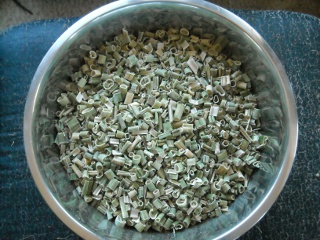
I cut up and dried the stalks in our solar food dehydrator, but they came out unusable in my opinion. I let them get too fibrous and leggy before picking them. Note to self: Don’t do that!

Spring Garden 2010 Dried Green Onions

Zucchini

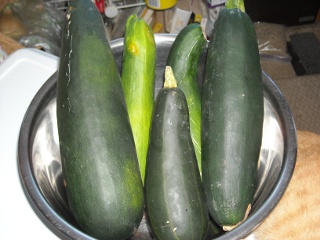
Due to a drought and large numbers of grasshoppers, our zucchini harvest was a fraction of the size of years past; but I picked these last few:

Spring Garden 2010 Zucchini Harvest

I decided to go the quick and easy lactic fermentation route and made some zucchini pickles and relish. I can’t believe how easy it is to preserve by lactic fermentation. You just add about two teaspoons of canning salt per pint in alternating layers with whatever vegetable you are using; fill the jar to about 1/2″ head space with water (preferably not tap water but distilled or filtered rain water); close with lid and move to a cool, dark place to ferment and develop those wonderful bacteria and enzymes for your gut and digestion. Once done, I put the jars all down in our root cellar. Due to our interest in zucchini, we traveled across the globe (ie: to the other side of our RV) to see the eighth wonder of the world, “Zucchini-Henge.” We were startled when we witnessed a rare sighting of the gargantuan feline monster on the left!

Spring Garden 2010 Zucchini-Henge

End of the Garden Pickles

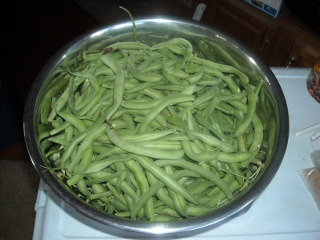
Here is our last harvest of green beans for the season. Since there weren’t that many, I decided to experiment with lactic fermentation with two pint jars full of beans, water and salt, combining the rest with other garden vegetables to make some “End of the Garden Pickles” from the recipe in the Ball Blue Book of Preserving:

Spring Garden 2010 Bowl of Freshly Picked Green Beans

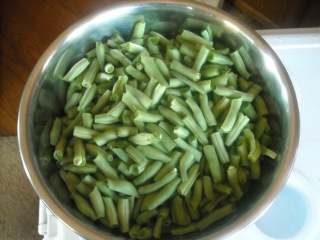
Here are the green beans all washed, cut and ready to go:

Spring Garden 2010 Bowl of Cut Green Beans

Can you find our freshly picked garden carrots in this picture packed with all things orange?!

Spring Garden 2010 Freshly Picked Carrots

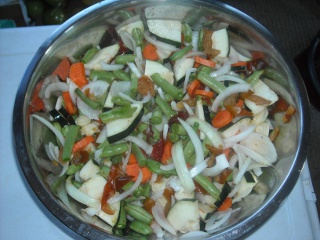
Here are all the ingredients ready to go for the “End of the Garden Pickles” recipe. In this batch I included green beans, zucchini, carrots, peppers and onions:

Spring Garden 2010 End of the Garden Pickles

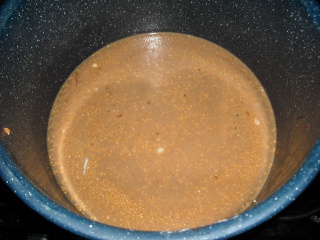
And here are sugars, spices and vinegar combined and ready to be mixed in with the vegetables:

Spring Garden 2010 End of the Garden Pickles Sauce

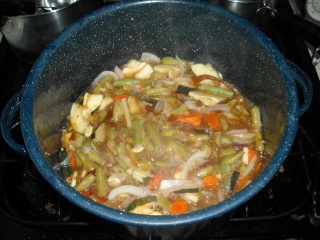
I brought the liquid to a boil and then added the vegetables and brought it to a boil again. Then I turned down the heat and let it simmer for about 15 minutes:

Spring Garden 2010 End of the Garden Pickles cooking

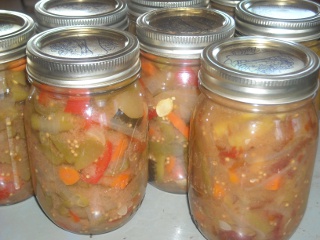
It was then ready to be ladled into hot jars and pressure-canned! How easy is that!

Spring Garden 2010 End of the Garden Pickles in Canning Jars

Tomatoes

Here are some tomatoes given to us by a neighbor. As I hinted at above, our own tomato crop didn’t produce until November, so we were very thankful to have received these:

Spring Garden 2010 Tomatoes

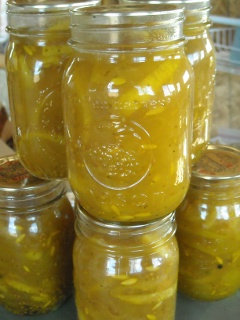
I decided to make some Sweet Yellow Tomato Chutney out of these tomatoes. All my chutney recipes so far are taken from the Ball Blue Book of Preserving. I think these recipes are top notch and delicious. A friend suggested putting some tomato chutney in with pasta sauce. I have done that many times and find it adds a delicious “tangy twist” to traditional pasta sauce:

Spring Garden 2010 Canned Tomato Chutney

Bread and Butter Pickles

Lastly, I honestly can’t remember where I got the cucumbers to make this batch of “Bread and Butter Pickles” (page 47 from the Ball Blue Book of Preserving). The cucumbers from our garden just did not do well, but someone must have given these to me, or I got them on sale or something. Another delicious recipe!

Spring Garden 2010 Canned Bread and Butter Pickles

Thanksgiving

We are thankful for this late harvest from our garden, and once again are very careful to thank our Creator for His direct provision. It is now Winter, and we have accessed and incorporated much of the above from our root cellar into our meals. We are also looking forward to the opportunity to do it all again this Spring, Lord willing!

Susan

« Older posts Newer posts »