Our journal of what we pray is our sojourn of life along the narrow way, even the old paths, submitting to the Bible as a light unto both.

Author: David & Susan Sifford (Page 67 of 96)

A Mulching We Will Go – Update I

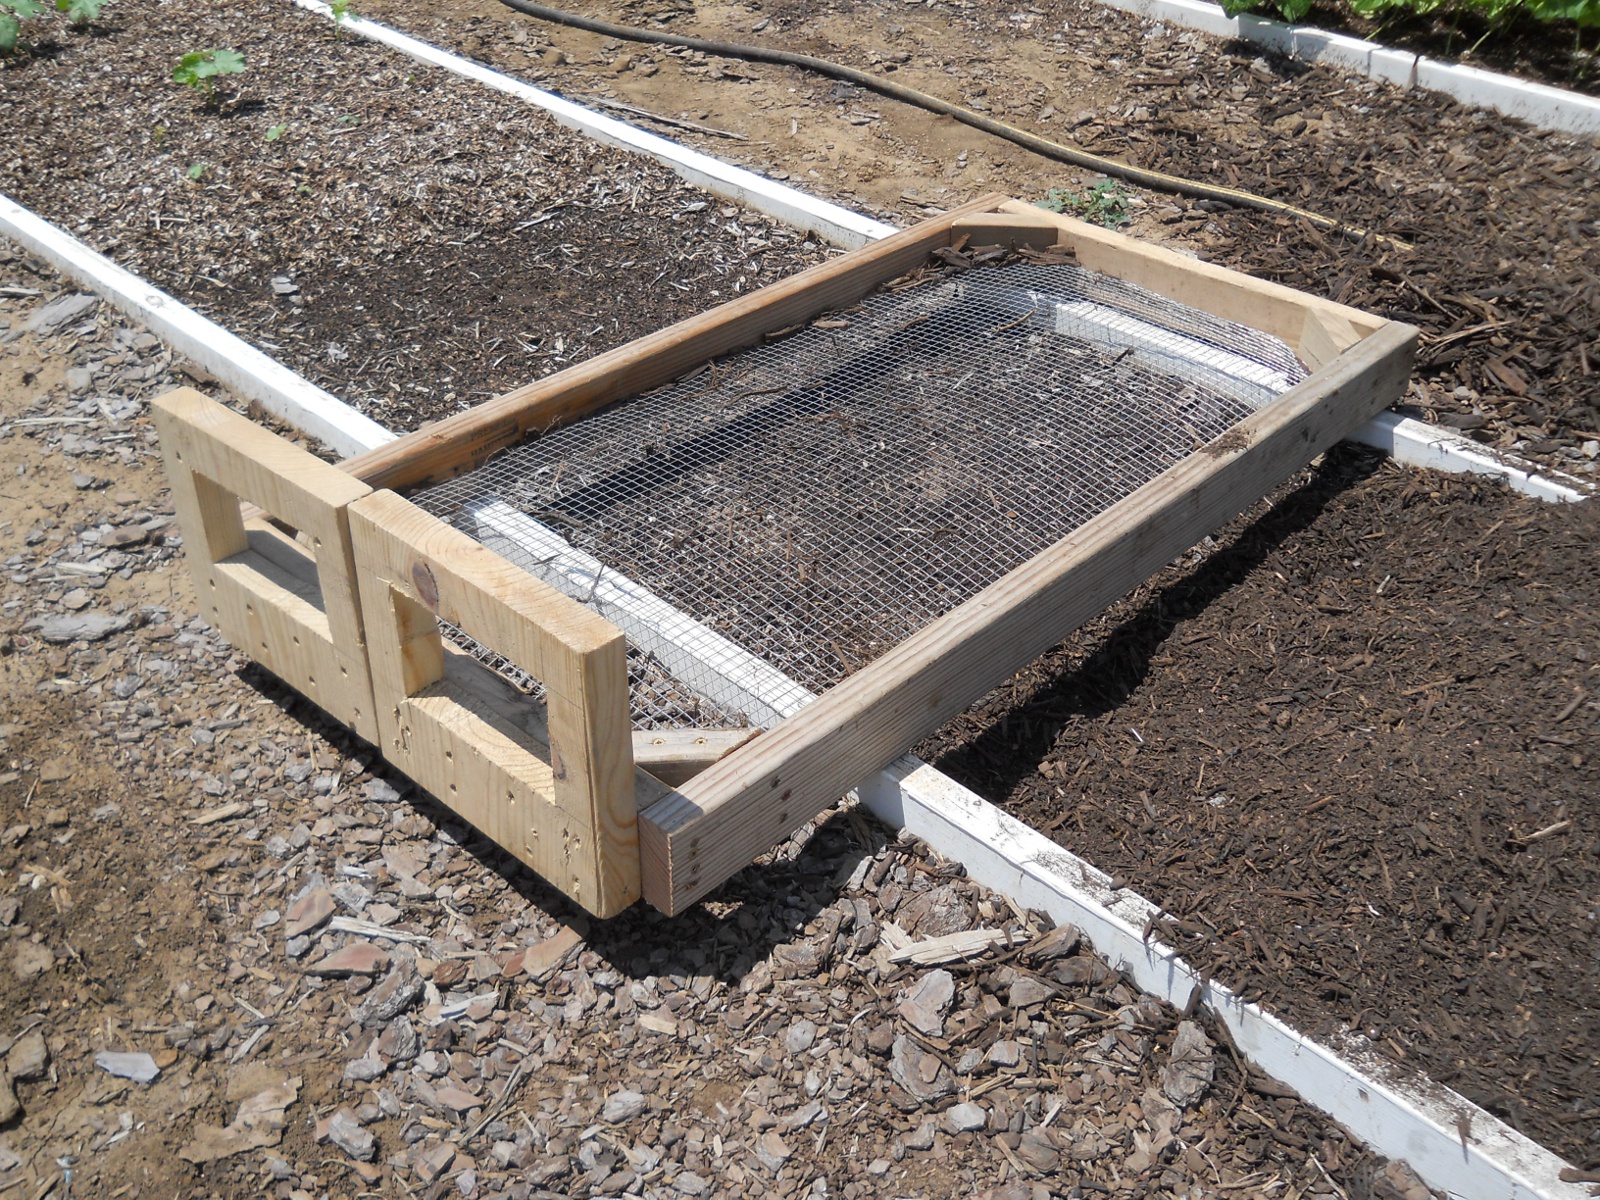
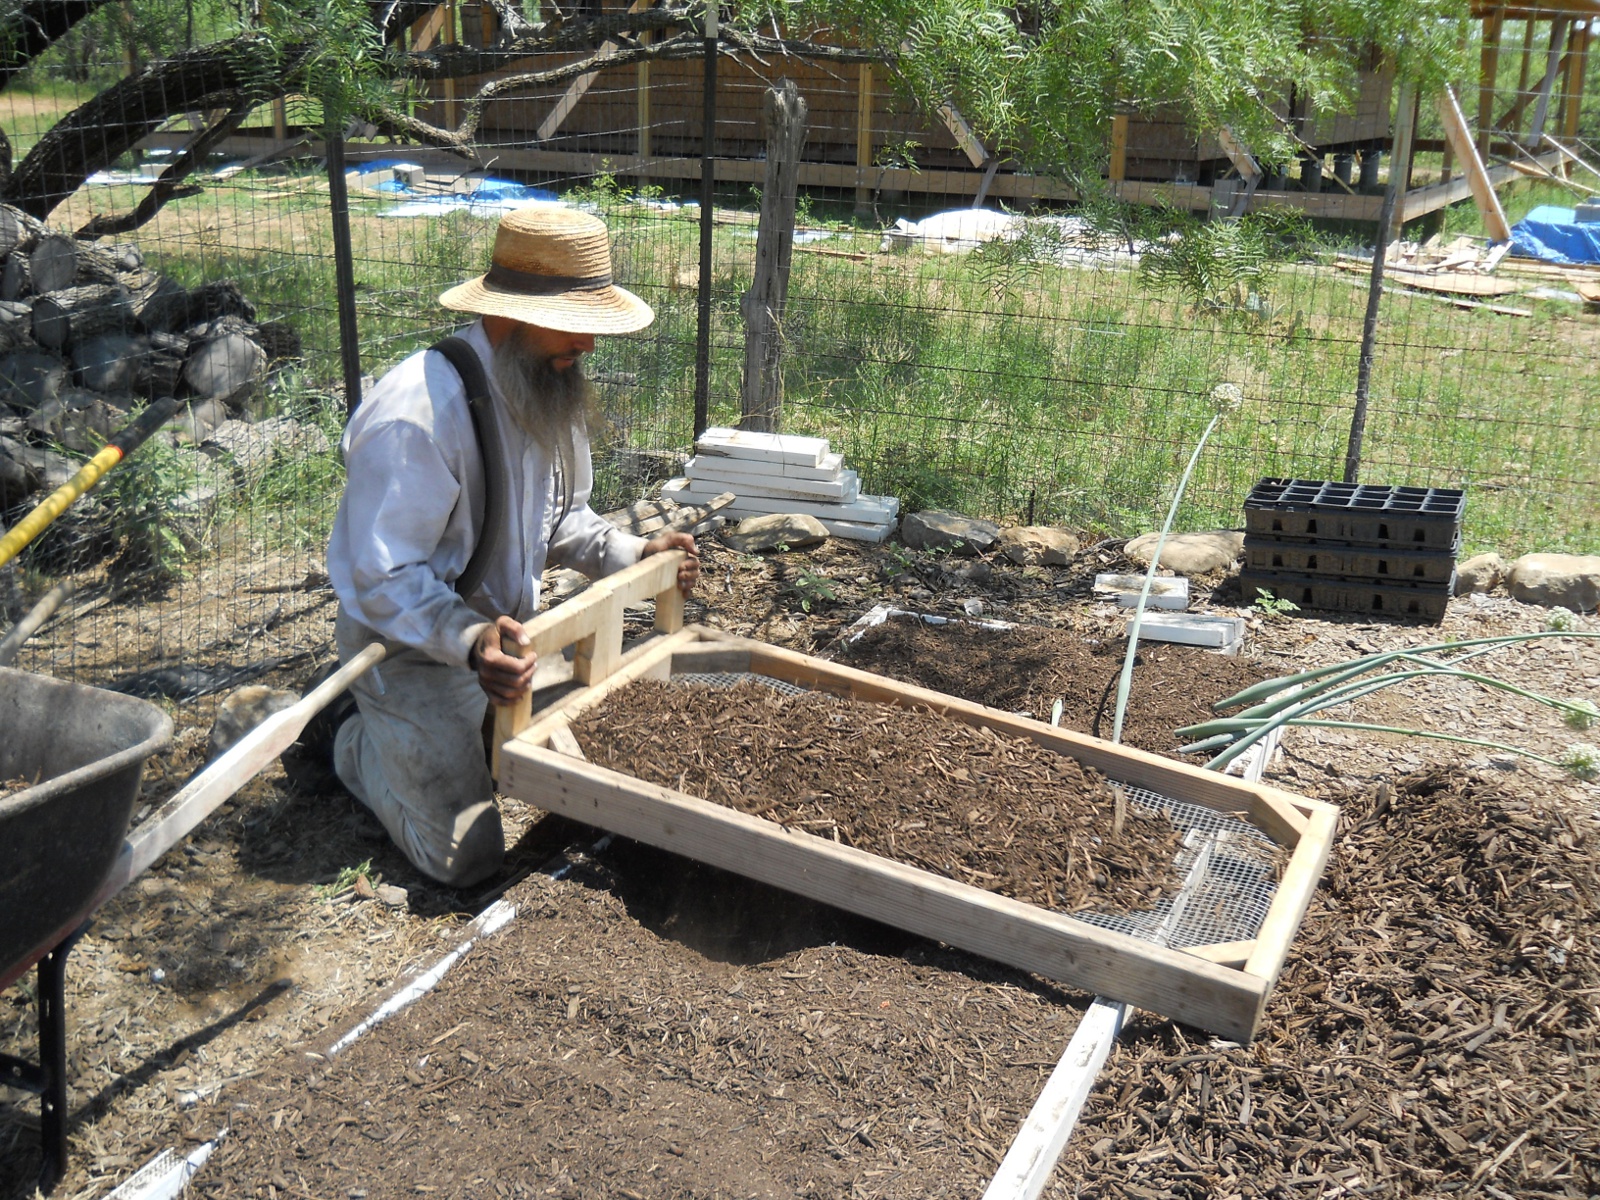
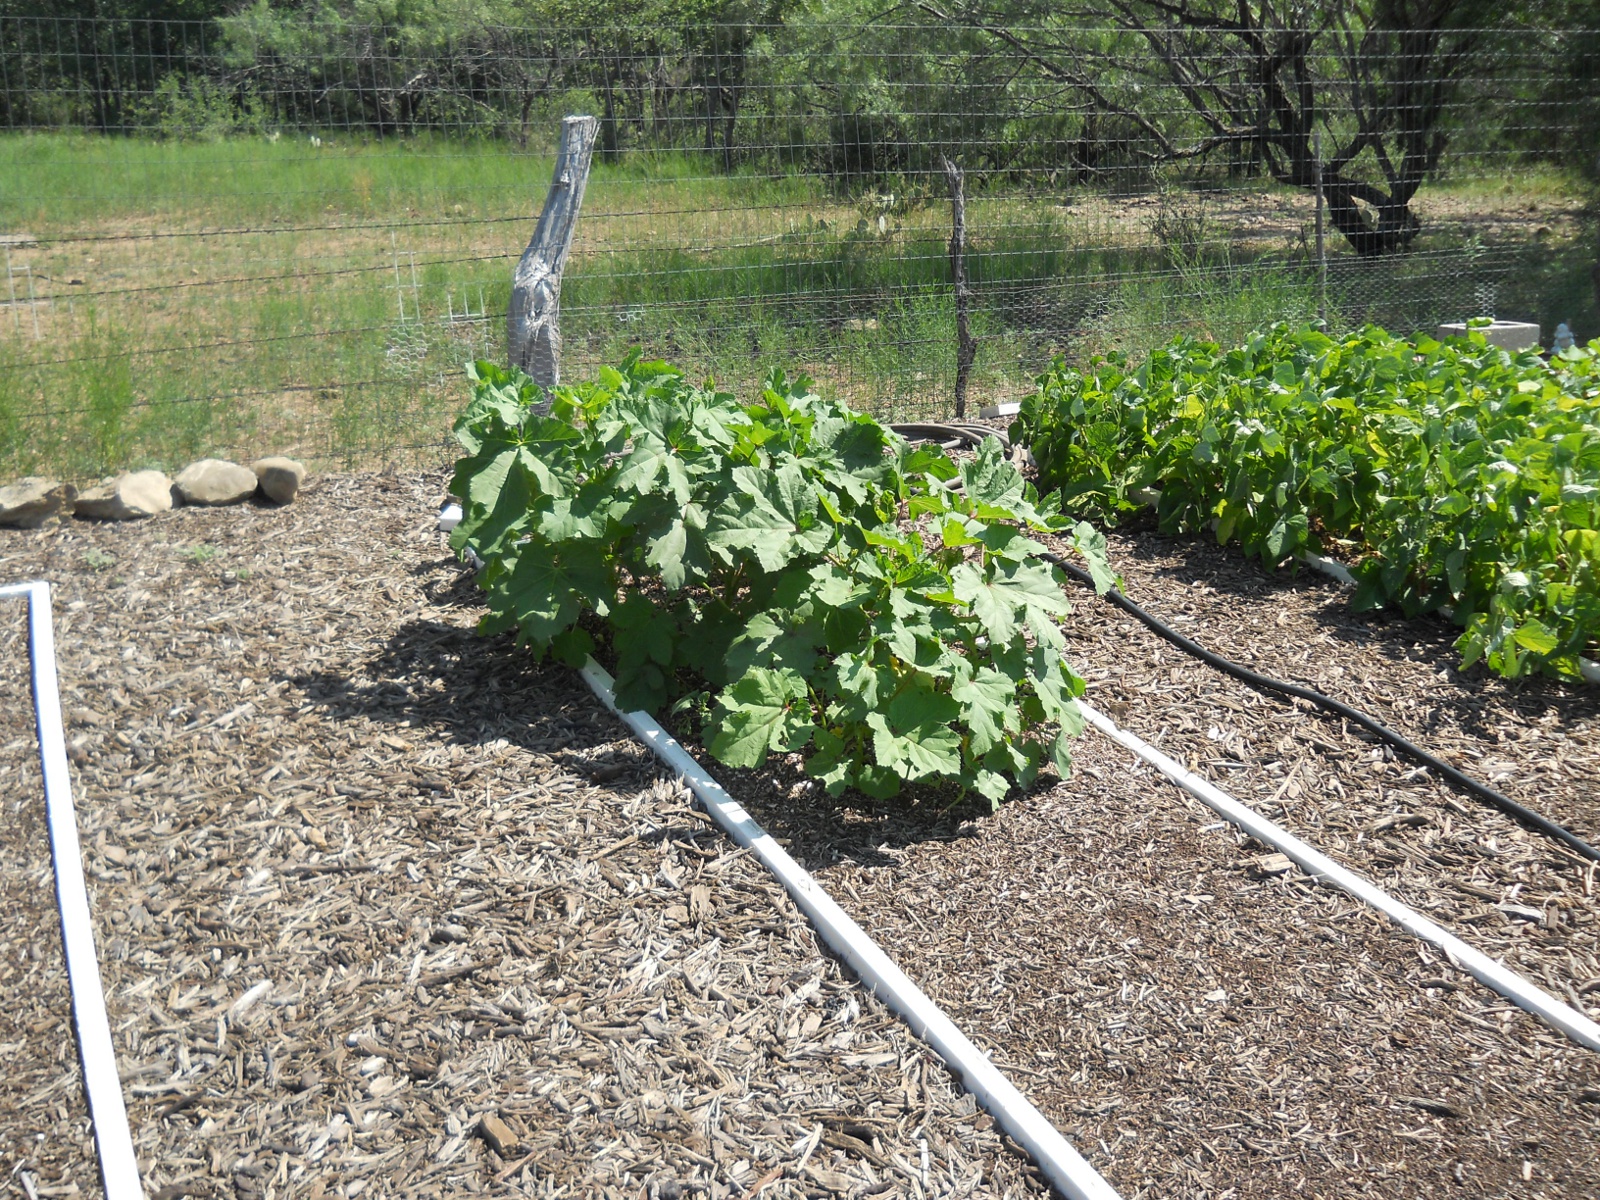
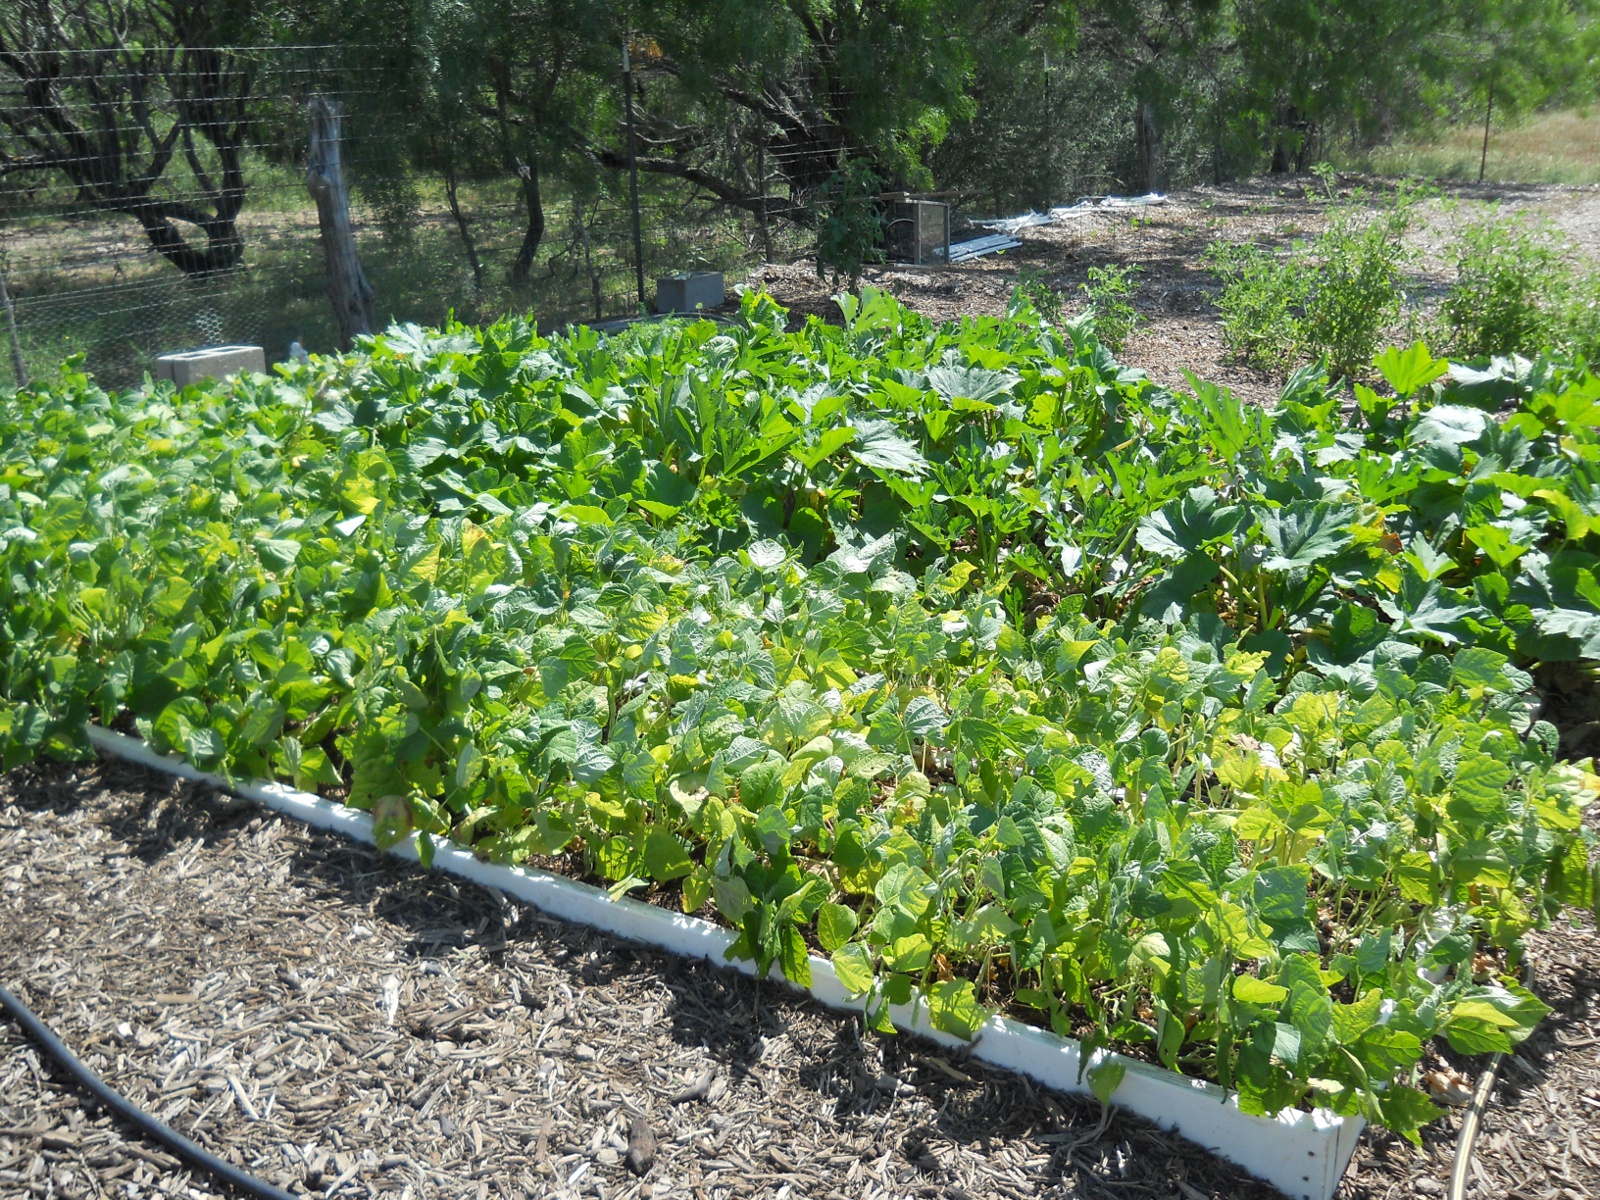
I have come to believe that about the only way to semi-win the temporal war of the weeds around here is to mulch them. Cutting them with a lawn mower endlessly just isn’t a long-term solution. Applying the mulch under the north lean-to of our barn has worked really well, and the mulch we get from the landfill has a lot of fine compost dust, which seems to really kill plant-type material (I have found that you have to be careful not to get it on leaves of plants you want to keep, because it seems to cause them to wither and even die); and so I am hoping, Lord willing, to mulch just about everywhere around buildings, the garden areas, etc. where I would like to control the weeds.

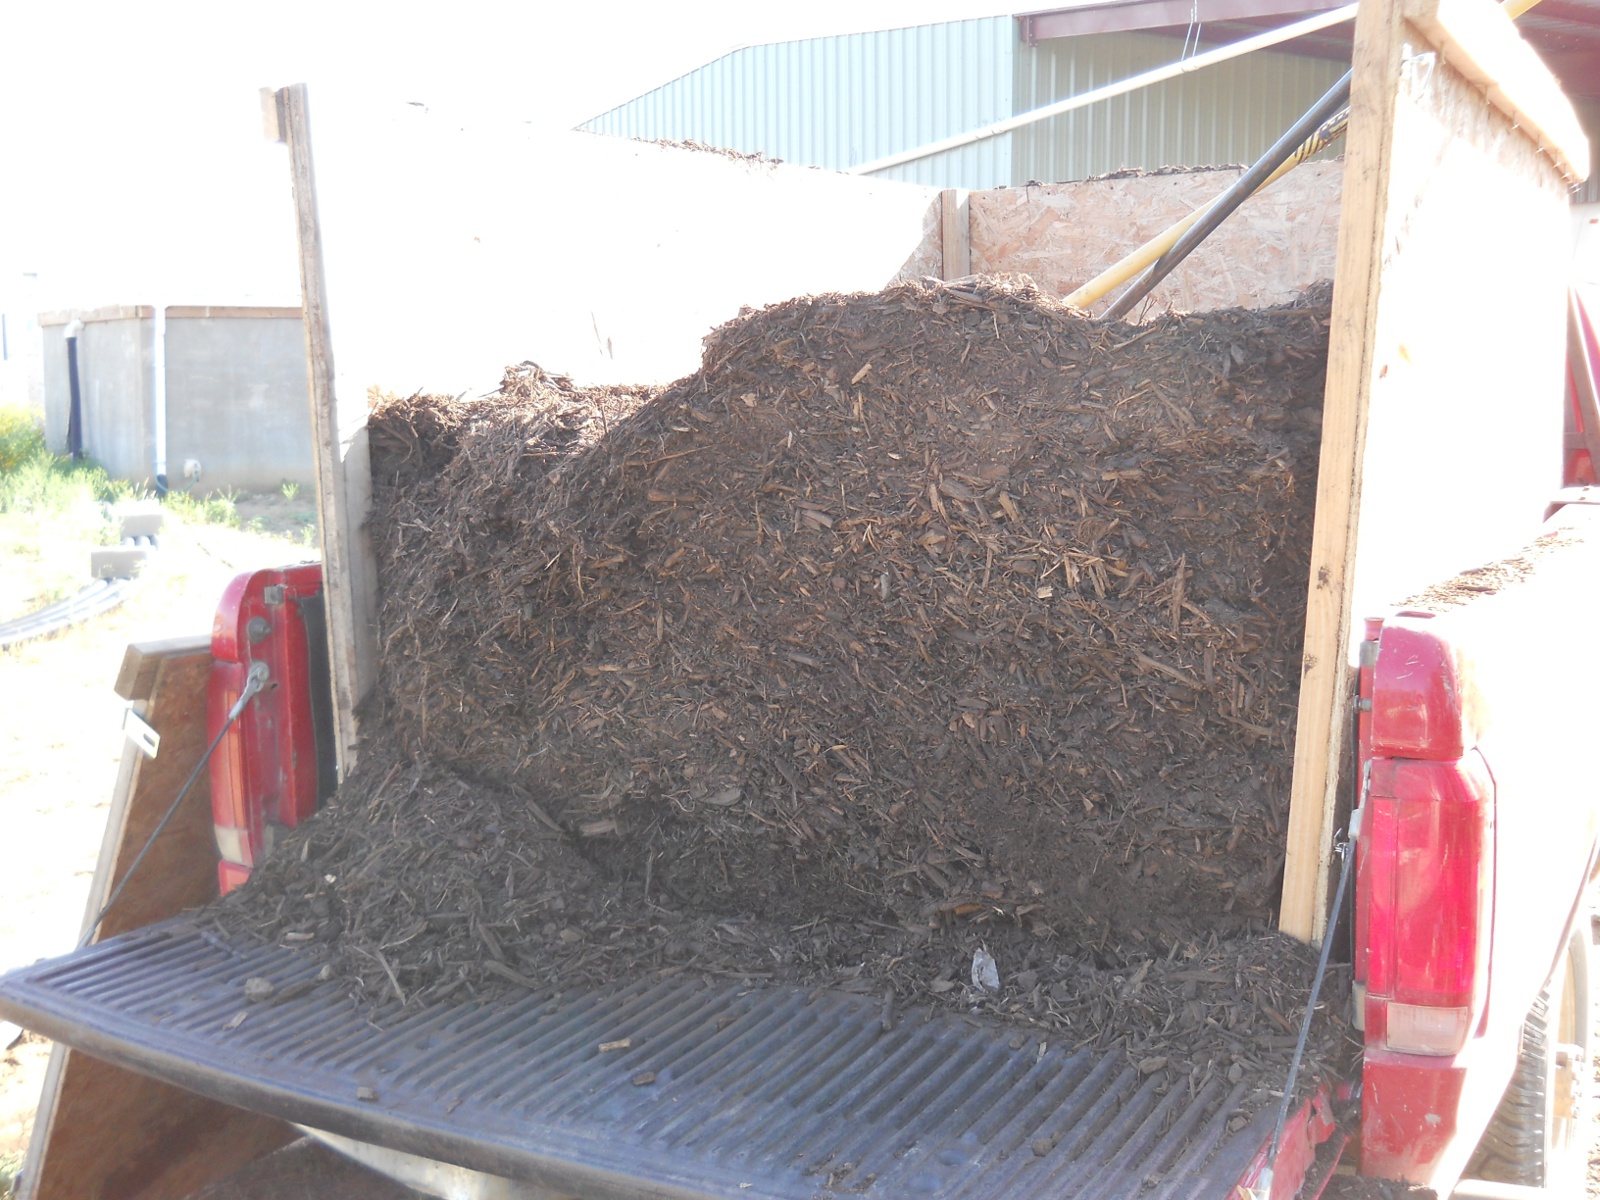
When we started adding heavy layers of mulch to the gardens, I had made a mulch carrier for our truck. With the way I originally built it, I had to heave all of the mulch over the sides. Someone asked why I didn’t have a removable back for it. Wow, brilliant! And so, I changed the carrier to have that.

Here it is with the removable back in place. I used latches that don’t spin and key hooks to keep them latched, which was a little cheaper way to go instead of using twisting latches:

Truck Bed Mulch Carrier with Removable Back

Here is the back door swung open;

Truck Bed Mulch Carrier with Removable Back Swung Open

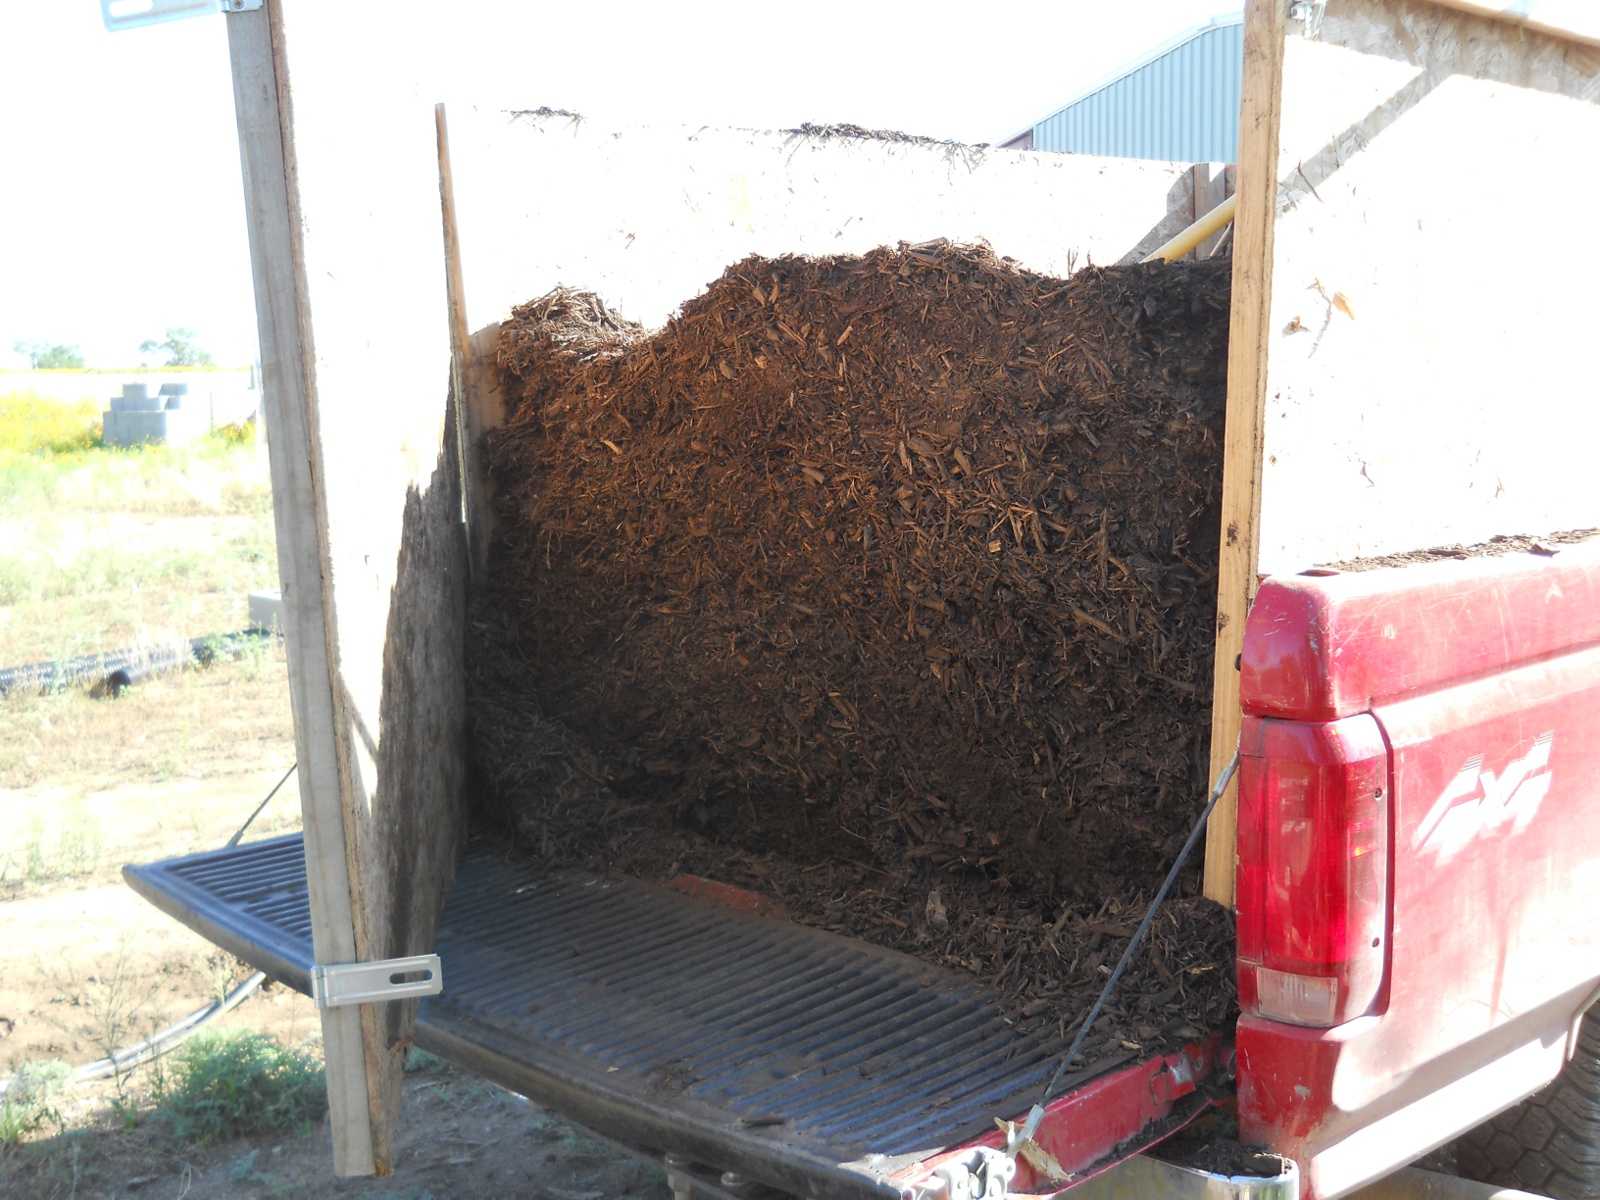
And then completely removed. It works pretty well, and is less messy on my person, especially when it’s windy:

Truck Bed Mulch Carrier with Removable Back Removed

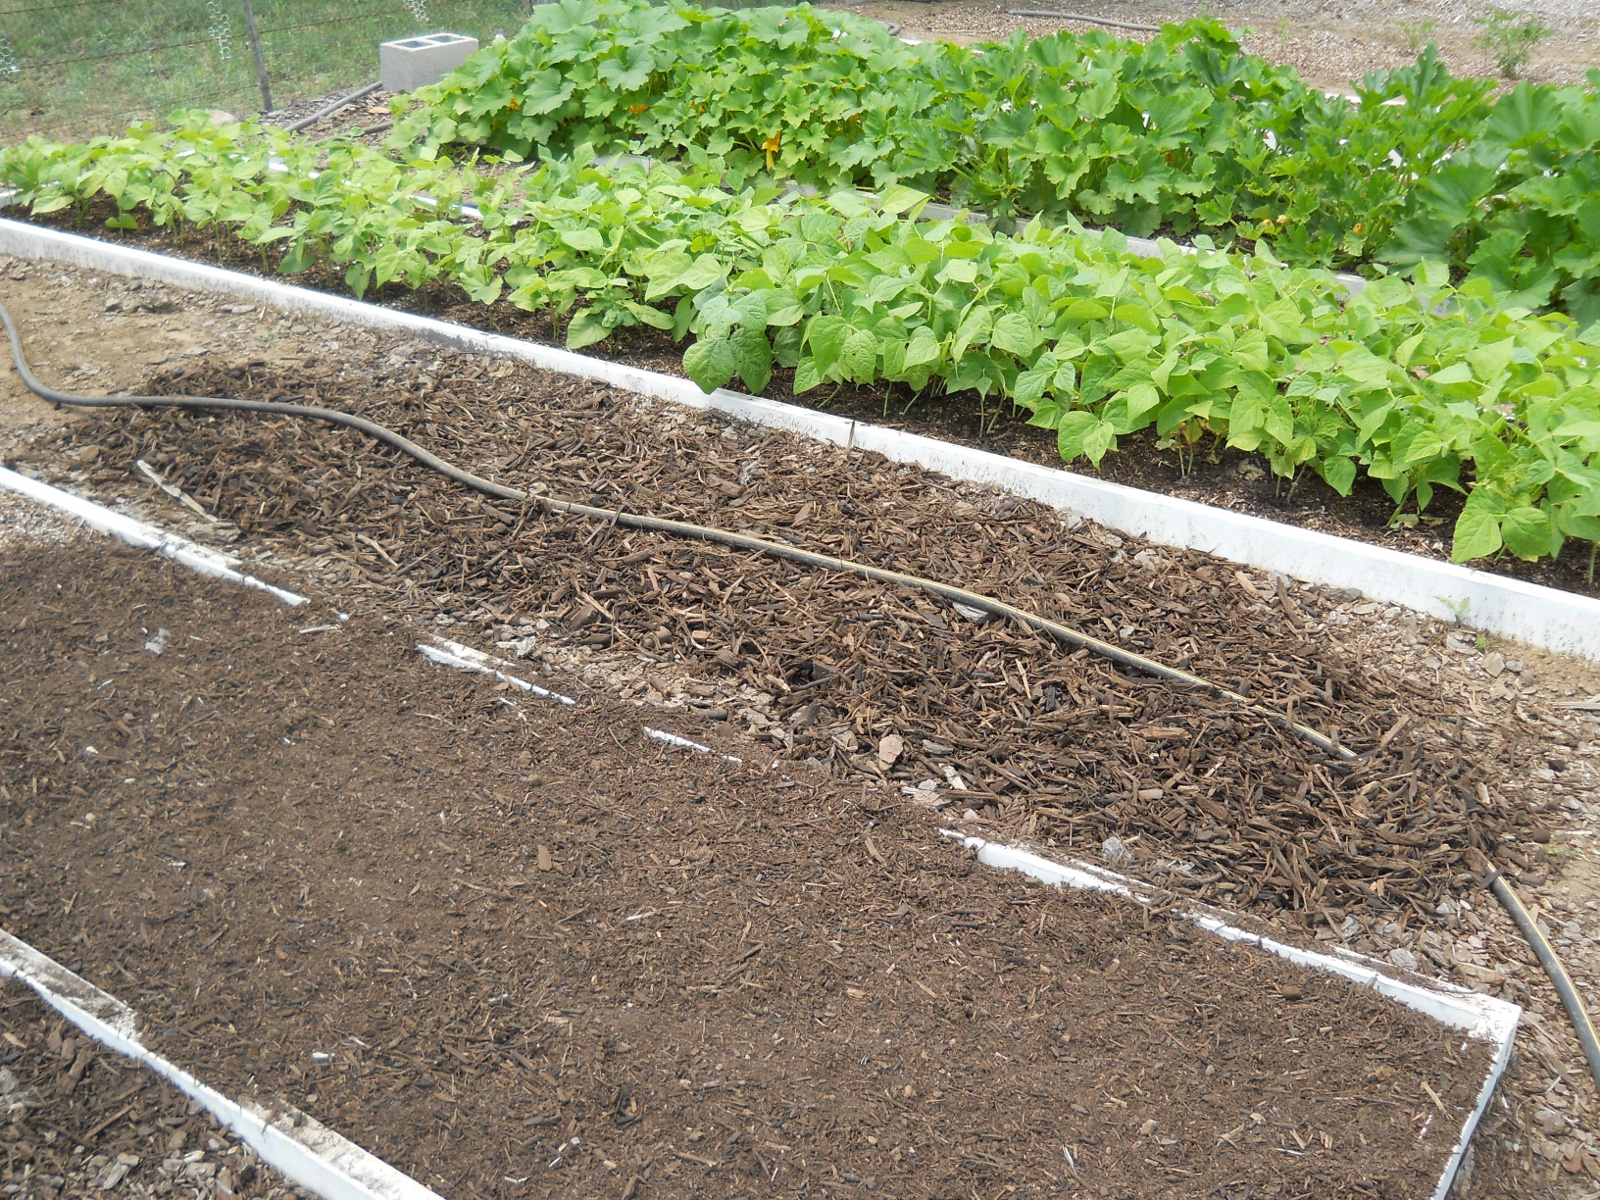
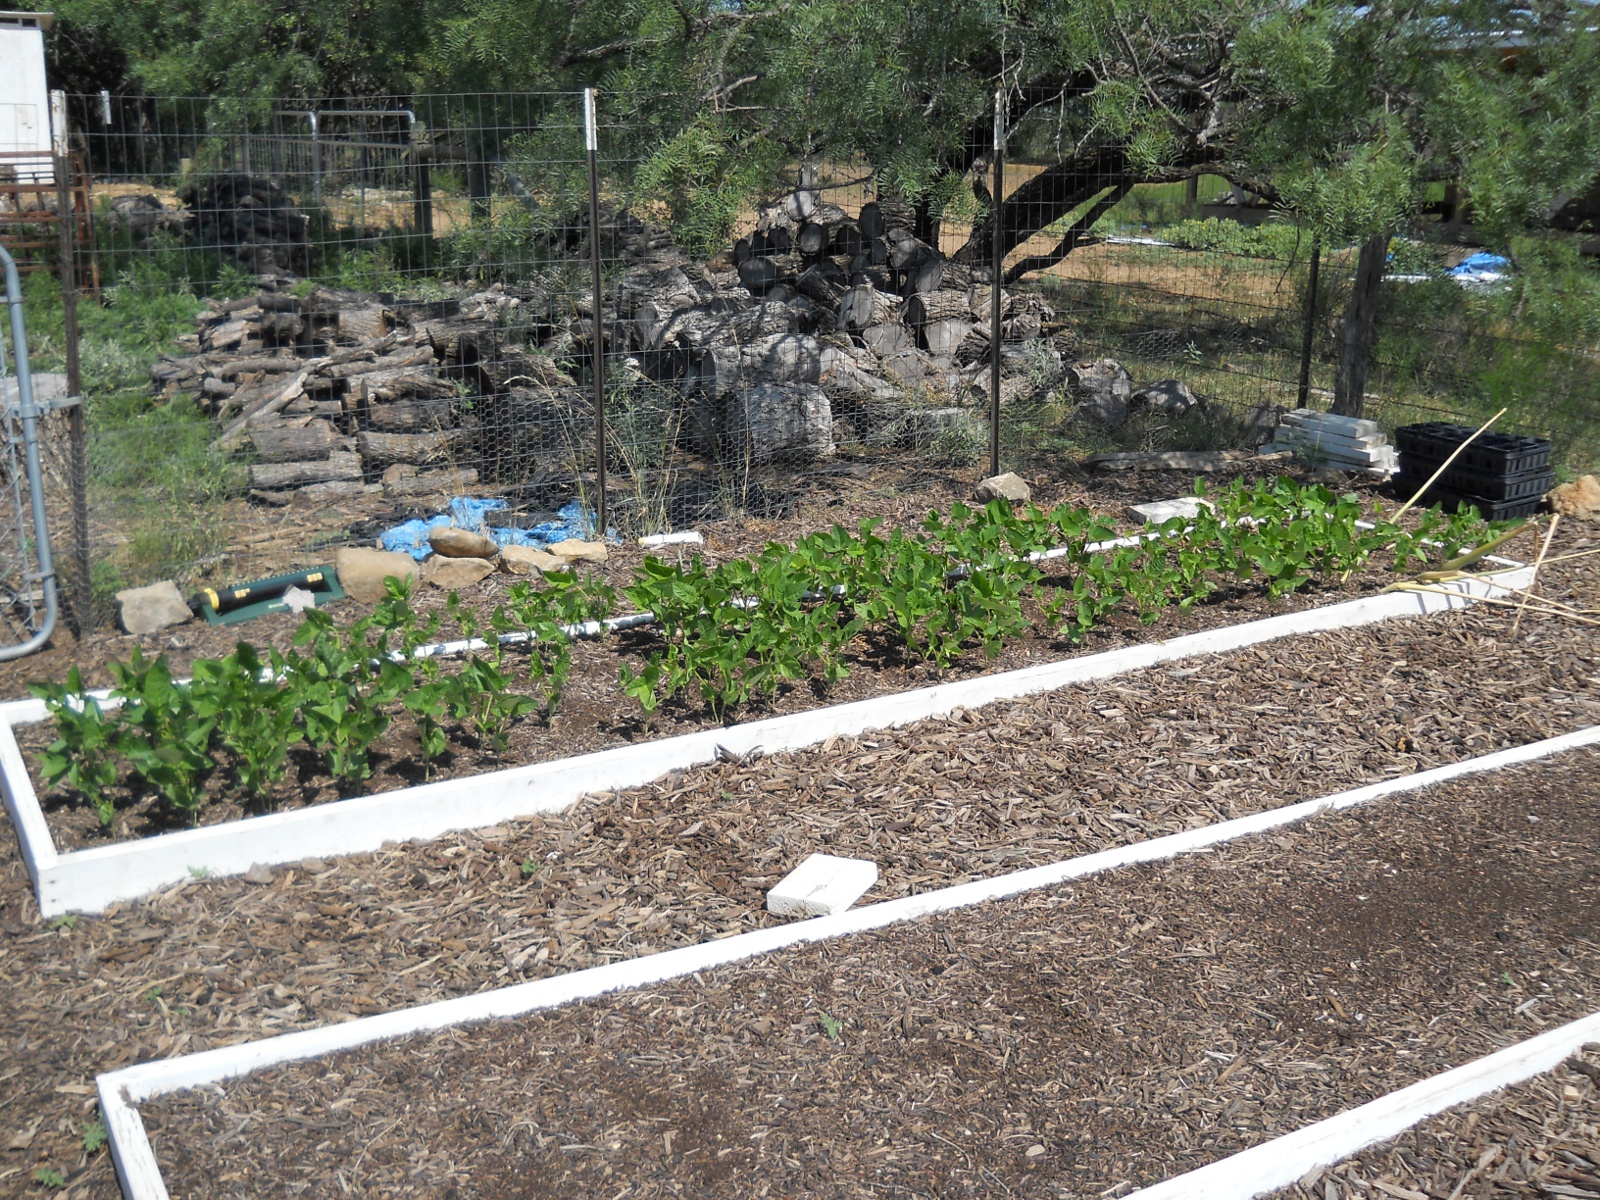
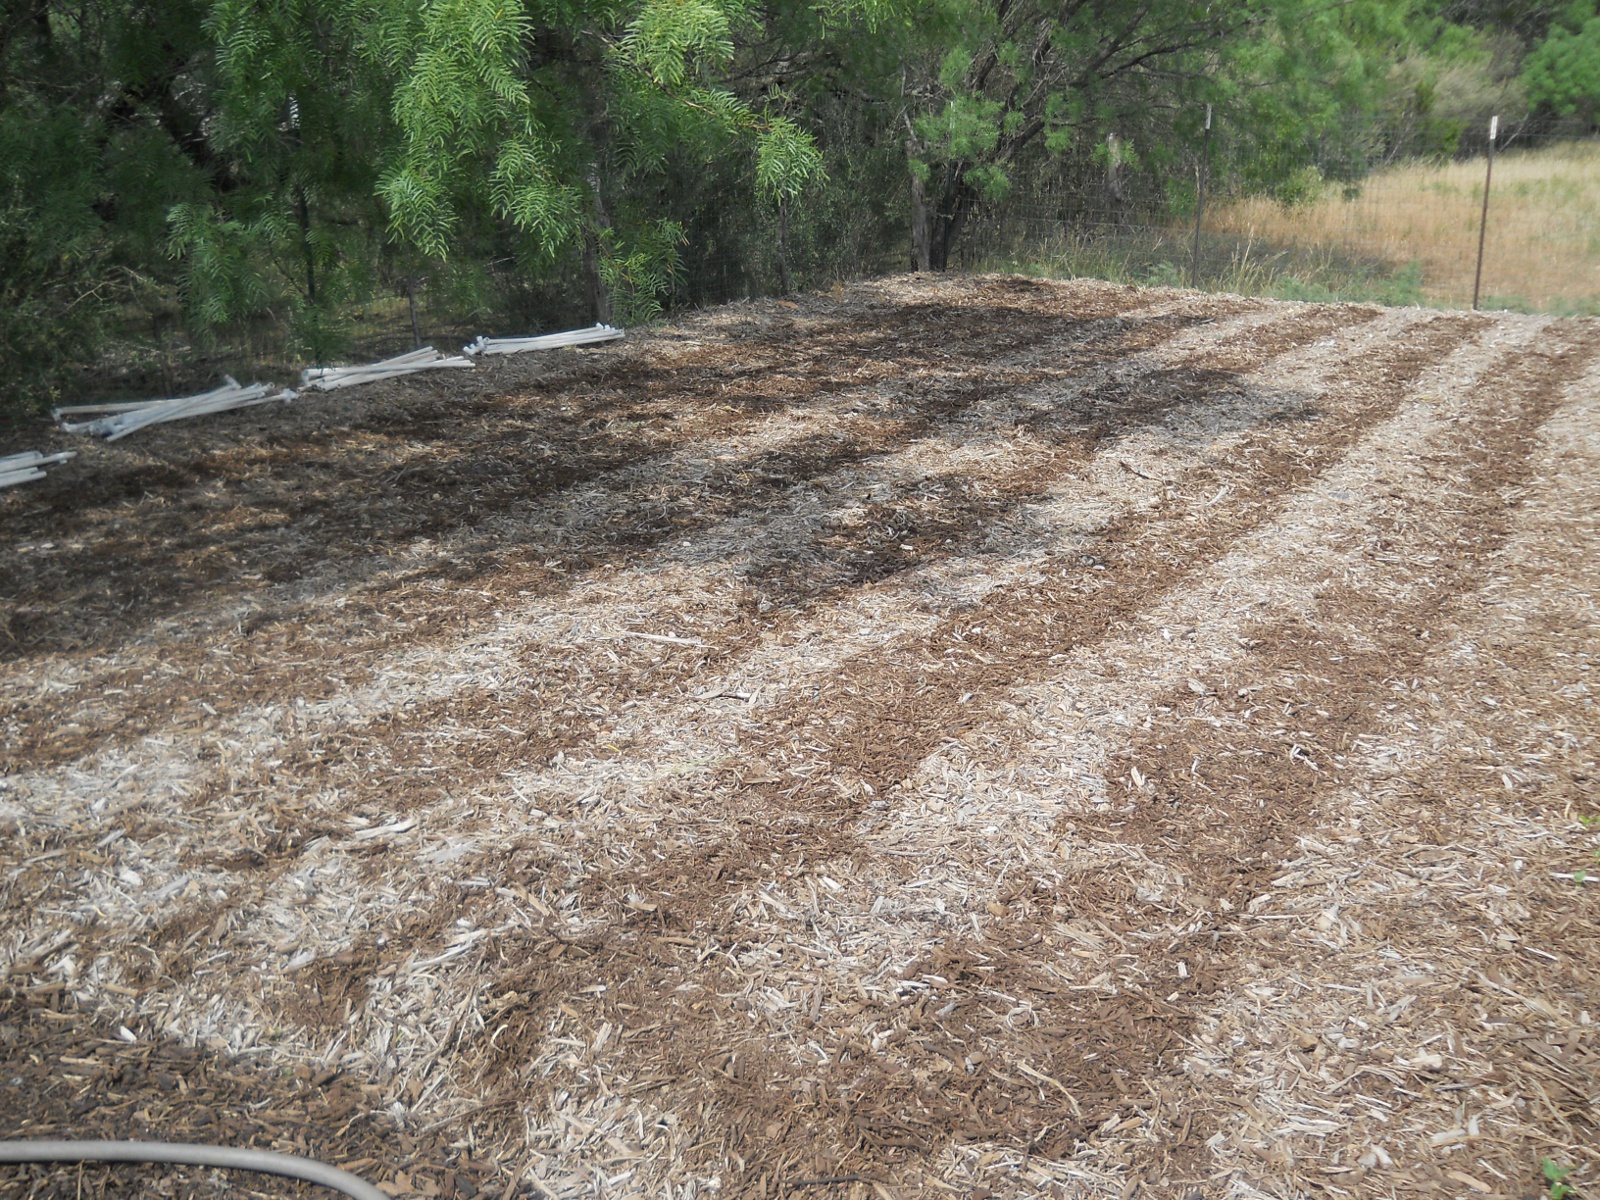
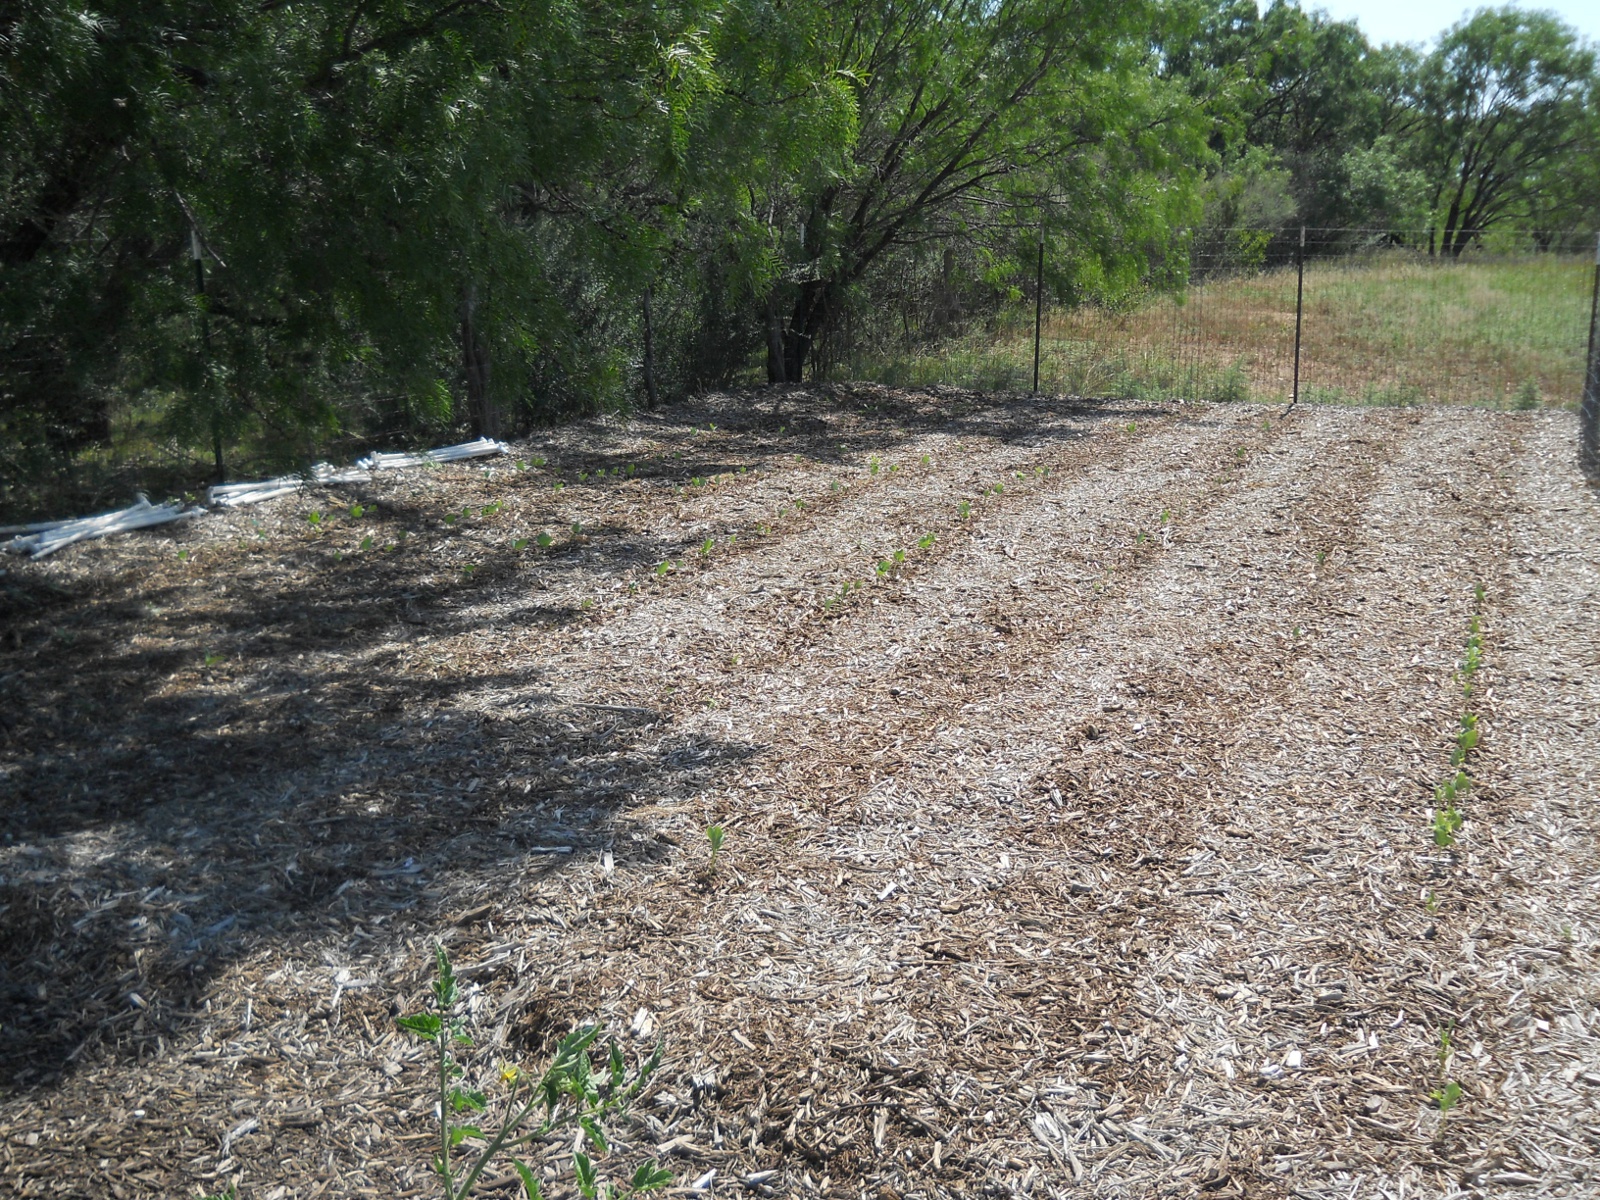
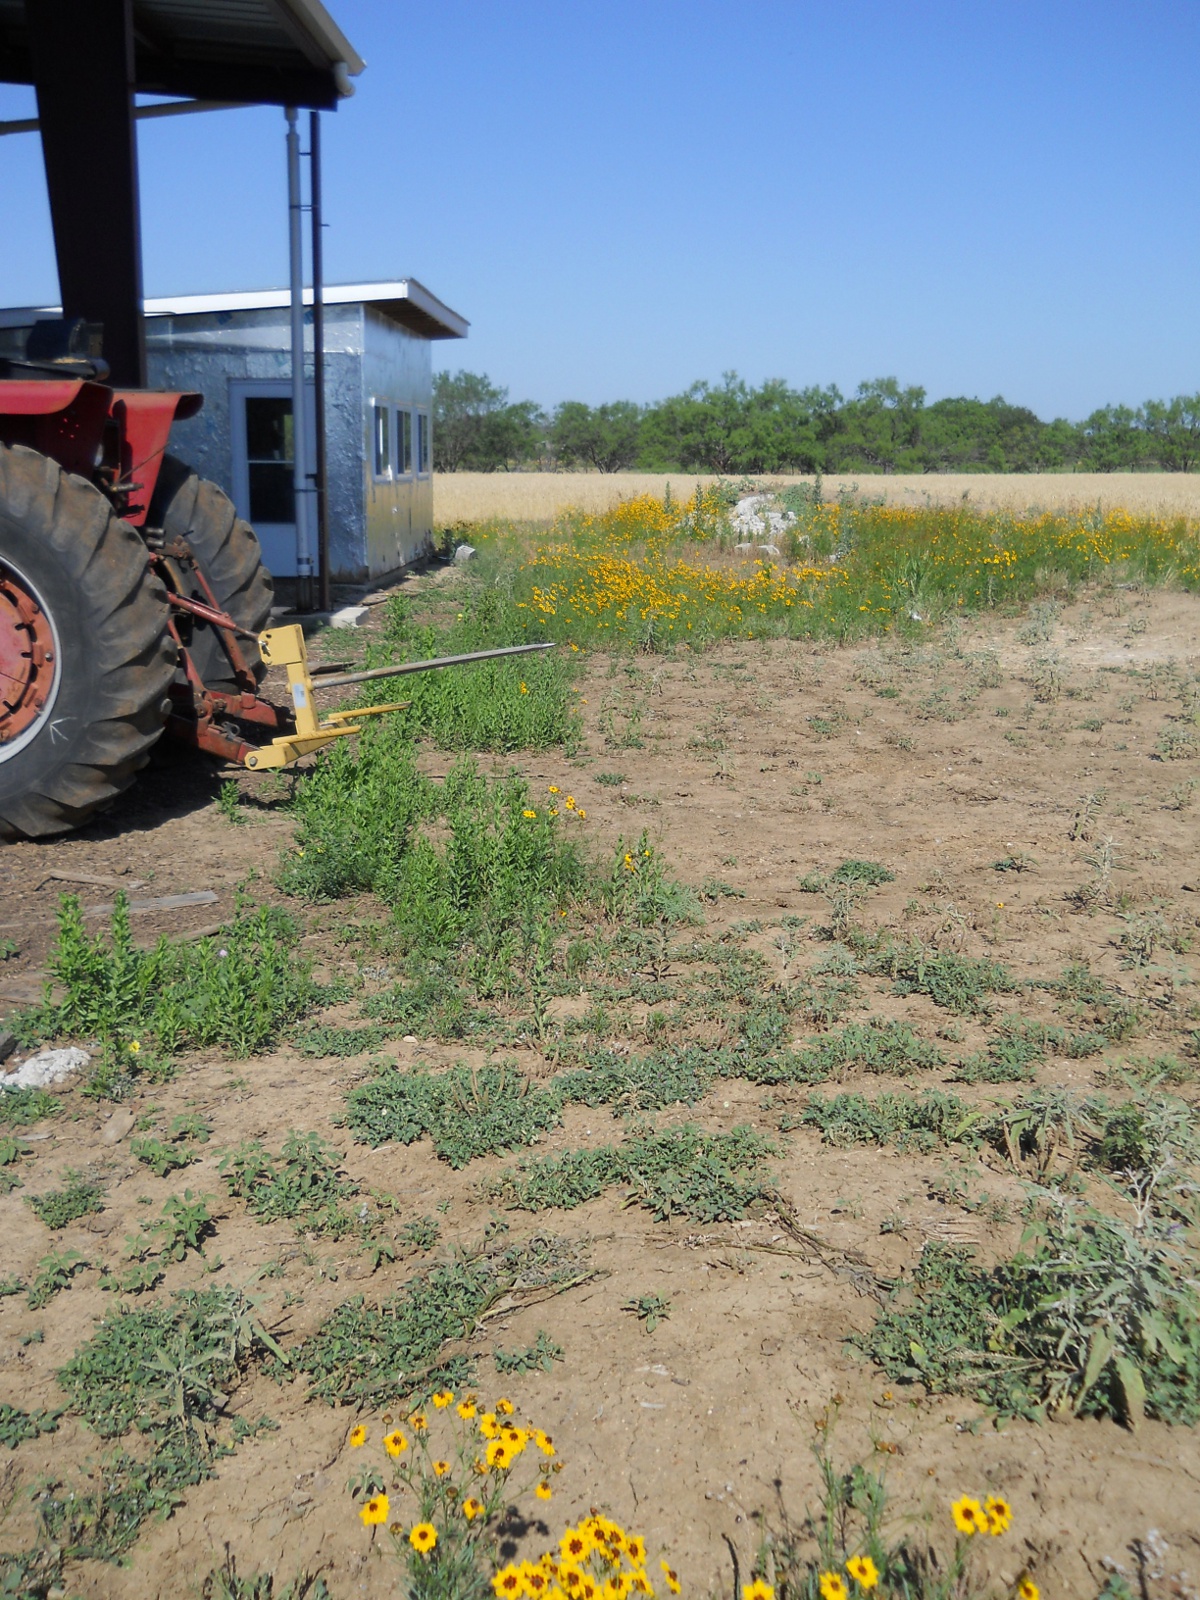
With the new carrier ready, for this round, I thought I’d continue north of the barn, filling in the whole area from where we left off last time to the water berm about 20 feet away. Here it is before the mulch, before being mowed:

Mulch Area with Weeds Before Mowing and Mulching

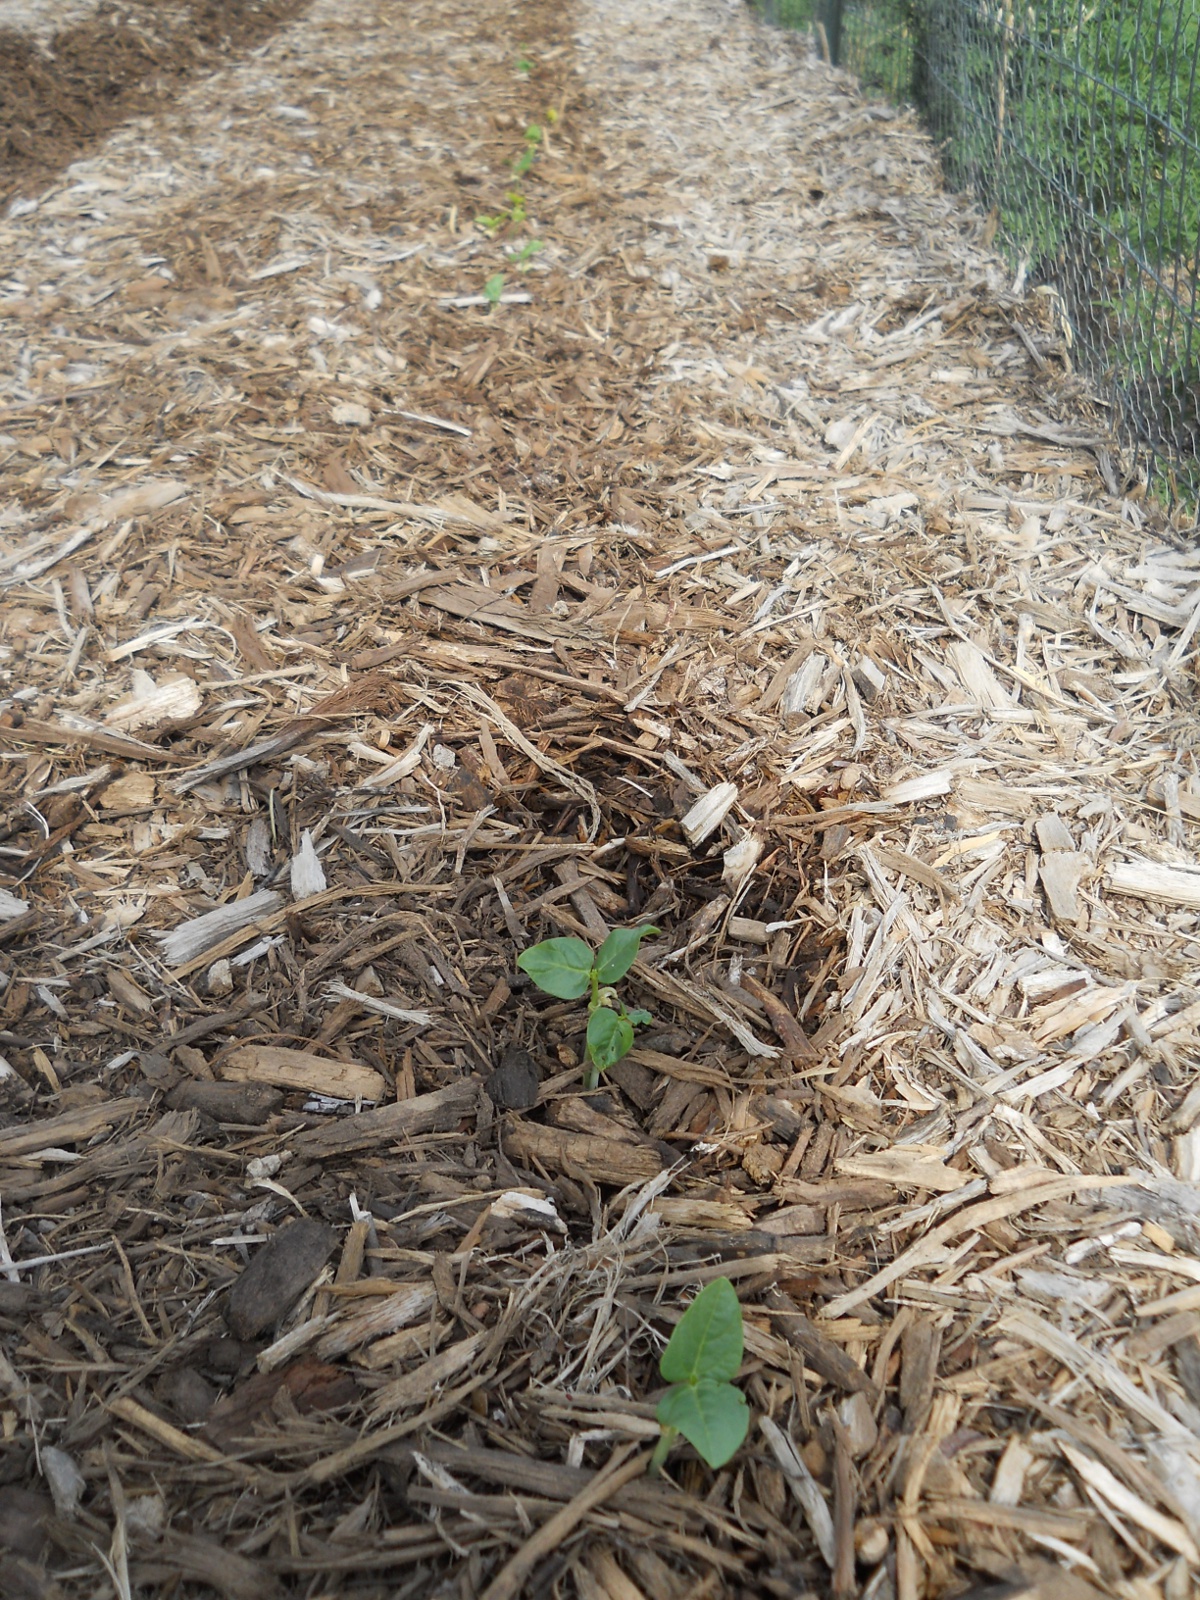
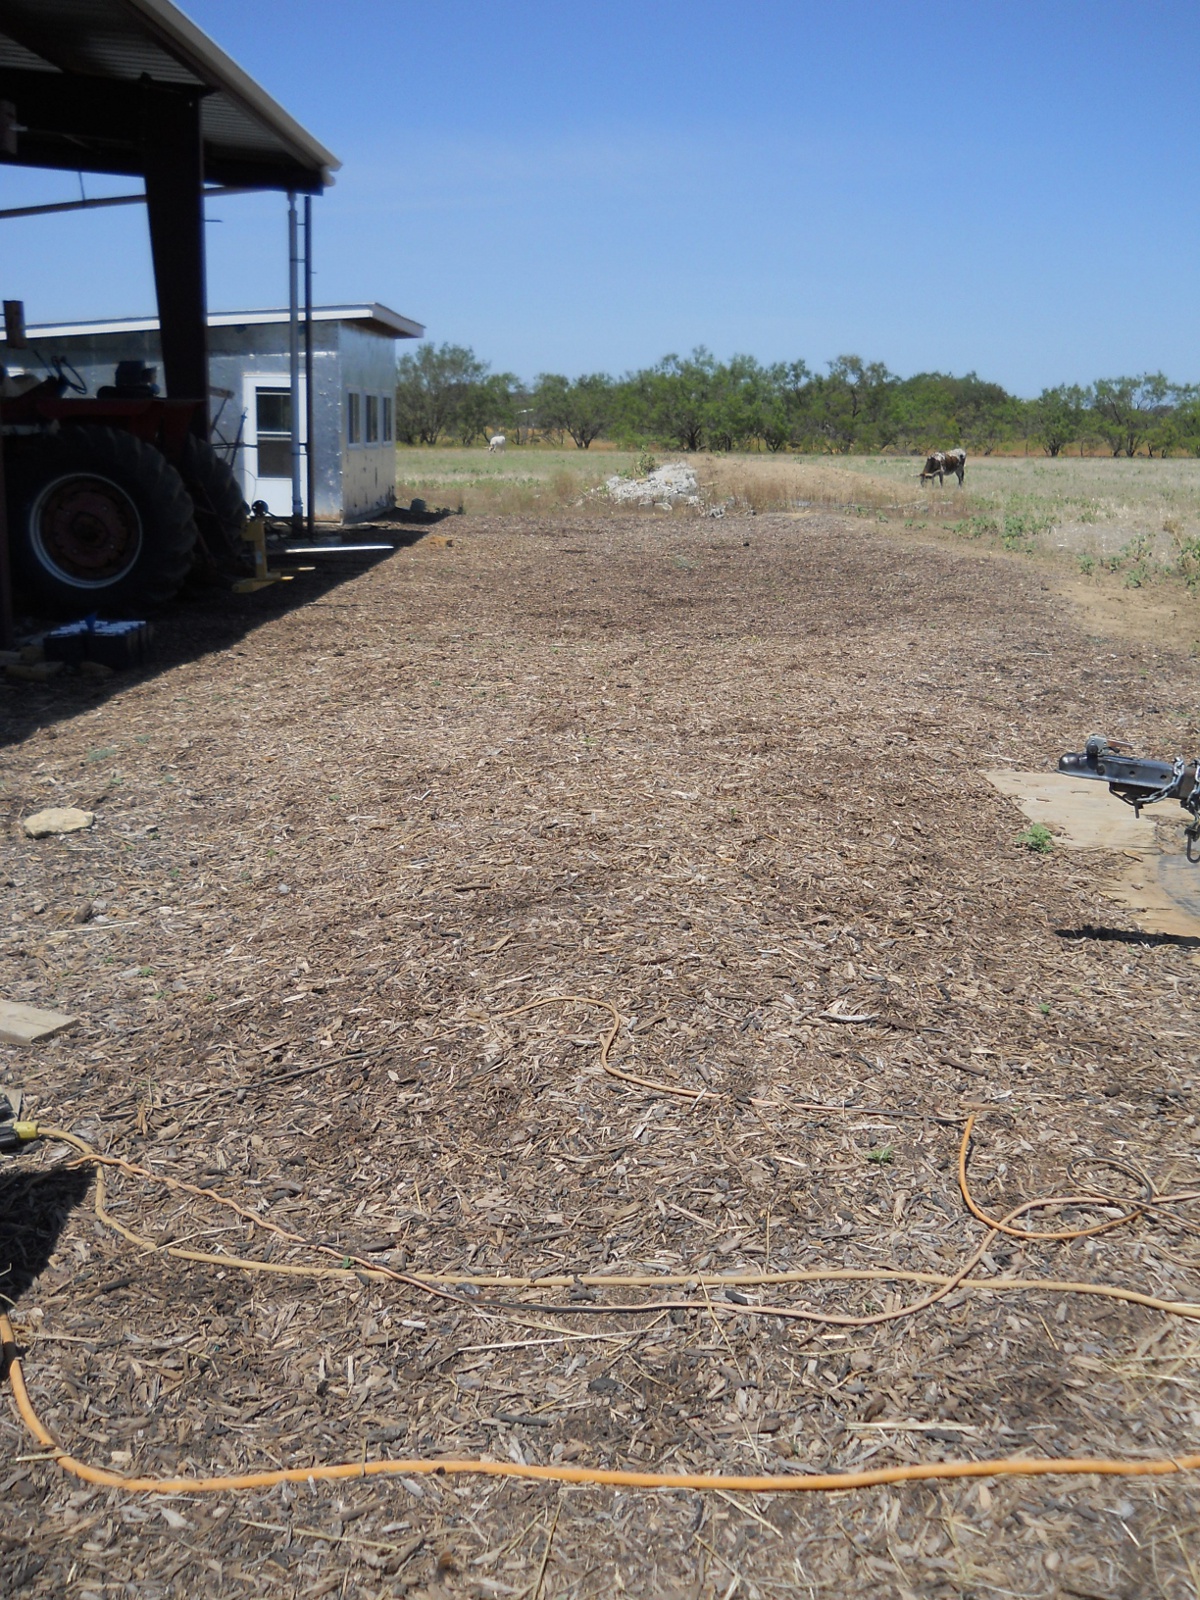
And here is the same area, two and a half months later, after laying down about a three to four inch layer. I picked the weeds one time, and it’s holding pretty well. It has to be weeded, but the weeds often come out fairly easily, and it seems over time, fewer and fewer weeds appear:

Mulch Area with Few Weeds After Mulching

Again, this whole mulching idea seems to work pretty well. We’re thankful to the Lord for this idea and the resources to implement it, and we pray God by His Spirit keep the gardens of our hearts weed-free.

— David

Providence’s Perpetuation Provisions: New Piglets of 2012

It’s been over a year since we did our last animal update on our pig Pebbles. As you can imagine, she has grown up quite a bit; and so, it was time to continue our normal cycle and get her a mate. We bought a medium-sized male from Mr. Bunker, and of course, had to call him Bamm-Bamm.

Here are Pebbles (left) and Bamm-Bamm (right) back in May:

Pigs Pebbles and Bamm-Bamm

And again, Bamm-Bamm (left) and Pebbles (right):

Pigs Bamm-Bamm and Pebbles

We thought, based on “action” we saw from the two that she was about ready to give birth late-April or so, but it ended up two estrus cycles past that.

And by God’s graces and mercies, she successfully gave birth! — a litter of nine, with two dead, and one little guy that just could never get walking properly, and he died as well.

After last year’s difficulties with Pebble’s mother’s delivery, we were really praying this one would go more smoothly; and the Lord was gracious in granting that to be so; and we are very thankful!

Here they are not too long after being born:

New Piglets 2012
More New Piglets 2012

And here is a video of the journey of Pebbles and Bamm-Bamm, from meeting last December to piglets in June (it’s a little long, but to me, kind of fun to see the progression). Bamm-Bamm has since been “processed” as our food provisions:

We are very grateful to God for granting these new piggies to be born, for the safe delivery for Pebbles, and for the meat from Bamm-Bamm we have been able to store away.

— David

A House – Update XVIII – Porch Roof – Update I

With the metal completed on the main roof of the house, it was on to finishing the porch roof.

Here is the beginning of one side, with the #30 tar paper (asphalt felt) in place:

House Porch Roof Metal on Tar Paper

And a completed side:

House Porch Roof Metal Side Complete

Here are the beginnings of the hip corner. The person helping us just used a metal blade on a circular saw to make the cuts (with face protection in place!):

House Porch Roof Metal Hip Roof Complete

And then the hip corner complete:

House Porch Roof Metal Hip Roof

This is the upper flashing on the right porch side, the top part of the flashing to go underneath the siding, and includes fitted foam underneath. The bottom drip edge we did like we did for the main roof:

House Porch Roof Metal Top Flashing

Here is the hip ridge cap installed. It too has special angle-cut fitted foam under it:

House Porch Roof Metal Hip Roof Ridge Cap

And here is what it looks like against the corner of the house:

House Porch Roof Metal Hip Roof Ridge Cap Corner Against the House

And here it all is with the metal, flashing and hip ridge caps in place, and with the fascia plates painted:

House Porch Roof Metal Complete

We are very thankful to the Lord for Him granting continued progress on the house.

— David

Turnips & Wheat 2012 – Update II

Since our last update on our turnips and wheat, the turnips basically dried out; but we are grateful to the Lord for what He granted in them in being able to feed our pigs with them.

But the wheat continued on its process. Here is what the wheat field looked like back in April. You can see how high it had grown in the second picture:

2012 Wheat Crop in April
2012 Wheat Crop Waist High in April
2012 Wheat Crop Wheat Heads in April
2012 Wheat Crop More Wheat Heads in April

Fast forward a little over a month, and here is what it looked like. A beautiful gift from God!

2012 Wheat Crop in May
2012 Wheat Crop More Wheat Heads in May

And then it was time! The harvest! This is something we had been looking forward to basically since we moved here — being able to harvest a crop. There is also much to learn spiritually from the wheat harvest, the wheat being the saints of God.

First was to cut it and tie it into sheaves. I tried using a scythe for reaping (God harvesting the souls of His people); but it ended up leaving the wheat on the ground in somewhat of a chaotic fashion (which could just have been a lack of technique); and we found that having all of the heads together in one place is better for the threshing process; and so Sue used a sickle, which worked well. We tied them using weeds or twine. The whole time out there are got “Bringing in the Sheaves” stuck in my head:

Tying the 2012 Wheat into Sheaves

And then stacked them into stooks to dry (God gathering His saints together):

Gathering the 2012 Wheat Sheaves into Stooks

Once ready, it was time to begin the threshing process (God breaking down the carnal, selfish man of His chosen with trials and chastisements). We laid out a tarp, and borrowed some flails from one of the folks here. He attached some chains on the end of closet dowels — we thought the loose, heavier chains might do well with the flailing:

Preparing to Flail the 2012 Wheat Crop

And here is Sue and myself flailing away. It’s something of a violent process (sometimes God needs to be a little “violent” in the breaking down of our pride):

Flailing the 2012 Wheat Crop
More Flailing the 2012 Wheat Crop

And then it was time to winnow the wheat, separating the chaff from the wheat berries (God further refining the souls of His children). We used a garbage can lid, which didn’t work too badly:

Winnowing the 2012 Wheat Crop

After several hours of work, here is the finished product — the mostly cleaned wheat berries (God’s gathered in, sanctified people):

Hand Harvested 2012 Wheat Berries

We were thankful to be able to go through the process of hand-harvesting and processing the wheat.

It happened though that a fellow from town we know had an old grain combine that he wanted us to have to use, if we wanted, and he had a backup one for spare parts. After the Bunkers got done using it, and graciously going through all of the headaches and replacing of parts needed to finish their fields, it was our turn to use.

The “combine” is a machine that does all of the processing we described above all at one time. Of course, it’s much faster, but you also have to maintain it (which causes dependence on the world), you don’t get the experience needed to learn how to harvest wheat by hand should the mechanized methods be no longer available one day, you don’t think about the spiritual aspects of the harvesting process because you’re not intimately involved, and you don’t get the benefits (spiritual and temporal) of performing work in God’s way, all of which are why we wanted to process at least some of the wheat by hand.

Still, I wanted to be able to make sure to get all of the wheat harvested and stored before we lost the crop from being in the field too long; and so I decided we would use the combine on the rest of the field. And here it is a-harvesting:

Harvesting the 2012 Wheat Crop with a Combine

And a completed row:

Completed Row of Harvesting the 2012 Wheat Crop with a Combine

You can see the difference in amounts between the picture above of the hand-harvested in the bucket vs. what the combine collected after just a couple of hours. I can understand the temptation of the carnal man that caused him to desire and then over time find and eventually implement, through industrialism, what appeared to be easier ways to do things, and how easily it can be to get sucked into the industrial trap, which actually leads to slavery — you become dependent on the industrial machine (as a system), and then MUST do things the worldly way to survive). This is something we try to remember and keep in perspective, even if we use something like a combine for now:

Combine Bin Full of Harvested 2012 Wheat Crop

With the combine’s grain bin full, with the help of some of the men, we unloaded it into sacks for storage:

Unloading 2012 Wheat Crop into Sacks

And used rebar ties to tie them off:

Tying Off 2012 Wheat Crop Sacks

Here is the first haul from that first bin:

2012 Wheat Crop in Sacks

And here is the final stack of wheat sacks:

2012 Wheat Crop Stored in Sacks in the Barn

If you’ve never seen a combine in action, it is pretty amazing the amount of “work” it does, when it’s working and not broken down:

We are so very thankful to the Lord for His granting of a wheat harvest — our first real crop, besides the turnips this year as well. We thank Him for the lessons He teaches us in His word and through work, and we pray He leads us into work that is worship unto him. We pray He thresh and winnow us in purity, and that He help us through that when He does; and we pray we will be presented to His Son one day, a “cleaned” and holy bride.

— David

Garden – Spring 2012 – Update I

After our garlic was harvested this year, I had planned to replant those beds with black-eyed peas we had harvested from Mr. Bunker’s field a couple of years ago, because late spring is about the time to start planting them, and they work well in the heat.

But, the garden beds needed to be prepared with some new soil. We’ve recently started using mulch for actual garden beds, but, even though the mulch we get has composted dirt in it, it also has too many larger wood chips; and so, other folks around here have been sifting their mulch to remove those larger chips; and I decided to follow suit.

Here is the mulch sifter I put together with scrap stuff I had laying around:

Mulch Sifter

And here I am doing the sifting:

Sifting Mulch

Here, you can see the results in the raised bed; and the left-over wood chips can be used for walkway covering:

Mulch Bed and Walkway Mulch After Sifting

And here are the black-eyed peas growing after being planted!

Sifted Mulch Bed Black-Eyed Peas Growing

So, going around the horn, here is how the garden now looks….

This is the okra:

2012 Okra

And the green beans (in the front bed) and the squash and zucchini (in the bed in back):

2012 Green Beans, Squash and Zucchini

And the tomatoes (in the front bed) and the carrots (in the bed in back). Usually, our carrots do really well; but for some reason this year, not too many grew. I did try planting a little scarcely, because usually the carrots are very packed and smaller; and I ended up trying to replant a couple of times too; but it just wasn’t to be this year:

2012 Tomatoes and Carrots

Now, in that previous blog post above about the new mulch gardening, one of the folks here had already tried planting in their mulch-gardening area with some success; so I thought I’d give it a whirl too, to see if anything might grow. I planted some more of the black-eyed peas in half a row as a test case, and lo and behold they started growing!

Mulch Gardening/Eden Black-Eyed Peas Growing

With those results, I went ahead and planted the whole area:

Entire Mulch Gardening/Eden Bed Planted with Black-Eyed Peas

And here, if you look closely (you probably have to click the image), many of them have started to grow too:

Black-Eyed Peas Growing in Mulch Gardening/Eden Bed

Here is some of the produce the Lord has graciously granted:

Squash and Zucchini from the Garden

Instead of pressure canning it, we’ve wanted to try to use the more healthy preservation method of lacto-fermentation. Here is some squash and zucchini in a brine solution, with some mesquite tree leaves that are supposed to help keep the vegetables crunchier:

Lacto-Fermenting Squash and Zucchini

And here is our lacto-fermenting section in the camper. We initially put the jars down in the root cellar, but the lacto-fermenting process actually needs a warmer environment to process correctly. Also, the vegetables would float in the brine. And so, we figure with the combination of the cooler temperatures of the root cellar, and the floating vegetables, they started to mold on top. Well, we picked off the moldy pieces from off the top, brought them into our very warm camper, tried weighing the vegetables down but didn’t find a good way to do that, and instead began to turn the jars upside down and then back right side up every 12 hours, burping them at the same time (to release the gas build-up from the lacto-fermenting process):

Lacto-Fermenting Garden Produce

Once again, we are very thankful to God for the provisions from the garden He has granted, and for the processes He built into His creation to preserve the produce without man-made methods of preservation (like canning, which destroys nutrients, or freezing, which causes dependence on the world for electricity and freezers).

— David

Garlic 2012 – Update I

As the the garlic-growing season went on, it became apparent it was time to pull the garlic. Last year, I believe I waited a little too long, and some plants started to wither; and so, this year, we tried to get them a little earlier. But to me, with some of the leaves yellowing, and a couple of the plants starting to lay over, it was time to get harvesting.

Here is the garlic haul for this year:

Garlic 2012 Picked and in Baskets

And here are the plants drying. We let them dry for about a week, although we had to roll them all up and get them out of the rain a couple of times:

Garlic 2012 Drying

After the drying, it was time to tie them up and get them hanging for the curing process. I think we might have ended up with at least a little more than we used for planting. Some of last year’s garlic ended up being rotten and dried by this year; and so, I’m hoping pulling them a little earlier will help against that:

Garlic 2012 Tied, Hanging and Curing
Garlic 2012 Batch of Garlic Bulbs

We are grateful to the Lord for granting the garlic He did, and we pray for a granting of the health benefits from it that can come with garlic.

— David

Providence’s Perpetuation Provisions: New Kids of 2012

Back in November, it was breeding time for the goats! We had decided in the past to basically in-breed only every other generation, and so we have two pure Nubian billy goats we use for that.

And so, without further ado, allow me to introduce you around the herd!

Our billy Shatner…

2012 Mating Billy Goat Shatner

…was mated with the following does, producing the following offspring:

Winnie (center), and her new buck Obie (we call him Obie from O.B., standing for “over bite,” because he has pretty pronounced one):

New 2012 Goat Buck Obie

If you are interested, here is a video of Obie’s birth, which Sue was able to capture. It’s a little graphic, for obvious reasons; but if you’ve never seen something like this, it is quite fascinating:

Betsy, and her new bucks Bo and Luke (think early ’80s TV show featuring a car named the “General Lee”):

New 2012 Goat Bucks Bo and Luke

Hannah, and her new does Rigby and Pippi (because their ears look like pig tails):

New 2012 Goat Does Pippy and Rigby

Pammy, with her new does PJ (for Pammy Jr., as she looks like her mother; and Sandy, like a white, sandy beach):

New 2012 Goat Does PJ and Sandy

Lucy, with her new buck Lester (from William Shatner’s daughter Leslie, since he looks a lot like his sire Shatner):

New 2012 Goat Buck Lester

And then, our billy Rocky…

2012 Mating Billy Goat Rocky

…was mated with the following does, producing the following offspring:

Marie, with her new buck and doe RJ (front) and Raquel (RJ for Rocky Jr., since he looks like his sire; and Raquel, since she does as well):

New 2012 Goat Buck and Doe RJ and Raquel

Nellie, with her new buck Melvin (from his coat looking velvety smooth, and Mel Torme being called the “Velvet Fog”):

New 2012 Goat Buck Melvin

Gracie, with her new buck Albert (Princess Grace’s son is Prince Albert):

New 2012 Goat Buck Albert

*

Gracie had another kid, whom she sadly rejected. And so, we sort of “adopted” (and I mean that loosely, not like adopting a pet today), and named him Junior:

New 2012 Goat Buck Junior

And here Junior and Albert are together. They do often hang out, so my guess is that they have a sense for each other:

New 2012 Goat Bucks Junior and Albert

And finally, Tapioca, with her new doe and buck Annie and Spot (Tapi is the goat to the far right in the second scene of the birthing video above). Tapi had a very rough delivery — she was a little older and this was her first kidding, although we’re not sure if that played into it. Whatever the reason, she had one teat squirting blood and water, and that whole side of her udder was purple (looking extremely bruised), and she wouldn’t really get up much at all and walk around and eventually stopped drinking water. It was very hot outside, and she had flies eating the skin of her udder, ears, snout, arms, etc. — I tried spraying eucalyptus essential oils on her udder, as I read that might help keep them away, and because we had some; but it didn’t work. We had a dilemma with that too — being as hot as it was, we made some shade over her, but it was too hot for the flies as well; so, her being in the sun was better to keep the flies away but had her in direct sunlight, and putting her under the shade brought the flies back in. Sadly, in the end, we decided it was best to euthanize her; and so, we had two more orphans on our hands — the doe we decided to call Annie (for Little Orphan Annie) and the buck Spot (because he looks like a dalmatian):

New 2012 Goat Doe and Buck Annie and Spot

Here is a video tour of the new herd:

And here is feeding time with the orphans:

As I mention in the tour video, the Lord showed His graces with the orphans in allowing other kids to be born on the same day, so we could “steal” some colostrum from the other mothers to get some into the orphans, as the colostrum has things in it, which apparently are adapted to the local area, to help the immune systems of newborns. We have had to use some milk replacer to feed the orphans, but now that the kids are over a month old, we’re able to use mostly milk from the other mothers.

Both orphan experiences, for different reasons, were somewhat difficult; but we thank the Lord for His help through them, and for the health of the orphans and all of the new kids.

We are very grateful to God for the increase in the herd, for the colostrum He granted for the orphans, for the increase in healthy goat milk; and we pray for help in proper management and for provisions for the herd.

— David

« Older posts Newer posts »