Just recently our Spring garden wrapped up for the year, and so we thought we’d show the progress since our last update in July:
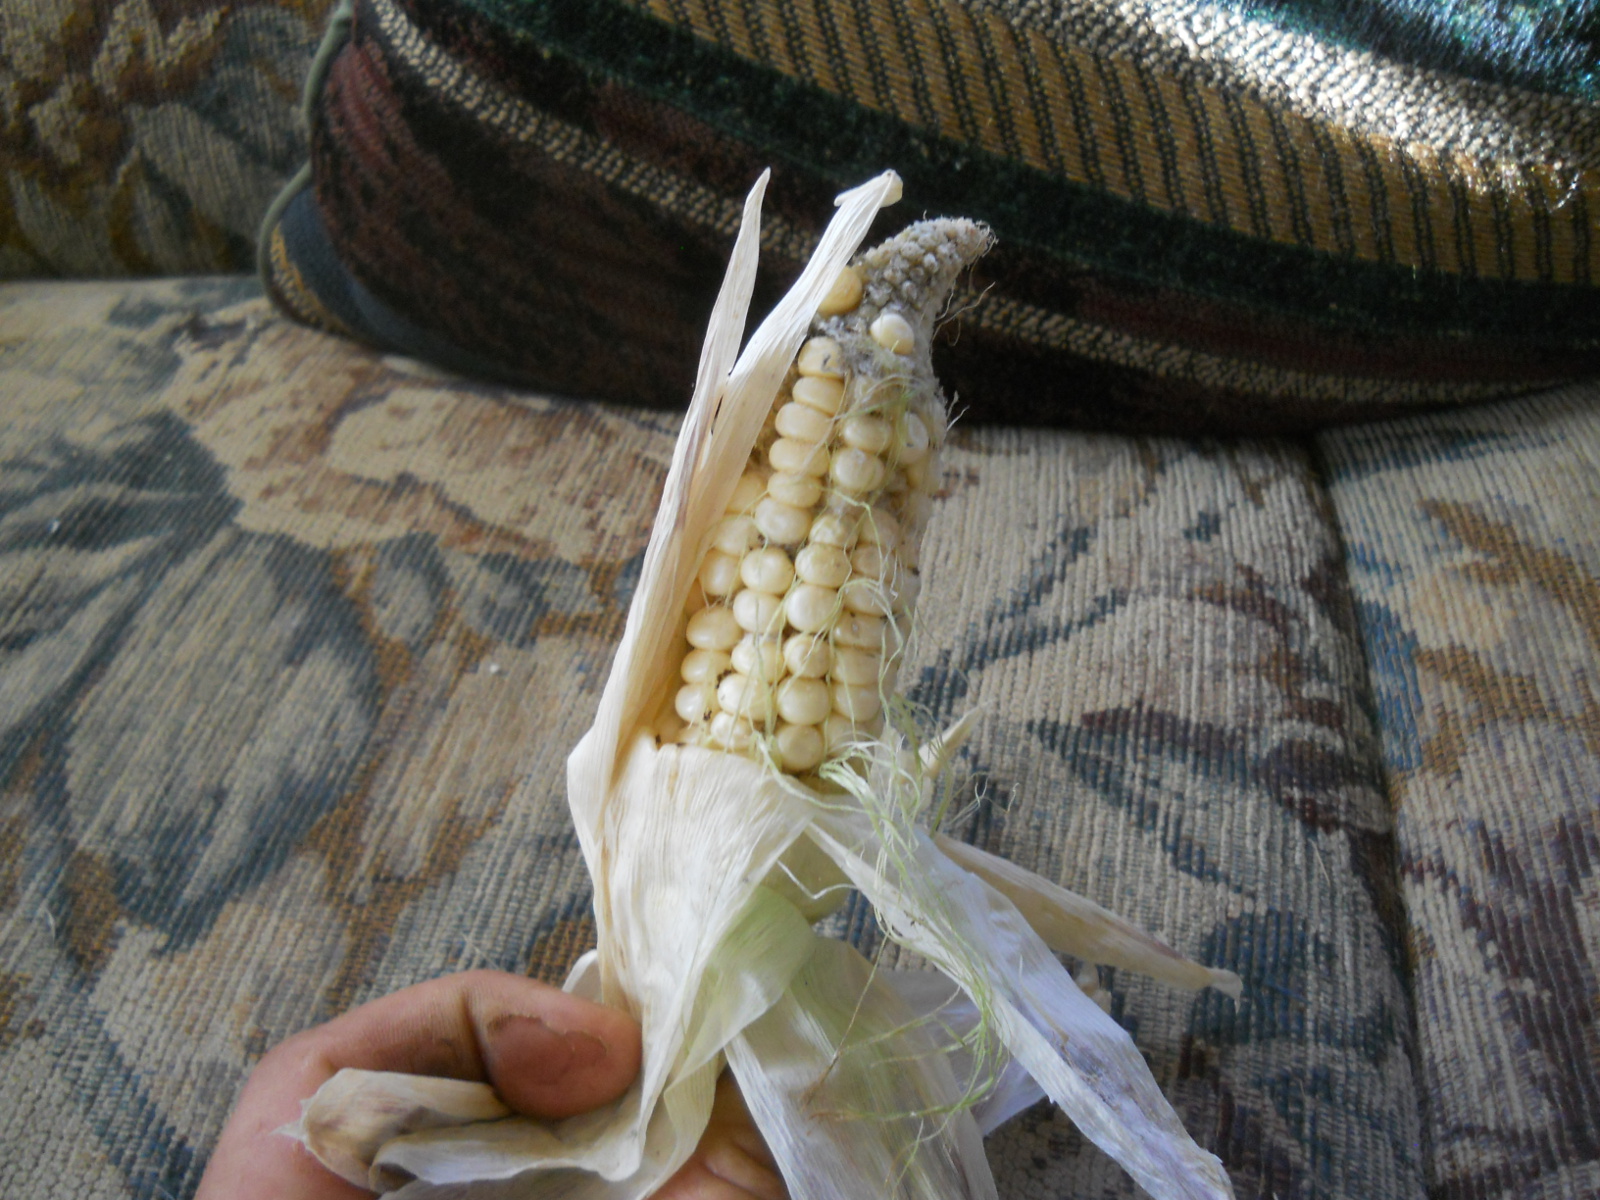
Shortly after that blog post, I believe, all of the zucchini plants pretty much dried up. The corn didn’t fare too well, but here is one ear we received — not too appetizing looking, but the corn was an experiment and tasted just like corn! 🙂
However, through the Summer, with the green beans really slowing down, the turnips continued to do well in the mulch garden beds, even though I didn’t manually water them:
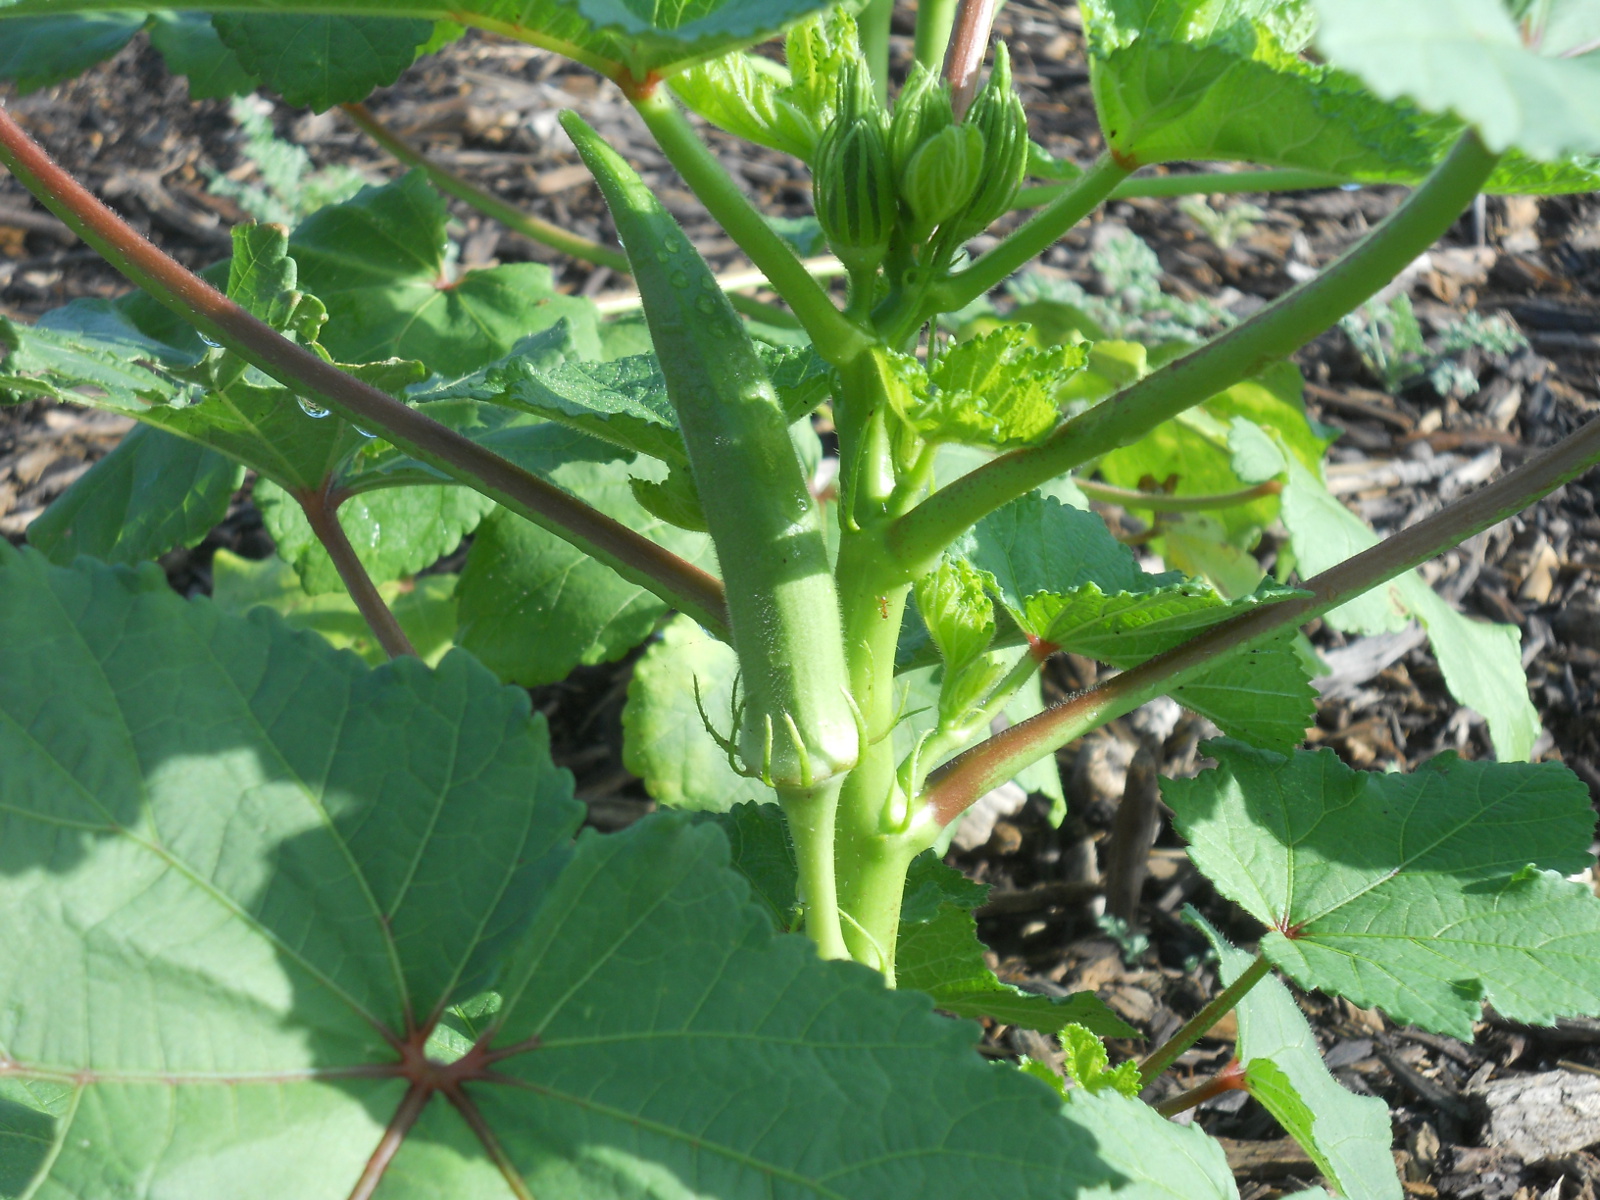
And the okra started to take off too!
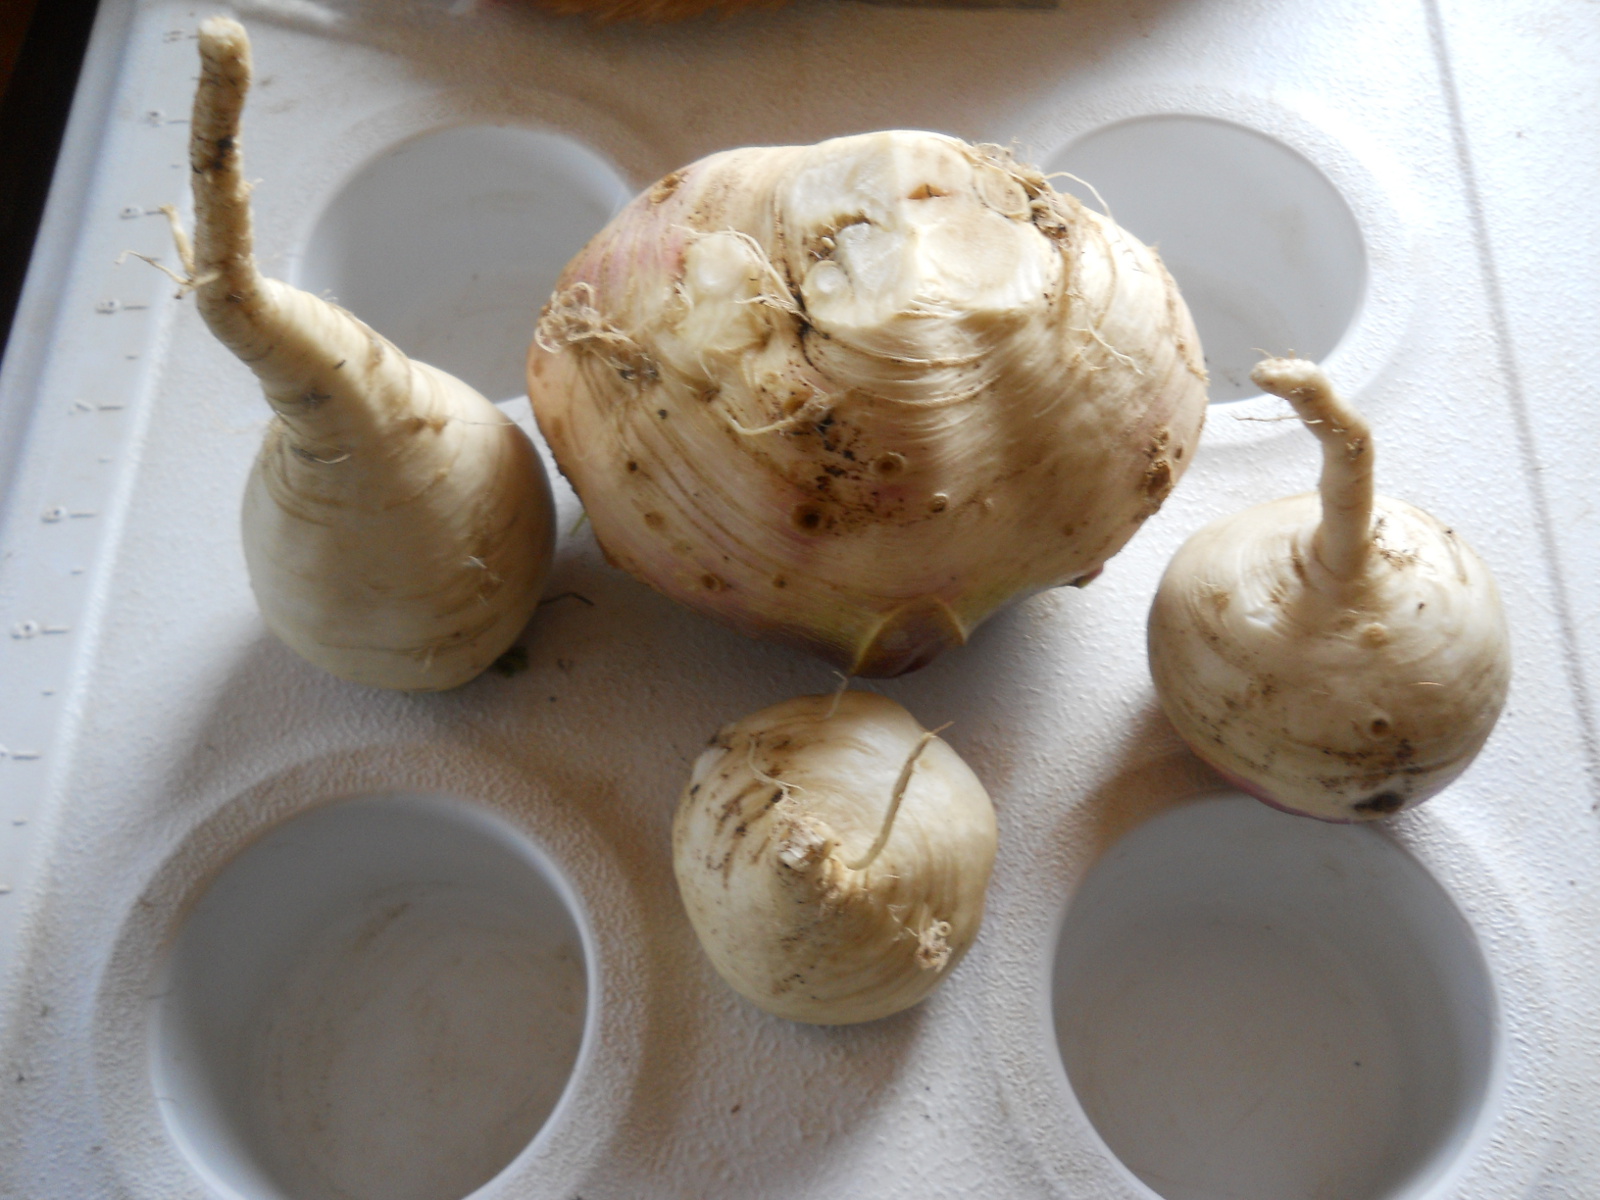
In September, here were some turnips I pulled to give to the piggies:
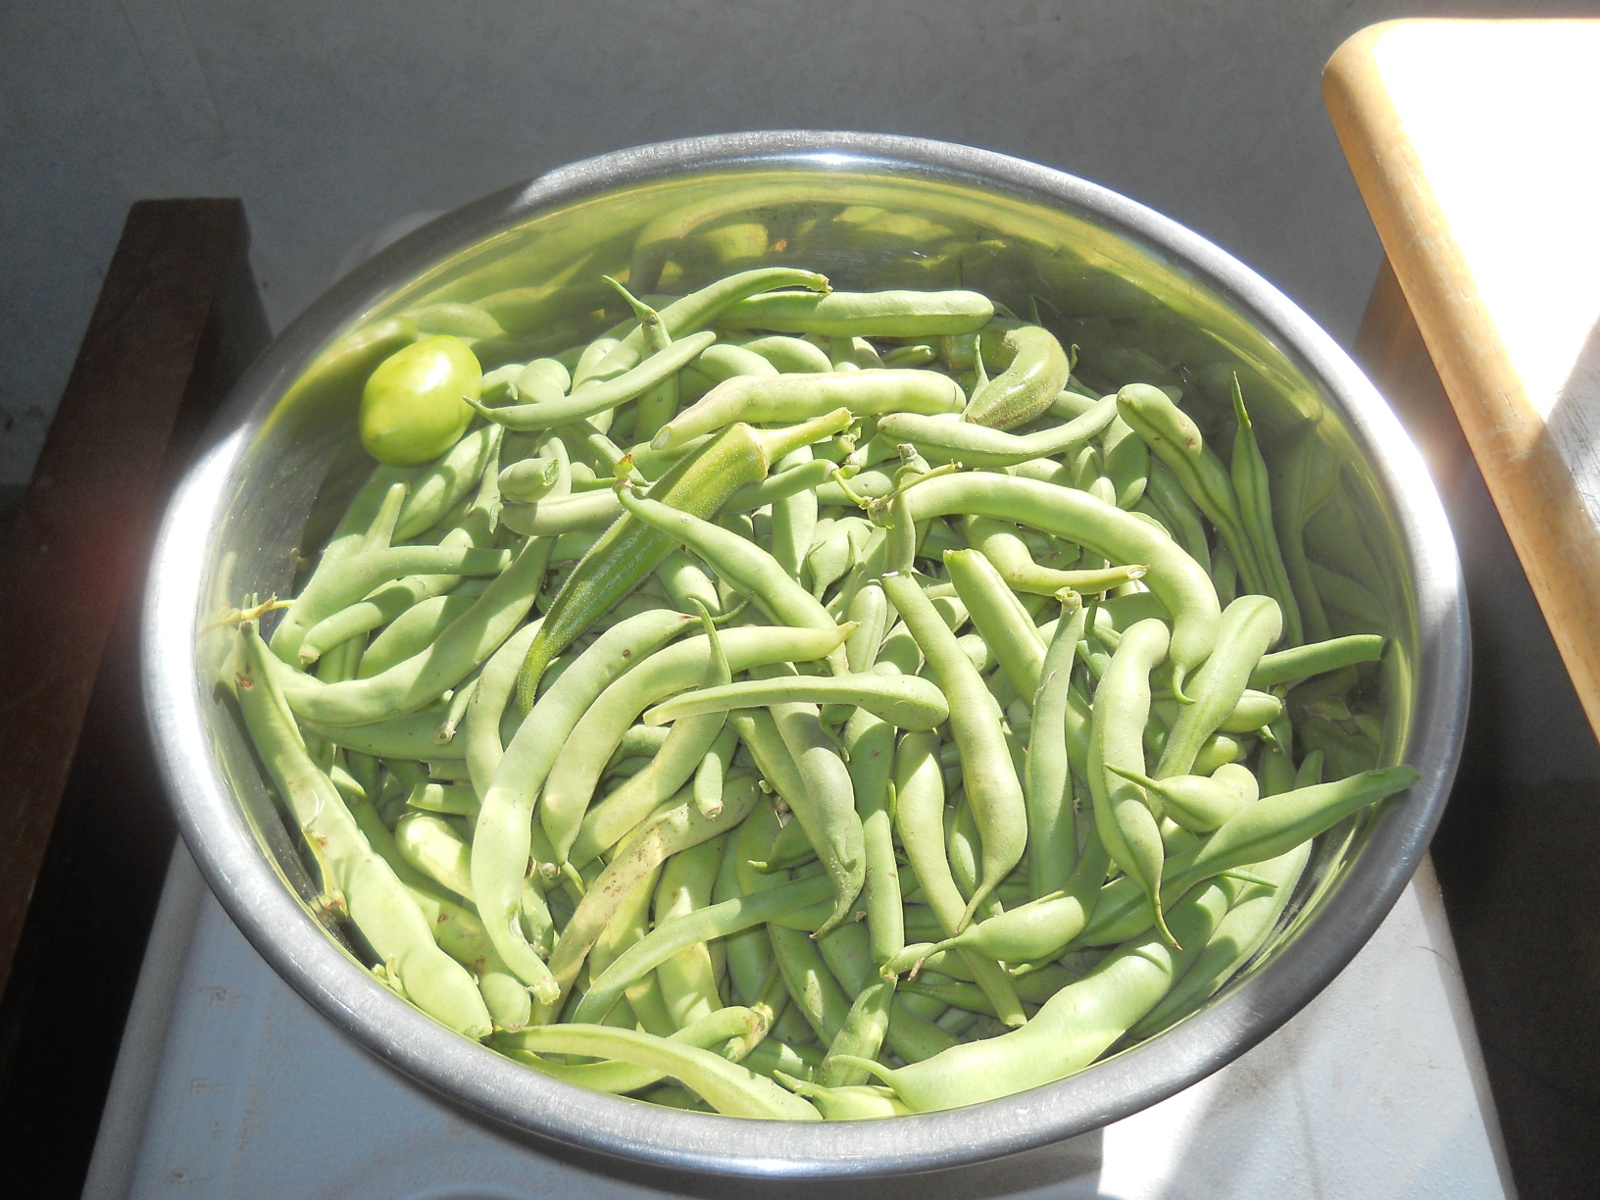
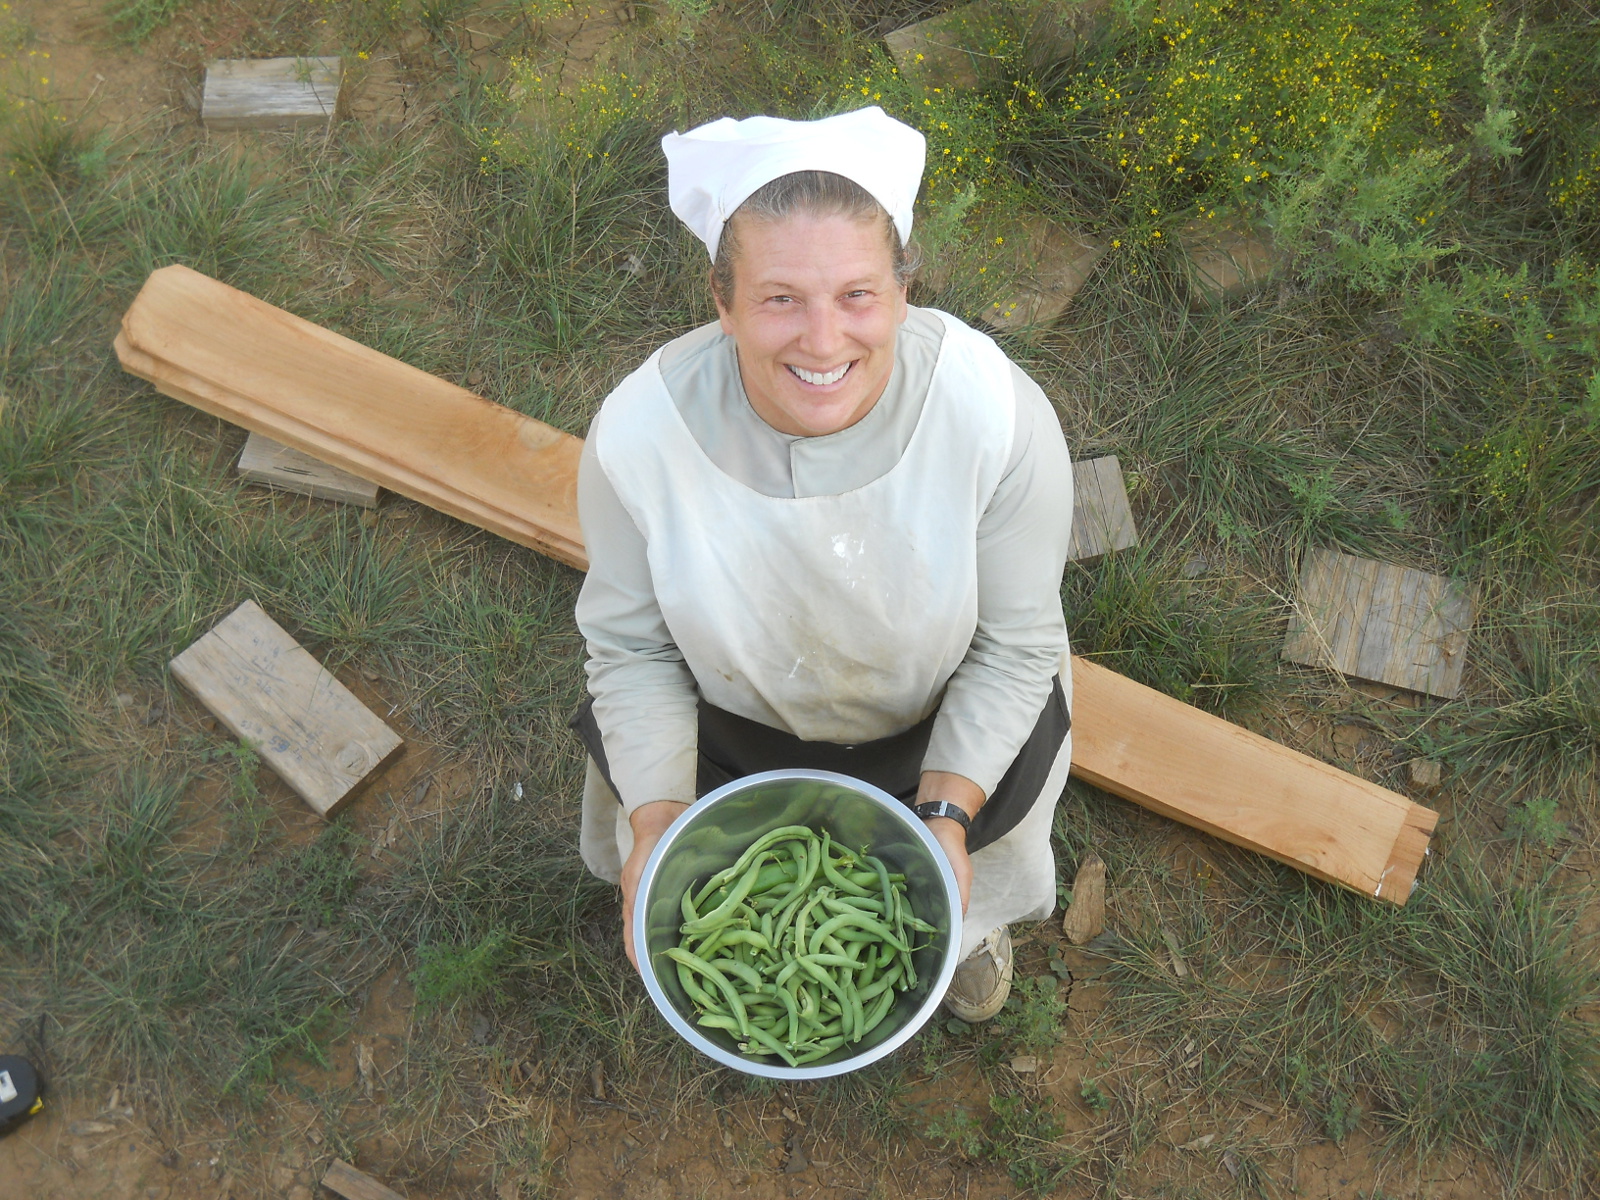
And with things cooling by October, the green beans started taking off again:
While working on the house from up on the porch roof, Sue showed me some more October beans:
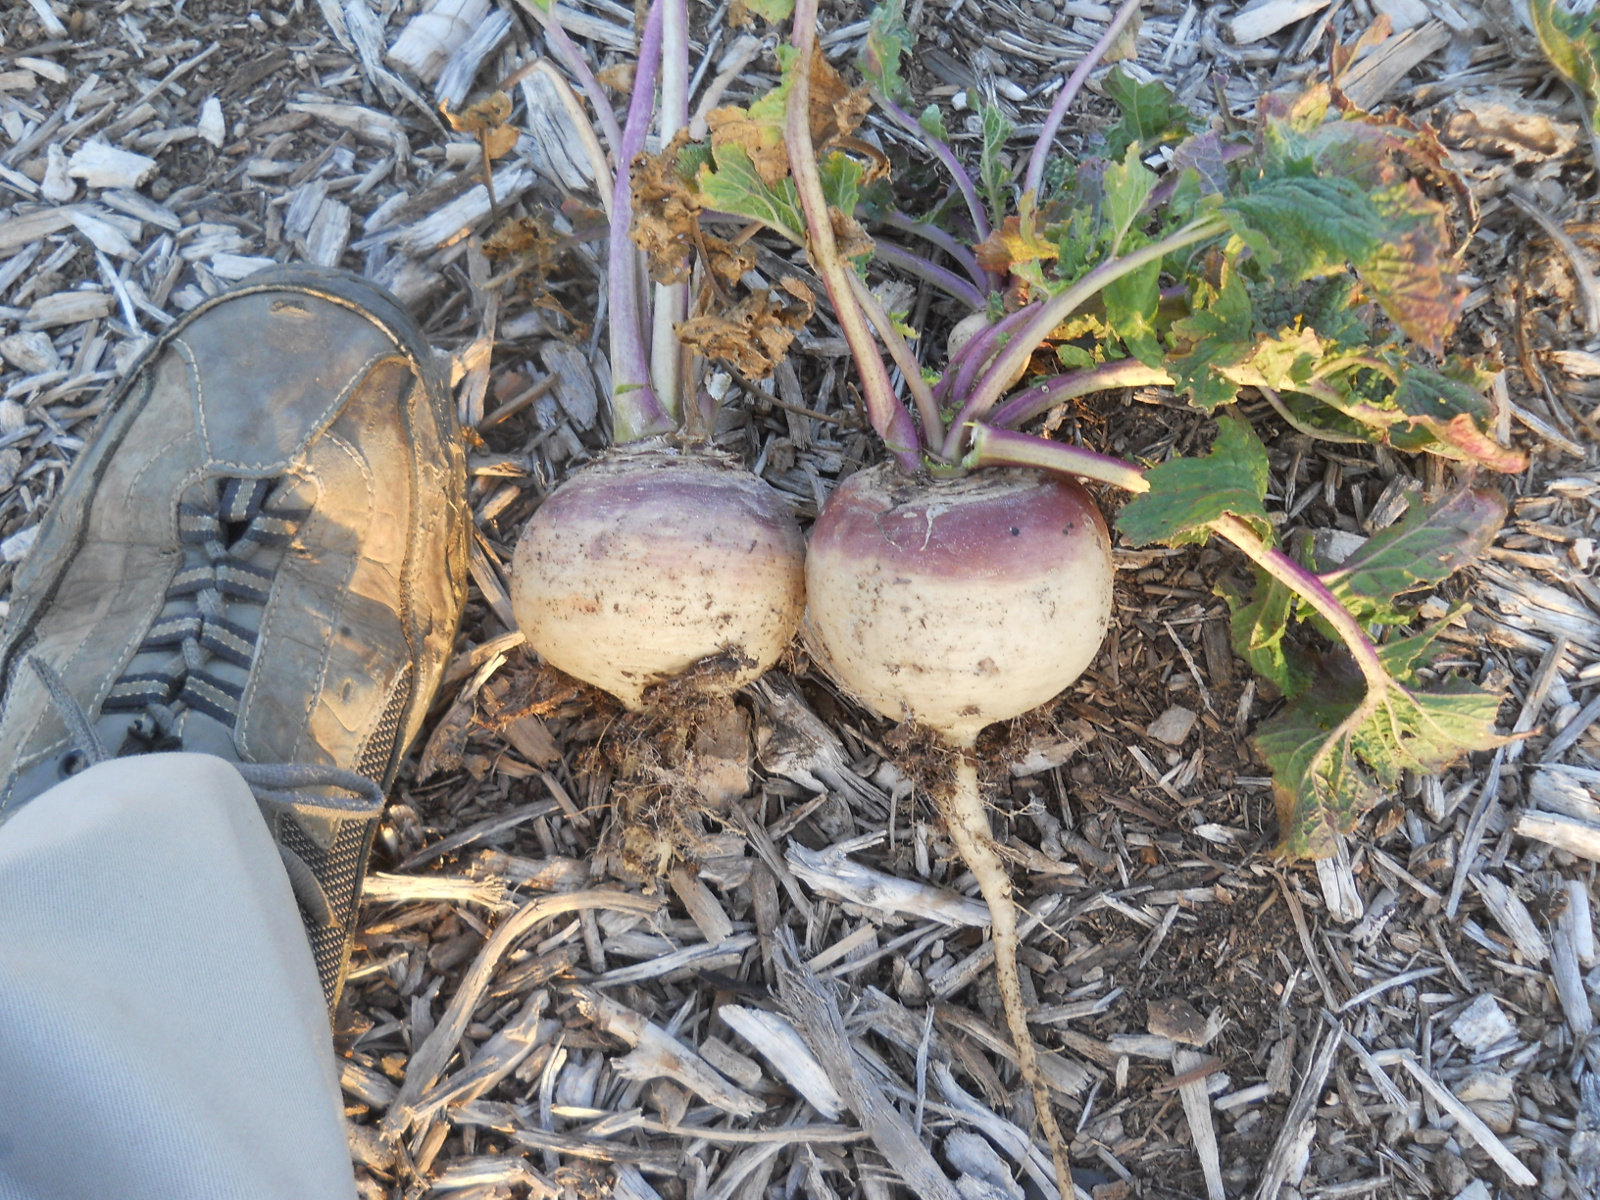
And some turnips!
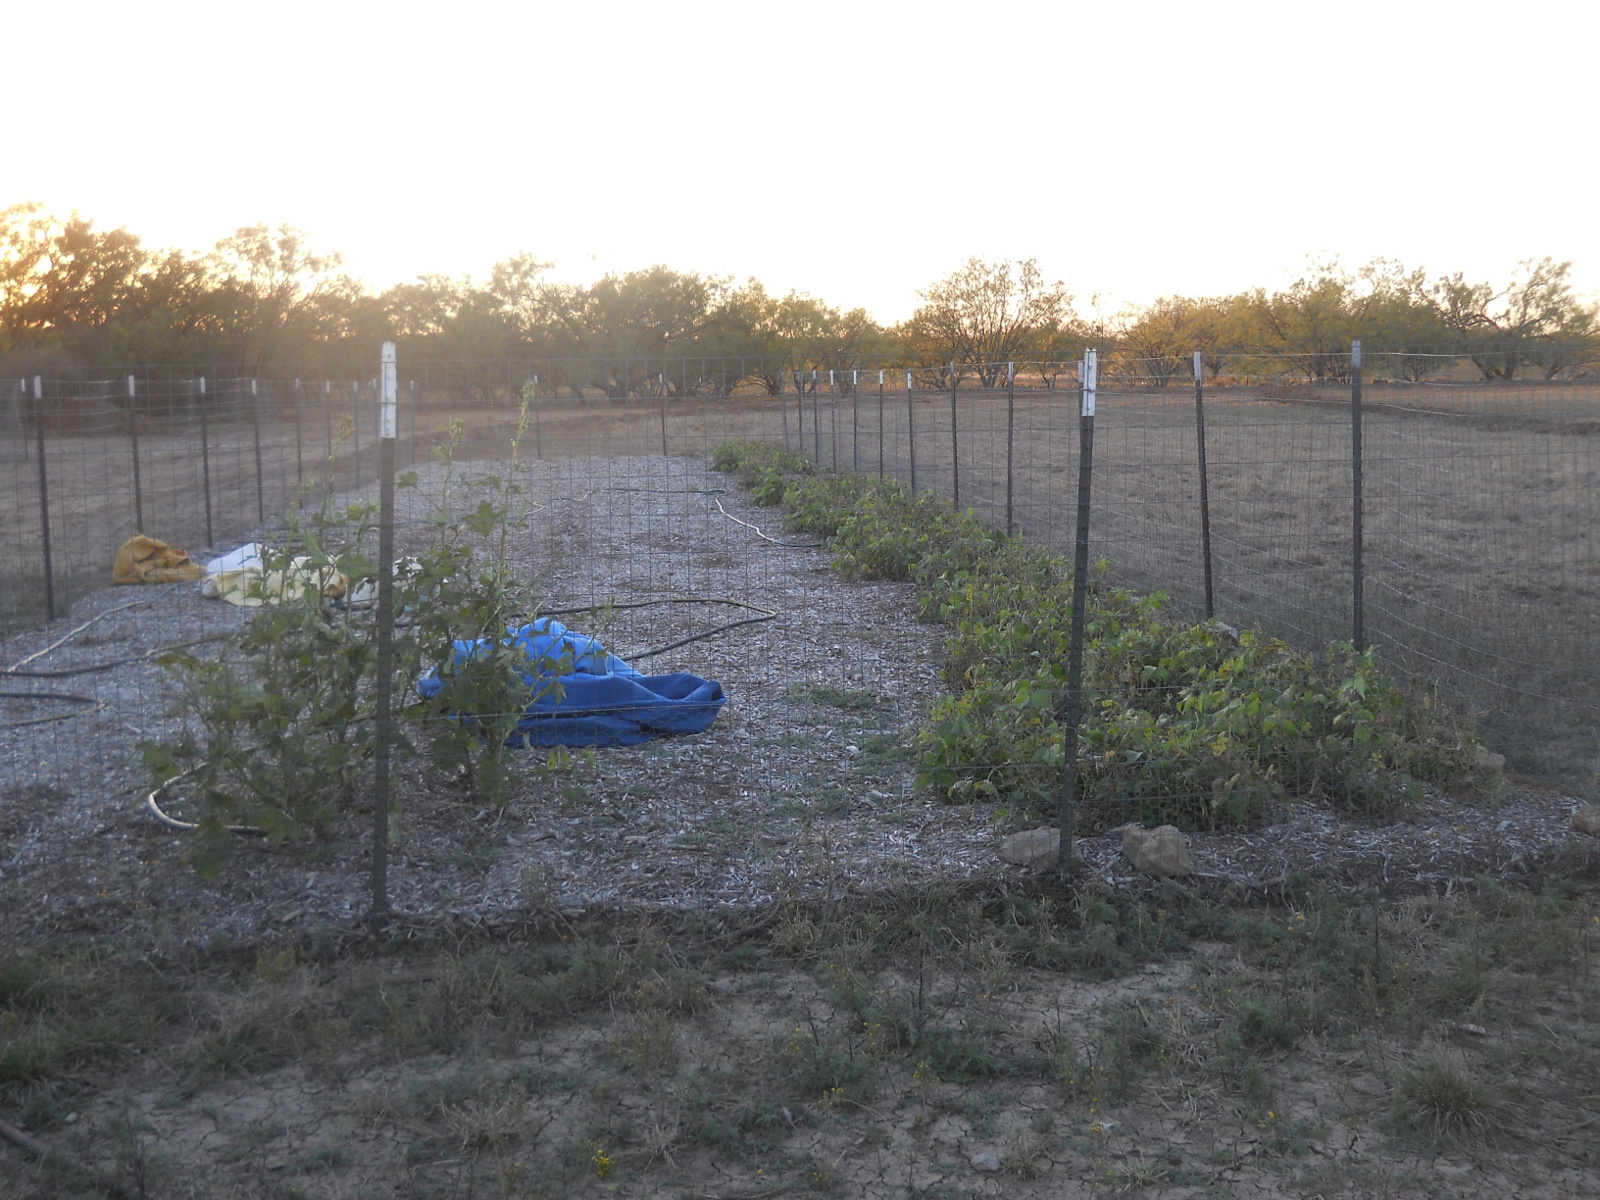
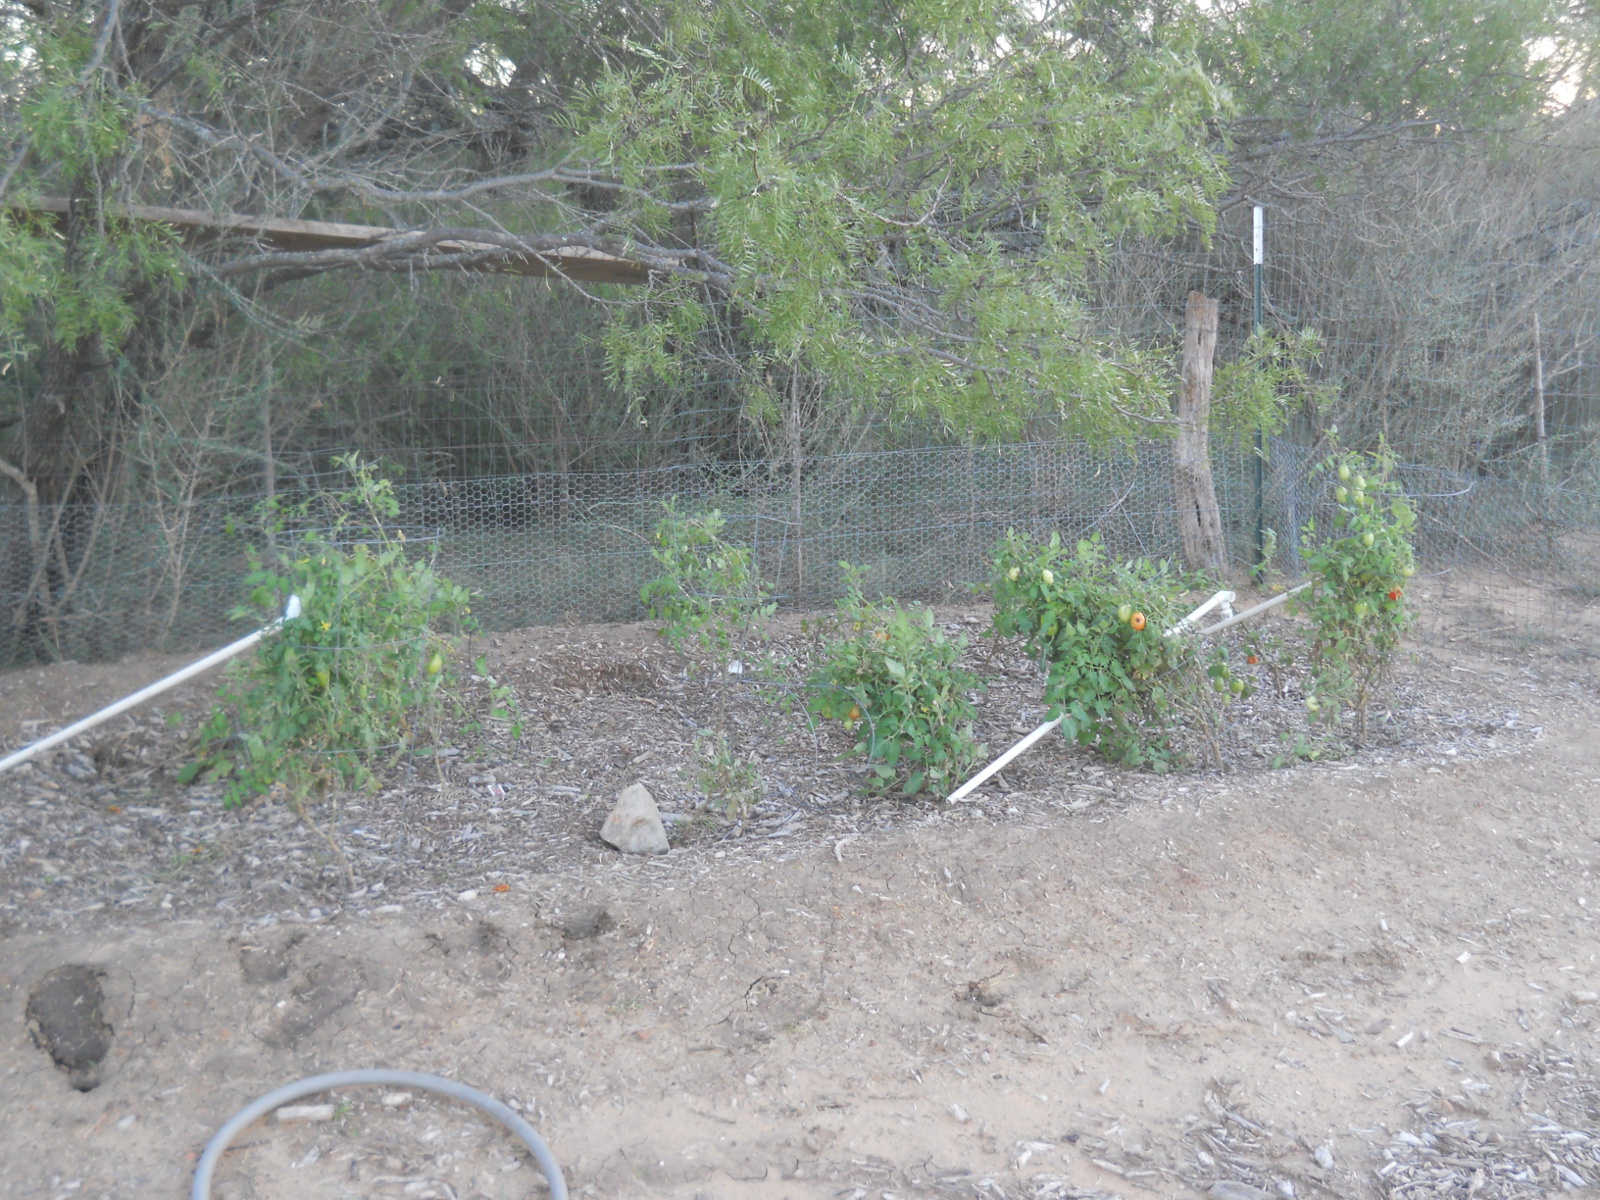
By mid November, here is what the gardens looked like:
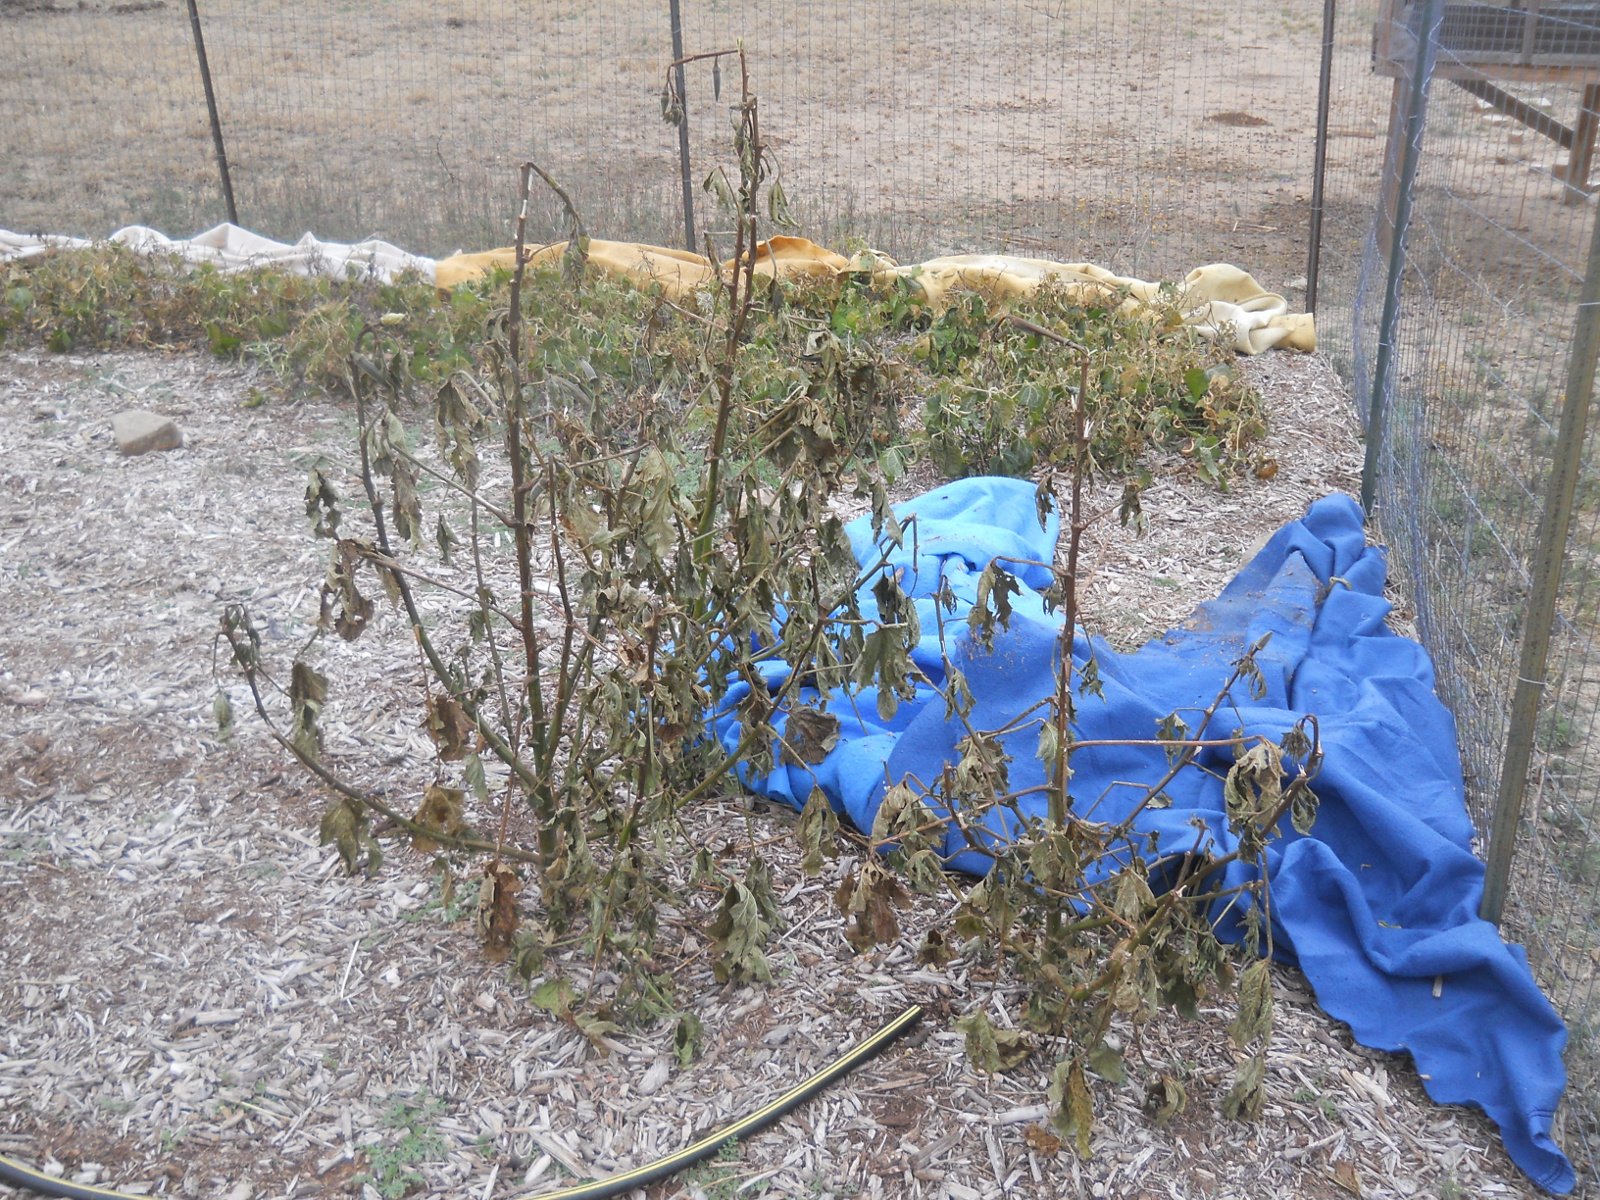
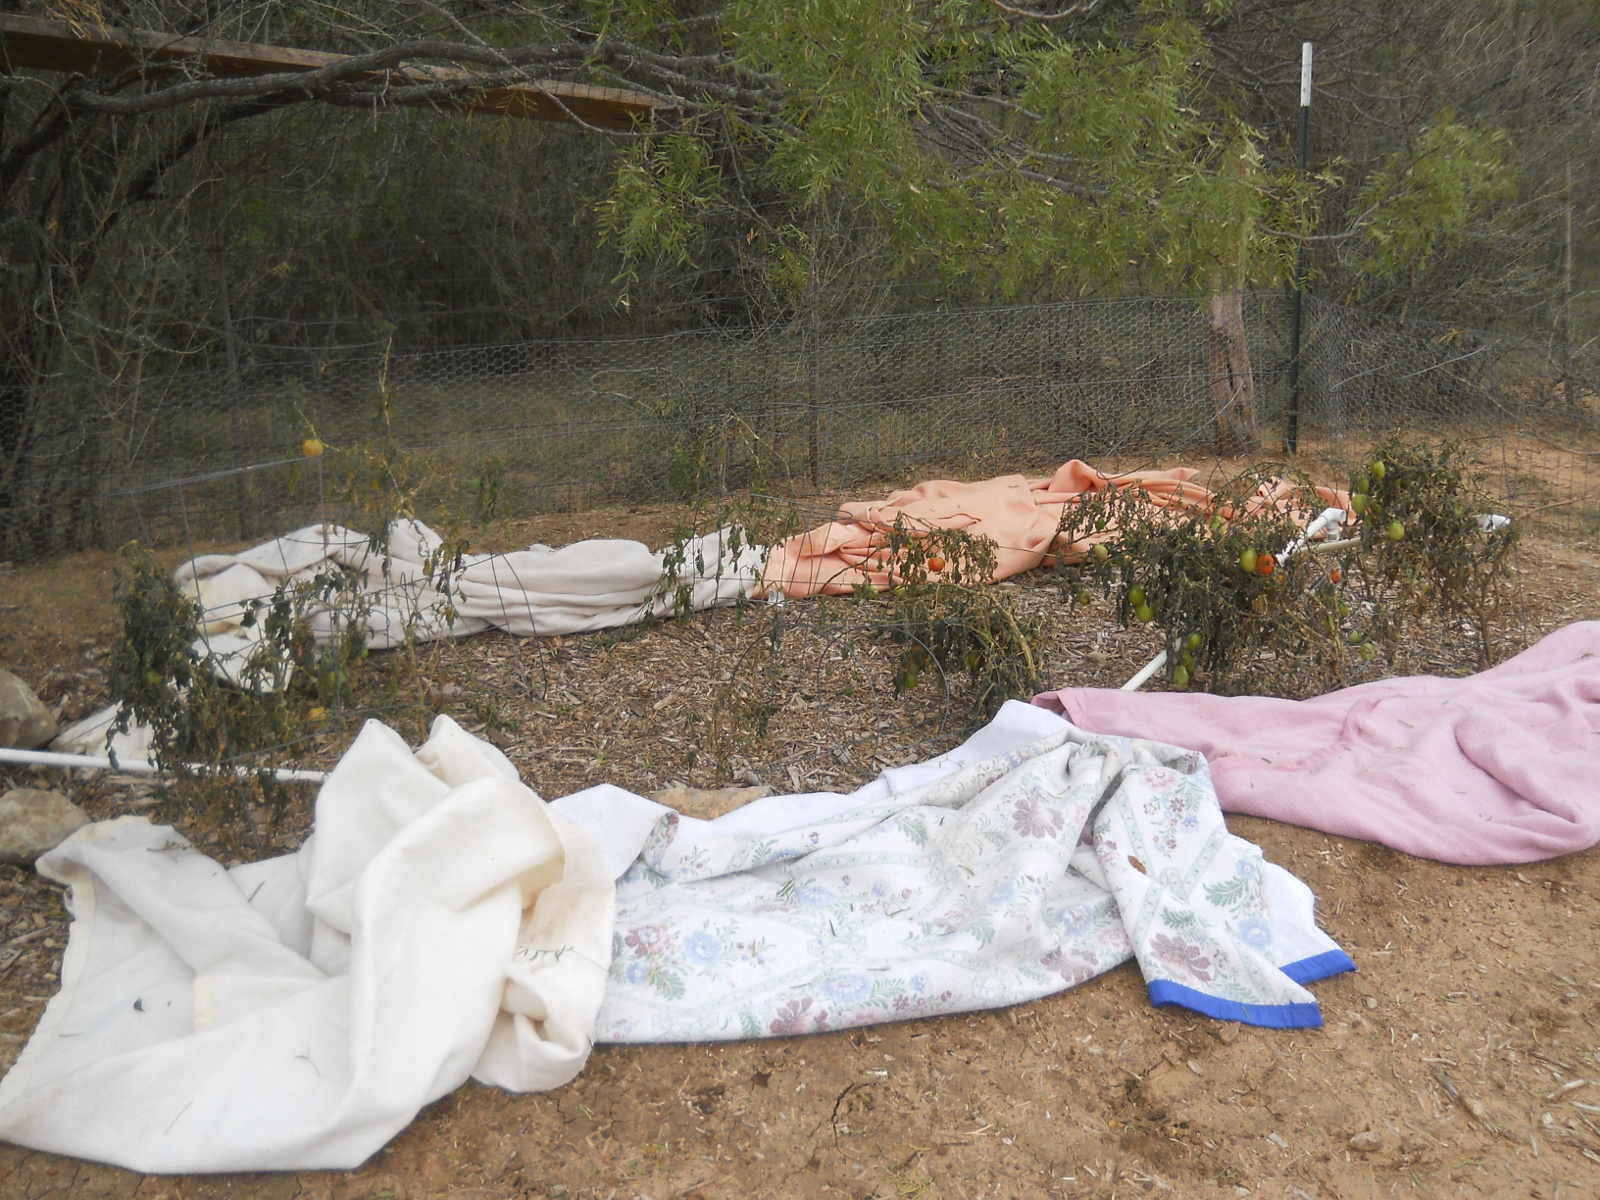
But, the cold was coming, and we covered with blankets as much as we could, which was almost everything. However, after several nights, most everything didn’t make it:
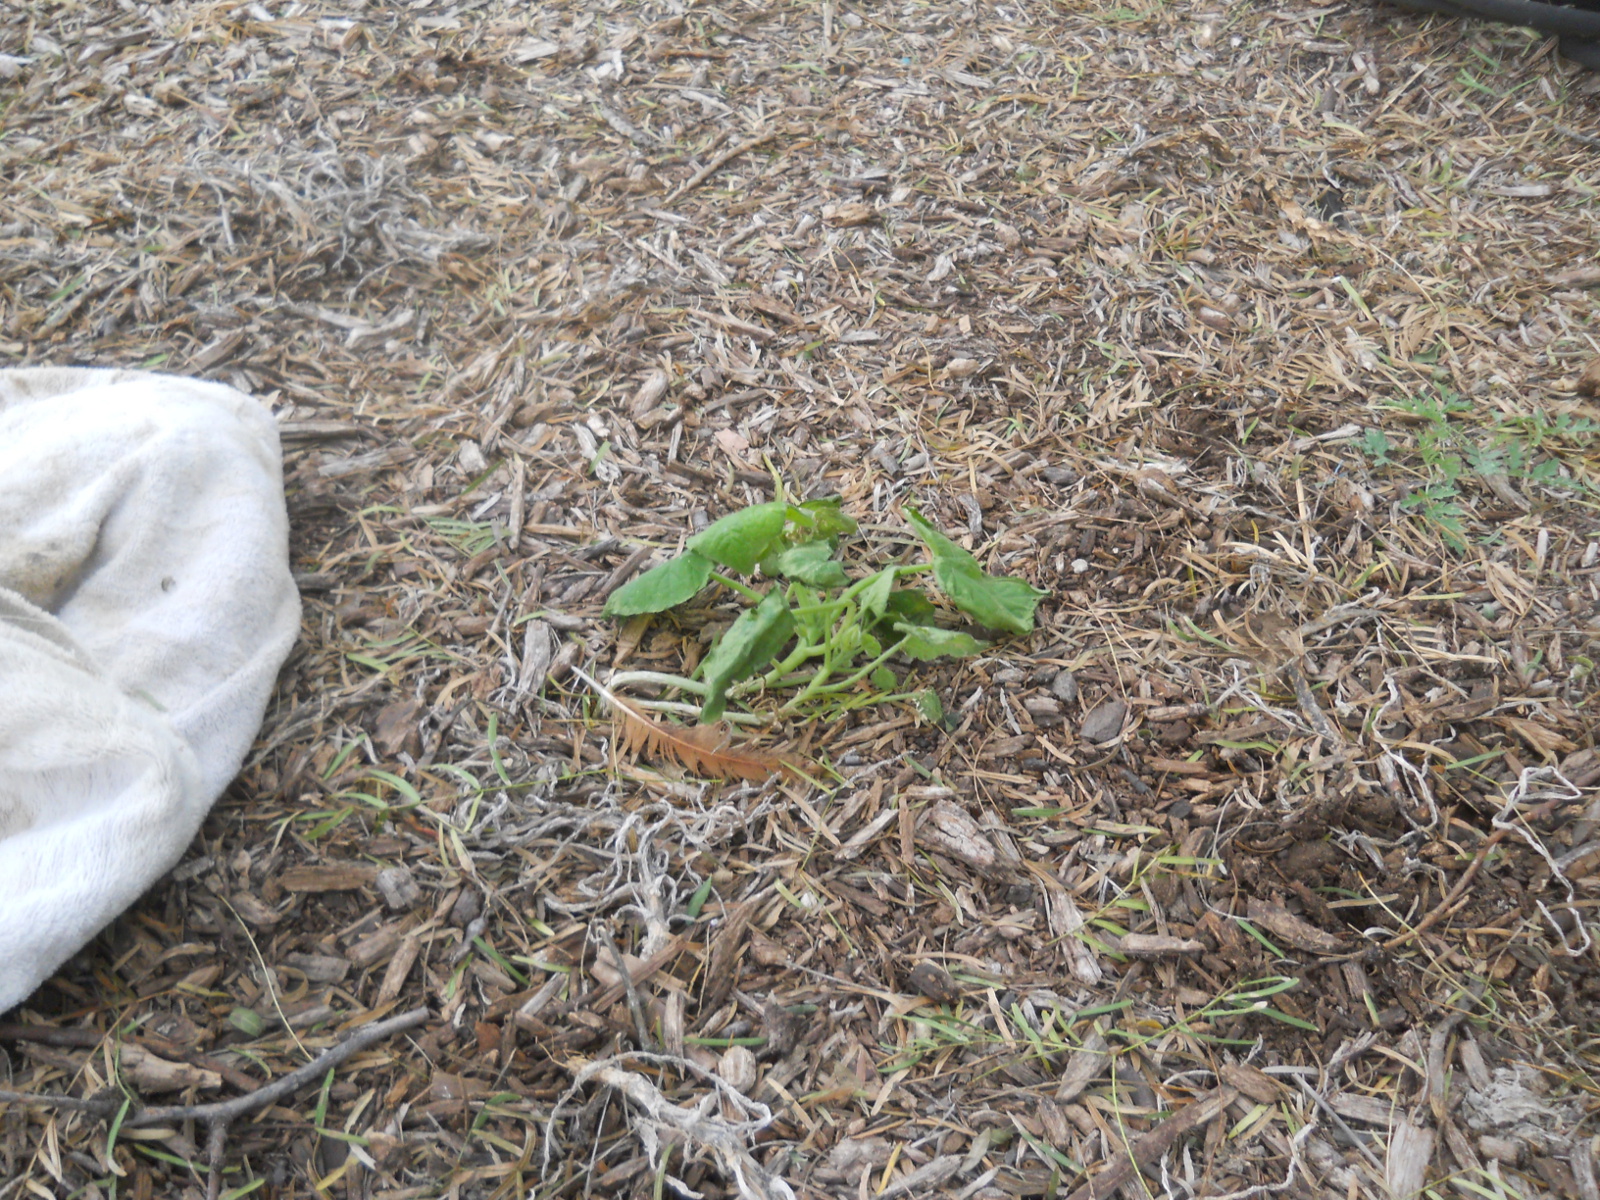
…except for this late-germinating zucchini. But, a few weeks later, this even succumbed to the cold:
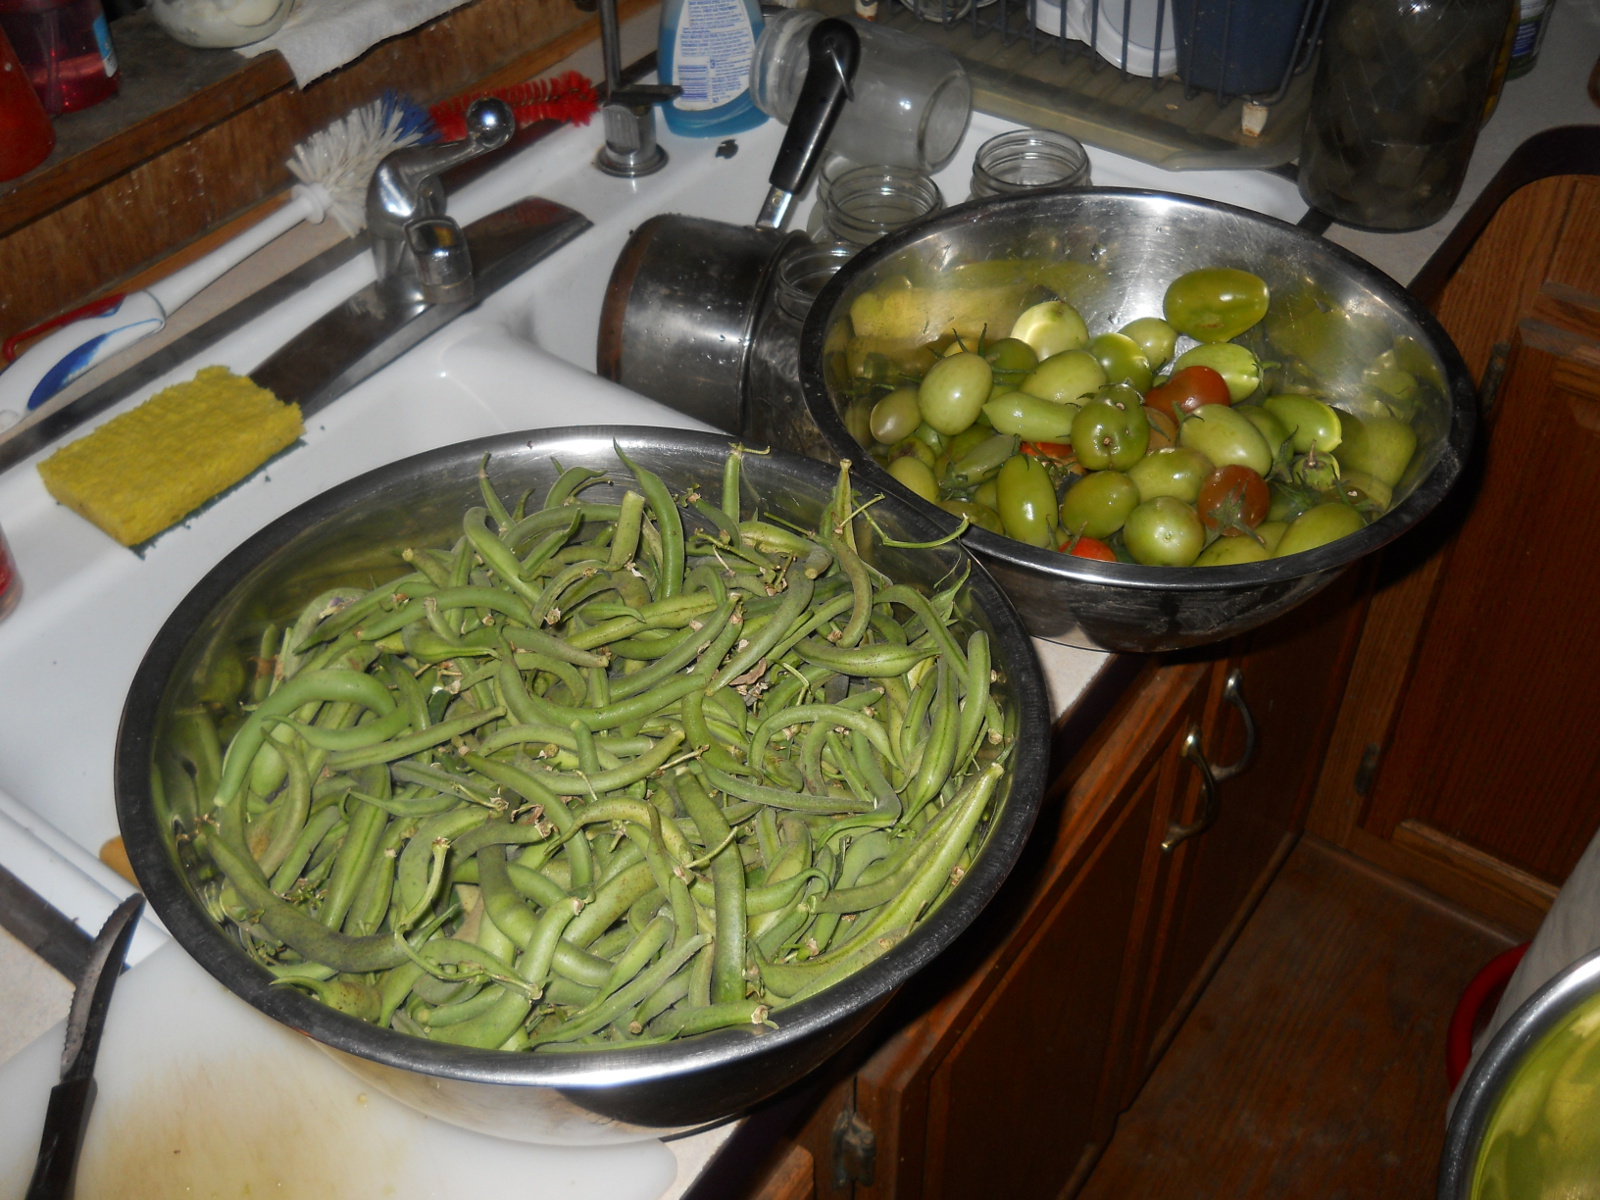
And here is the last bean and tomato haul after the freezing nights:
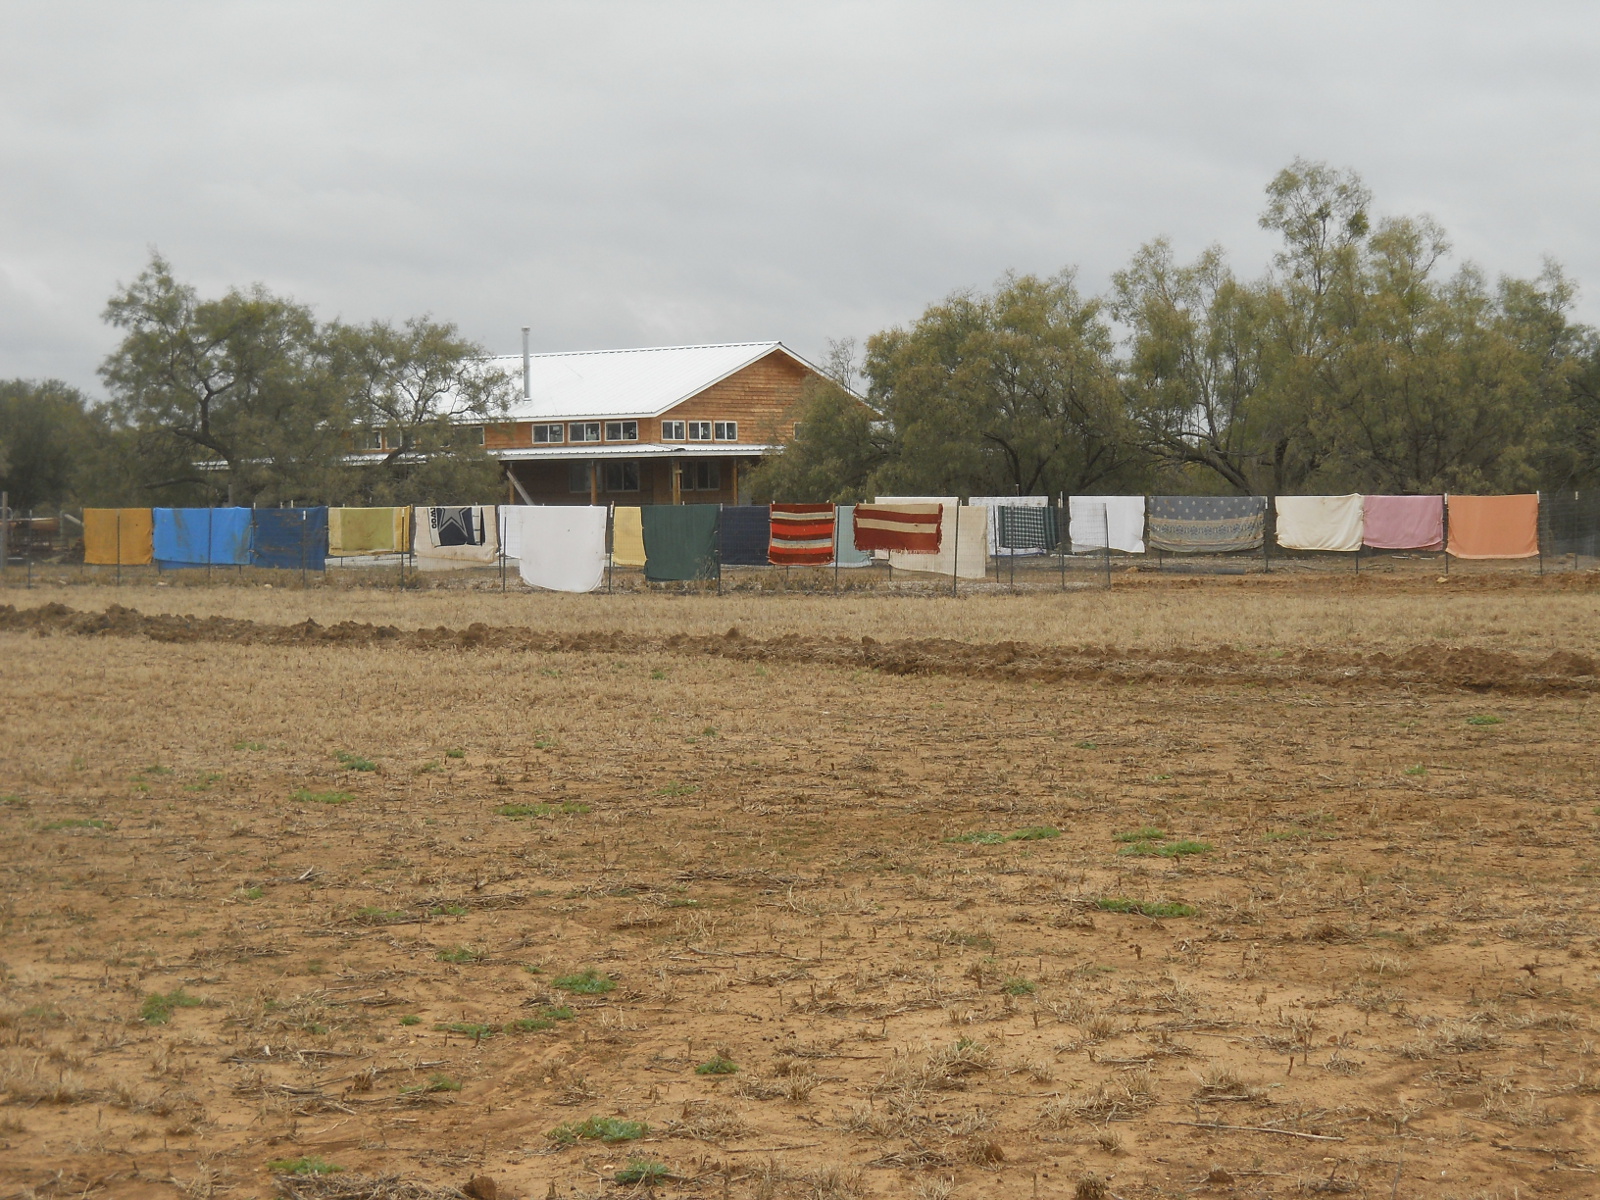
And a final, nostalgic look at the gardens with the blankets hanging to dry:
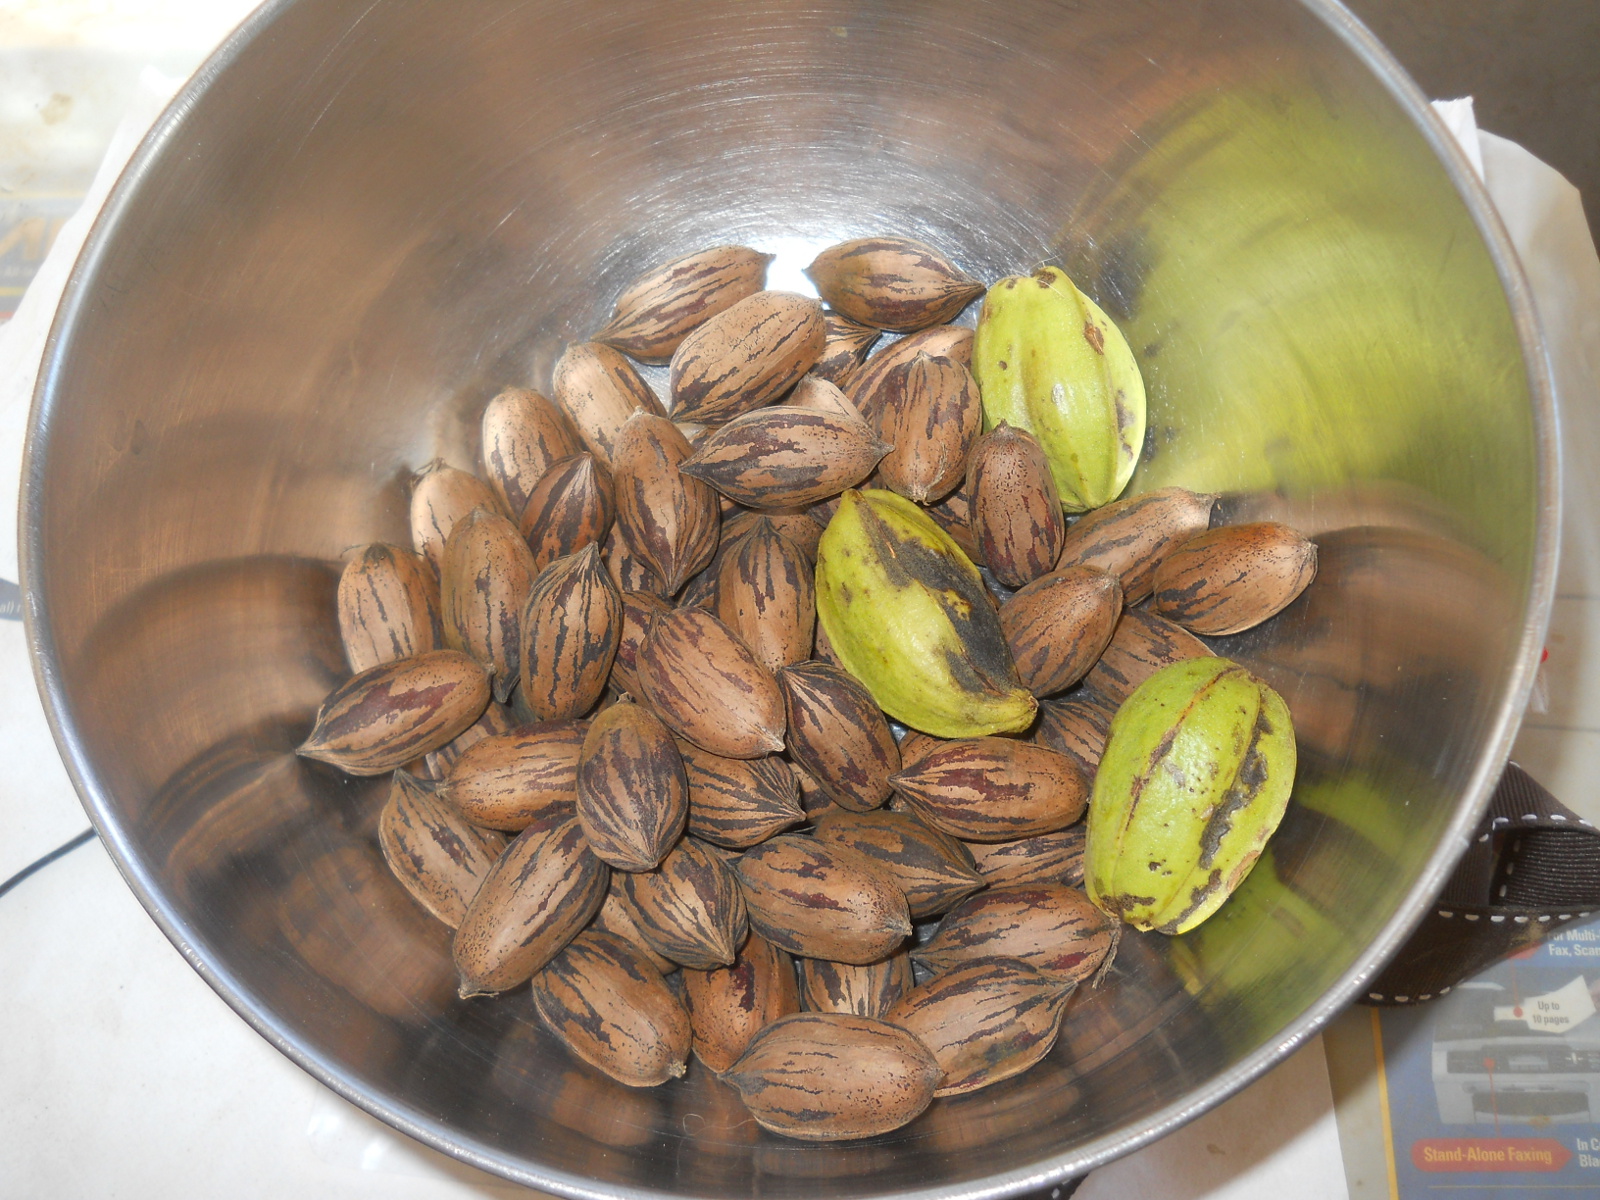
And finally, the Lord also granted some pecans again from our pecan trees!
We are very grateful to God for His gracious and merciful provisions from the garden this year, the successes and failures, and learning more about gardening and mulch garden beds. We look forward to the next growing season, if the Lord wills it to see us to that point — the season of new life after the time of cold and death, much like a cold, dead soul being brought forth in new life by the work of the Holy Spirit.
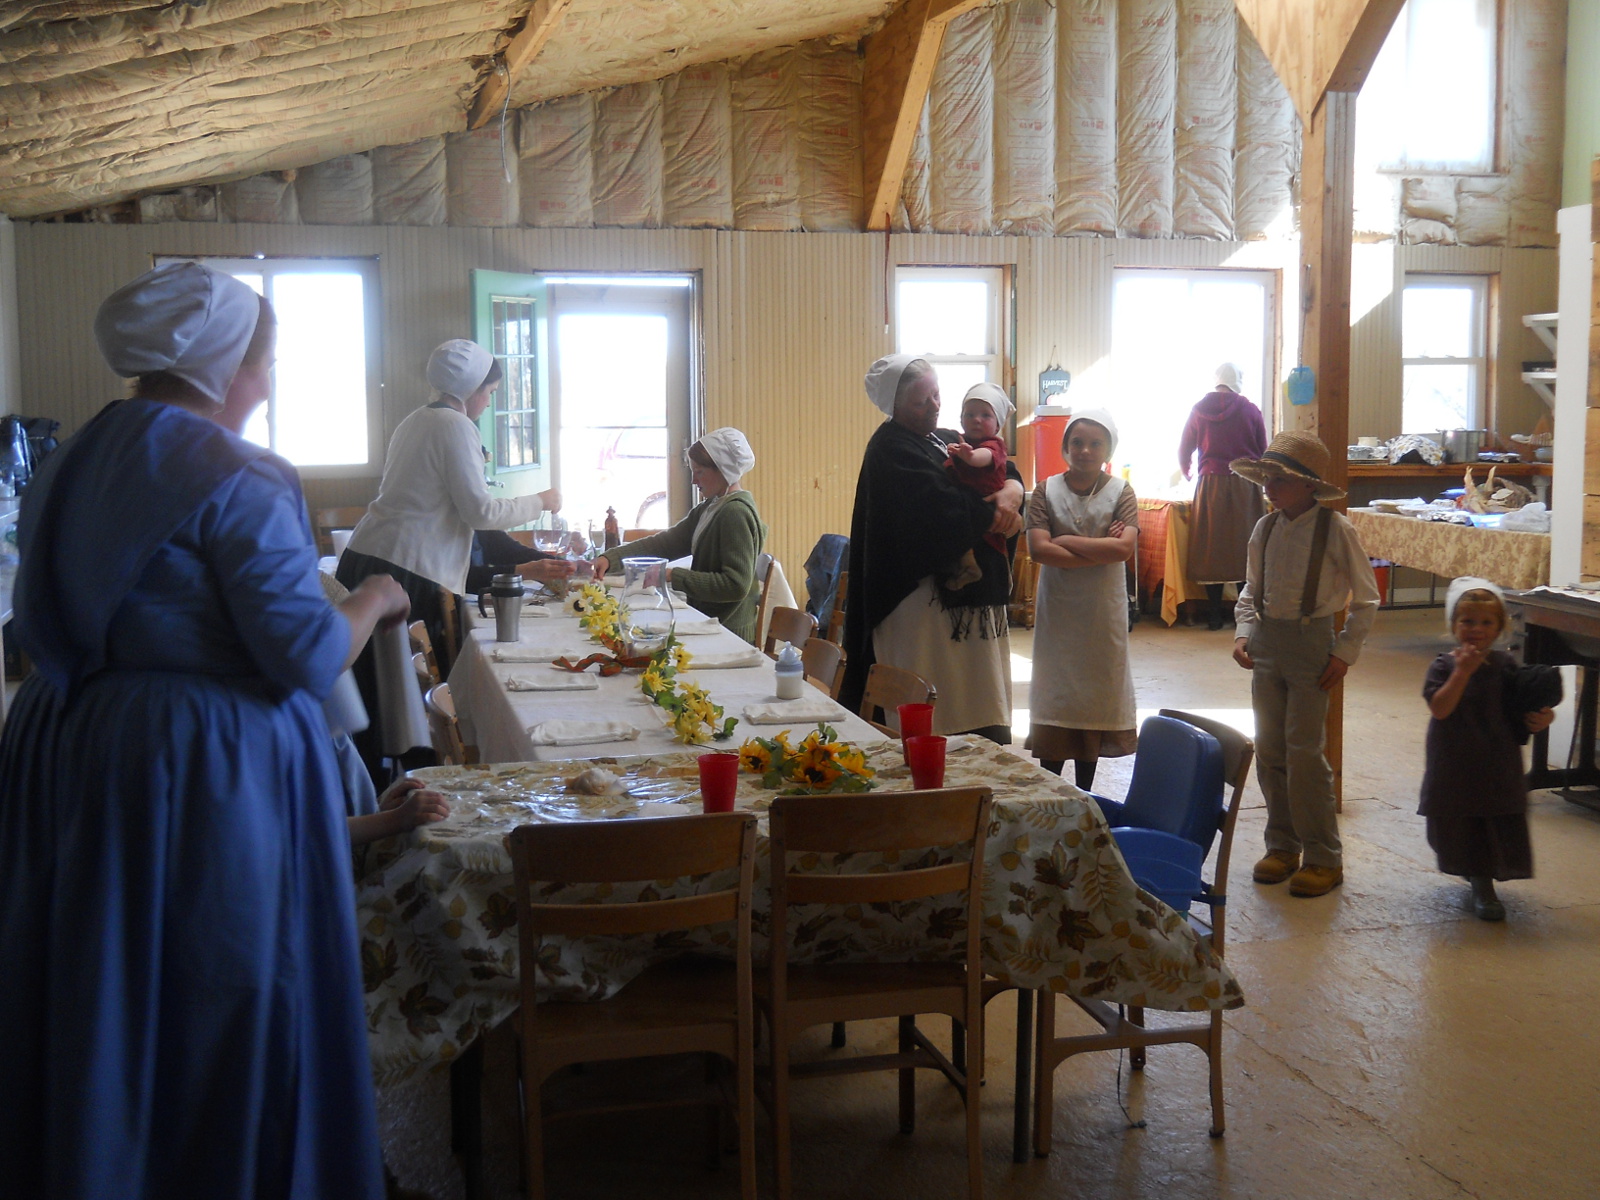
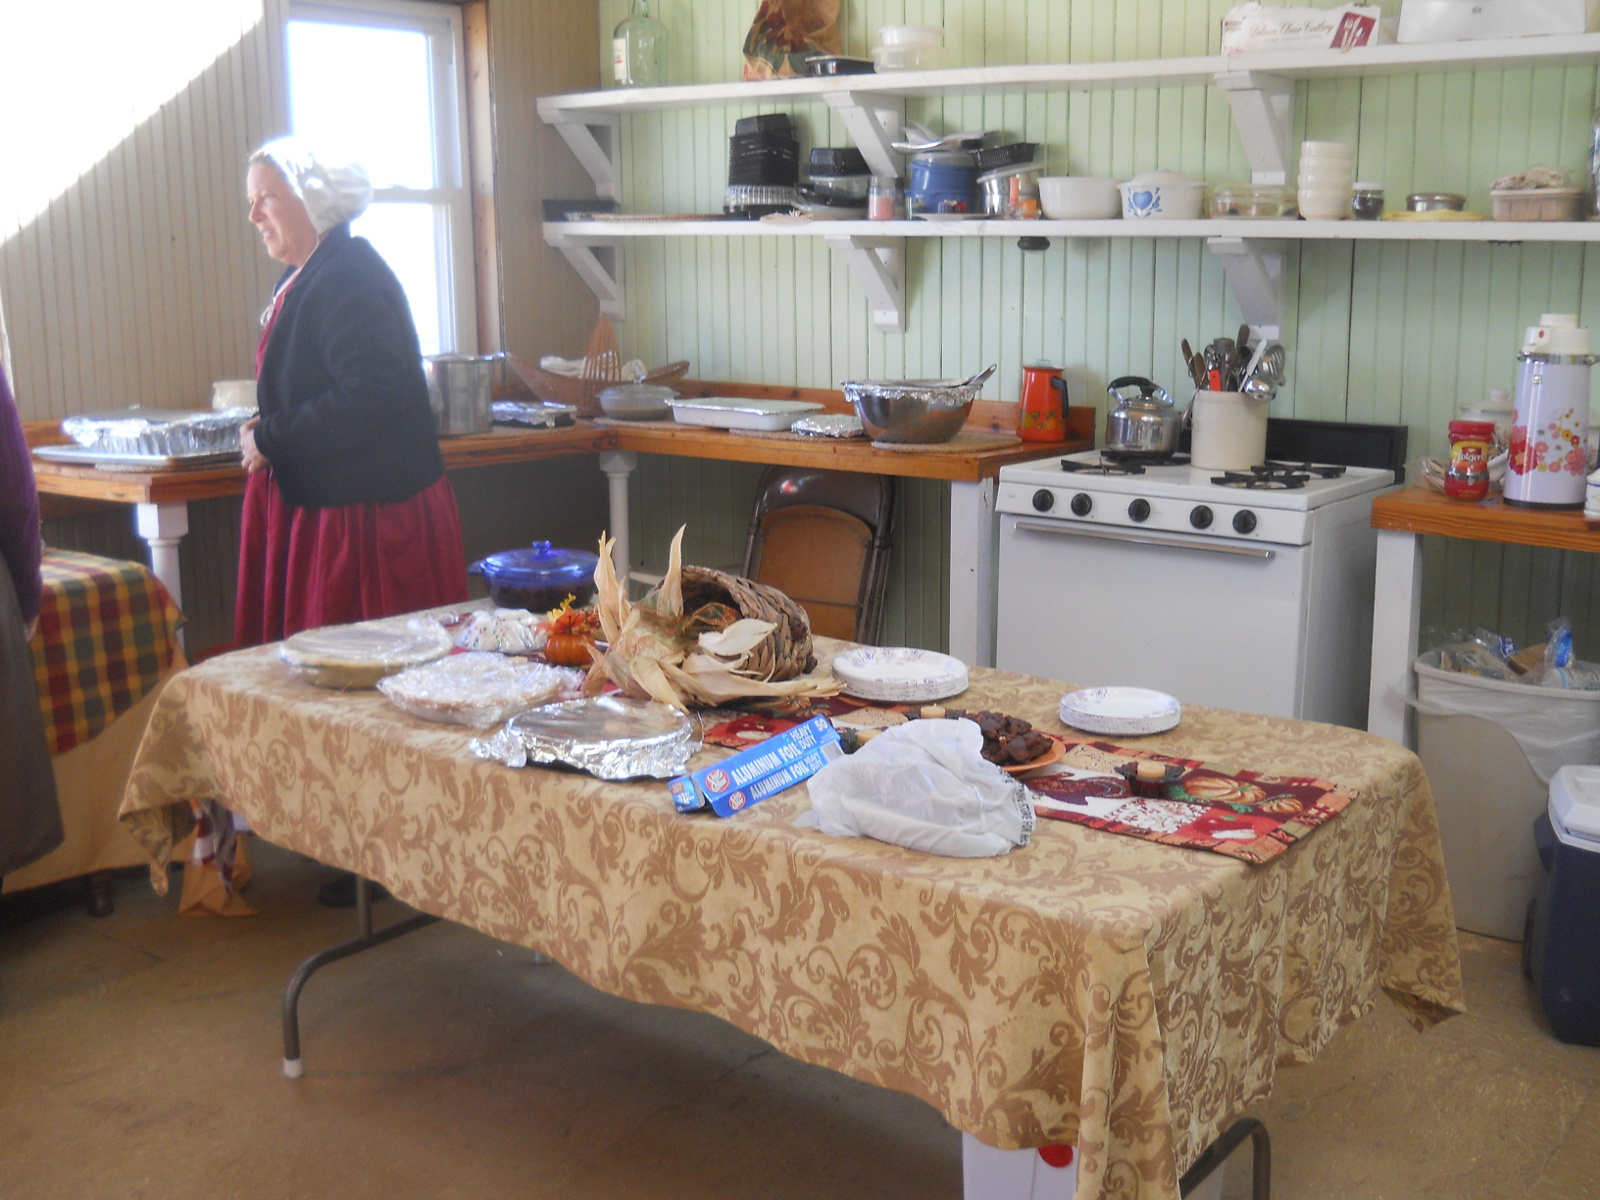
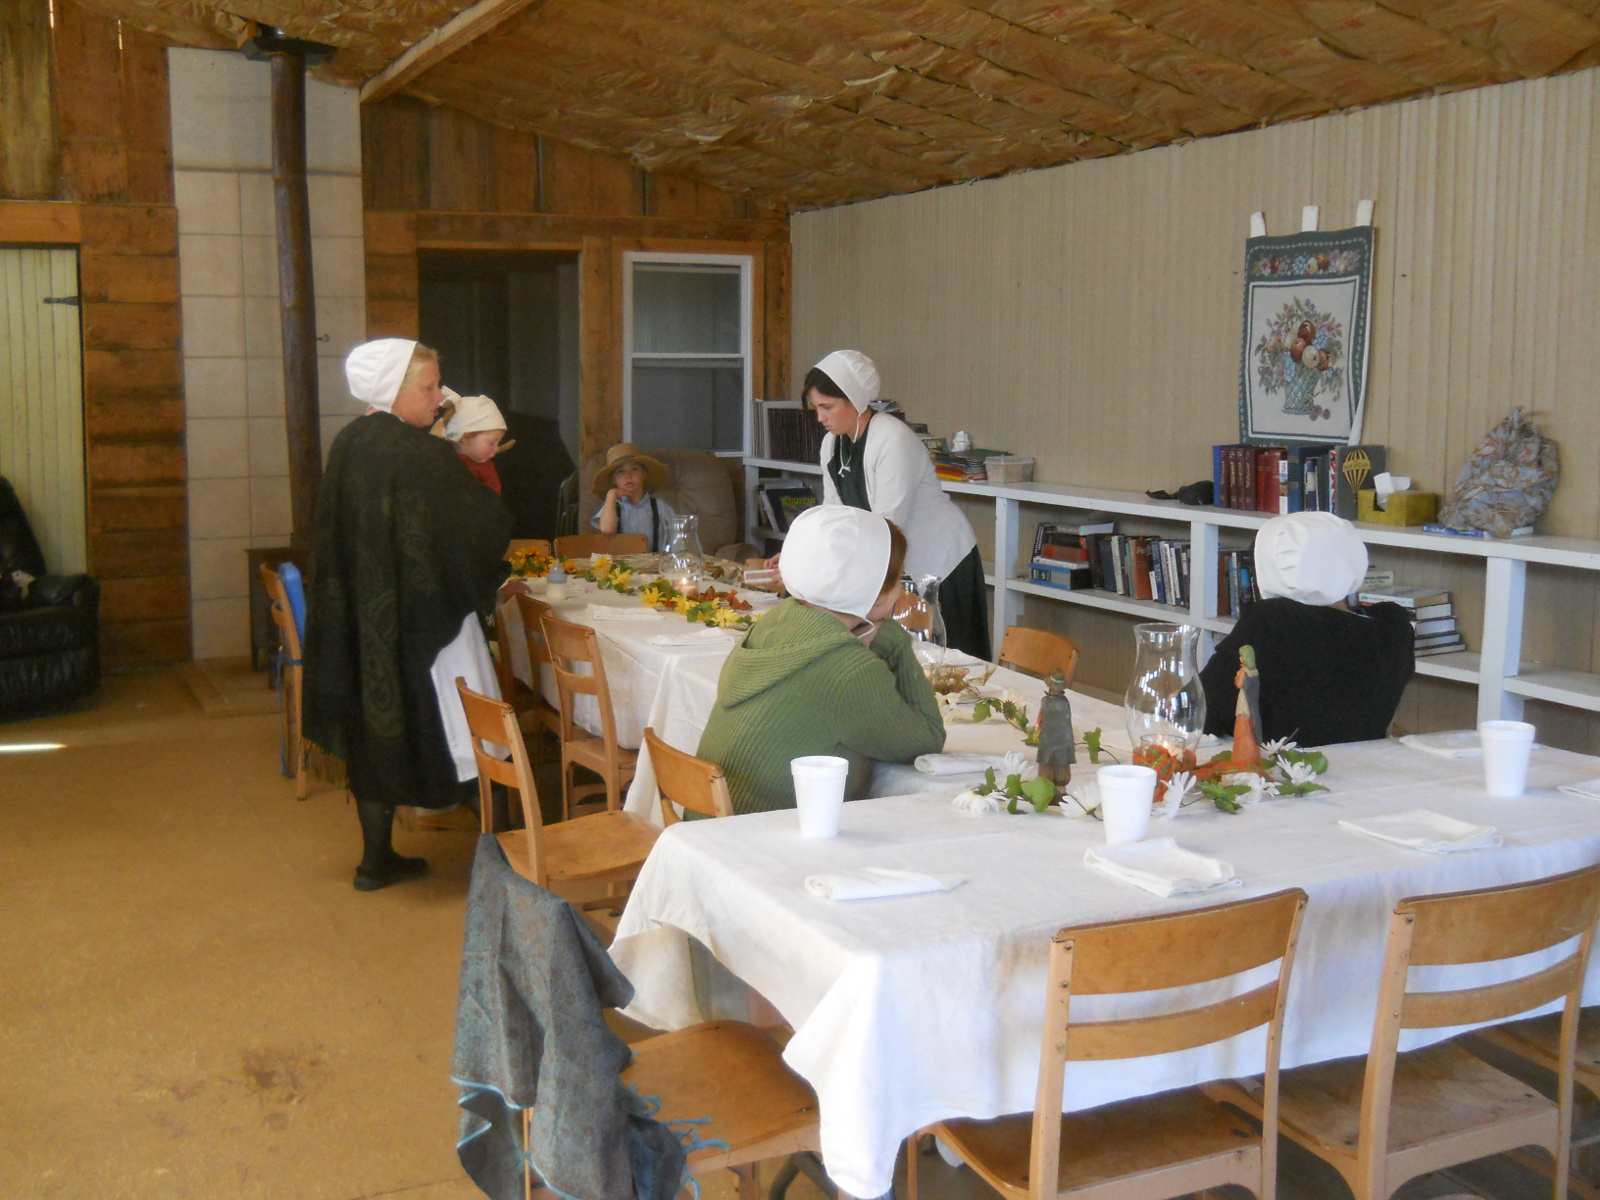
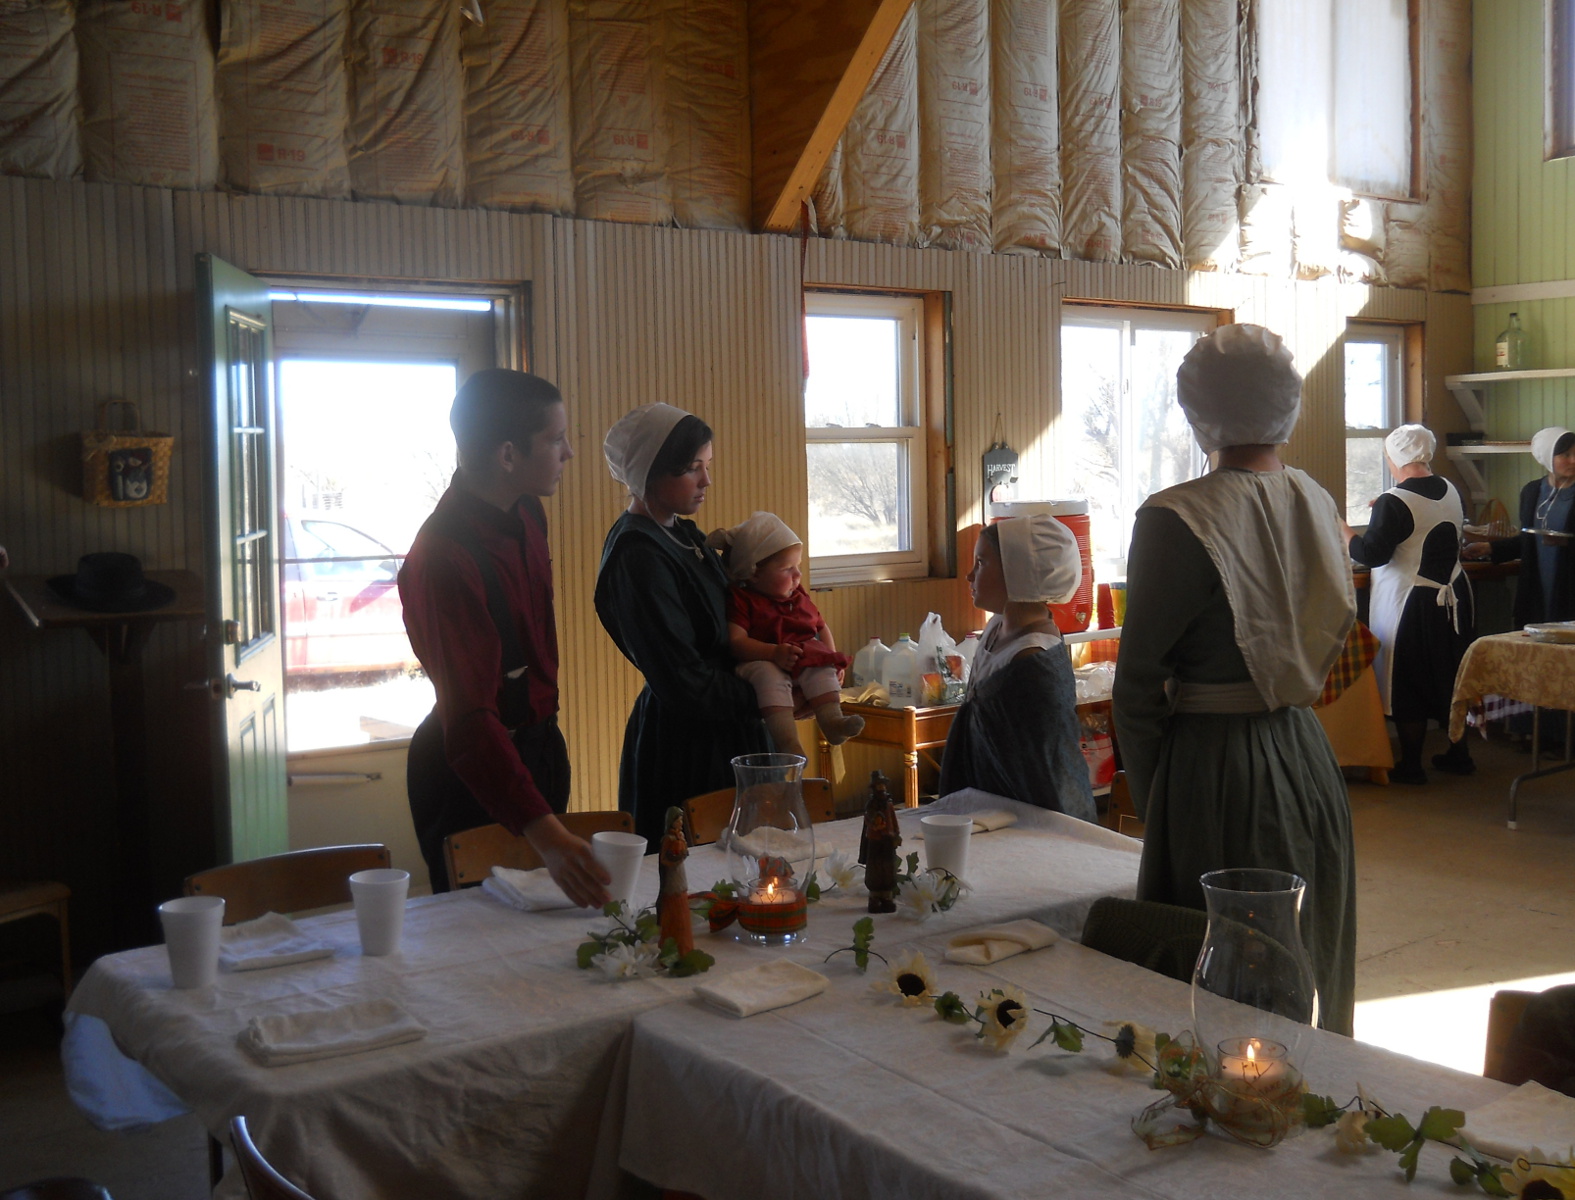
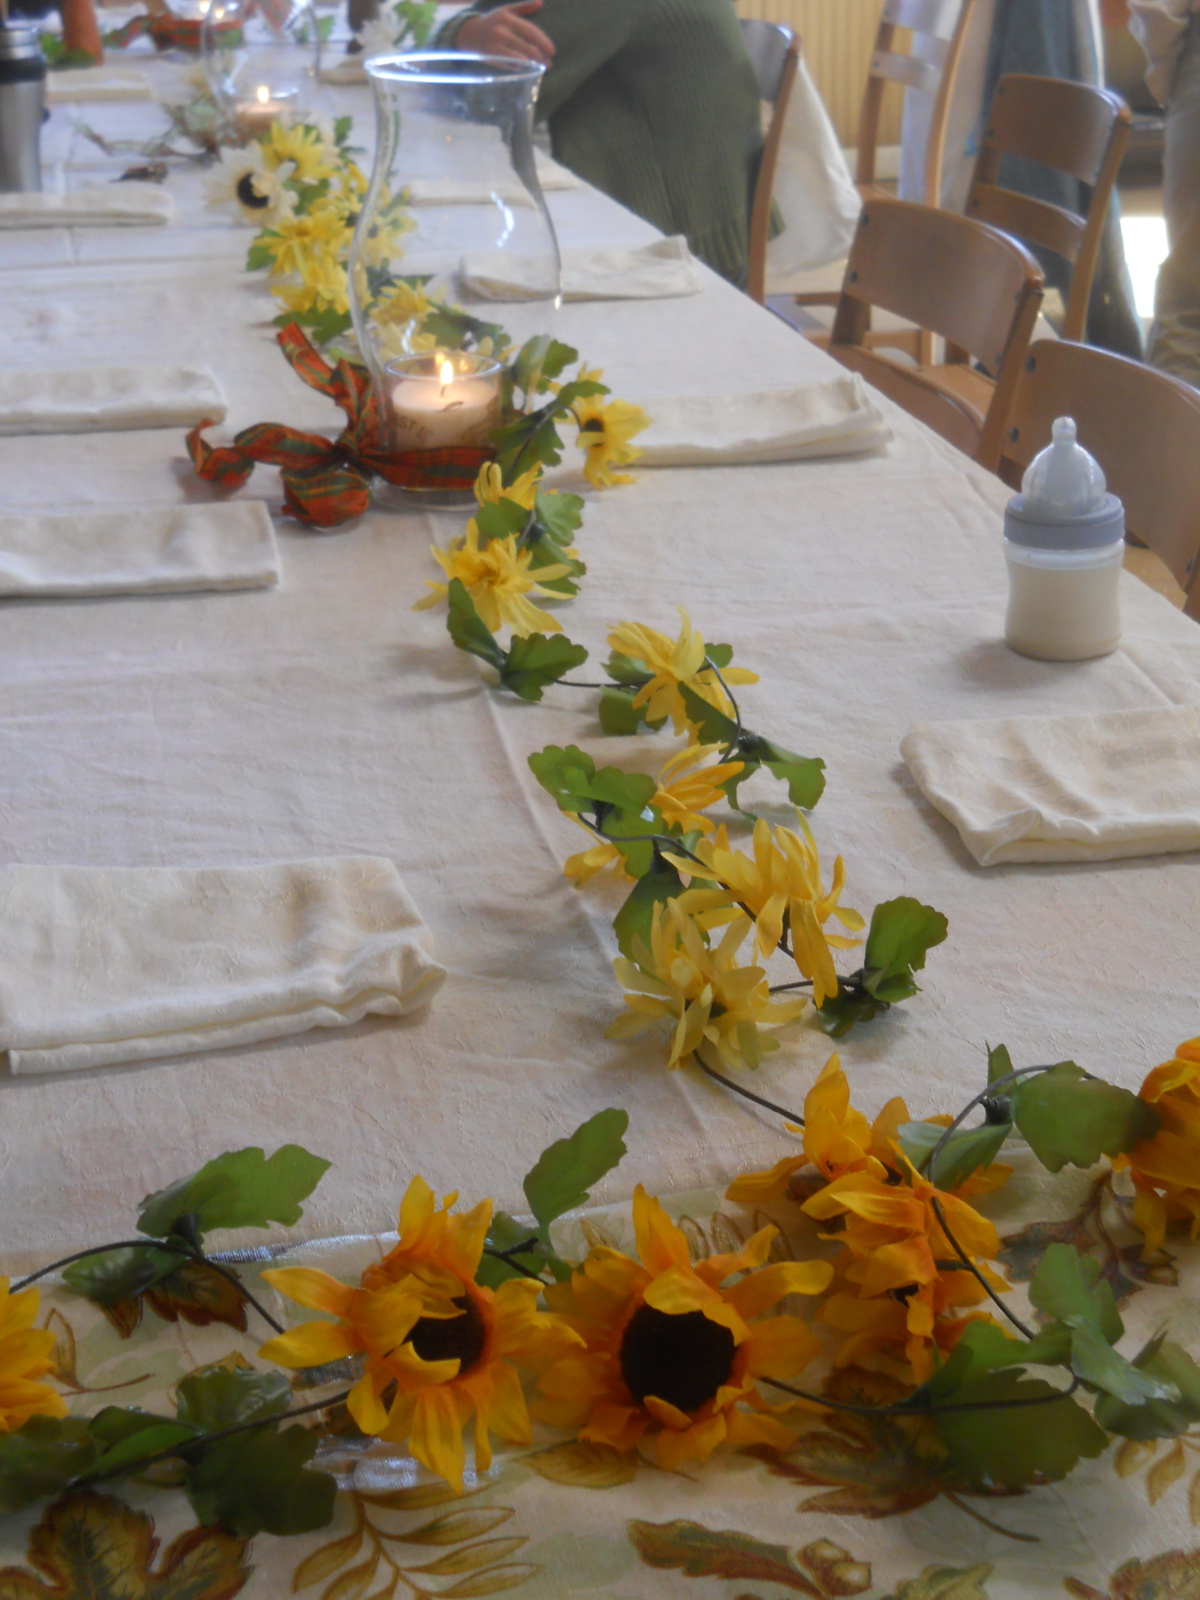
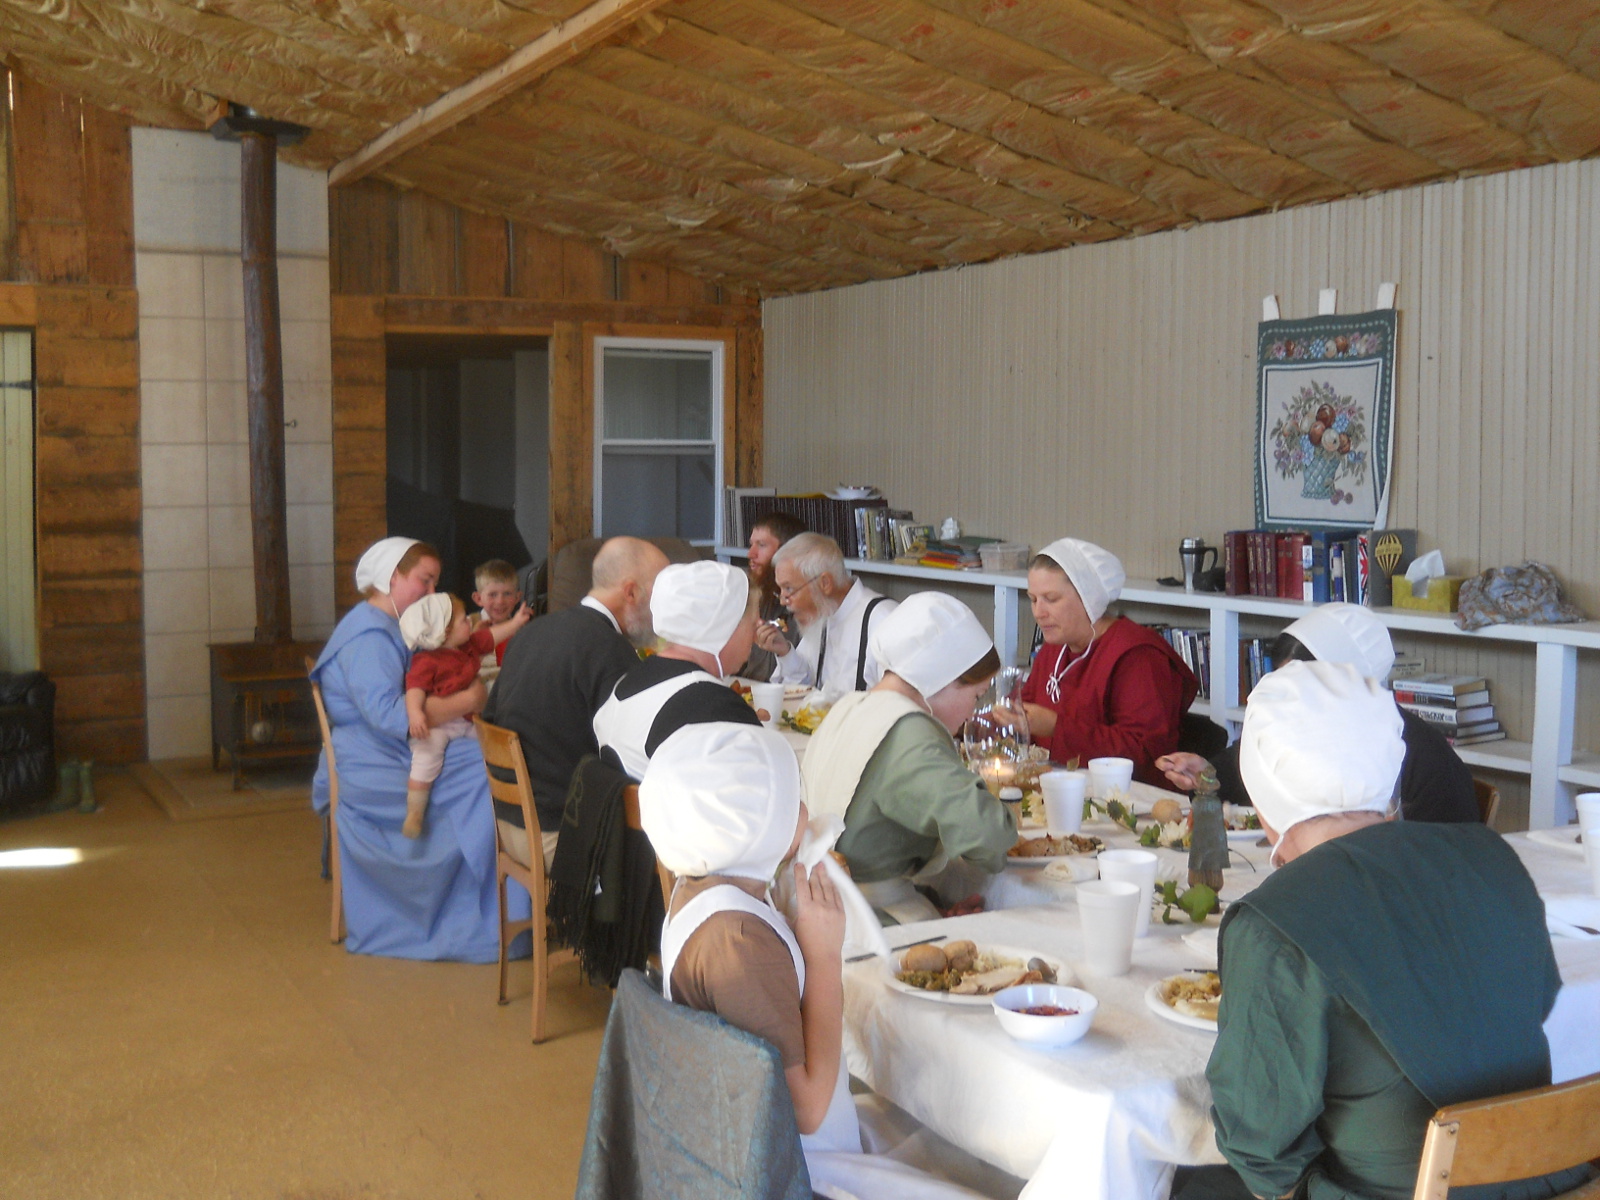
The Lord was gracious and merciful again to allow us the opportunity to gather together as a group for our Thanksgiving fellowship meal for 2014! We thought we’d share some of the sights…
Before the meal:
The tables:
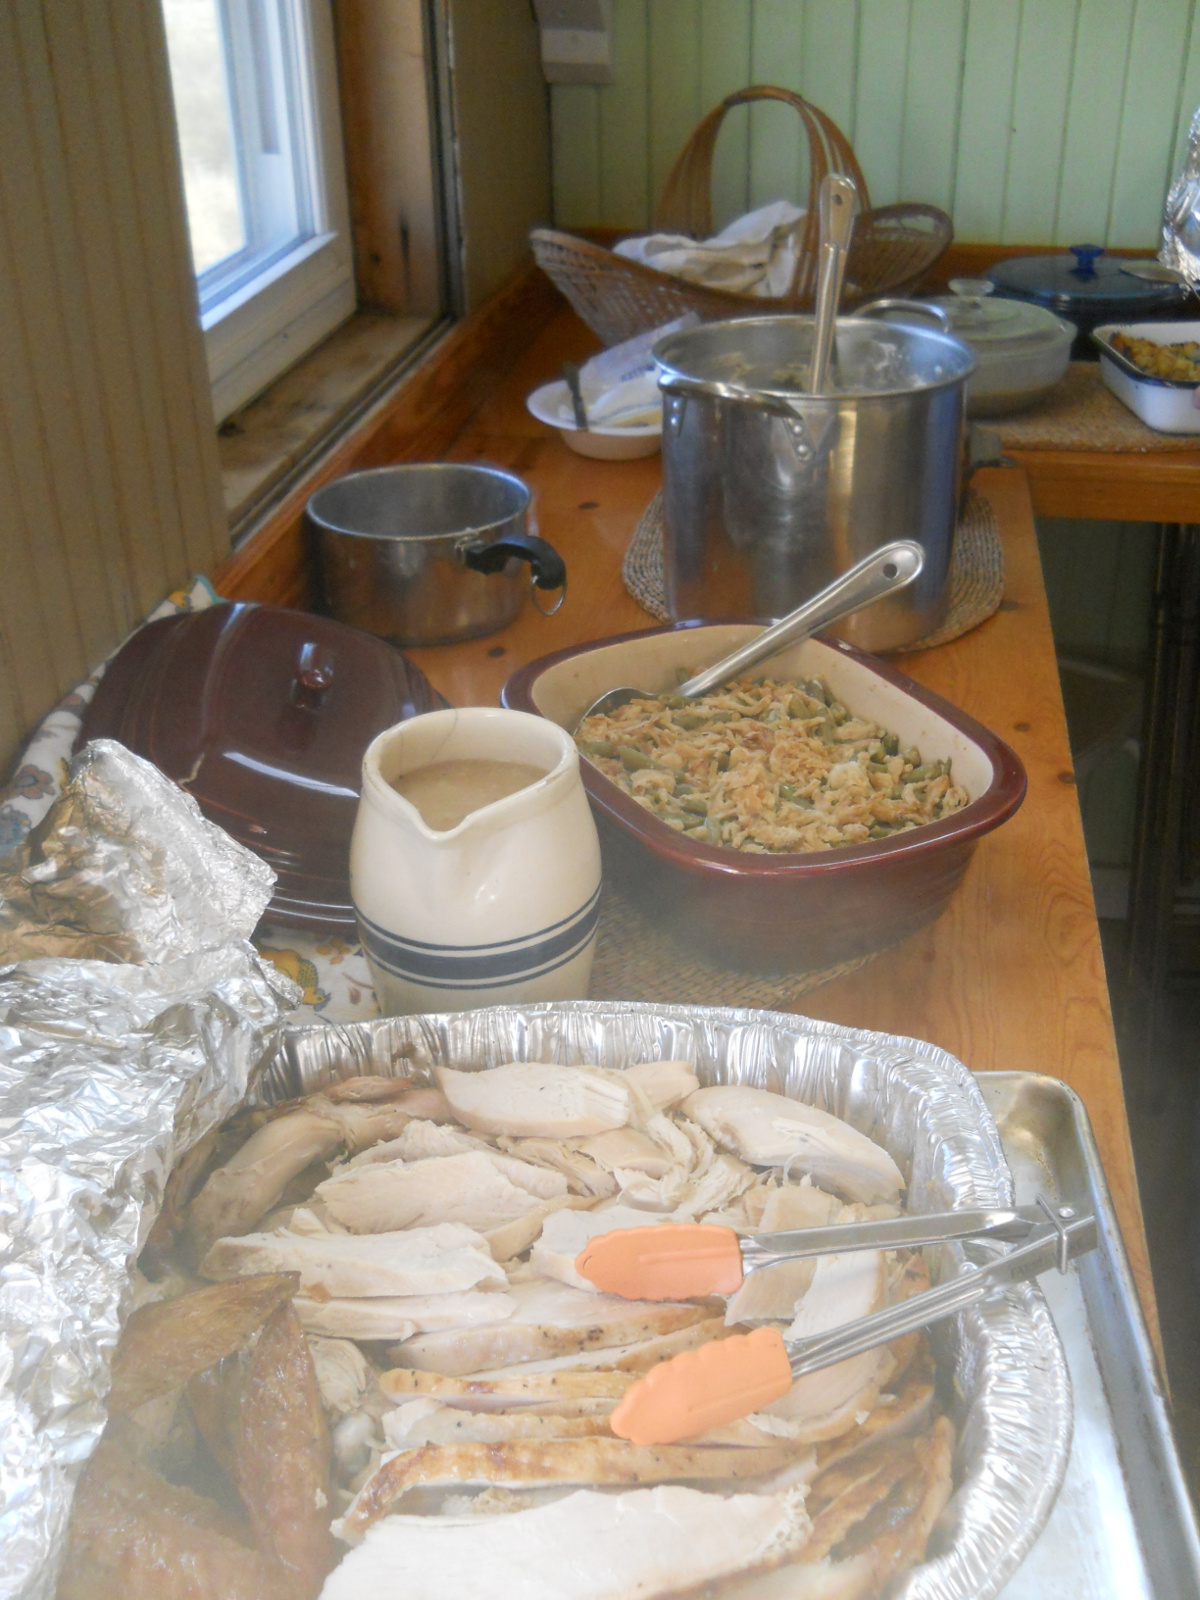
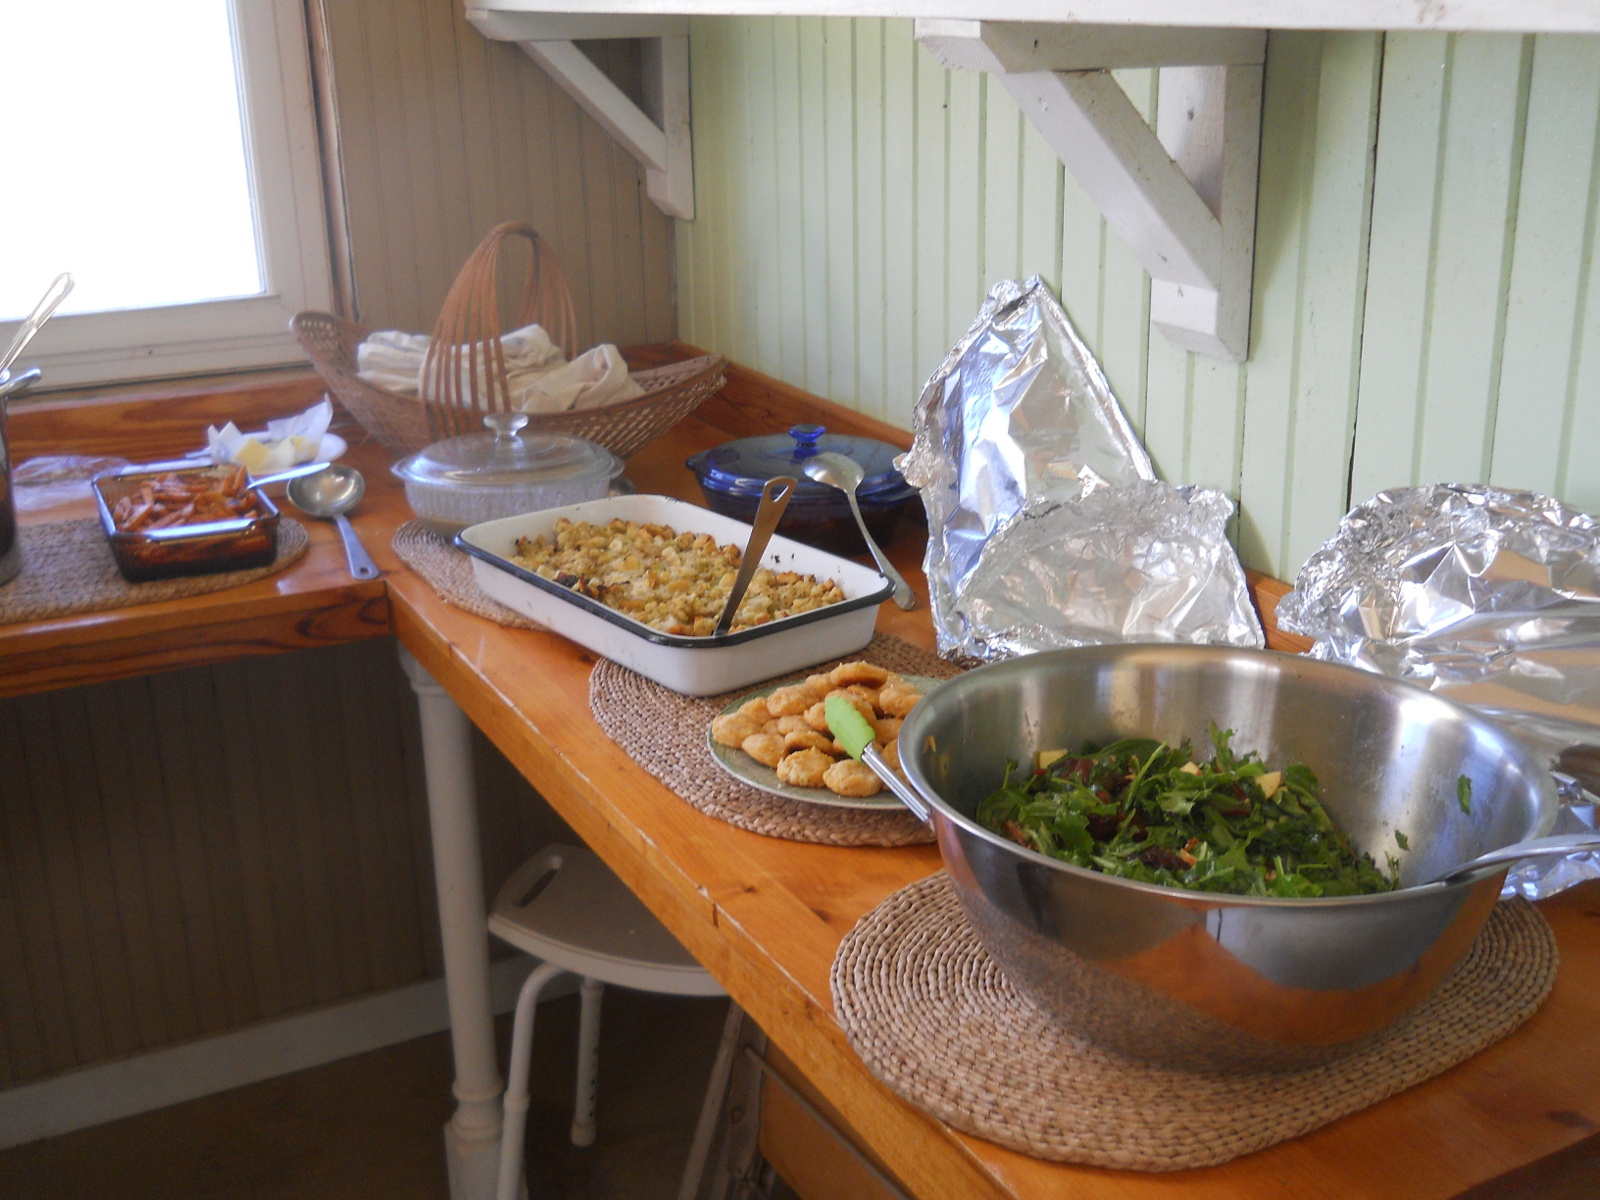
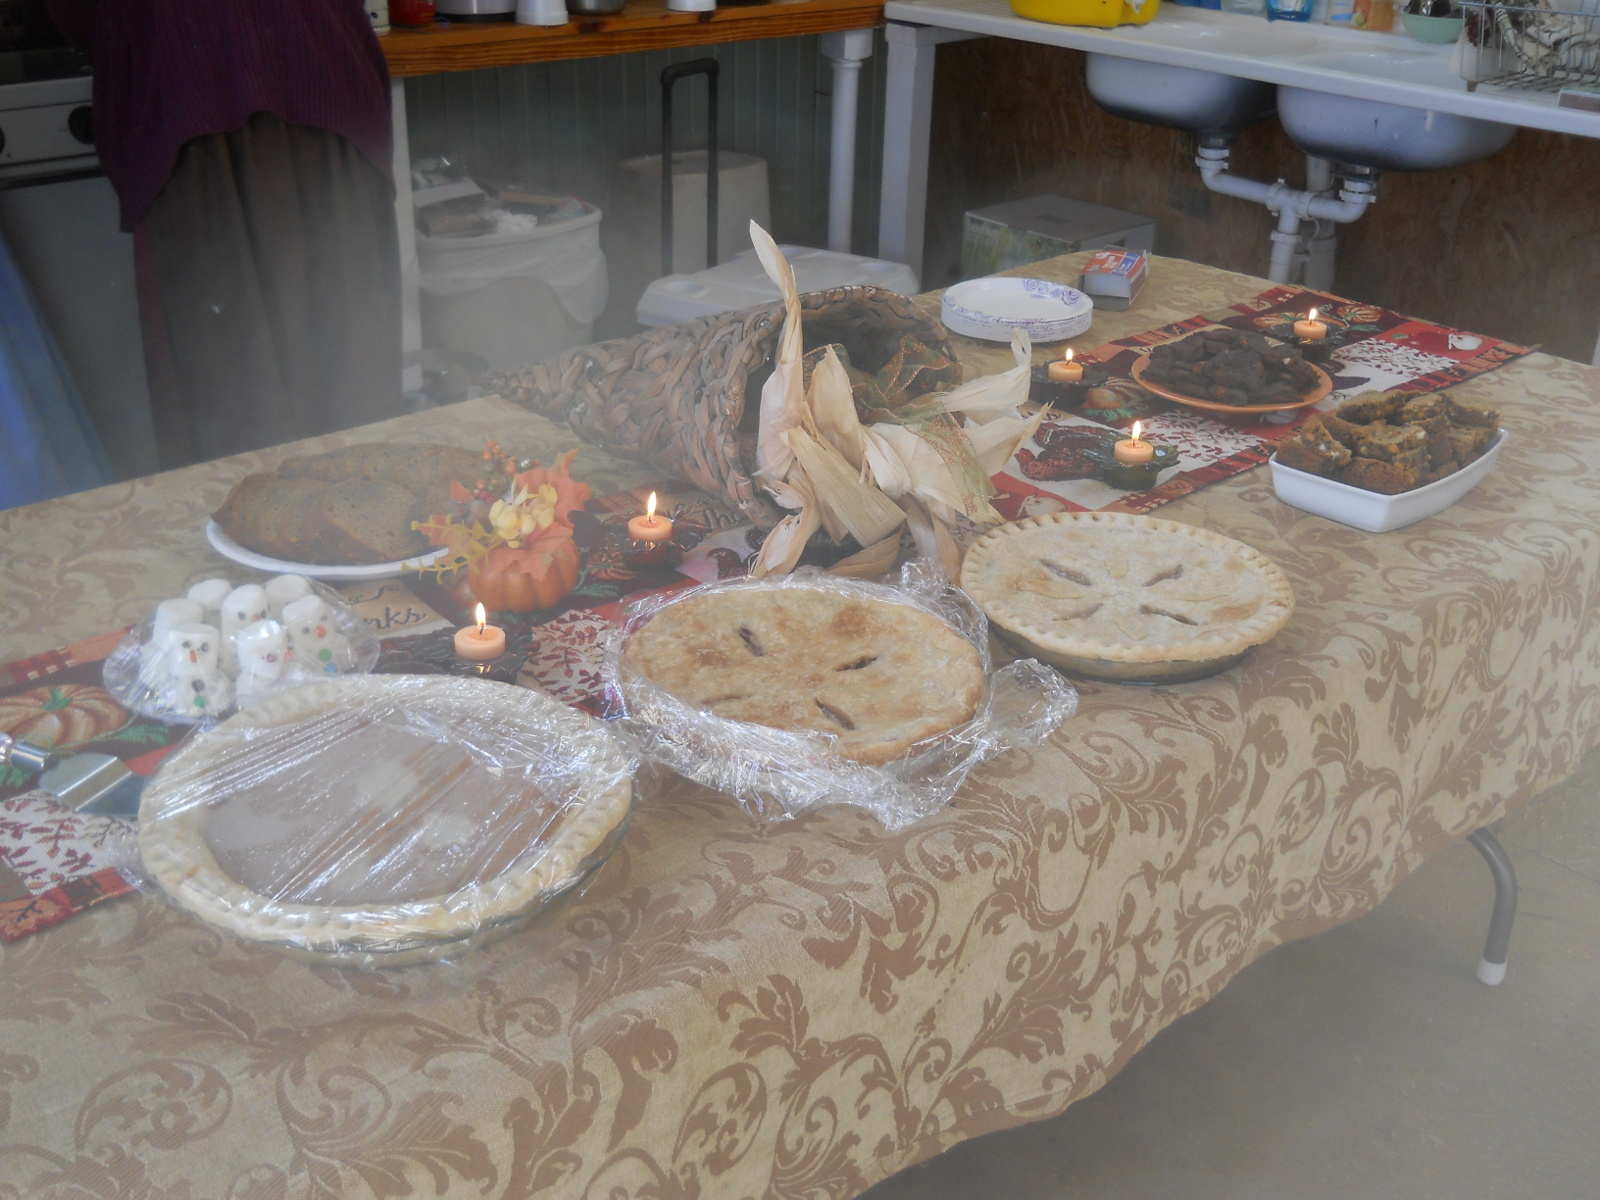
And the food goodnesses! Thanks to the ladies for always preparing wonderful meals!
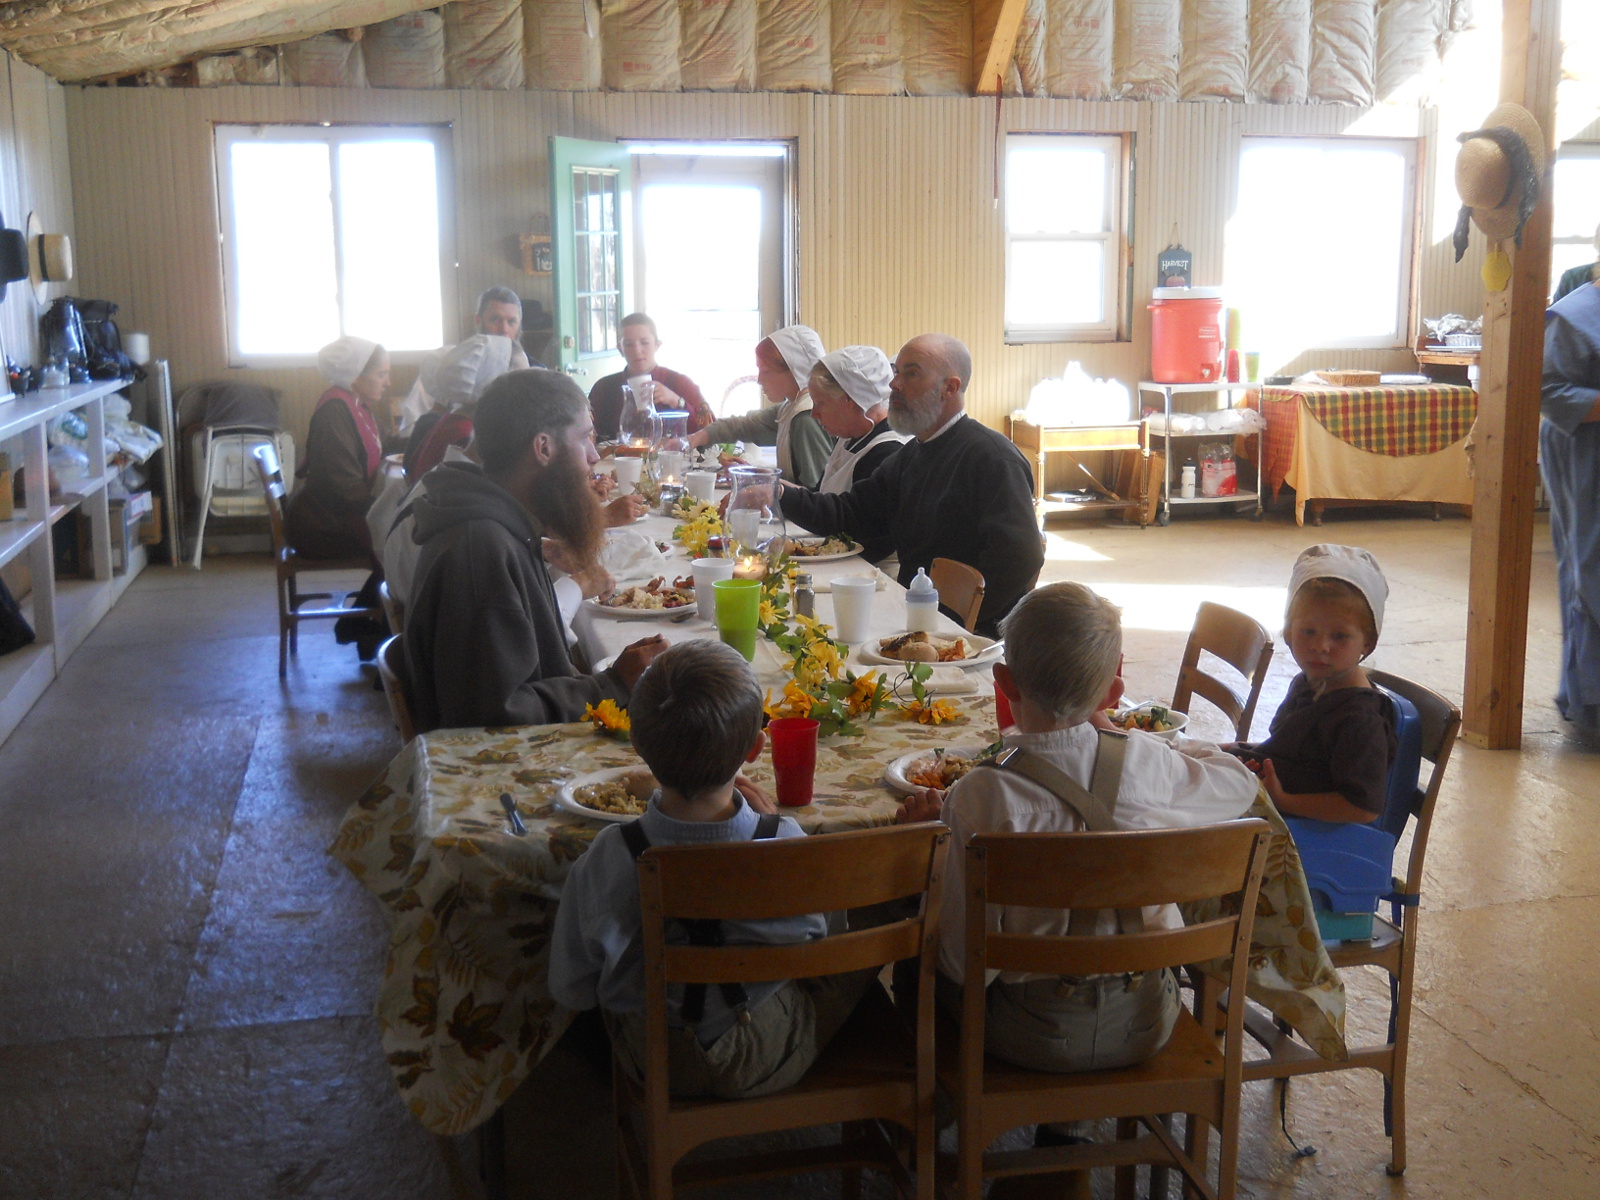
Enjoying God’s provision of this daily bread and the fellowship He’s allowed us to have:
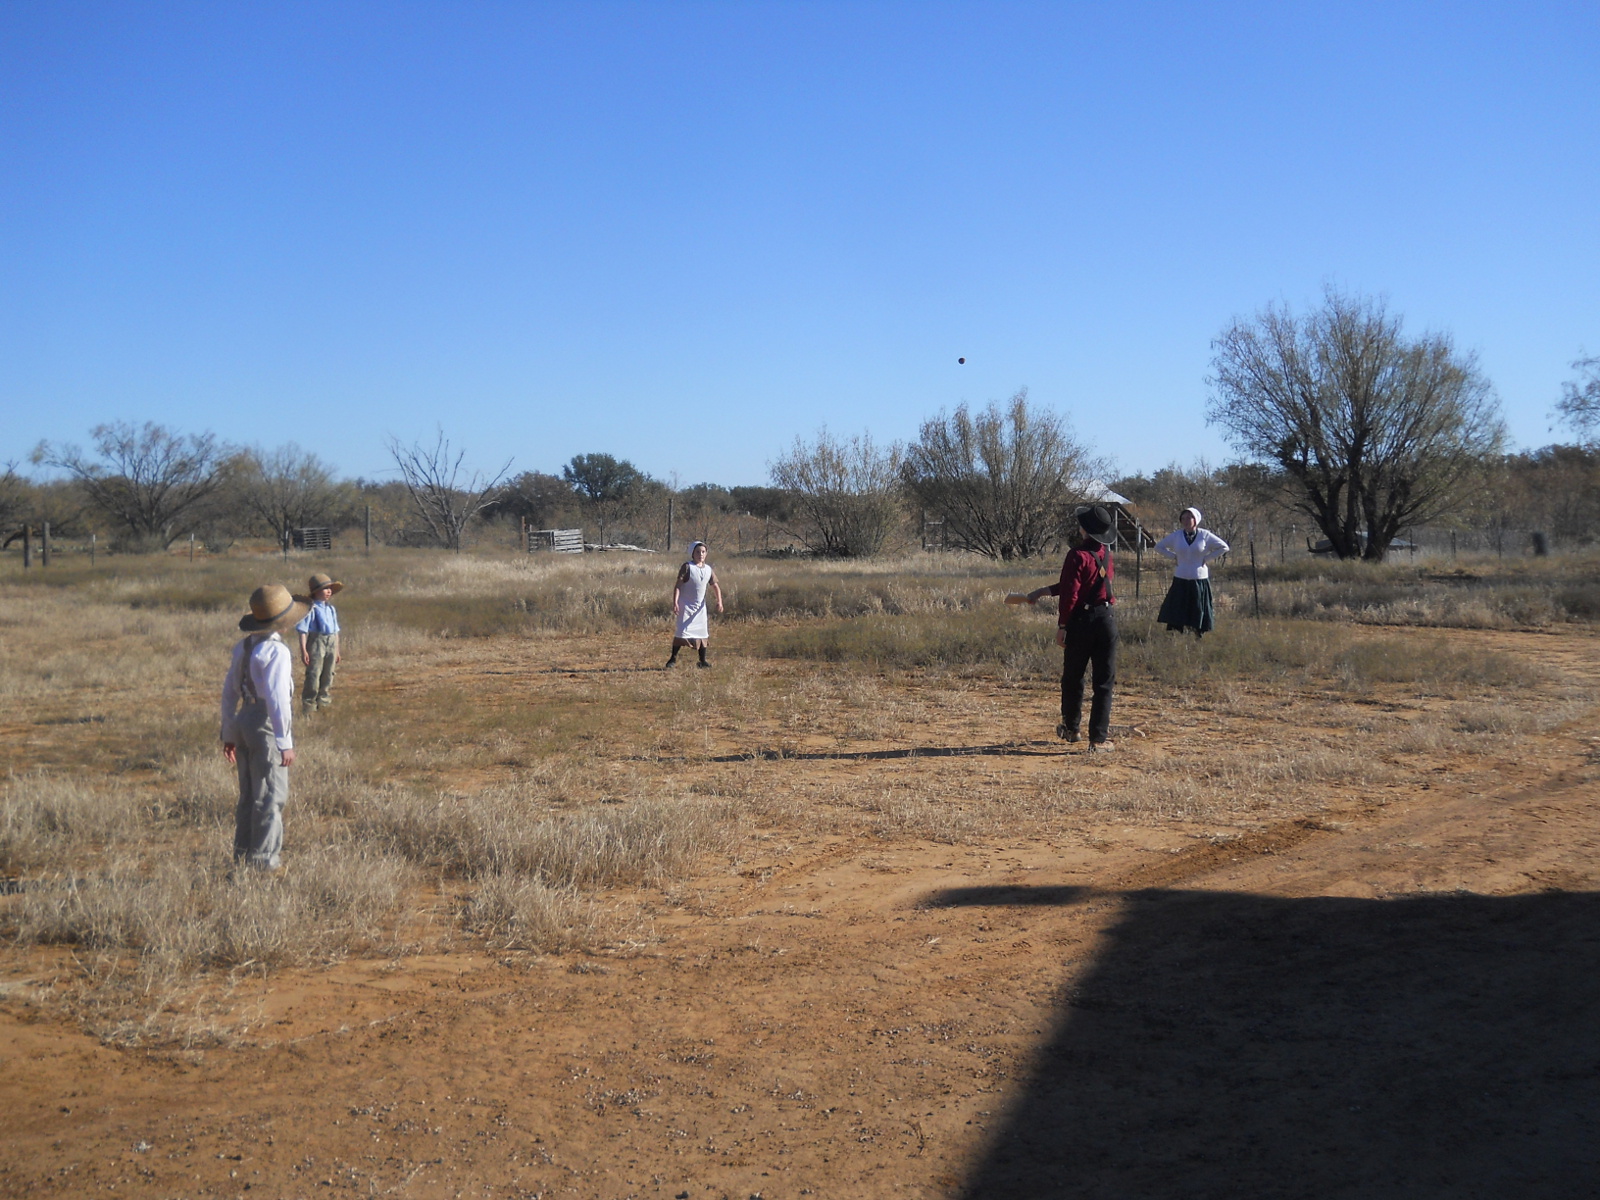
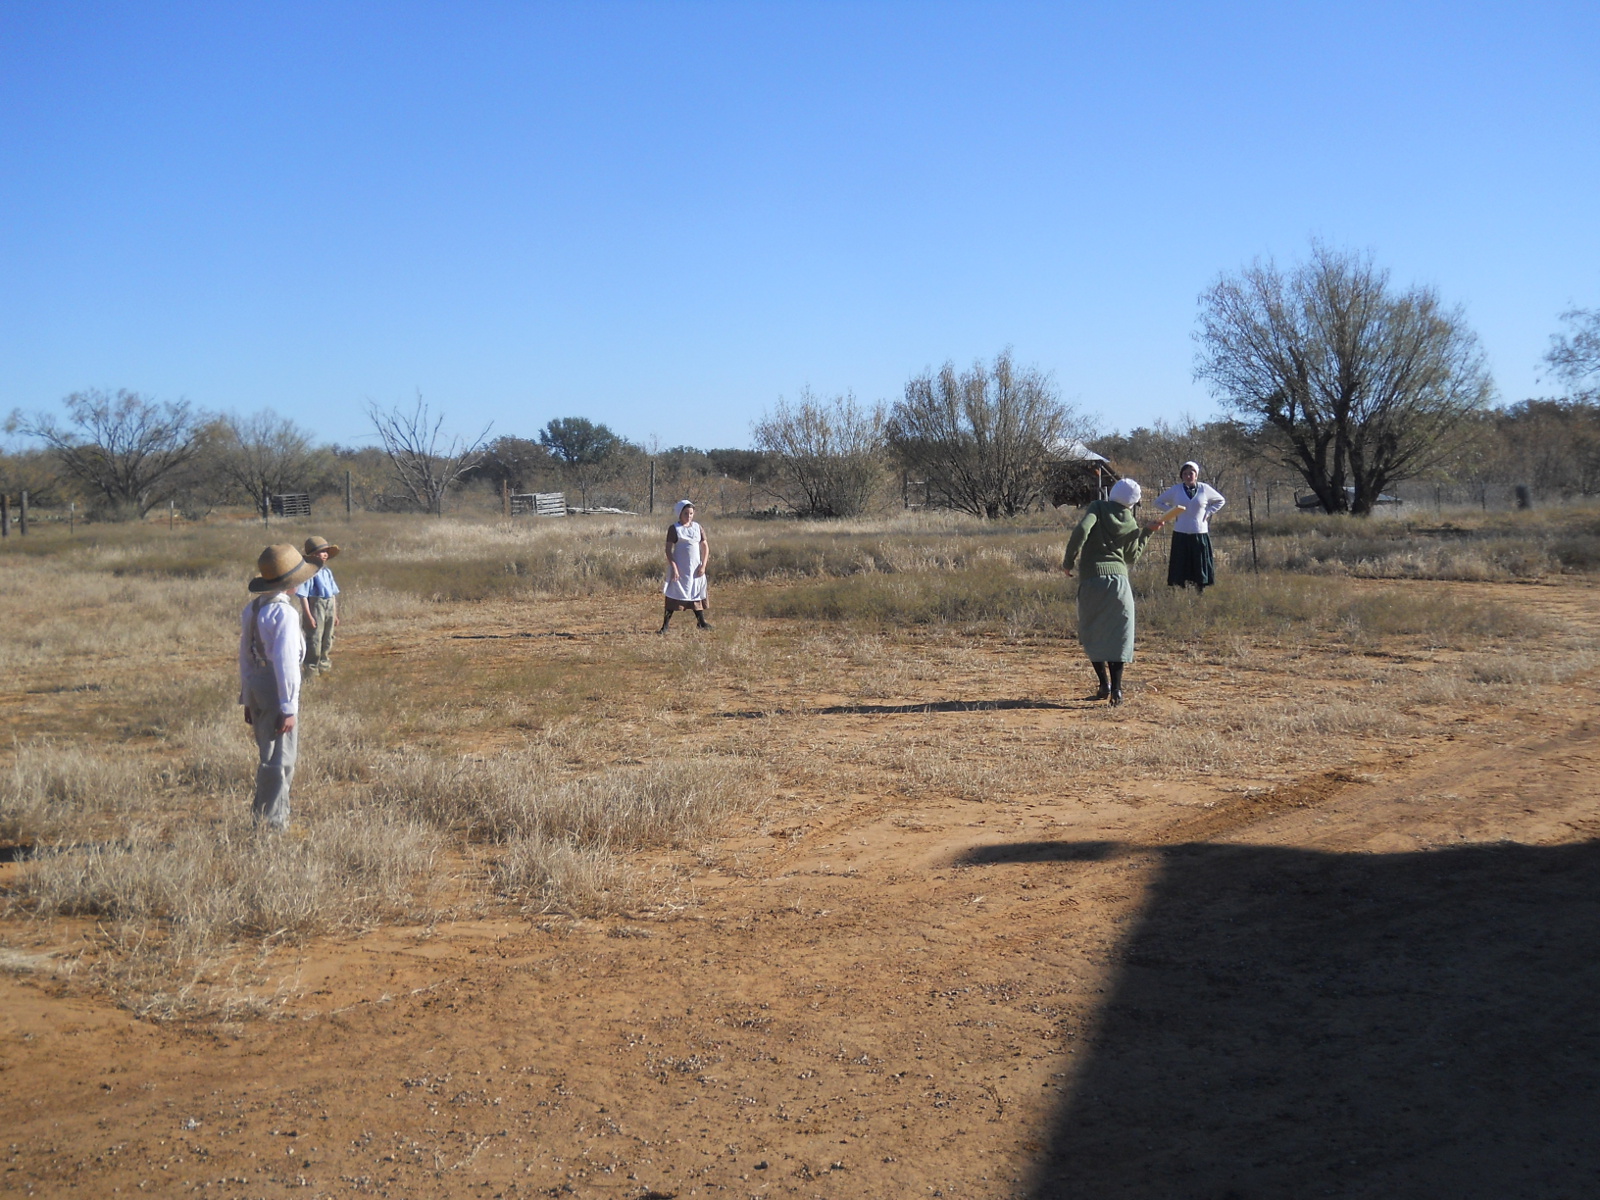
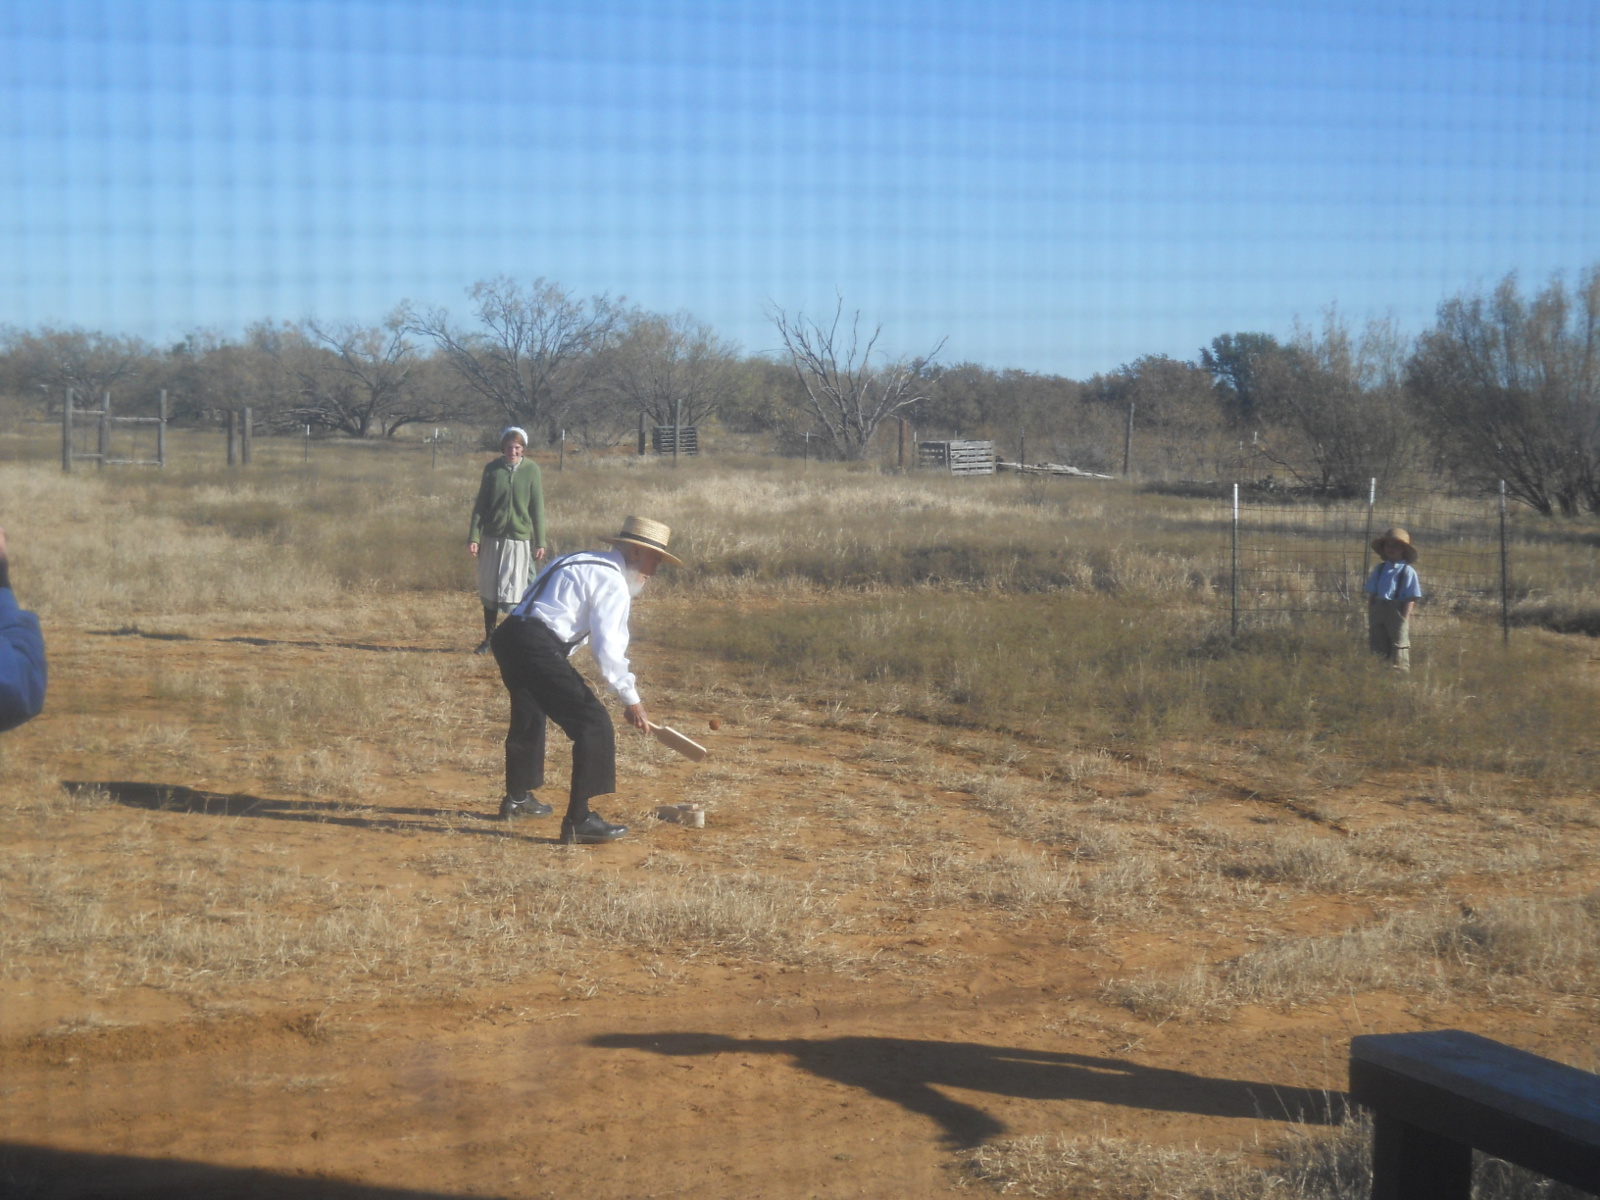
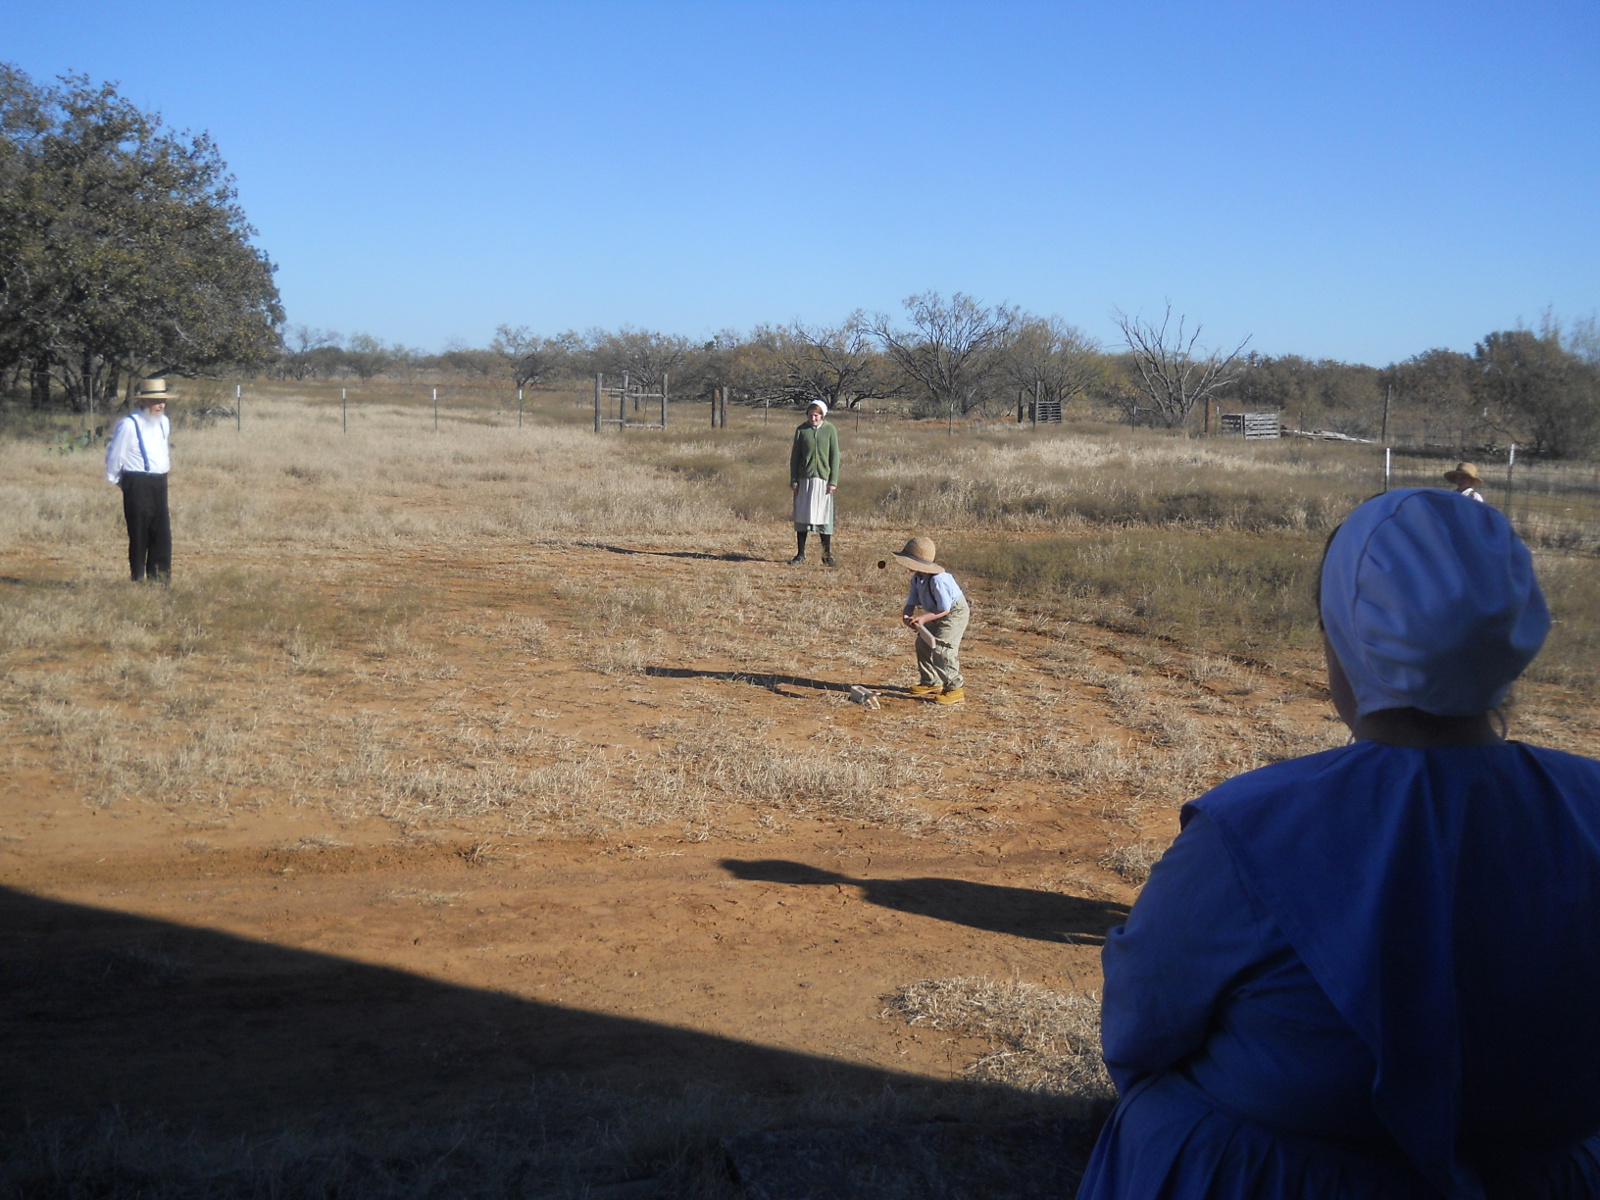
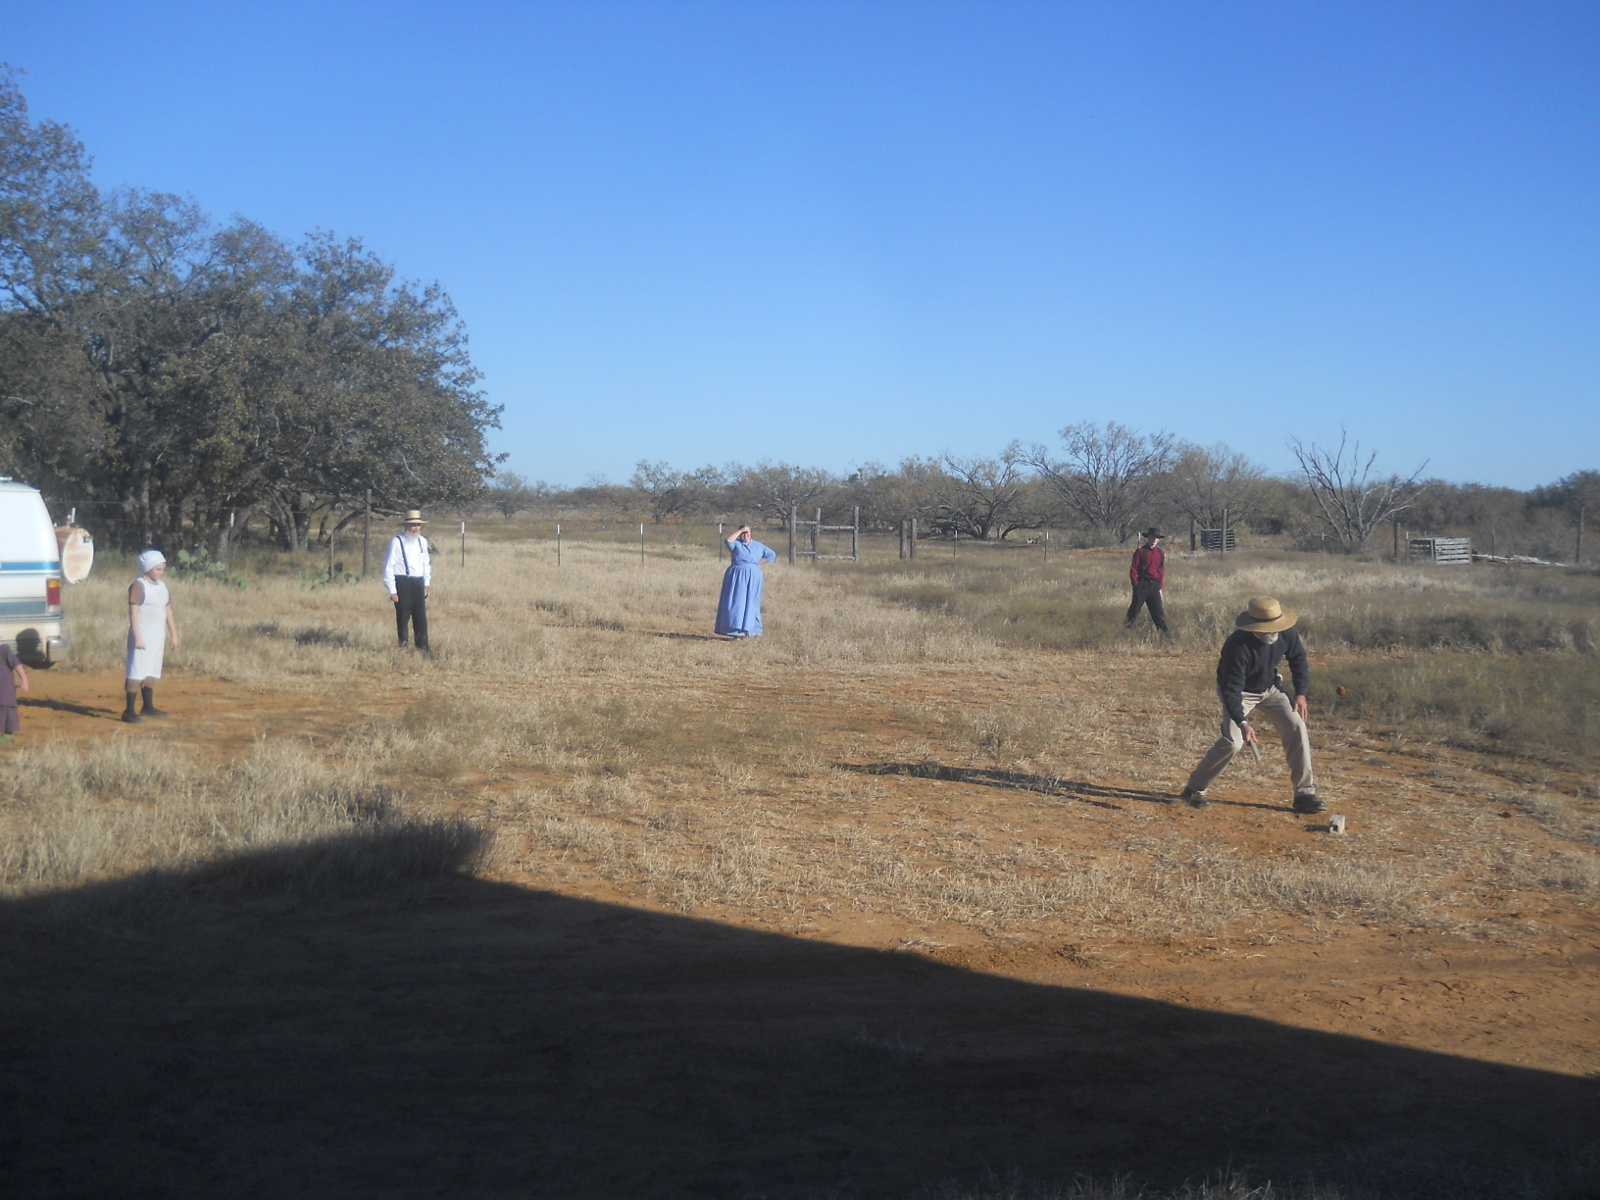
After the meal, someone brought what I guess is called Trap Ball, where you set a sack-type ball on the end of a small teeter-totter device, hit one end with a paddle, which pops the ball up in the air, and then the idea is to hit the ball past everyone without it being caught on the fly. Lots of people participated!
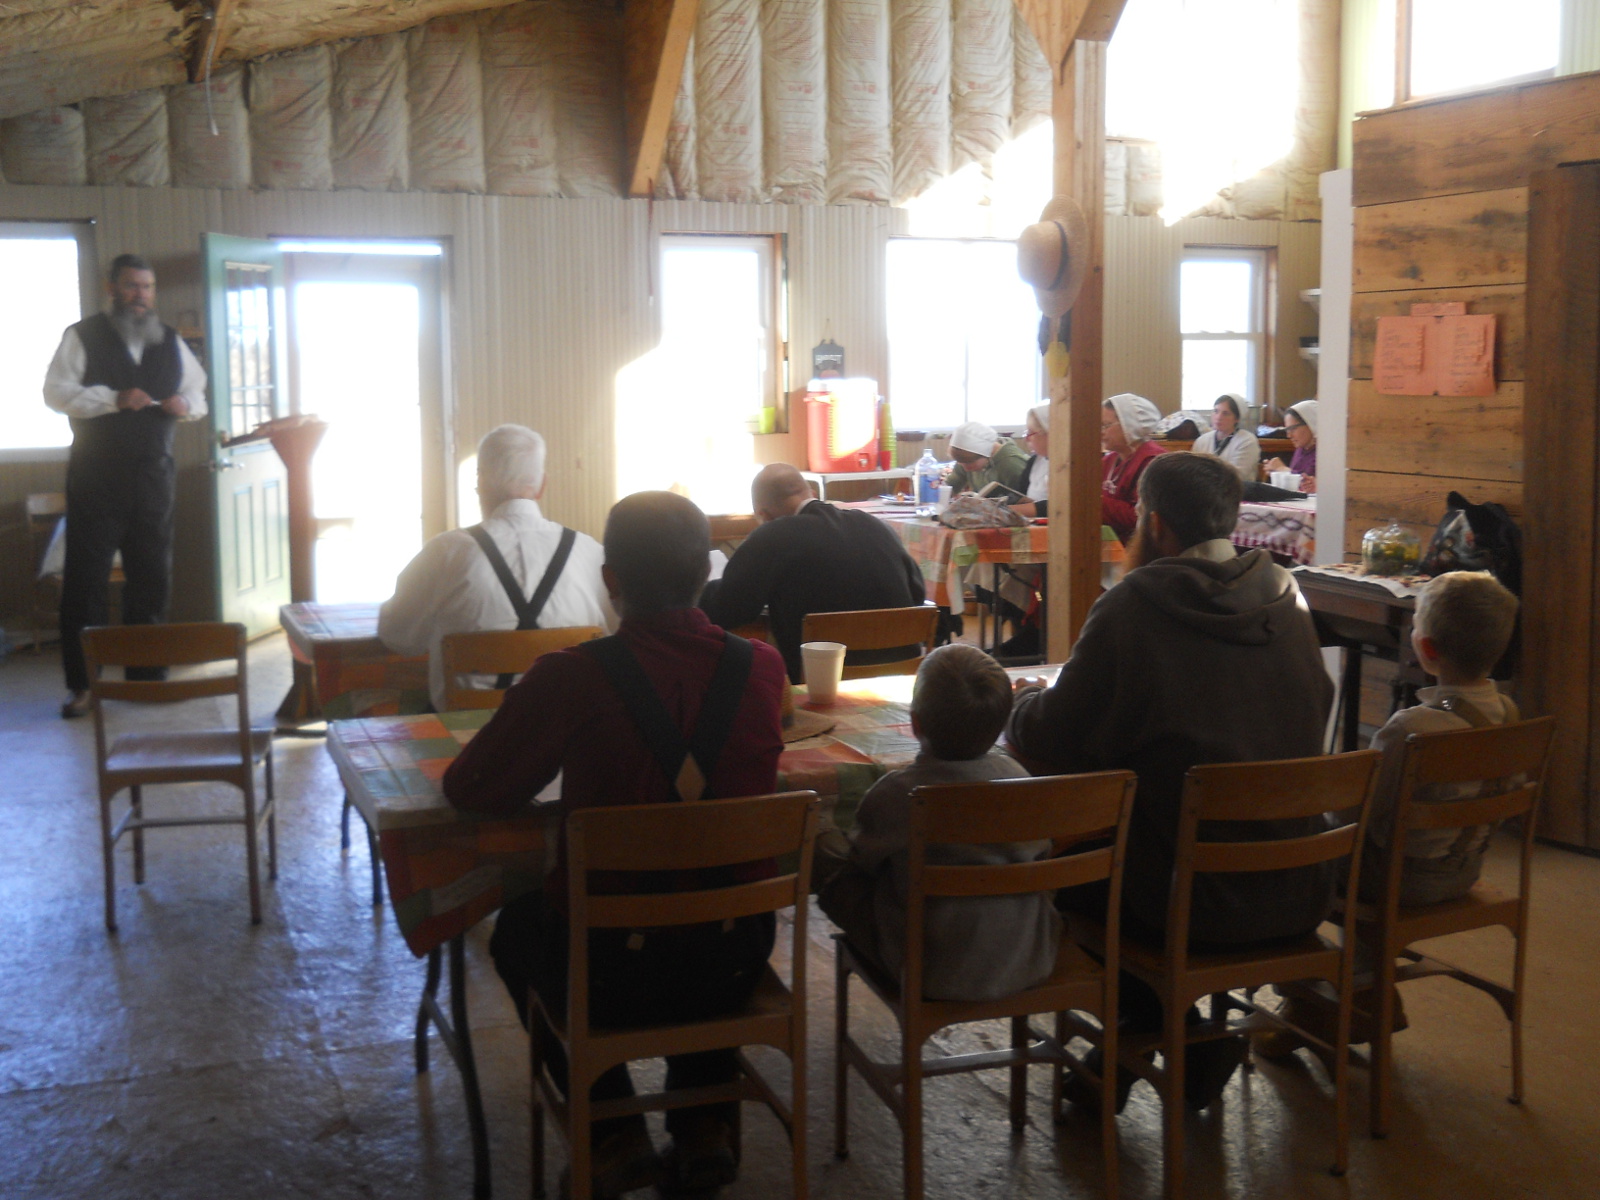
And finally, we continued on in John Owen’s works’ volume “The Glory of Christ“, which we’ve been at for several years now (we have just started the first “Meditations and Discourses on the Glory of Christ,” which is on pg 349):
Once again, we are grateful to the Lord for allowing us this opportunity together, for His infinite graces and mercies, and His provisions both spiritual and temporal. May He always glorify Himself through us in whatever way He might.
We thought we’d give you all an update on the cattle, with the calves born from earlier in the year. I’ve included their individual blog posts below so when you see them in the video, you can see how much they’ve grown:
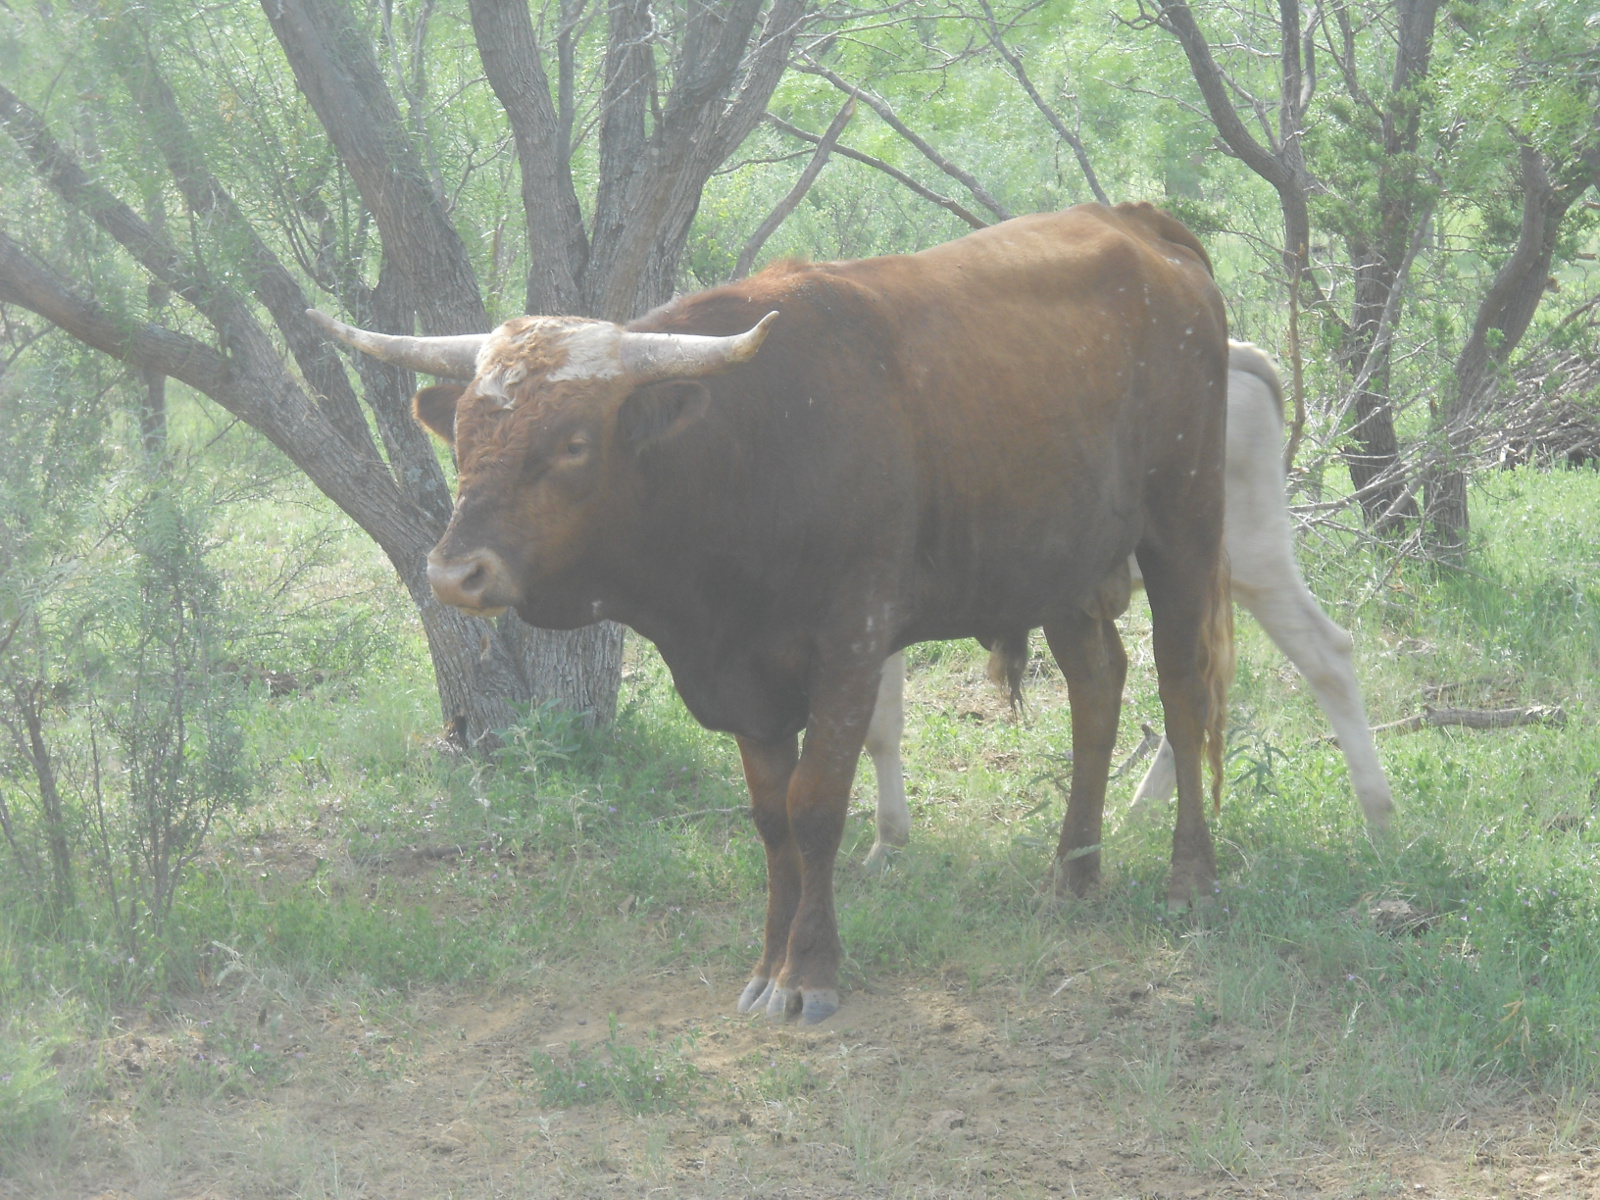
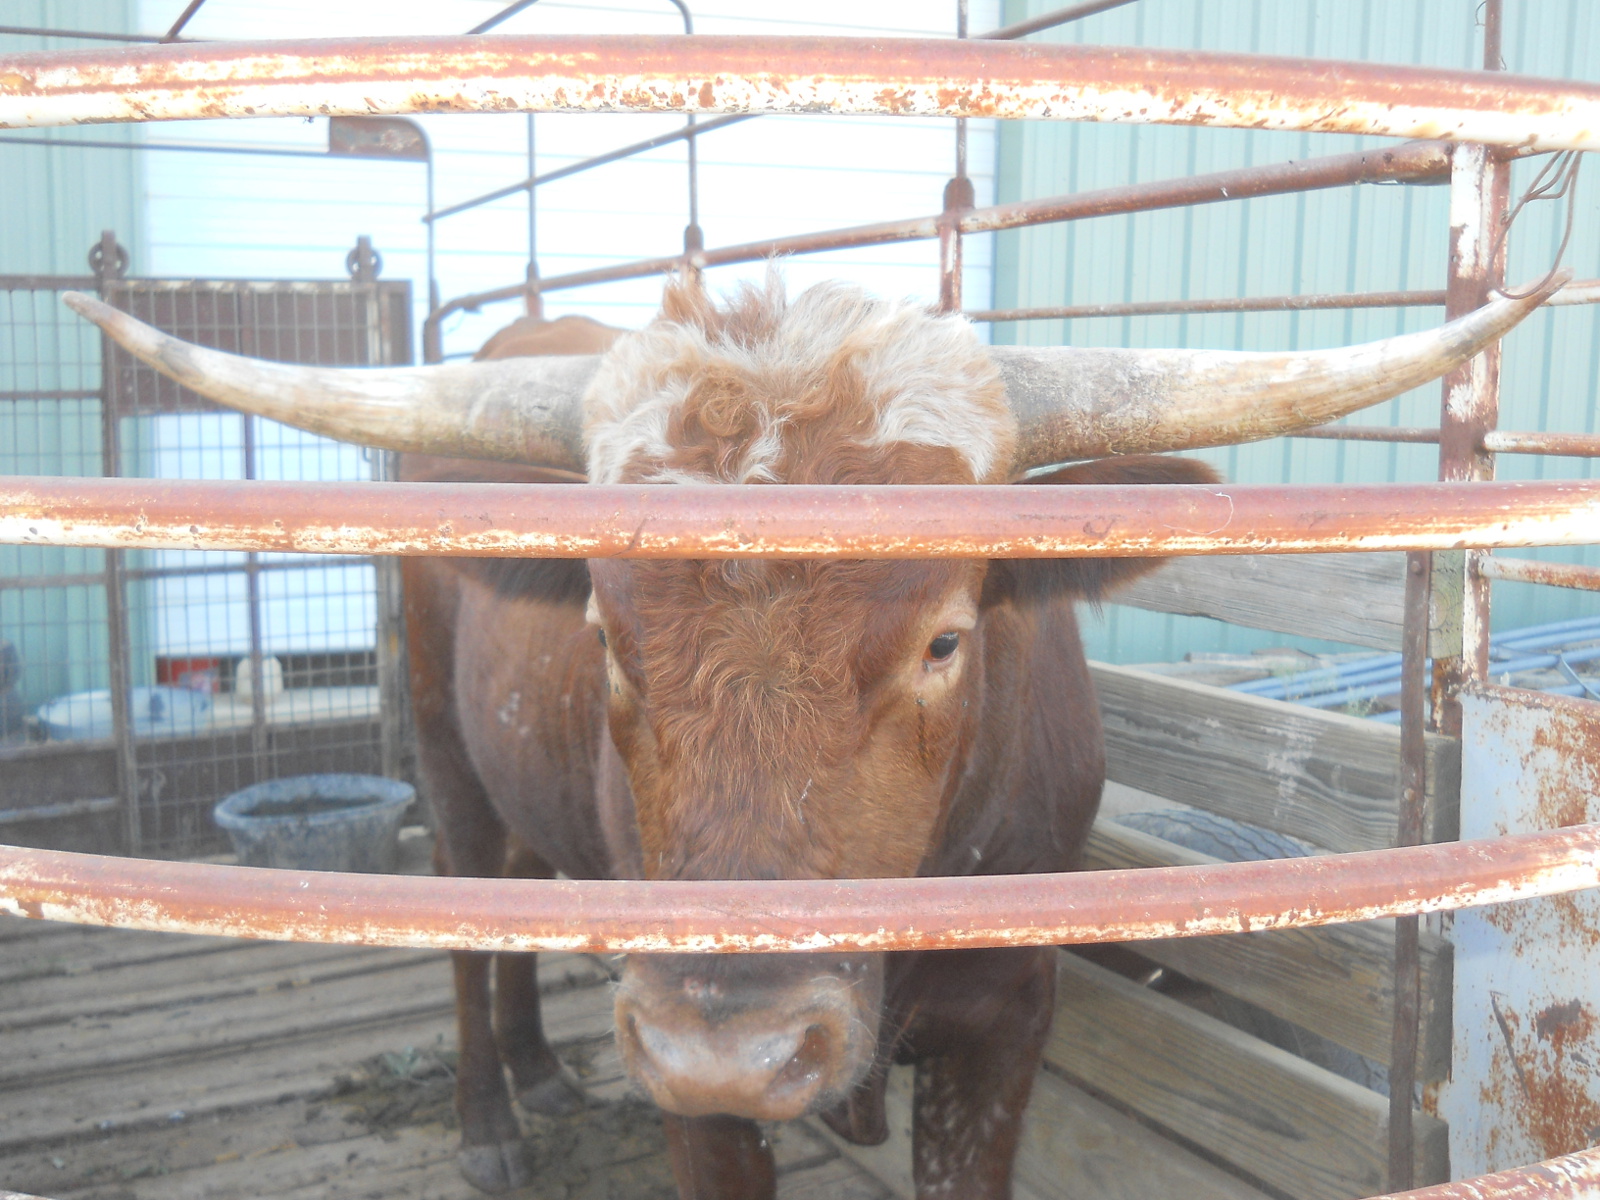
We also recently took in one of our bulls to the butcher — our bull Rufino, and here he is back in July, and then in October the day before his final trip:
And here is the video, of the cattle now and Rufino on the last day:
As always, we are grateful to the Lord for His provisions with and for the cattle!
On Sue and my area of the land, we have about an 11-acre field. As part of our continued separation from dependence on the world, I’ve wanted to get it into something perennial, where I didn’t have to plow it anymore, or seed it, or what have you. A few years ago, I tried planting B-dahl, but that didn’t work at all. Finally this year, I was really hoping to try again, with some sort of grass, but wasn’t sure what direction to go. I really prayed the Lord might grant that direction. Over time, and through discussions with local grass planters/experts, I decided to go with something that should have been obvious all along, because it works so well out here in drought weather, and is actually hard to get rid of. Although it is given a bad name because of that, and because if you’re not careful, at times of injury to it, it can be toxic to animals, Johnson grass grows really well out here. That seemed perfect for what we were trying to do with that field.
We decided on a cheaper variant, which apparently will cross-pollinate with the Johnson grass, called sorghum almum. On the advice of the seed-seller, we mixed in some millet, because he suggested the sorghum almum might only sprout 50% until going through a winter cold, which apparently helps its seed germinate better, and having things sprout now was important in trying to fend off the weeds growing instead.
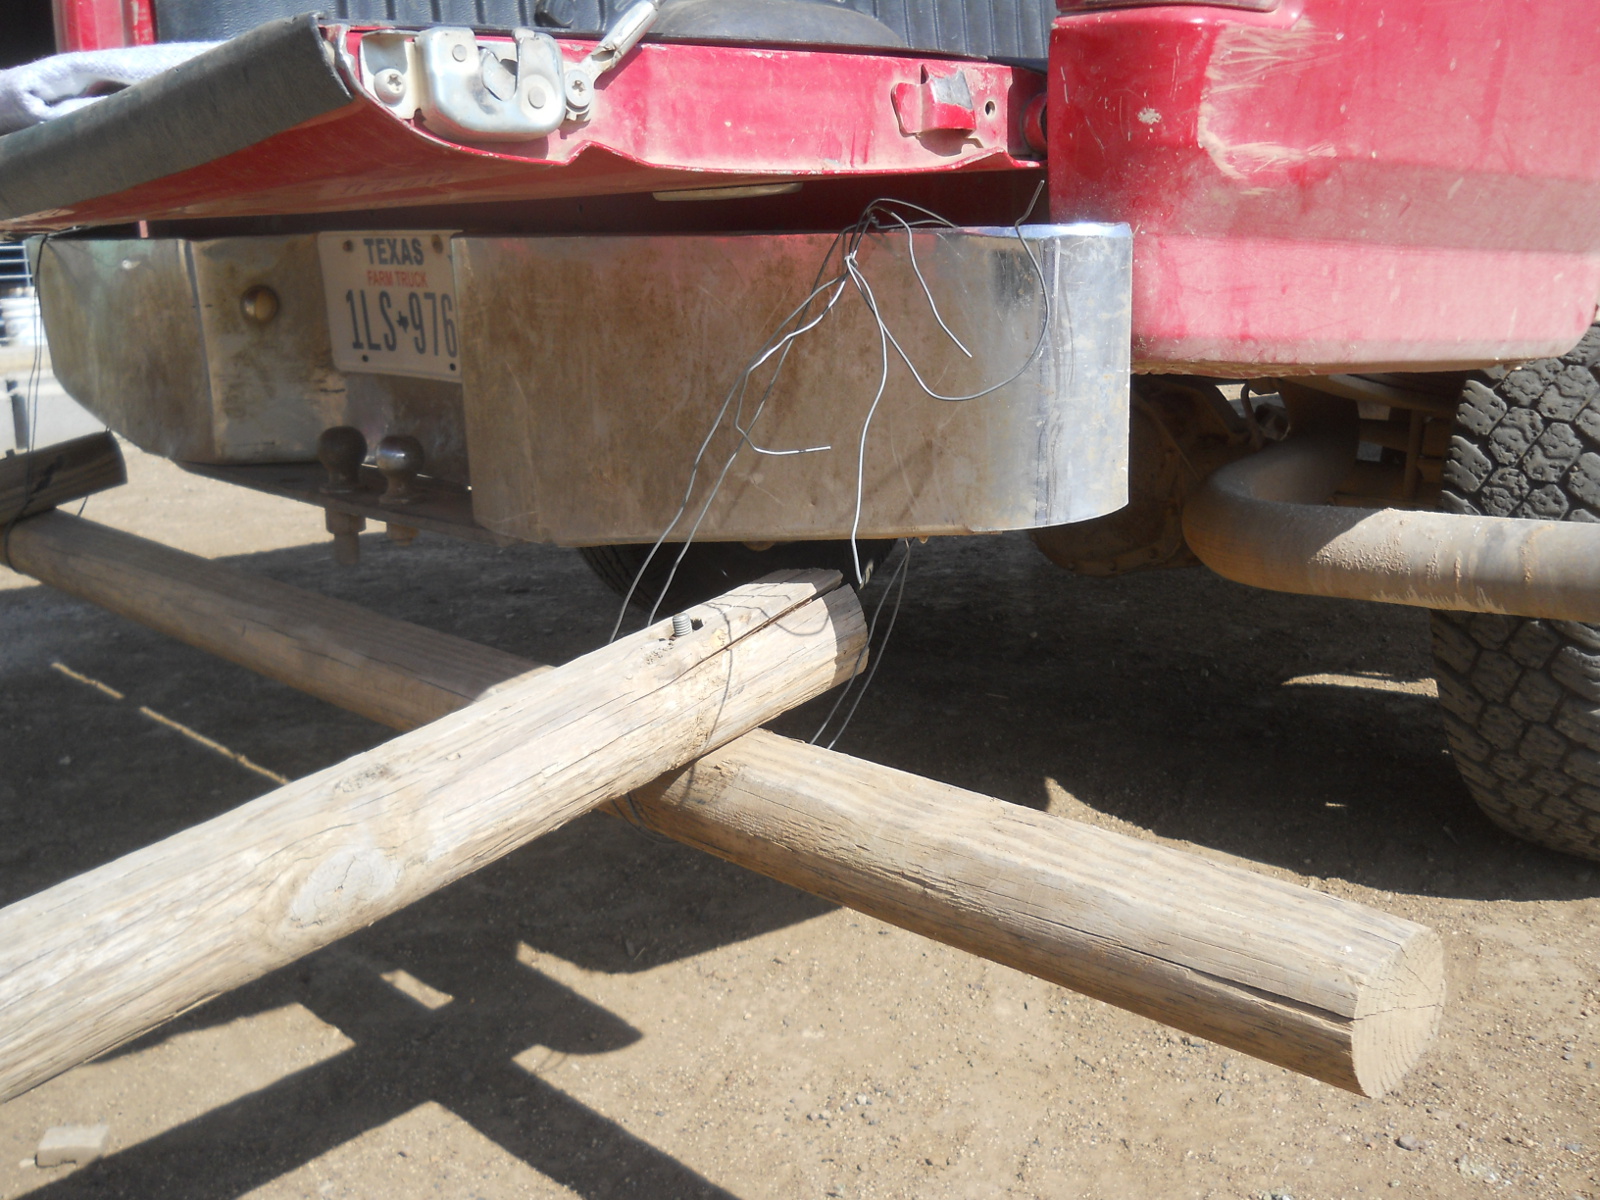
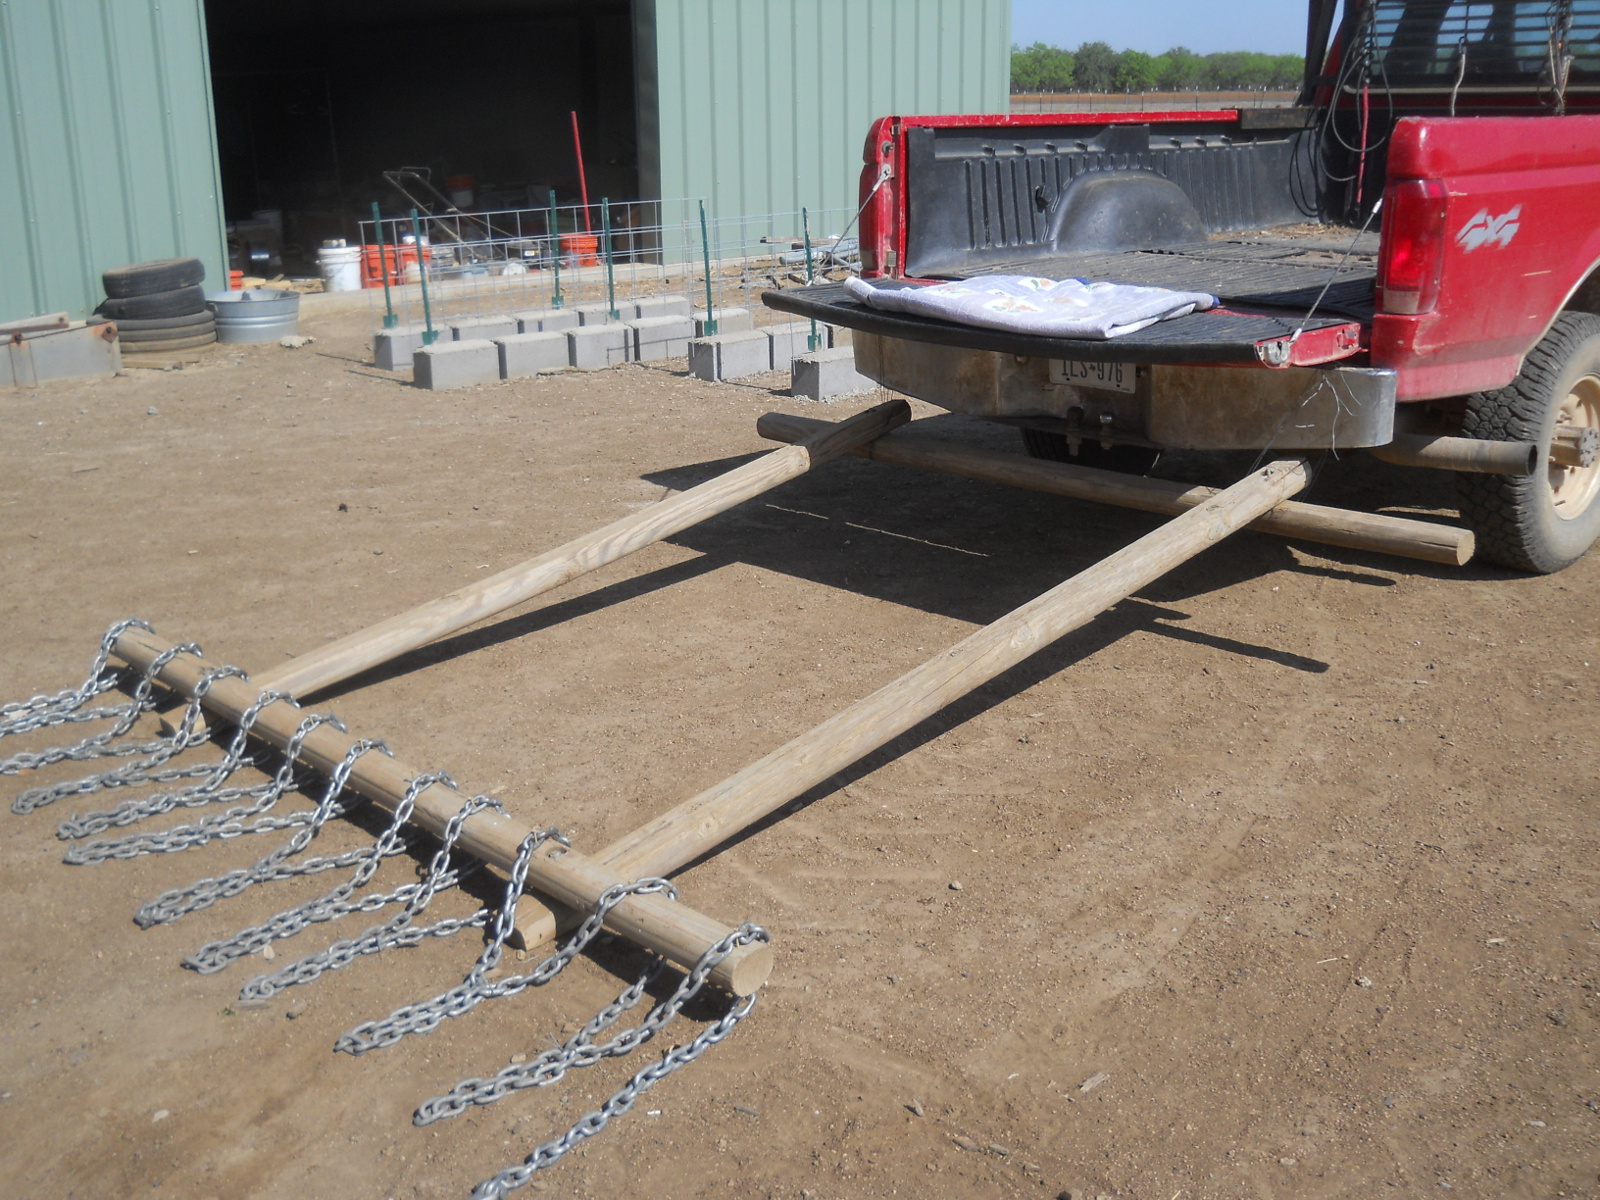
After plowing up the field, it was time to plant. I tried using the grain drill, but ended up going through half the seed in just two times around the outer edge of the field. So, I had to go get more seed, and figure out a way we could plant it….which for us ended up being by hand tossing. But, we also needed a way to sort of cover the seed once sown by scattering, and so I threw together a little contraption to drag behind the truck, using our goat shed caddy.
We had originally tried to just drag it as we normally would, but it didn’t really produce a light covering. And so, we tried to go about it a different way.
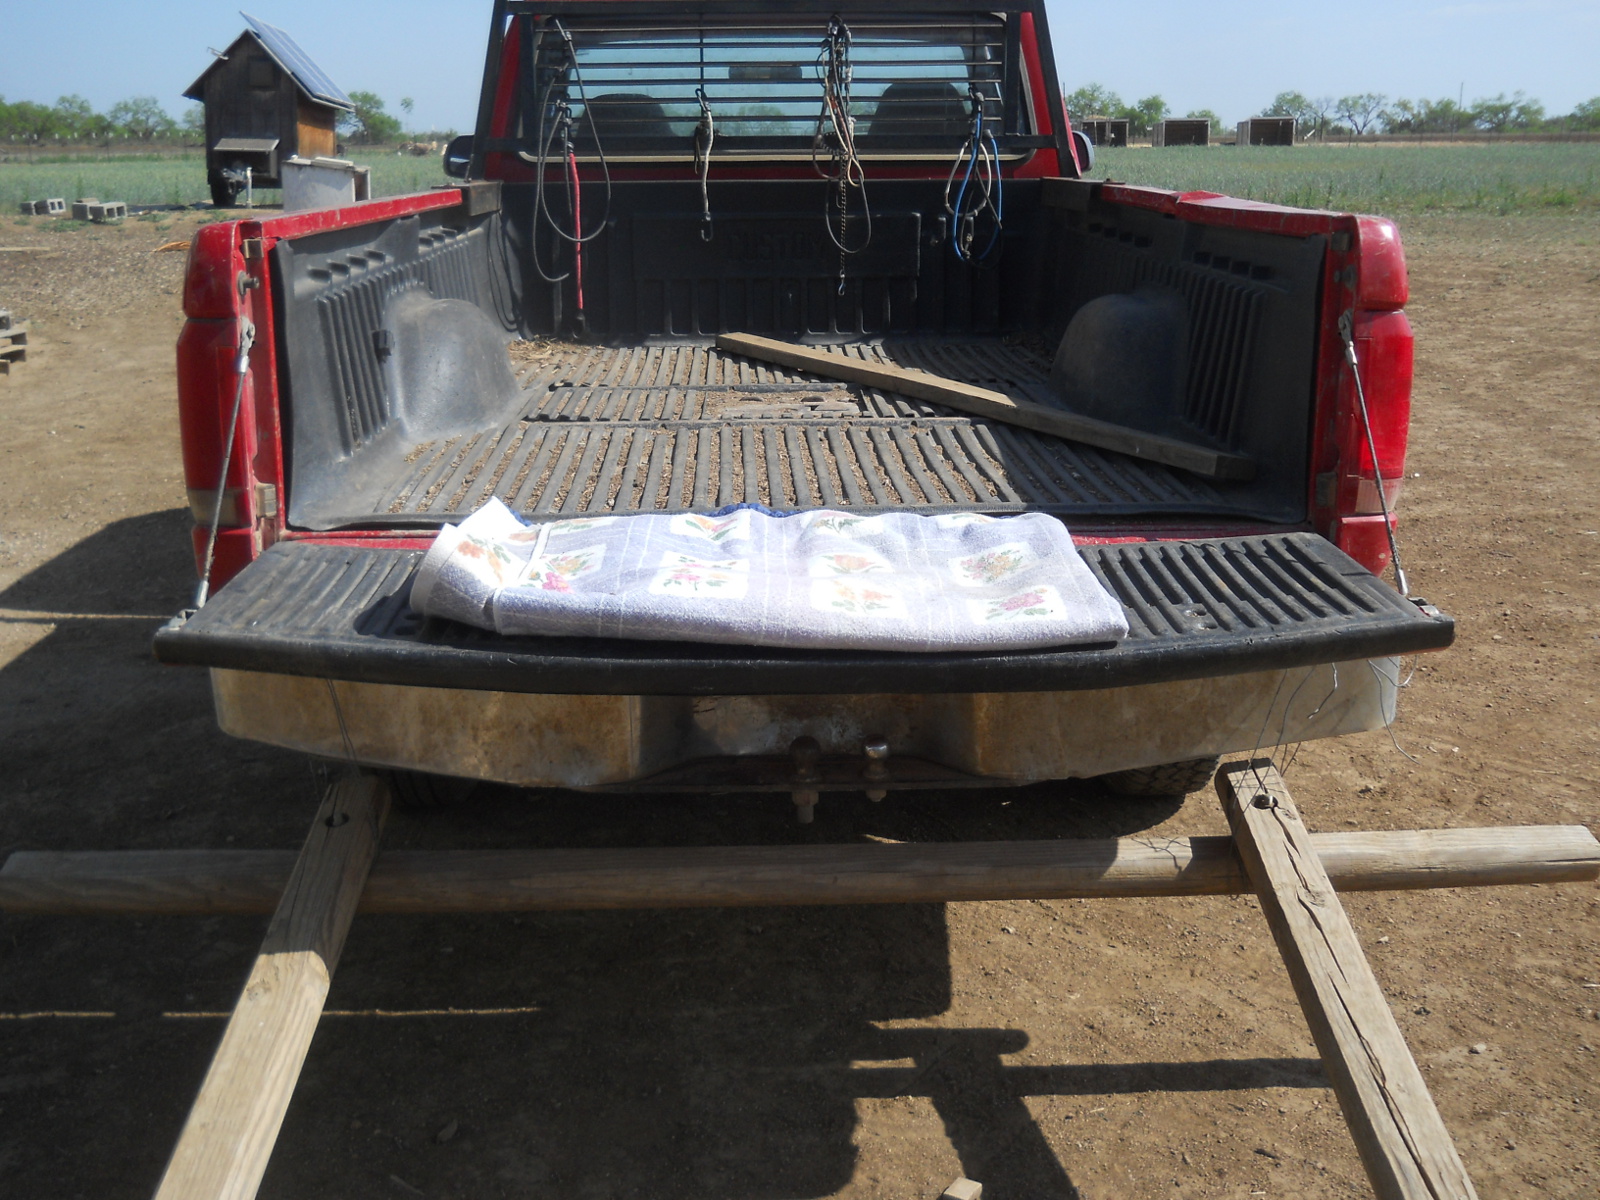
Here it is wired to the truck, facing in reverse:
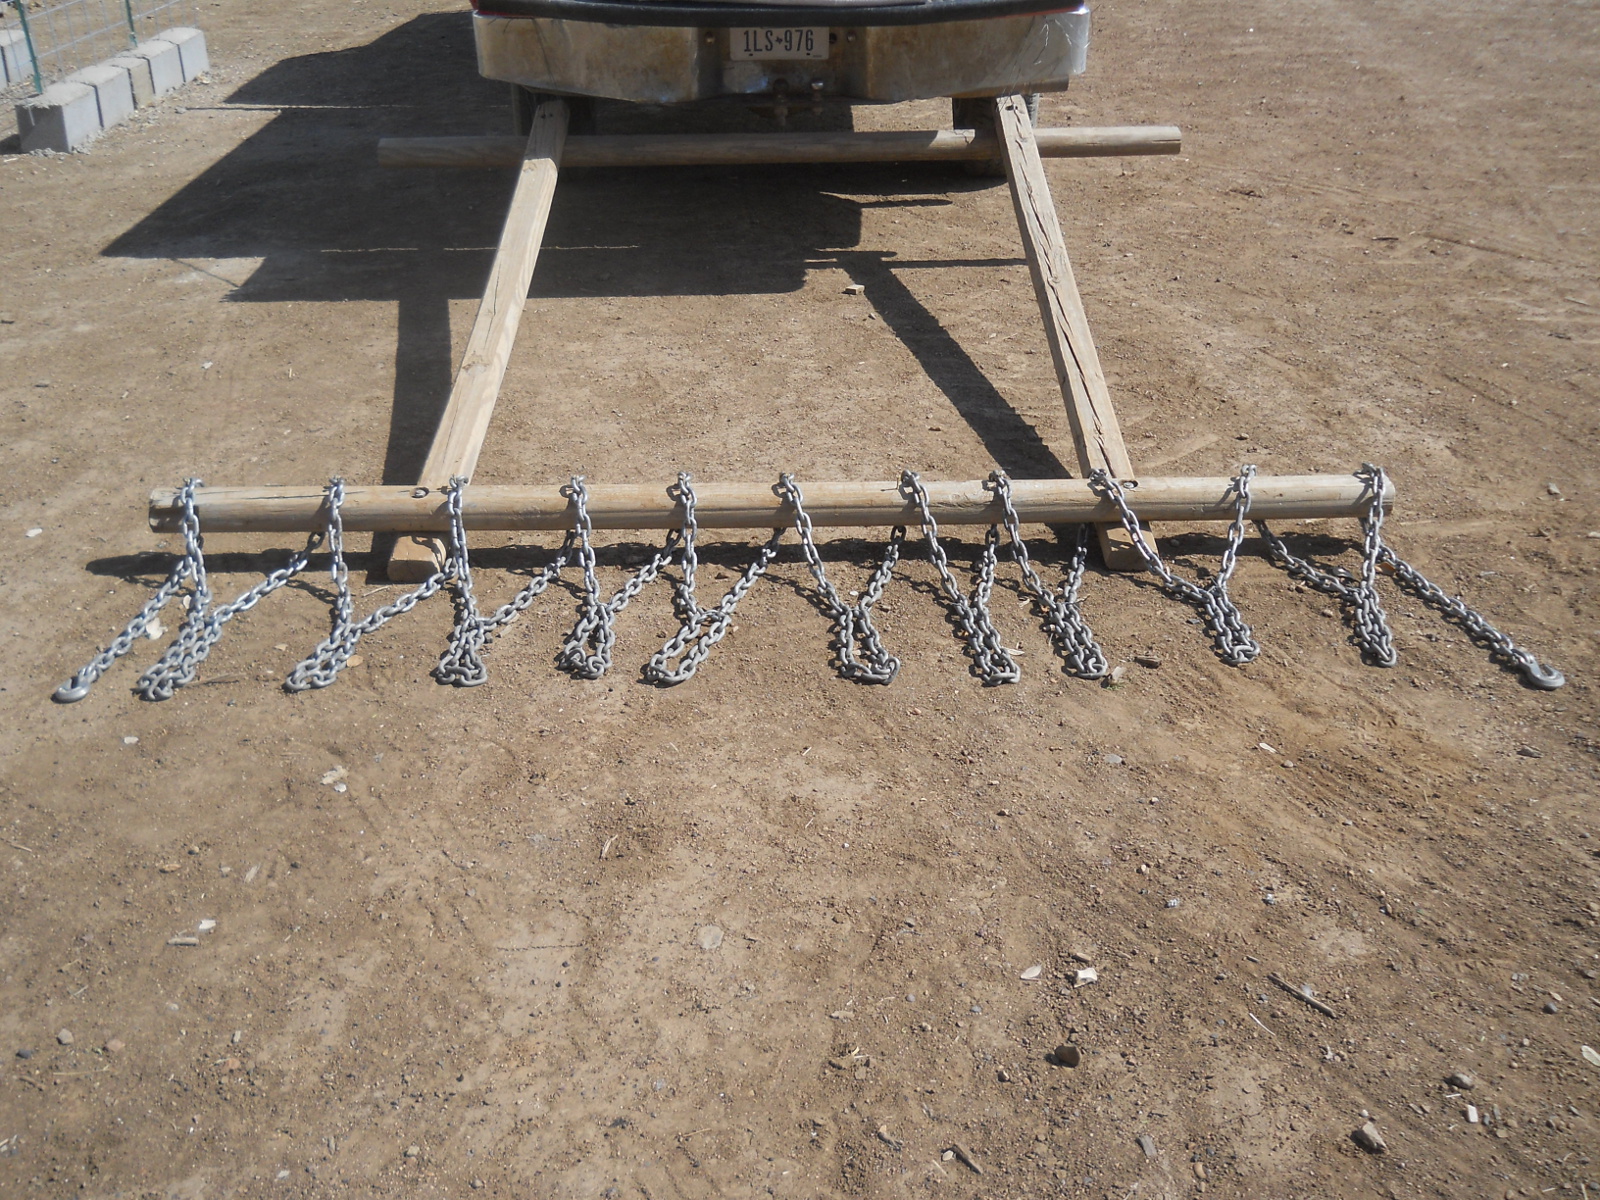
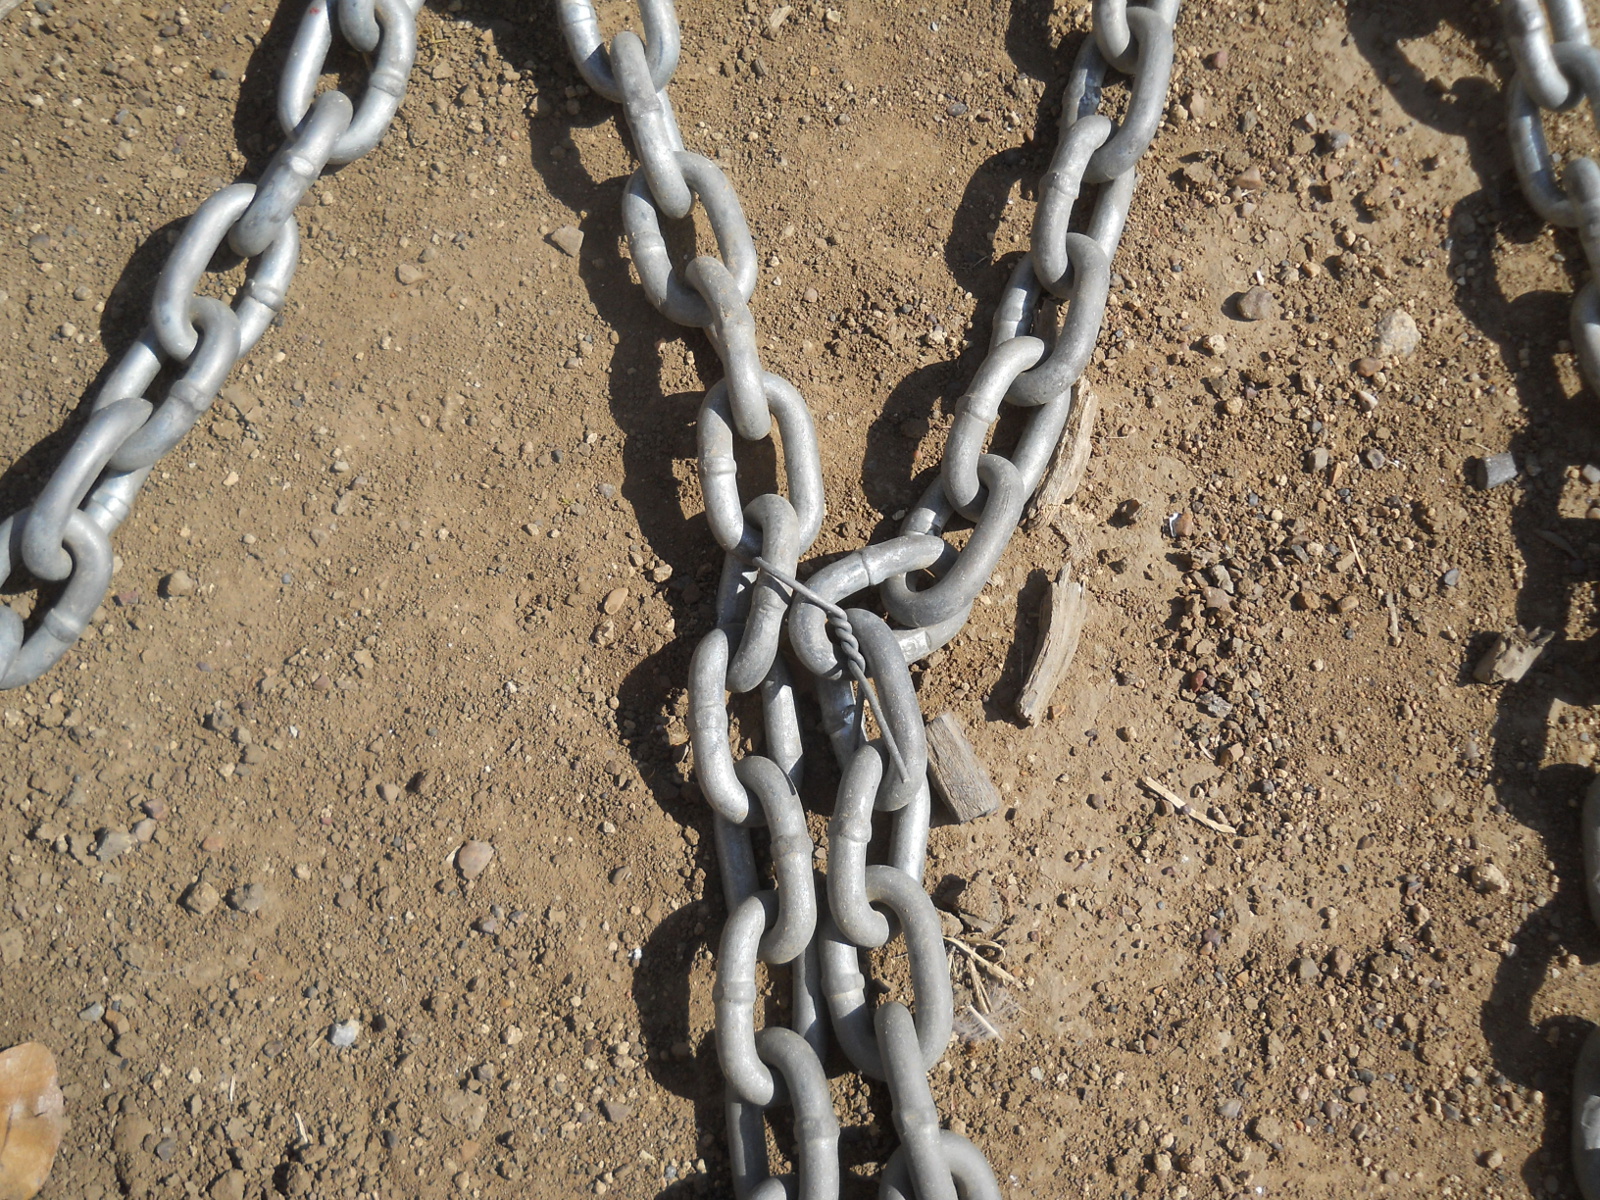
And then I wrapped a chain around the back to create “fingers”:
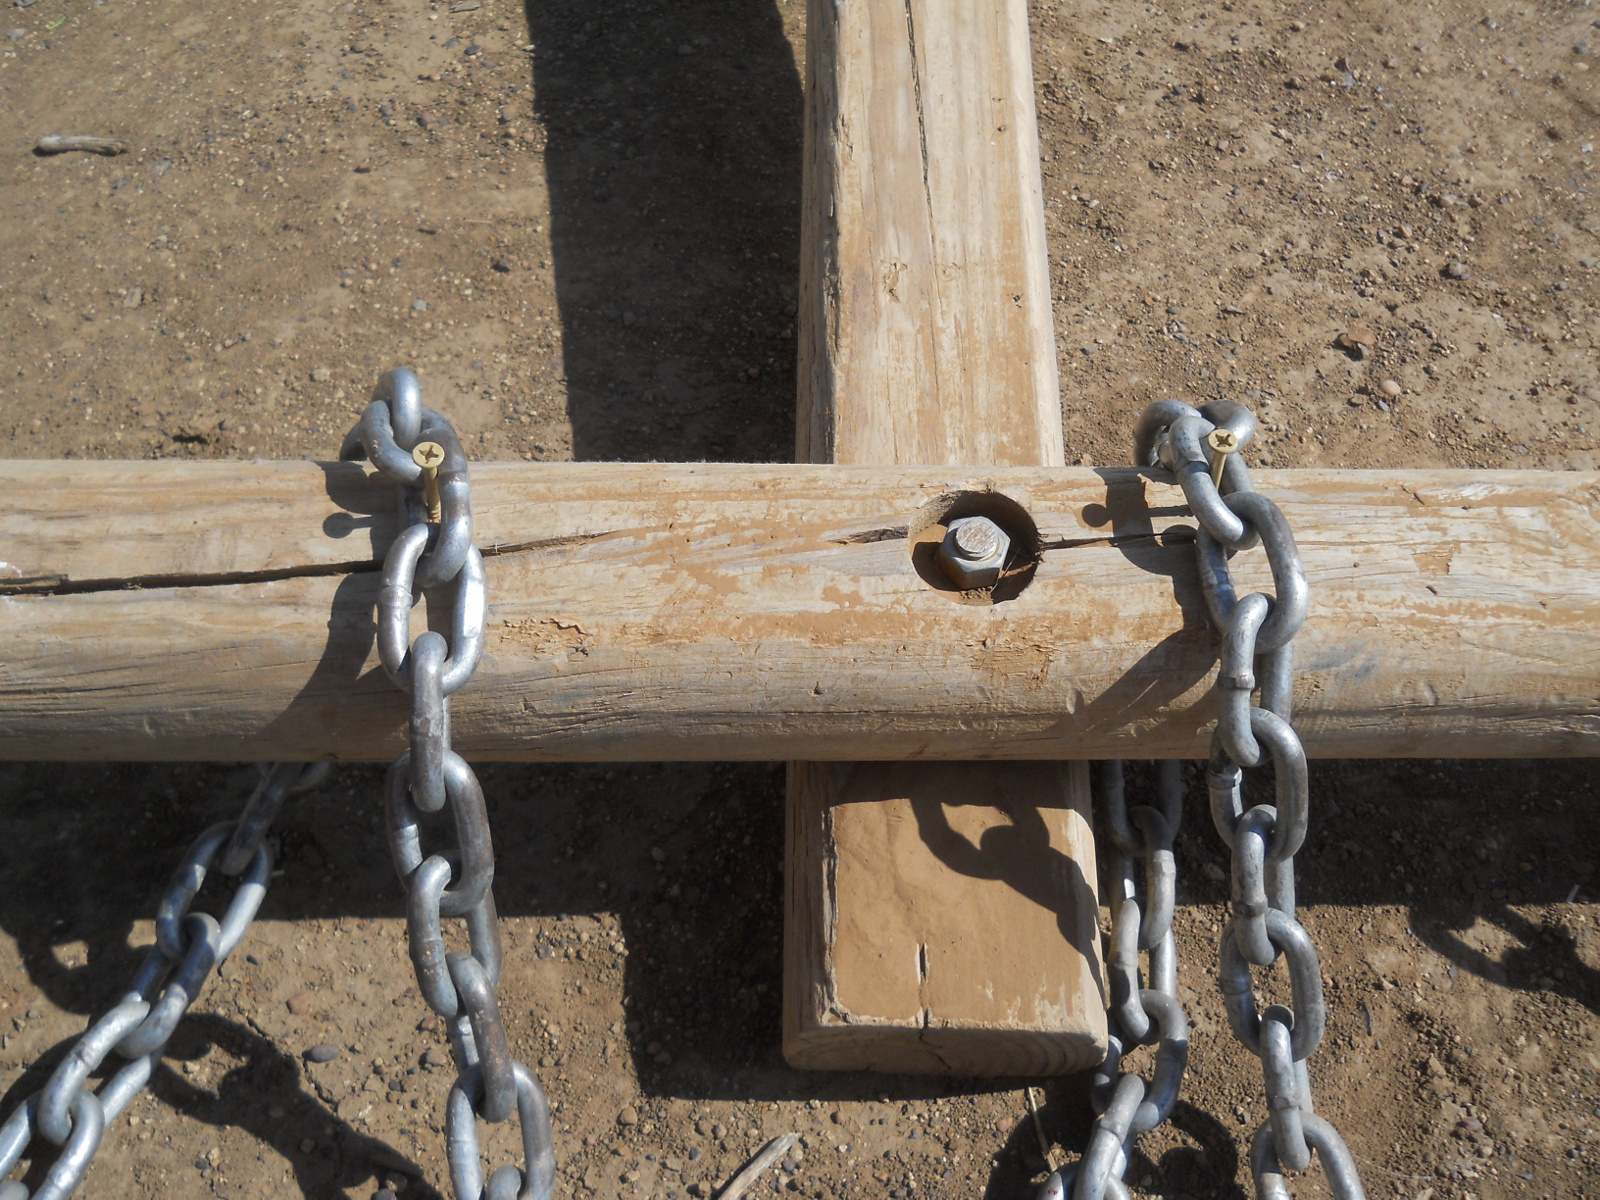
The chain was held in place by screws:
And the dragging chains were wired to created the “fingers”:
And here it is ready to go:
This was Sue’s planting chariot seat while I drove:
Once planted it was just pray for rain, and that God might bring forth the growth.
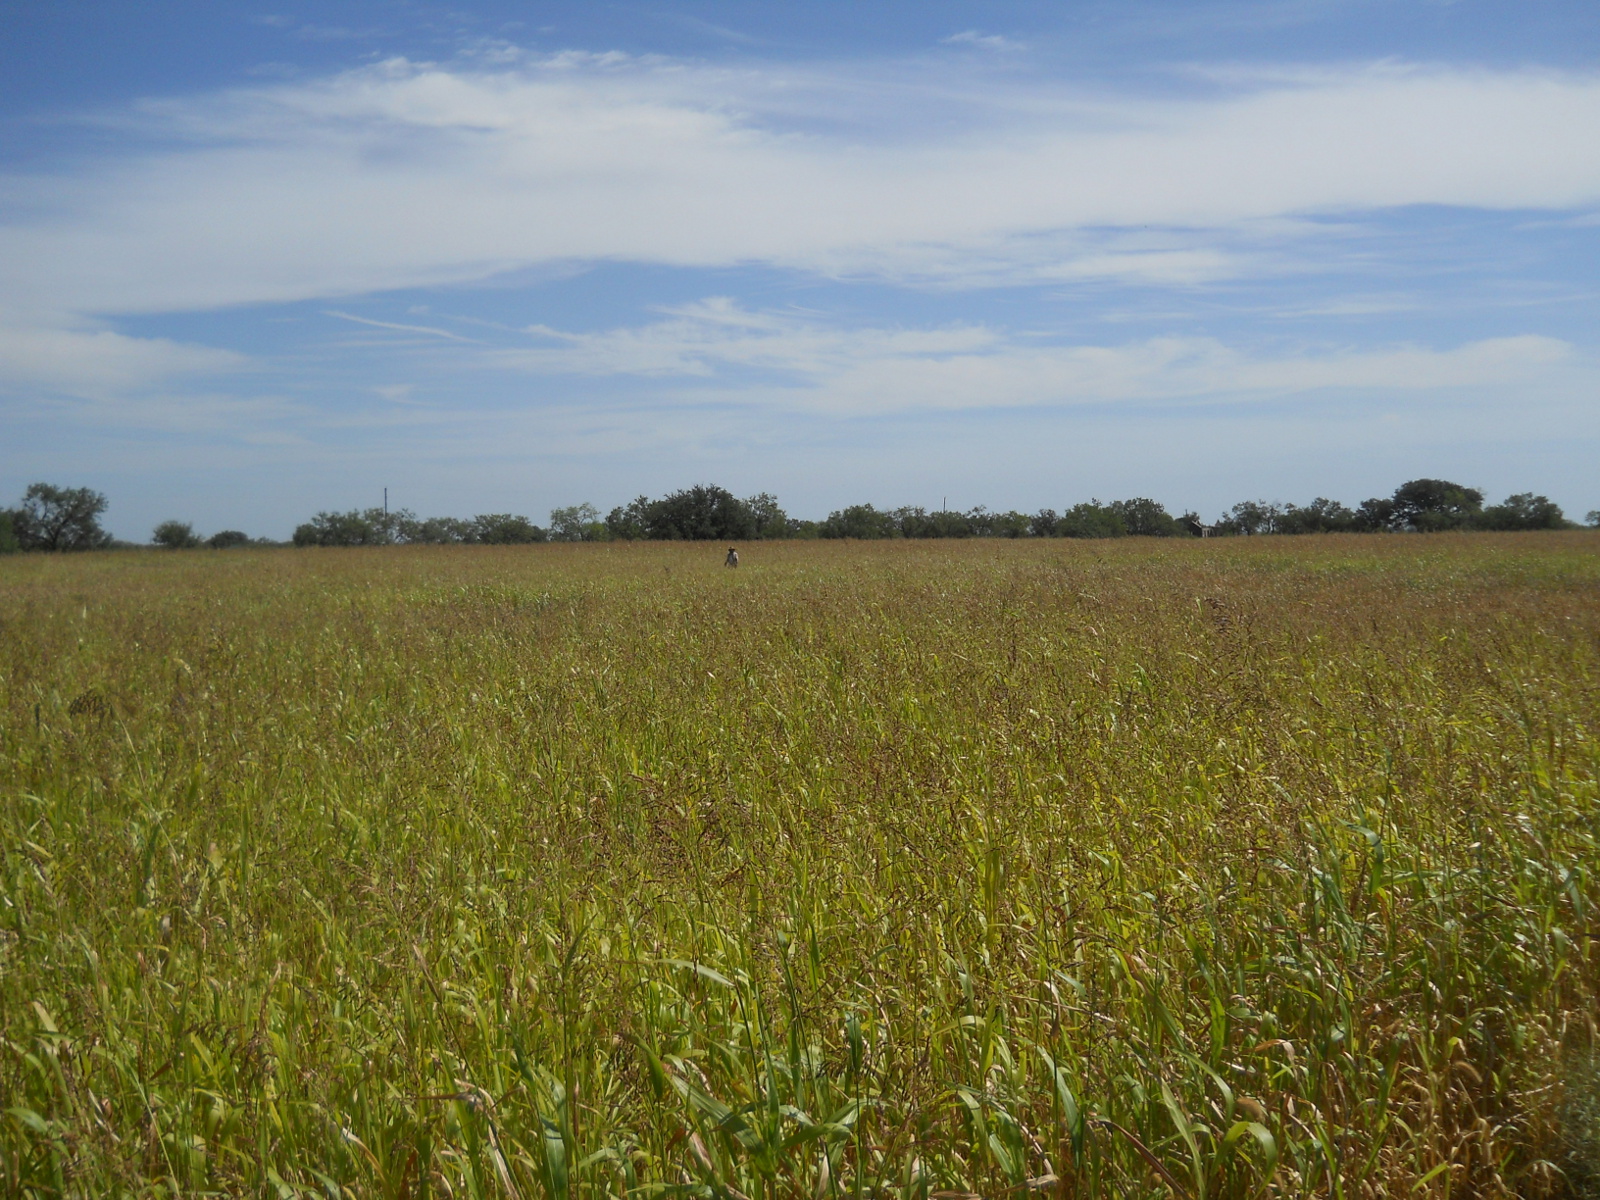
God did bring some rains, although in large doses spaced out over time, and He has granted quite a bit of foliage to grow, plants even taller than myself in places.
I tried to hire some local grass baler folks to bale up the field but never really got responses from them. But, we’re trying to establish the field in something permanent, and I thought perhaps God was directing with that, so I didn’t really push it — we really need seed to re-plant itself, and perhaps after cutting it down, it wouldn’t re-grow in time, and then we could be having the re-plant it ourselves all over again.
We are very thankful to the Lord for the rains and what He granted in growing the field!
The War of the Weeds
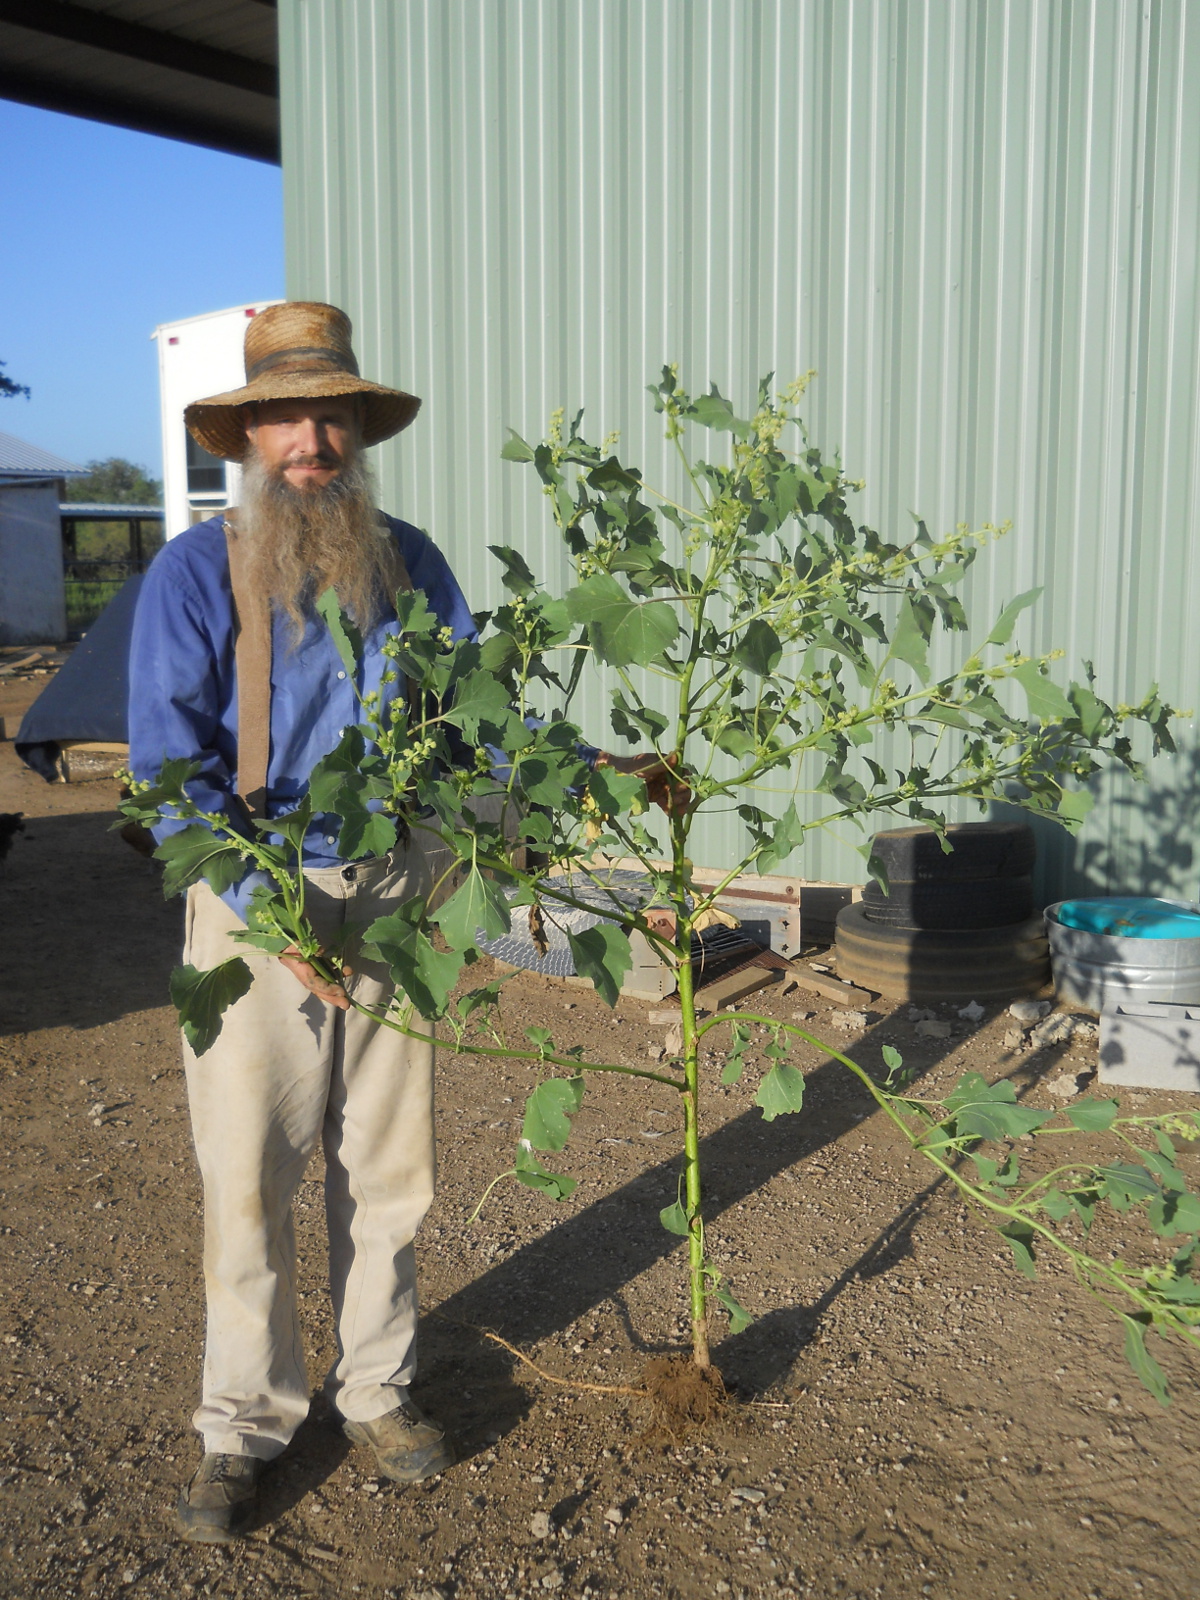
If any of you have been involved in plowing and growing, you’ll know about the weed issue. We have a little nasty weed around here that is very difficult to get rid of called a cocklebur, which are very invasive. Here’s a picture of them:
And here’s one I found next to our main pond:
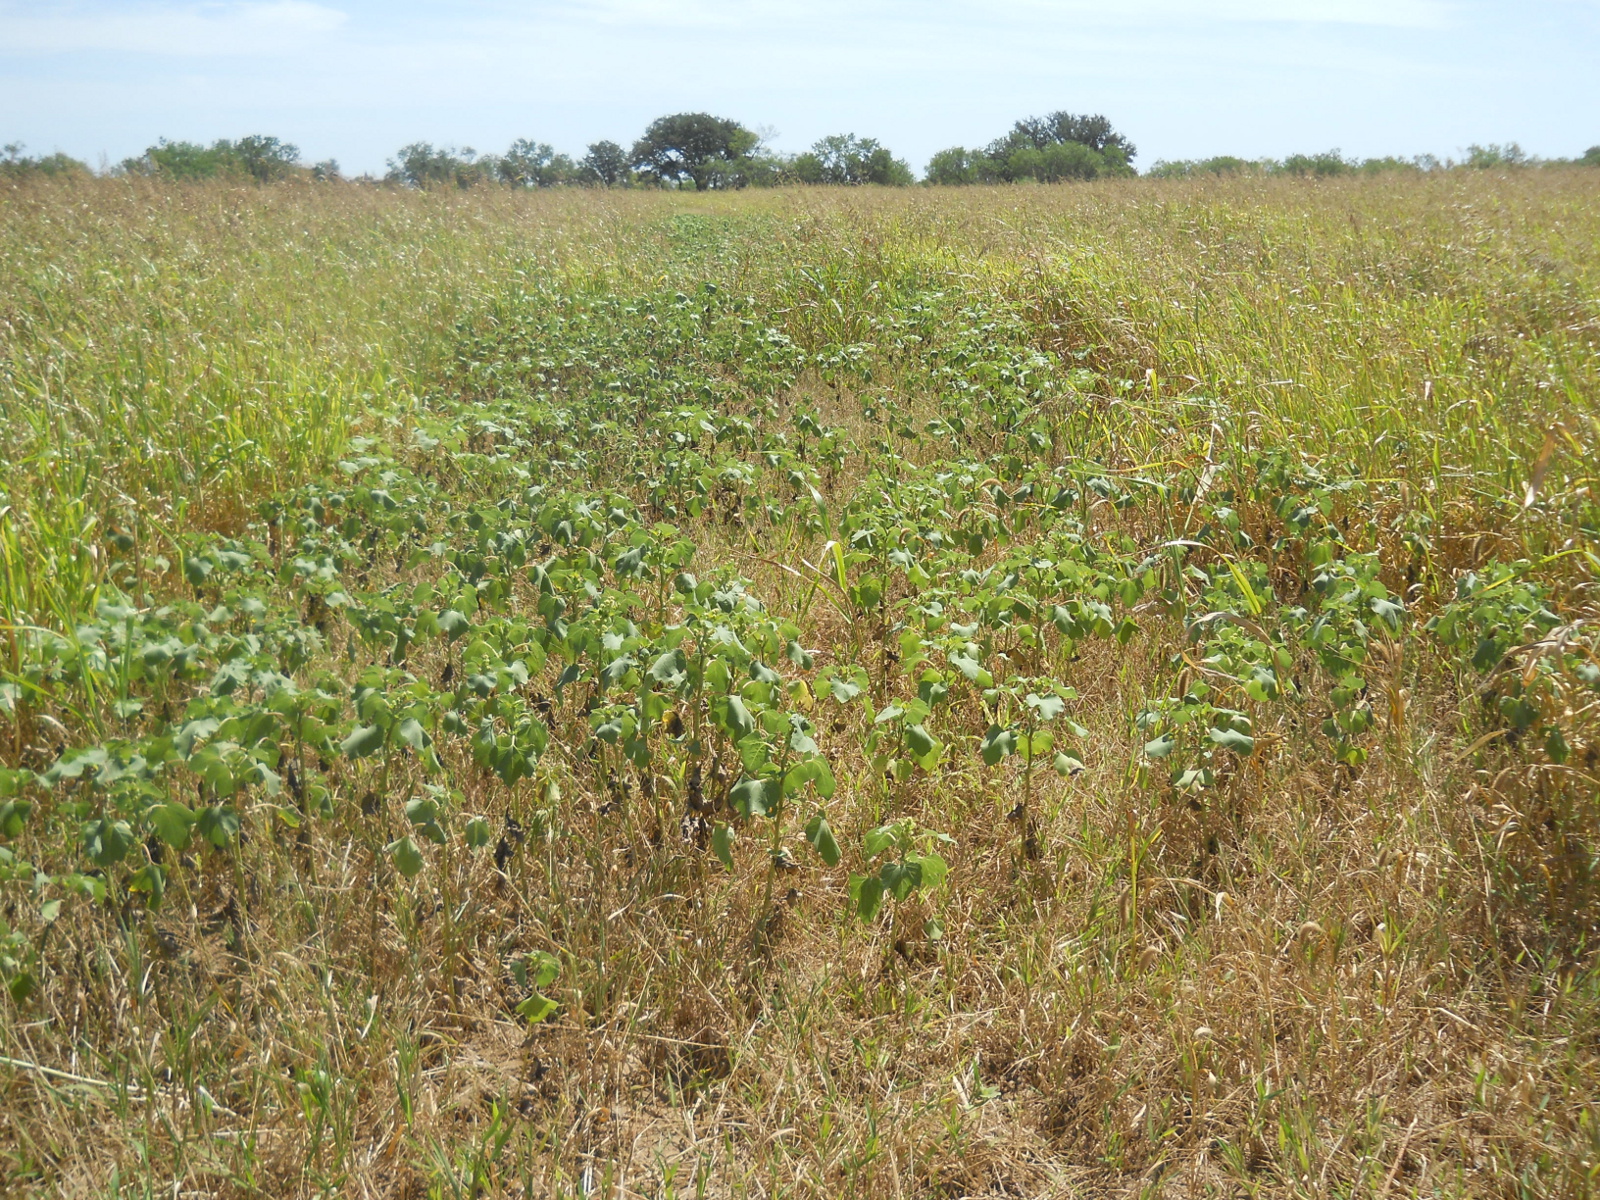
As time went on with the field, it became apparent that they were going to be a problem. In years past, I had hand-pulled all of the cocklebur plants, although one year I let several go. Still, I hadn’t anticipated what we encountered, and that was that just about everywhere where good grass wasn’t growing, cockleburs were.
Arg. And those little devils reproduce themselves many times over, with two seeds in each visual seed, one which can sit dormant for years!
Well, what do to, now with a whole field of good grass as well and given that the cockleburs seed out late August into September, which meant I was on a timer.
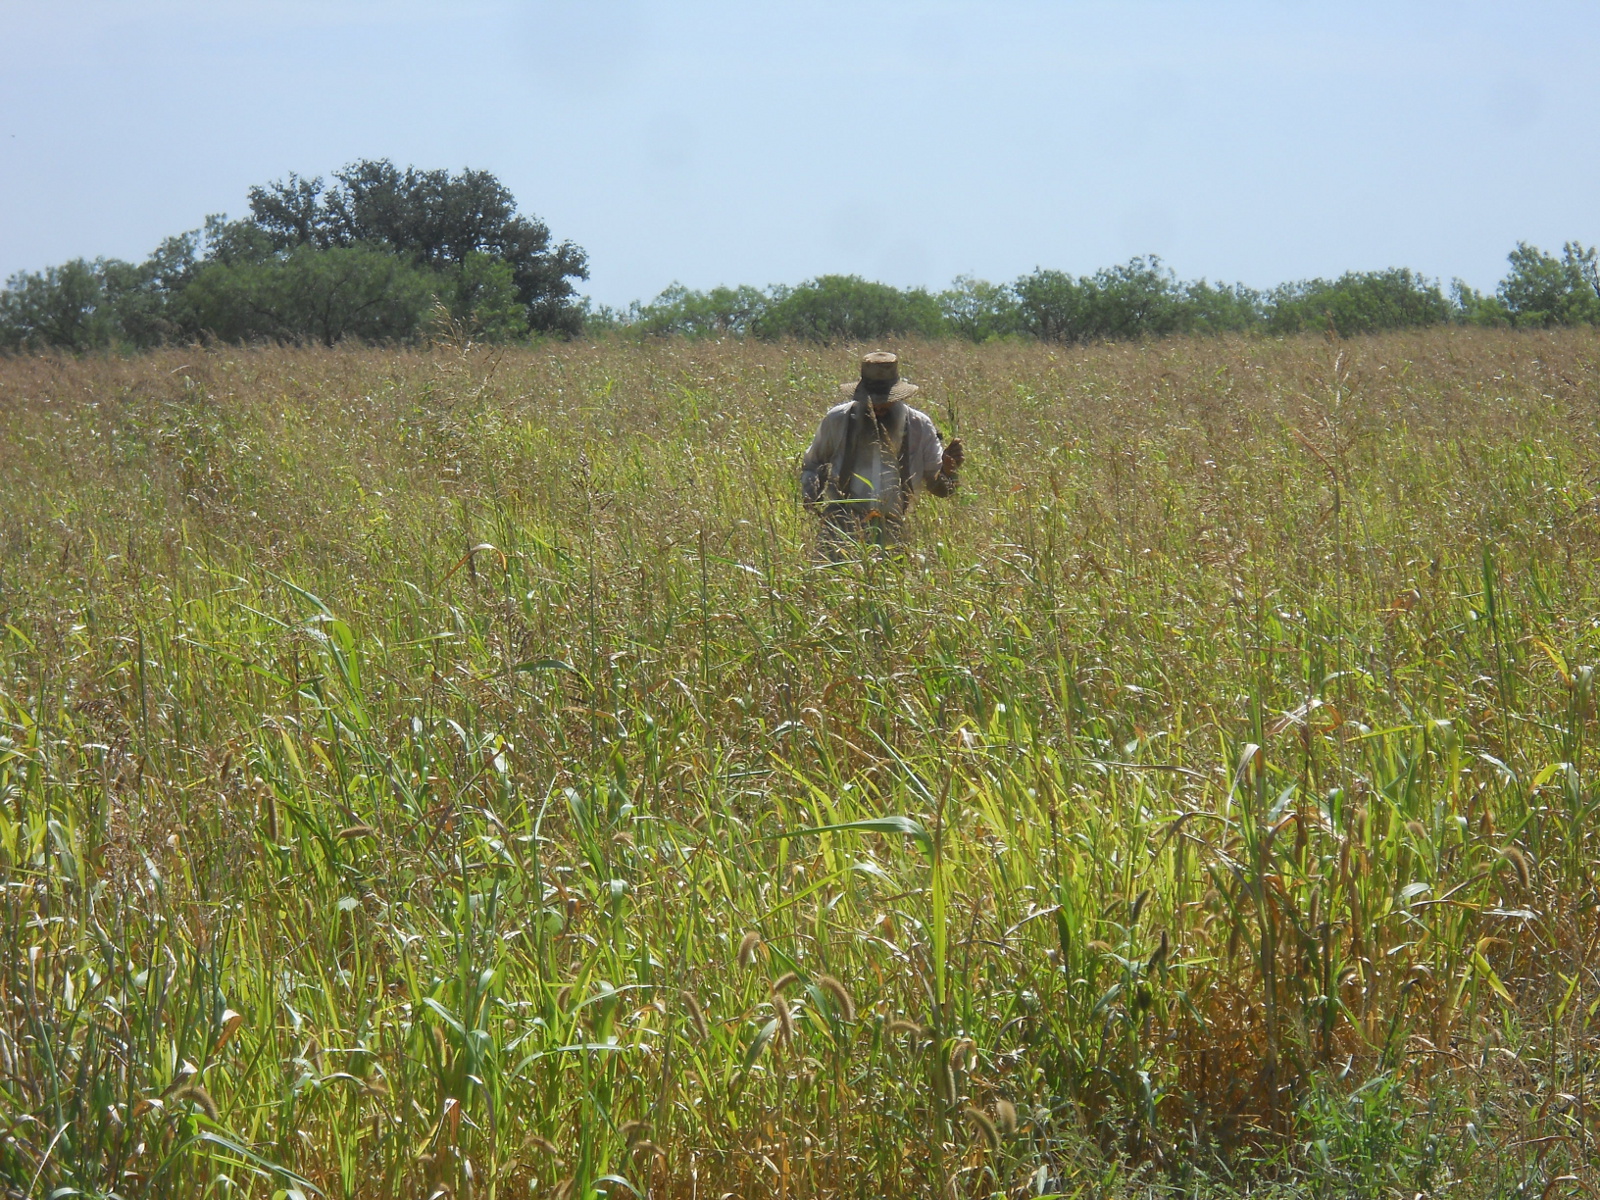
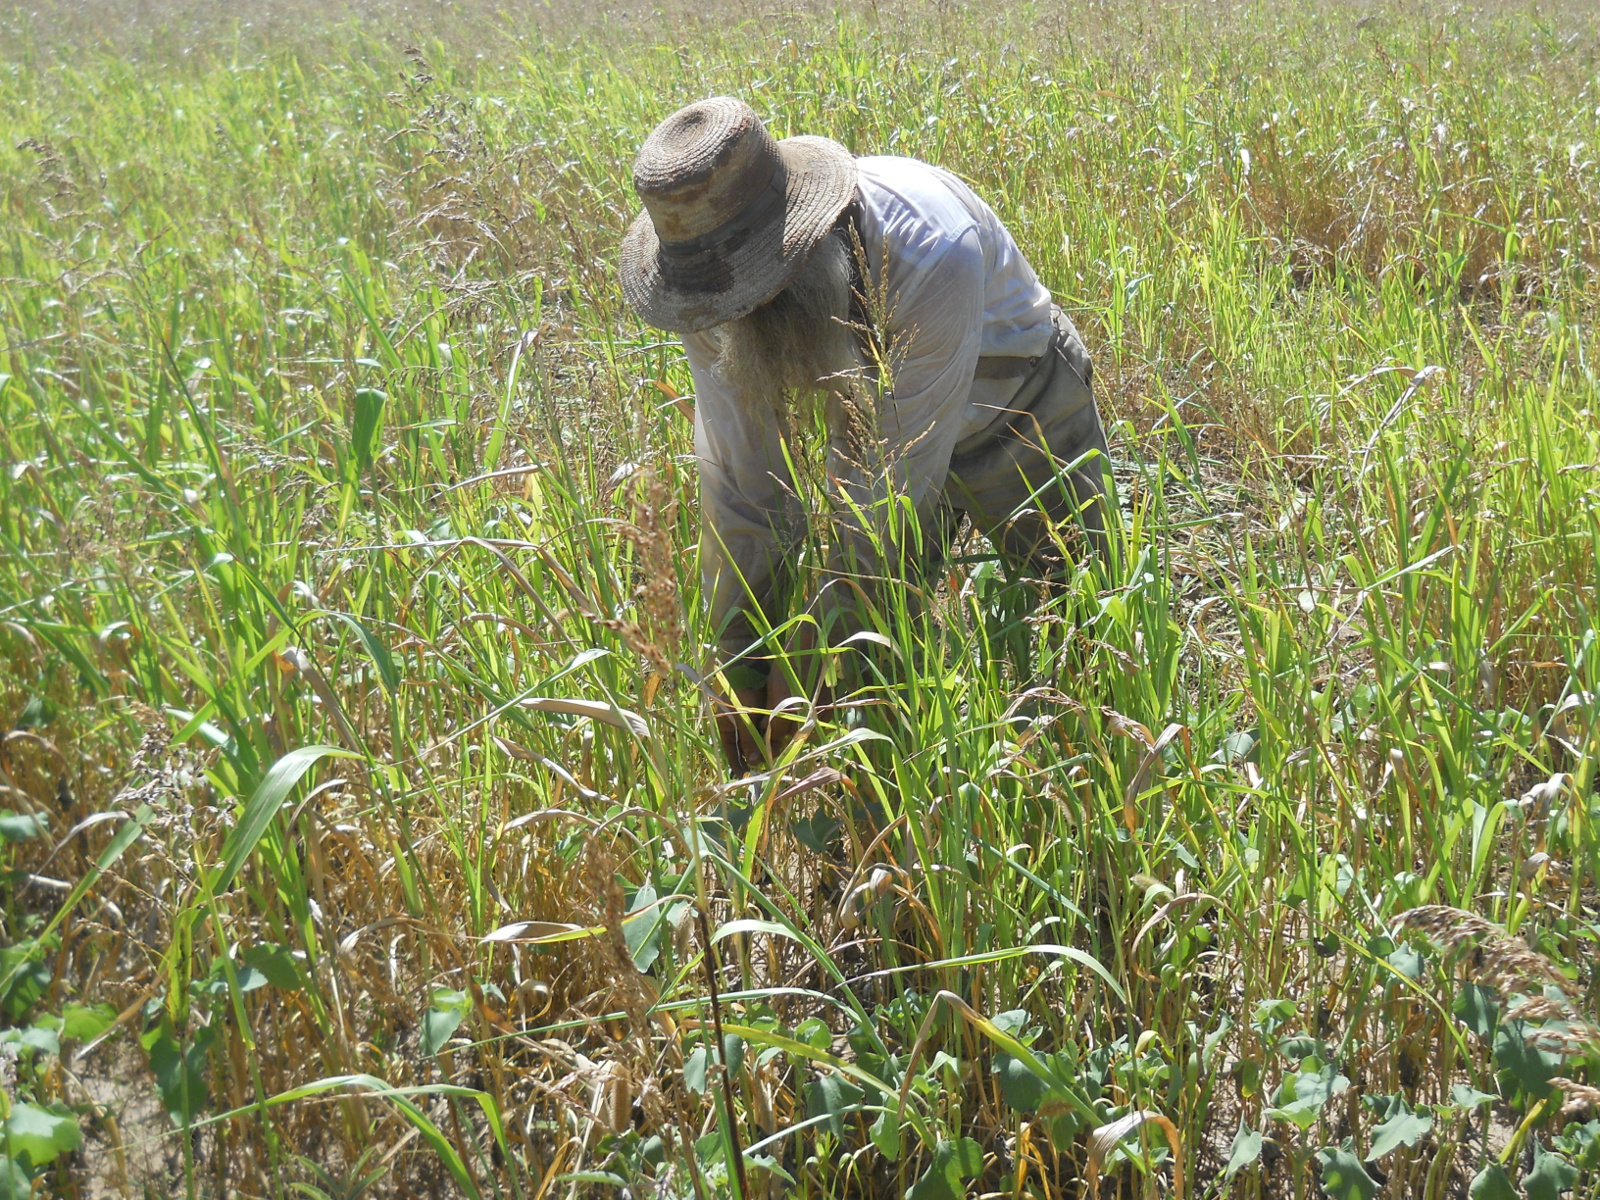
And so, I decided to just get out there, and have at it. Yes, pull them by hand…all 11 acres.
I started beginning of July and stayed at it anywhere from 2-4 hours a day starting after morning chores, 4-5 times a week — pretty much all of the time I would be doing other development around the homestead (like working on the house). It’s been grueling at times, but the Lord has helped keep me going.
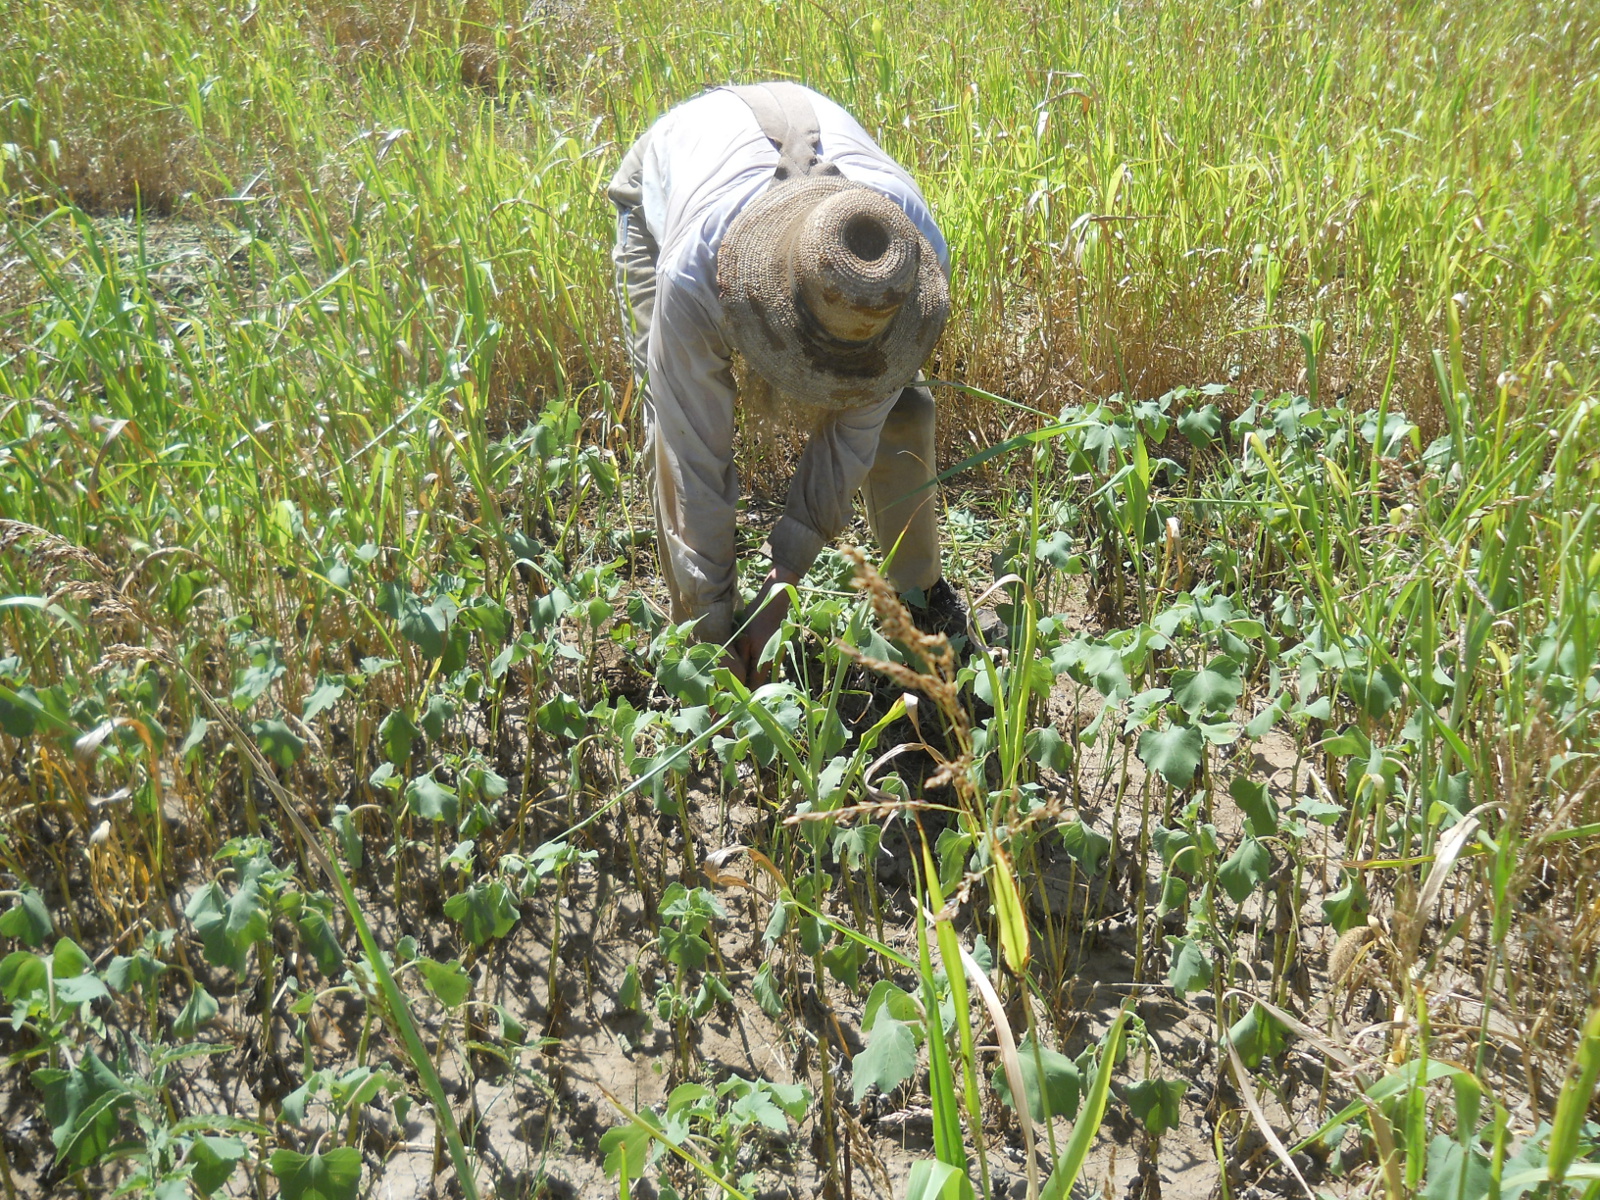
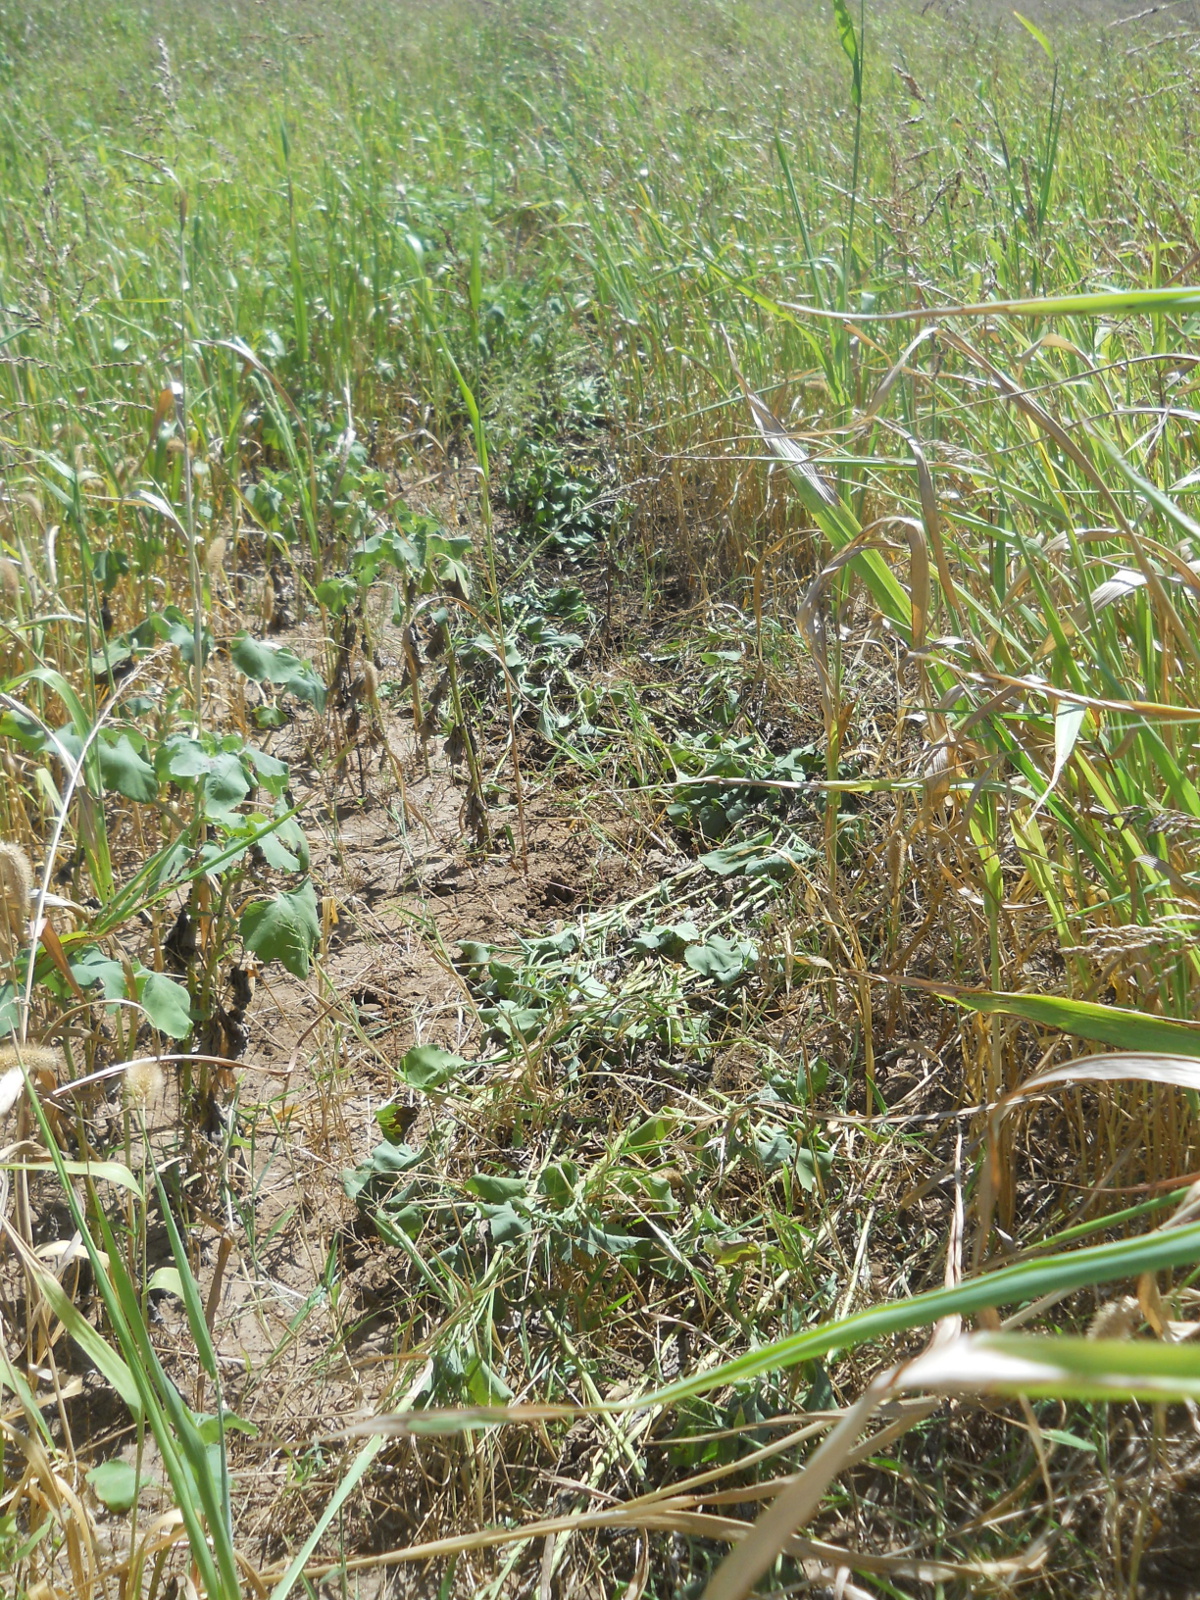
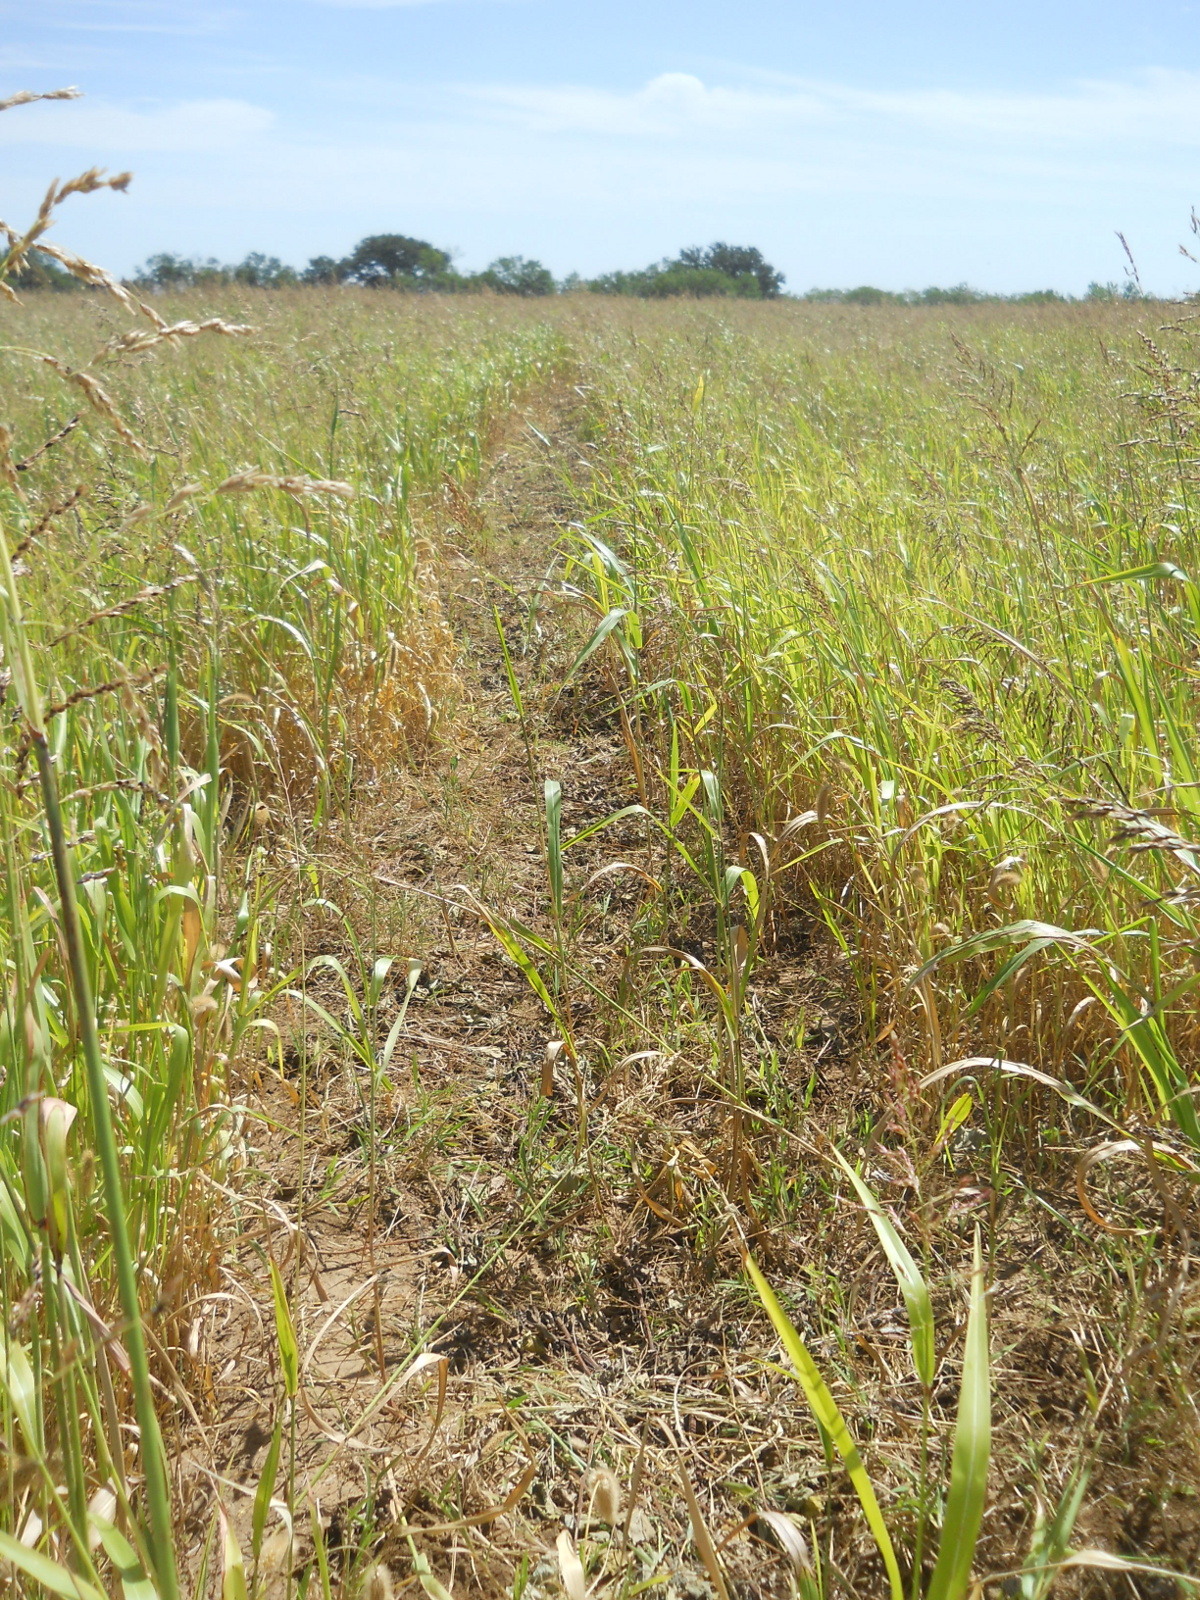
Pulling filled rows was pretty difficult, being bent over a lot:
And while pulling them amidst the sorghum almum plants was slower, it was a bit easier:
Here’s a half-pulled row:
And fully hand-pulled:
It was slow going, but we just kept at it. And thanks to Sue for her getting up there and helping too!
Since I was spending so much time up there, I really was hoping God might 1) glorify Himself through the process in some way, and 2) that He might show me anything He might along the way spiritually. I pulled a lot of weeds, and had a lot of alone time up there, with God, contemplating; and graciously, I was reminded of some things…..
As Christ discussed in the parable of the sower, only the good ground produces a true bearing of fruit. This is spiritually in the heart. A.W. Pink talks much of keeping the heart in his “Heart Work” chapter from his book “Practical Christianity.” Besides the below, I hope you will take the time to read the entire chapter here:
4. To “keep” the heart means to look diligently after its cleansing. Perhaps some of our readers often find themselves sorrowfully crying, “Oh, the vileness of my heart!” Thank God if He has discovered this to you. But, dear friend, there is no sufficient reason why your “heart” should continue to be vile. You might lament that your garden was overgrown with weeds and filled with rubbish; but need it remain so? We speak not now of your sinful nature, the incurable and unchangeable “flesh” which still indwells you; but of your “heart,” which God bids you “keep.” You are responsible to purge your mind of vain imaginations, your soul of unlawful affections, your conscience of guilt.
But, alas, you say, “I have no control over such things: they come unbidden and I am powerless to prevent them.” So the Devil would have you believe! Revert again to the analogy of your garden. Do not the weeds spring up unbidden? Do not the slugs and other pests seek to prey upon the plants? What, then? Do you merely bewail your helplessness? No, you resist them, and take means to keep them under. Thieves enter houses uninvited, but whose fault is it if the doors and windows be left unfastened? Oh, heed not the seductive lullabies of Satan. God says, “Purify your hearts, ye double minded” (James 4:8); that is, one mind for Him, and another for self! one for holiness, and another for the pleasures of sin.
But how am I to “purify” my heart? By vomiting up the foul things taken into it, shamefacedly owning them before God, repudiating them, turning from them with loathing; and it is written, “If we confess our sins, He is faithful and just to forgive us our sins, and to cleanse us from all unrighteousness.” By daily renewing our exercise of repentance, and such repentance as is spoken of in 2 Corinthians 7:11; “for behold this selfsame thing, that ye sorrowed after a godly sort, what carefulness it wrought in you, yea, what clearing of yourselves, yea, what indignation, yea, what fear, yea, what vehement desire, yea, what zeal, yea, what revenge! In all things ye have approved yourselves to be clear in this matter.” By the daily exercise of faith (Acts 15:9), appropriating afresh the cleansing blood of Christ, bathing every night in that “fountain” which has been opened “for sin and uncleanness” (Zech. 13:1). By treading the path of God’s commandments: “Seeing ye have purified your souls in obeying the truth through the Spirit” (1 Pet. 1:22).
…
“Man looketh on the outward appearance, but the Lord looketh on the heart” (1 Sam. 16:7). How prone we are to be occupied with that which is evanescent, rather than with the things that abide; how ready to gauge things by our senses instead of by our rational powers. How easily we are deceived by that which is on the surface, forgetting that true beauty lies within. How slow we are to adopt God’s way of estimating. Instead of being attracted by comeliness of physical features we should value moral qualities and spiritual graces. Instead of spending so much care, time and money on the adorning of the body we ought to devote our best attention to the developing and directing of the faculties of our souls. Alas, the vast majority of our fellows live as though they had no souls, and the average professing Christian gives little serious thought to the same.
Yes, the Lord “looketh on the heart”: He sees its thoughts and intents, knows its desires and designs, beholds its motives and motions, and deals with us accordingly. The Lord discerns what qualities are in our hearts: what holiness and righteousness, what wisdom and prudence, what justice and integrity, what mercy and kindness. When such graces are lively and flourishing, then is fulfilled that verse, “My beloved is gone down into his garden, to the beds of spices, to feed in the gardens, and to gather lilies” (Song of Sol. 6:2). God esteems nothing so highly as holy faith, unfeigned love, and filial fear; in His sight a “meek and quiet spirit” is of “great price” (1 Pet. 3:4).
The sincerity of our profession largely depends upon the care and conscience we have in keeping our hearts. A very searching example of this is found in 2 Kings 10:31, “But Jehu took no heed to walk in the law of the Lord God of Israel with all his heart.” Those words are more solemn because of what is said of him in the previous verse: “And the Lord said unto Jehu, Because thou hast done well in executing that which is right in Mine eyes, and hast done unto the house of Ahab according unto all that was in Mine heart, thy children of the fourth generation shall sit on the throne of Israel.” Jehu was partial in his reformation, which showed his heart was not right with God; he abhorred the worship of Baal which Ahab had fostered, but he tolerated the golden calves which Jeroboam had set up. He failed to put away all the evil.
Ah, my reader, true conversion is not only turning away from gross sin, it is the heart forsaking all sin. There must be no reserve, for God will not allow any idol, nor must we. Jehu went so far, but he stopped short of the vital point; he put away evil, but he did not do that which was good. He heeded not the law of the Lord to walk in it “with all his heart.” It is greatly to be feared that those who are heedless are graceless, for where the principle of holiness is planted in the heart it makes its possessor circumspect and desirous of pleasing God in all things—not from servile fear, but from grateful love; not by constraint, but freely; not occasionally, but constantly.
…
5. The diligent keeping of the heart is a great aid to the improving of our graces. Grace never thrives in a careless soul, for the roots and habits of grace are planted in the heart, and the deeper they are radicated (cause to take root) there the more thriving and flourishing grace is. In Ephesians 3:17, we read of being “rooted and grounded in love”: love in the heart is the spring of every gracious word of the mouth and of every holy act of the hand. But is not Christ the “root” of the Christian’s graces? Yes, the originating root, but grace is the derivative root, planted and nourished by Him, and according as this thrives under Divine influences, so the fruits of grace are more healthy and vigorous. But in a heart which is not kept diligently those fructifying influences are choked. Just as in an uncared-for garden the weeds crowd out the flowers, so vain thoughts that are not disallowed, and lusts which are not mortified, devour the strength of the heart. “My soul shall be satisfied as with marrow and with fatness; and my mouth shall praise Thee with joyful lips: when I remember Thee upon my bed, and meditate on Thee in the night watches” (Ps. 55:5, 6).
As I continued pulling out the weeds from the field, I was reminded of a Psalm we were learning to sing as a group end of 2012 to early 2013, God keeping clean His house:
Root up Psalm 52:
Psalm 52
1 Why boastest thou thyself in mischief, O mighty man? the goodness of God endureth continually.
2 The tongue deviseth mischiefs; like a sharp razor, working deceitfully.
3 Thou lovest evil more than good; and lying rather than to speak righteousness. Selah.
4 Thou lovest all devouring words, O thou deceitful tongue.
5 God shall likewise destroy thee for ever, he shall take thee away, and pluck thee out of thy dwelling place, and root thee out of the land of the living. Selah.
6 The righteous also shall see, and fear, and shall laugh at him:
7 Lo, this is the man that made not God his strength; but trusted in the abundance of his riches, and strengthened himself in his wickedness.
8 But I am like a green olive tree in the house of God: I trust in the mercy of God for ever and ever.
9 I will praise thee for ever, because thou hast done it: and I will wait on thy name; for it is good before thy saints.
These processes of sanctifying of the heart and God’s house can often be quite disruptive, as I know from experience, and as was typified by how disruptive to the ground pulling some of the weeds were. It was amazing how much dirt often came up with the roots, even tiny weeds. And sadly, sometimes good grass came with the weed, but thankfully the Spirit is assuredly more careful and only what is supposed to come up does when He is working. We pray the Lord grant us His graces and mercies in these things, and thank Him for what He has, and may we heed these exhortations and warnings.
I also continued to be enlightened about my carnal man, in frustrations with weed-pulling difficulties (it never ceased to amaze me how even small cocklebur weeds required the same strength to pull them as weeds twice their size), the heat, and my obvious entitlement in my grumblings that this process should be easier. This gave me opportunity to repent and pray for God to help me exercise His graces of patience and submission to Him more. But, with me removing the “carnal flesh” of the field, it struck me that God might actually be mortifying the weeds of my heart while I was mortifying the weeds of the field. I pray it was so!
In my previous blog post on the war of the weeds, I discussed more about mortification, and recommended a Free Grace Broadcaster on the subject here.
As I mentioned, in the end, my prayer was that God would glorify Himself through the process, and that I might learn something from it as well. But, from a temporal standpoint, in God’s mercies, I was also very thankful for:
– No gnats, flying insects – Every breeze – Strength to get through each time – Seeing the cavalry (Sue) bringing something cool to drink – Hardly any fire ant problems – Only the relatively few times of being poked in the eye – The time alone with the Lord, and myself and continually being reminded of carnal reactions – No snakes – The easily-pulled weeds – The hard-to-pull weeds – Healing of the many blisters – No thorns on the weeds – Easy to identify stems (color and texture) – The bee swarm that flew over me, hopefully that’s gone on to make a new colony!
Thanks to the Lord for His graces and mercies!
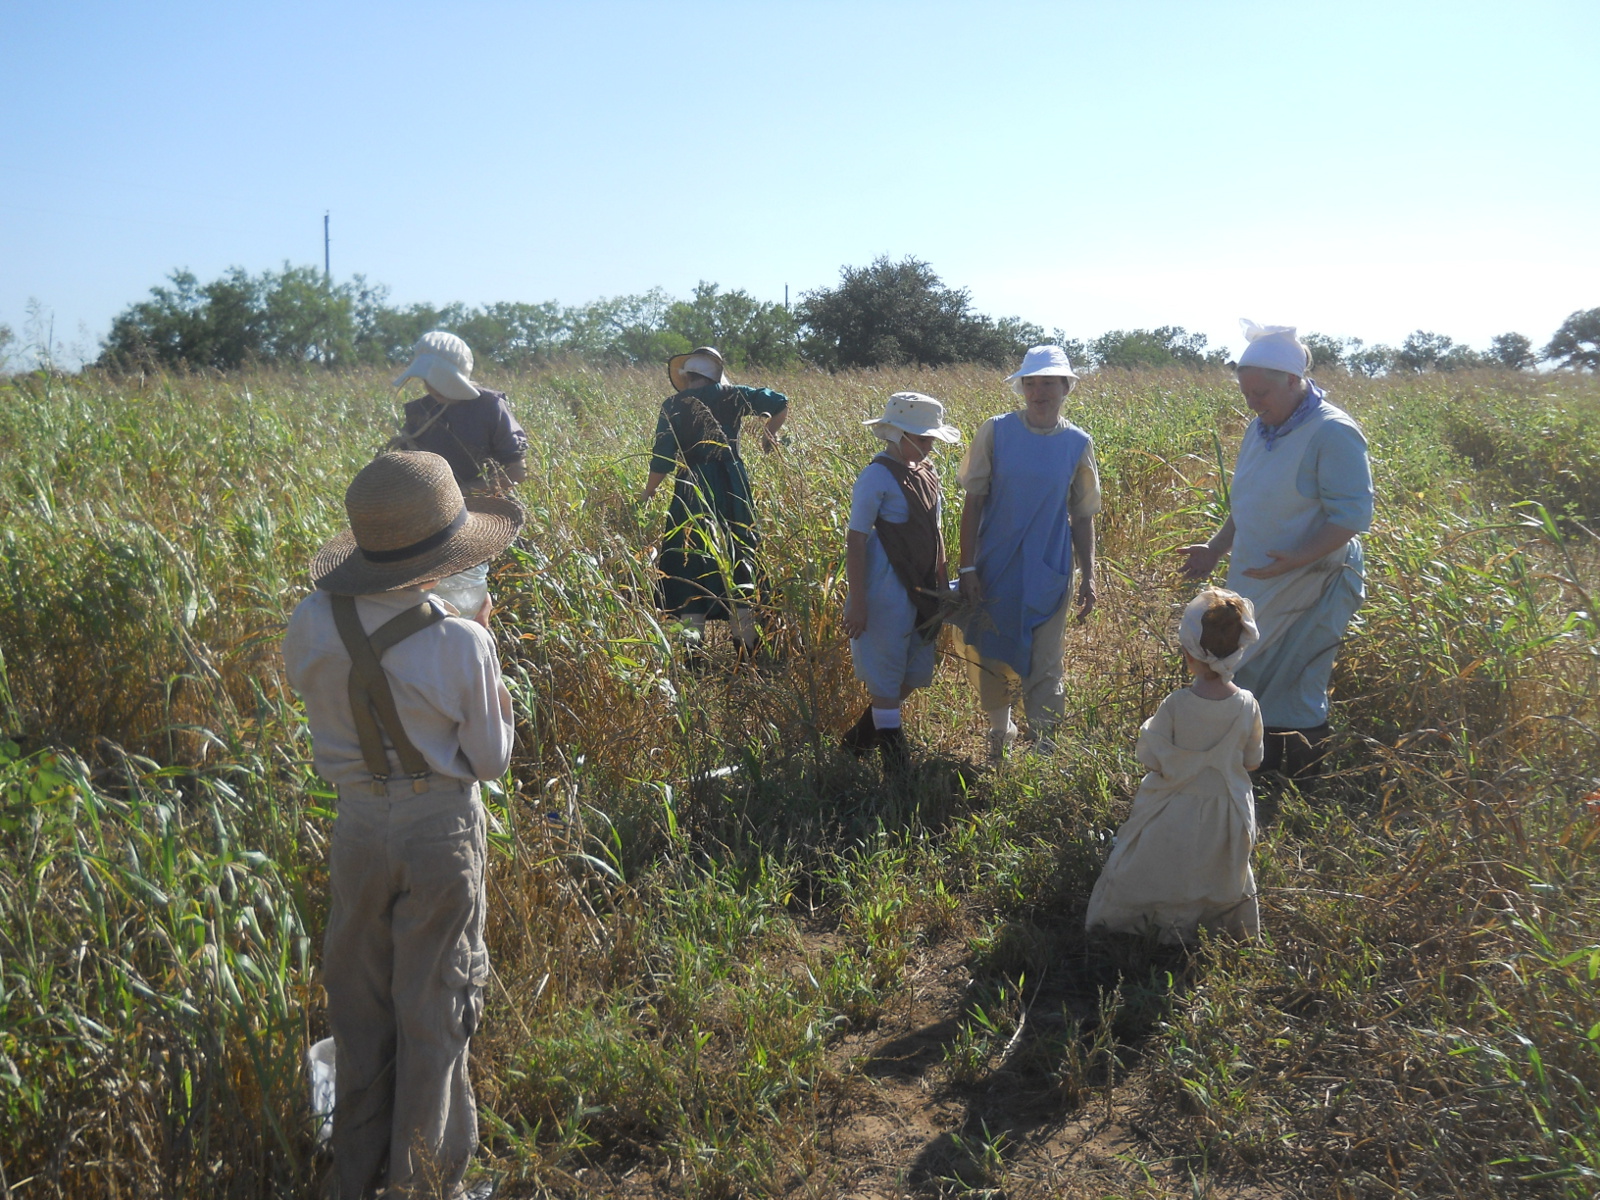
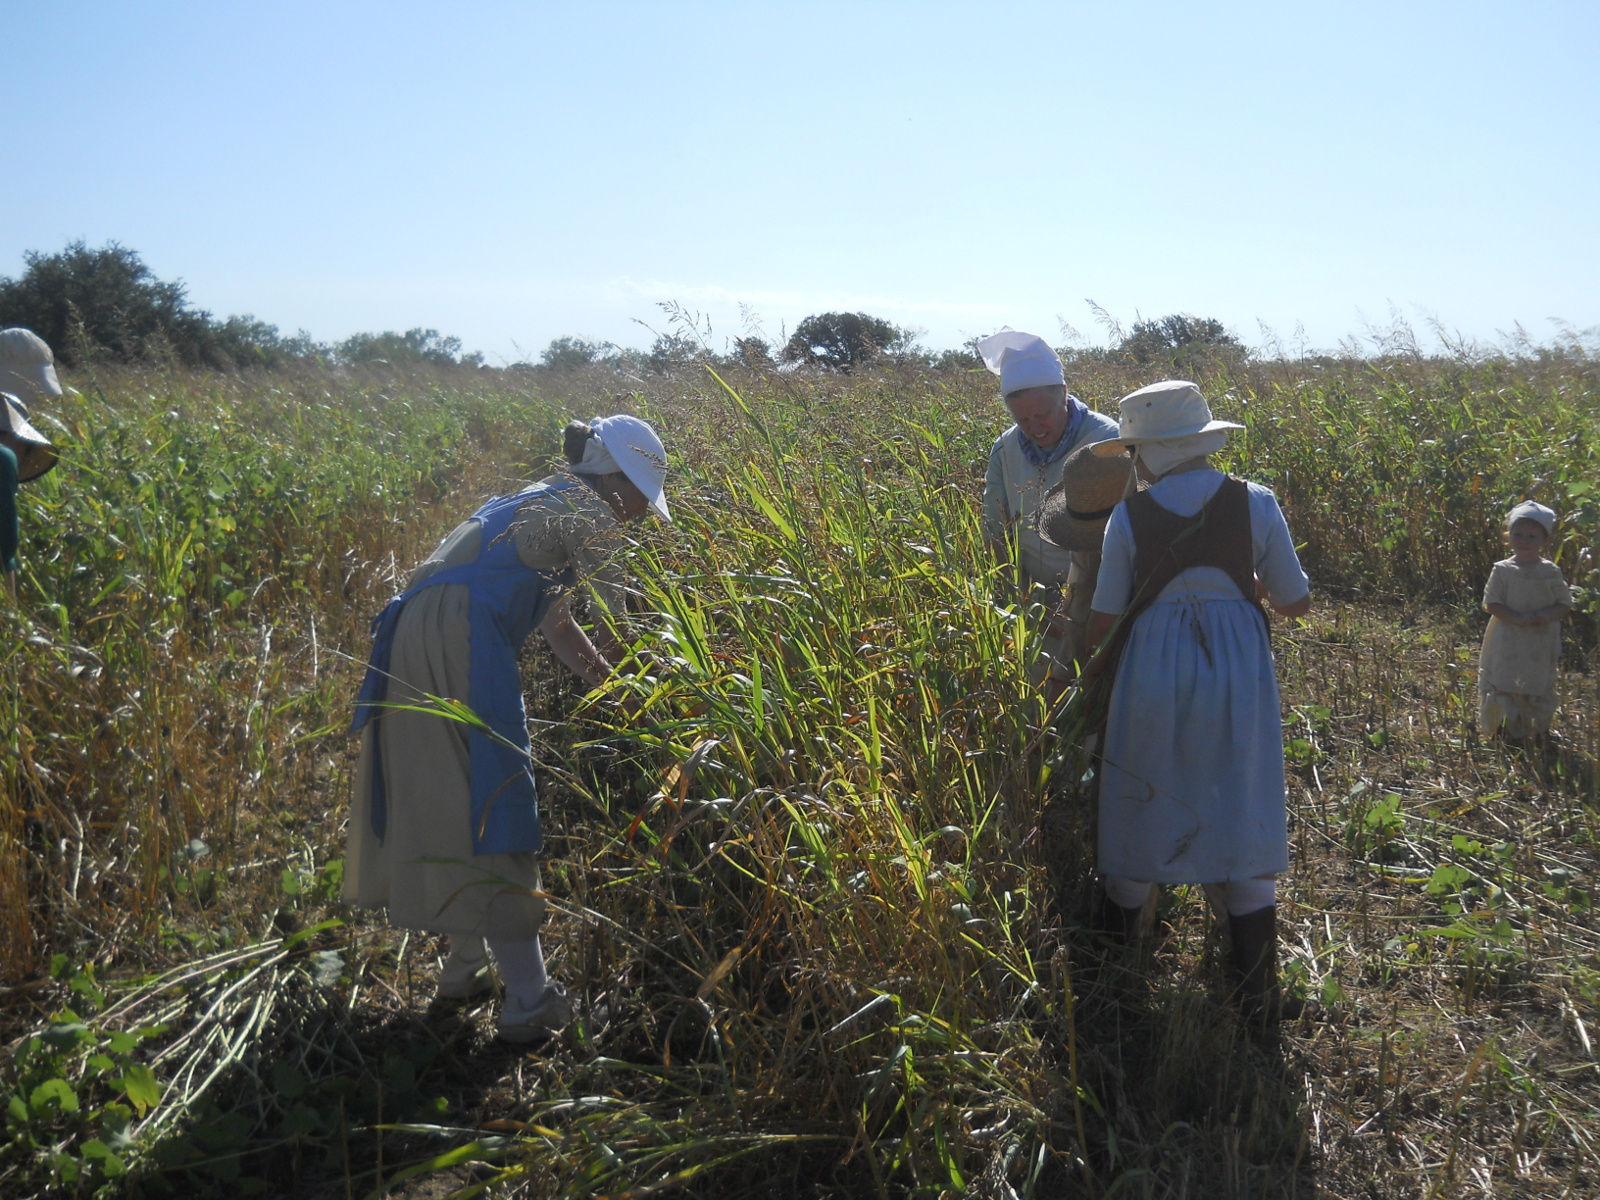
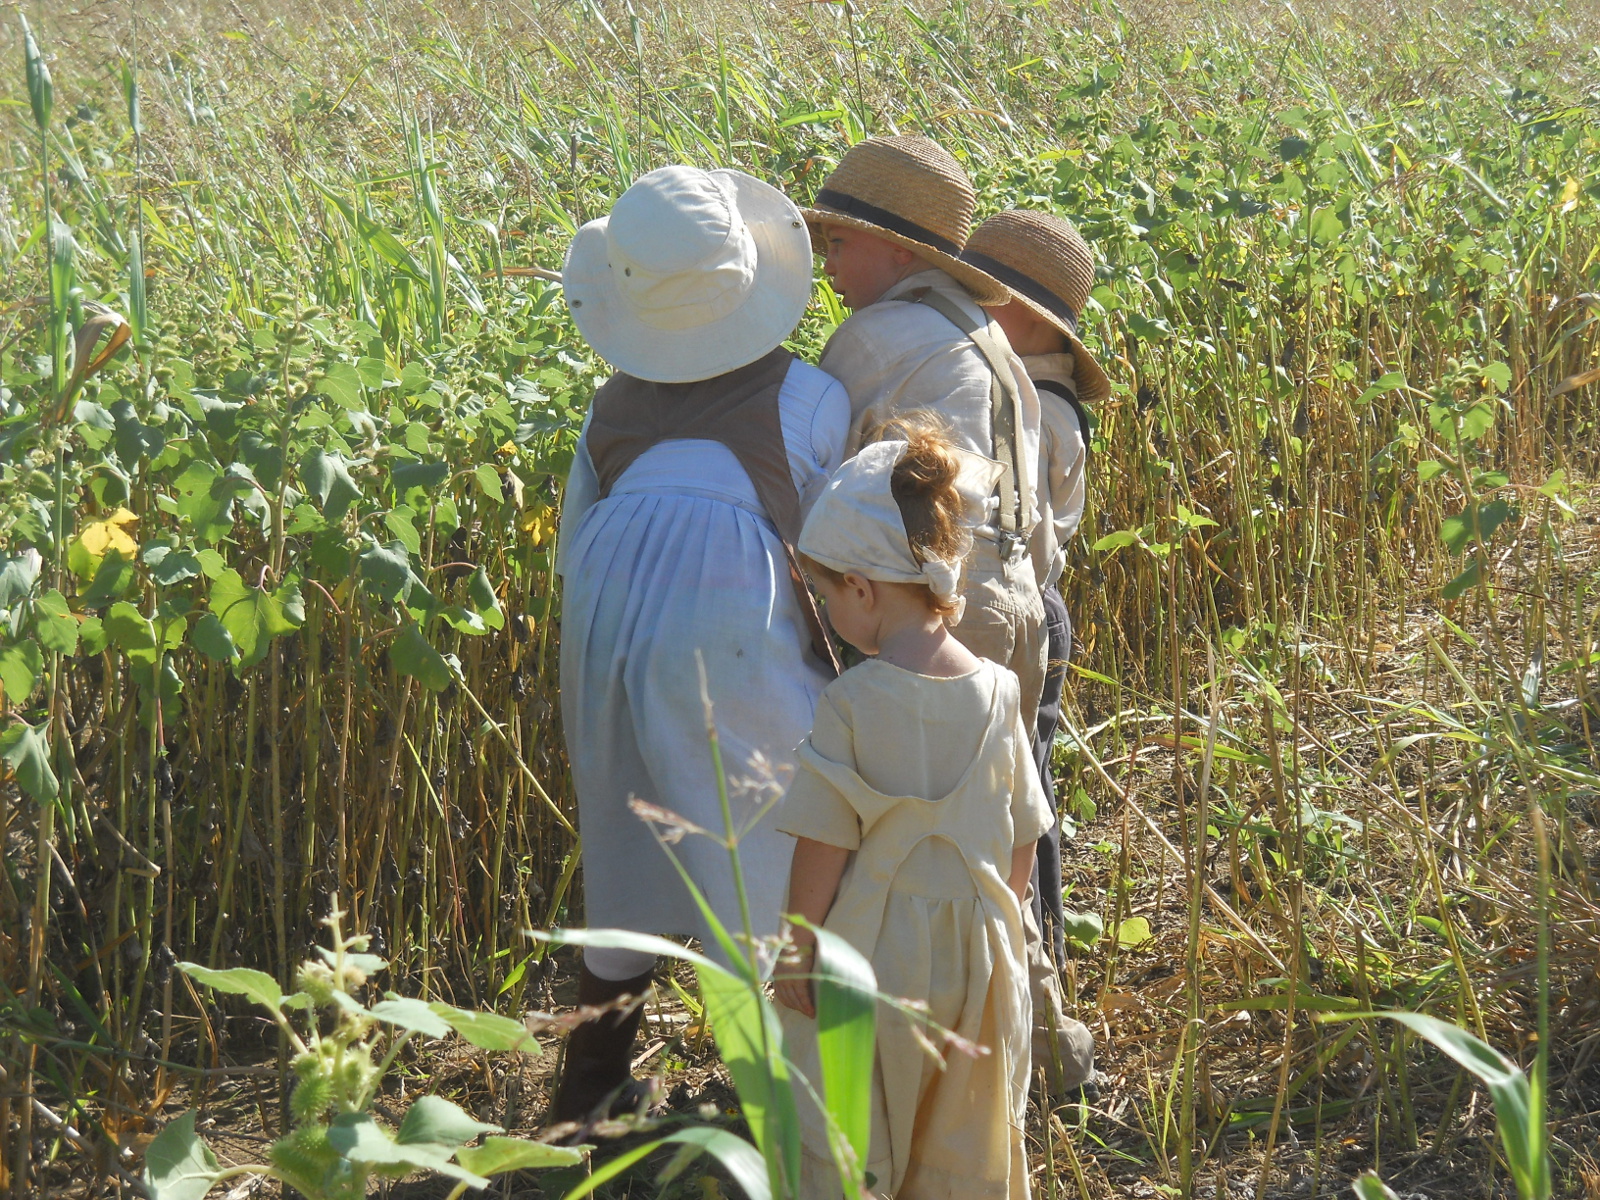
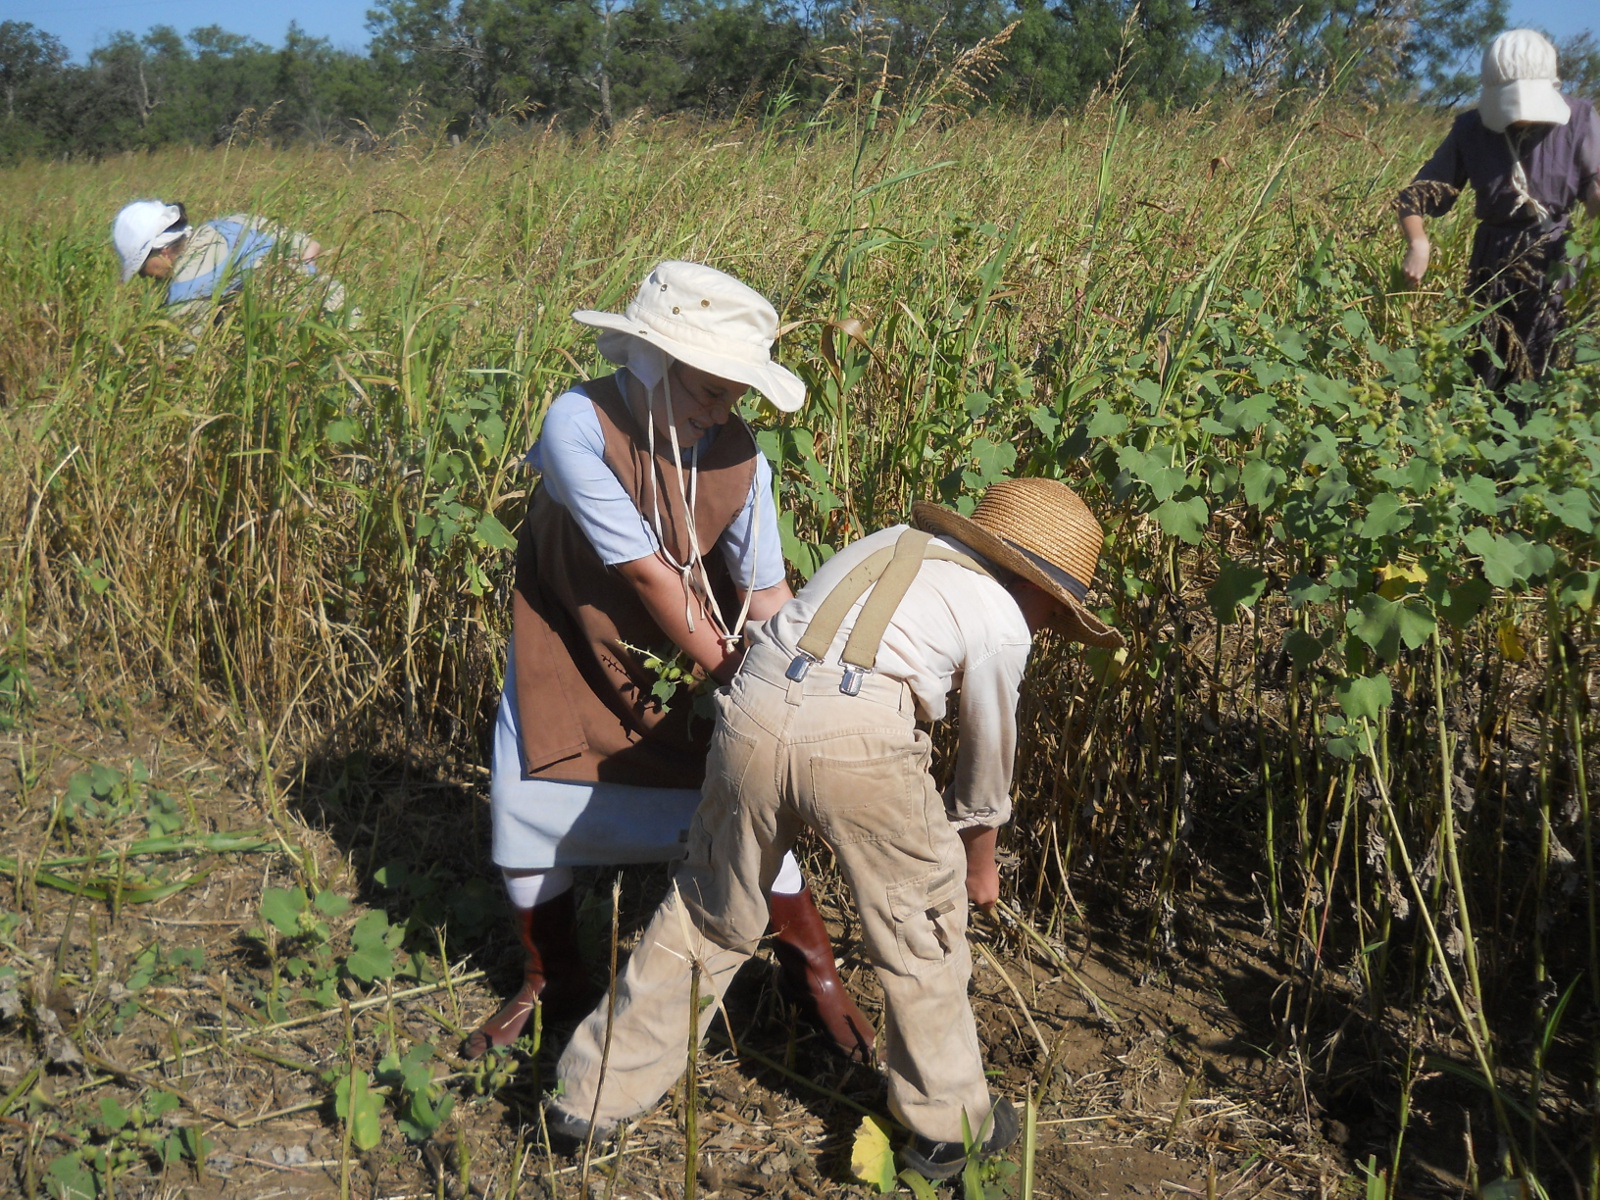
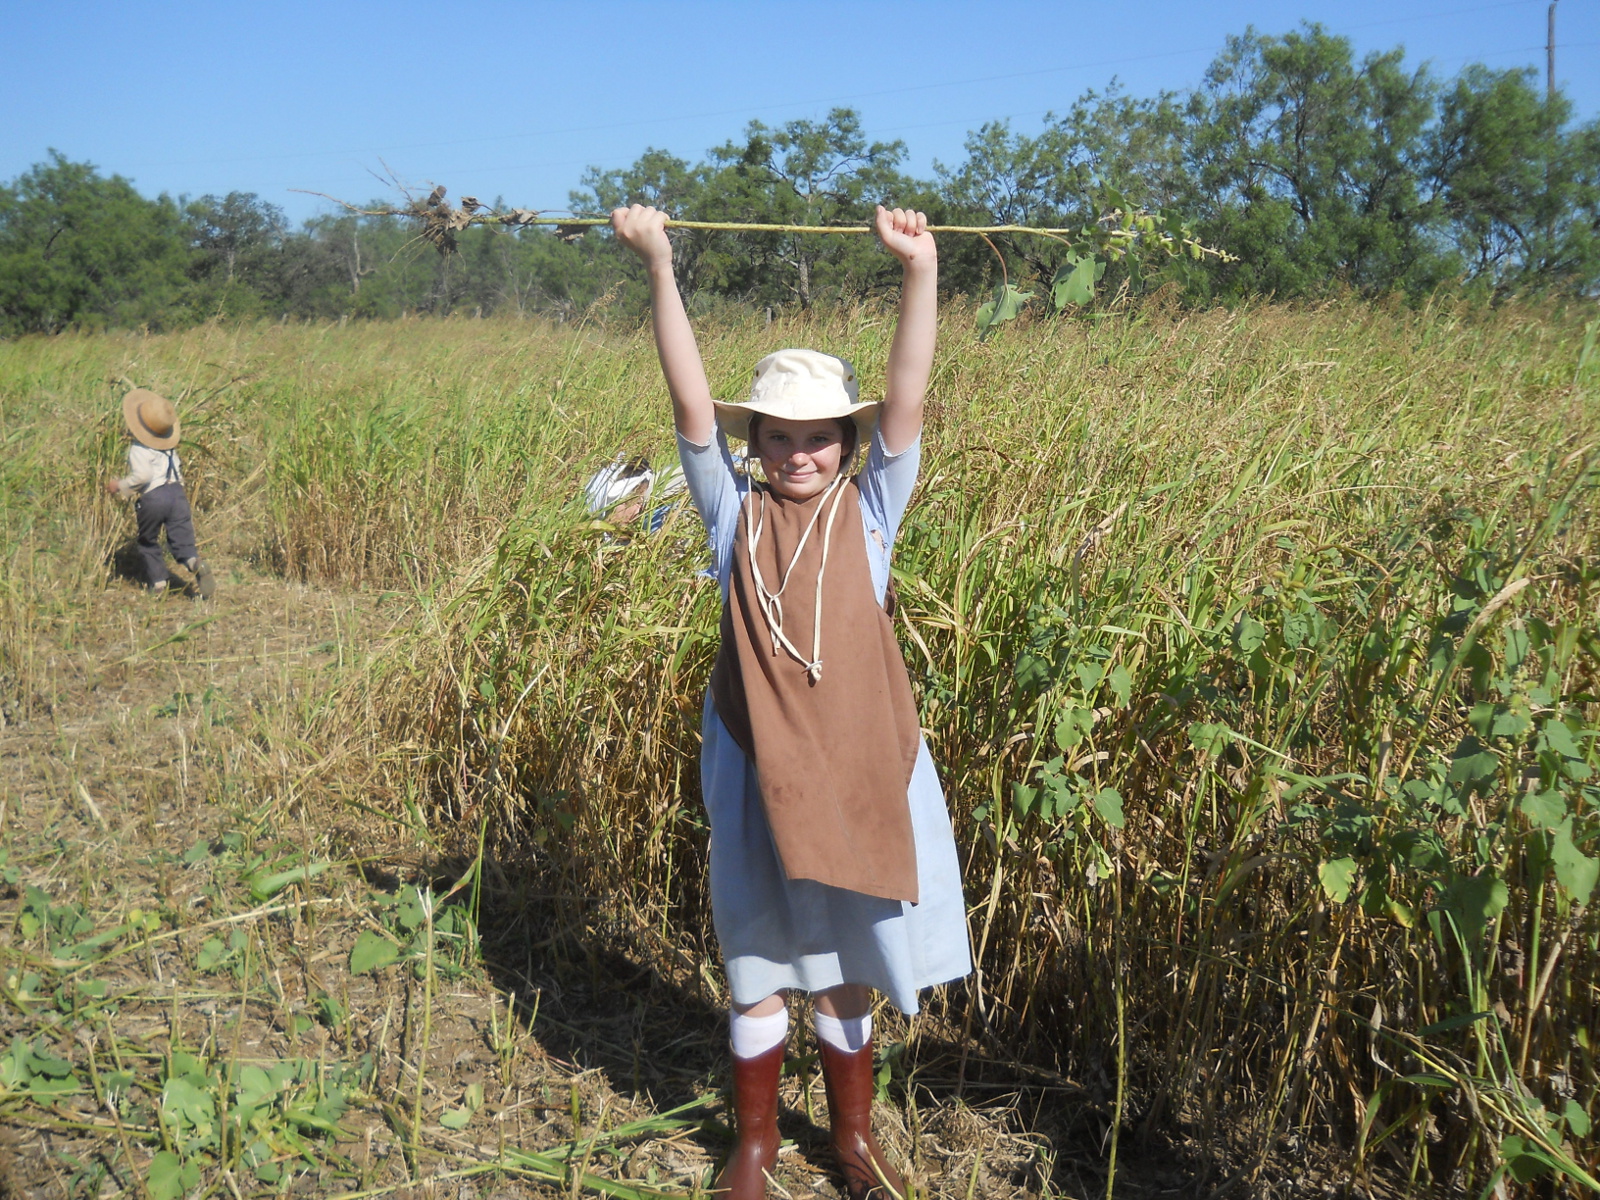
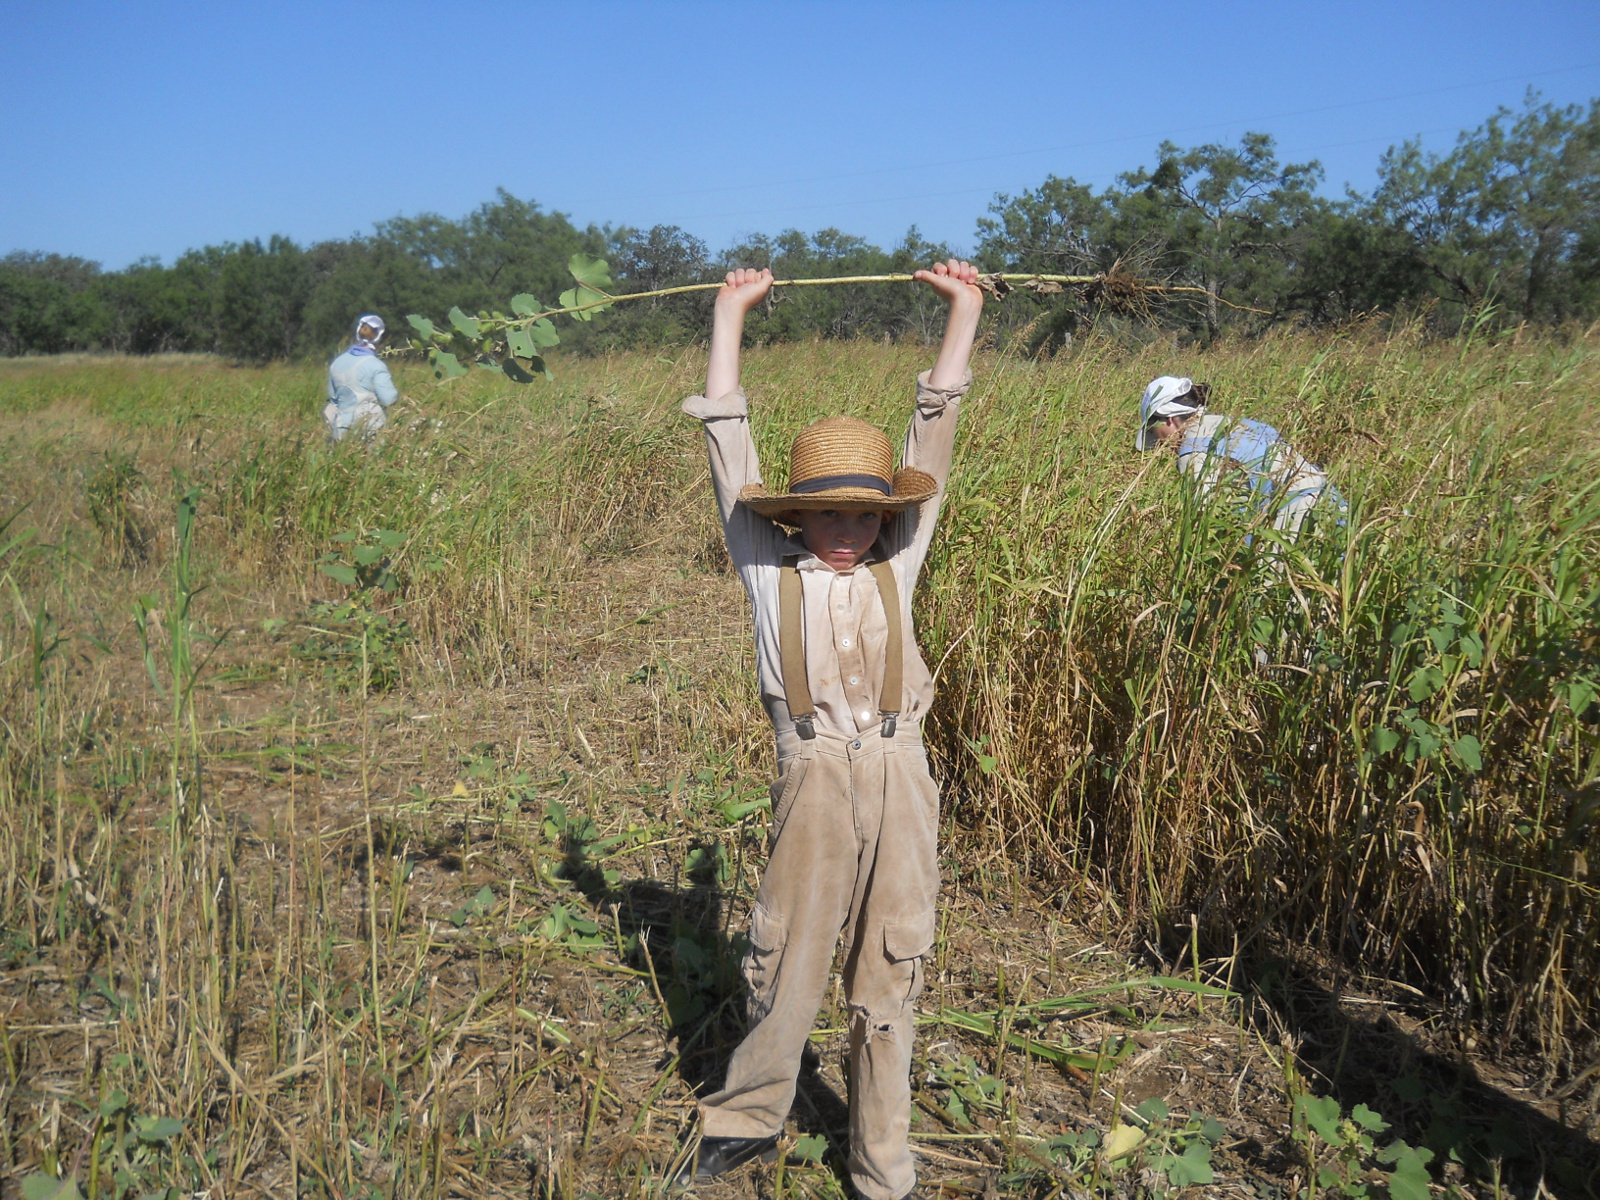
During one of our community work days, while the men helped me with the house ceiling, the ladies and children graciously agreed to help pull weeds in the field.
Victory!
And more victory!
We really appreciate their willingness to help and the sacrifice of their hands with blisters! 🙂
One day I came back from pulling, and found a cocklebur seed in my beard. Nice. But that gave me an idea too…..cockle-beard darts! And here is a video of our first community tournament!
At least we found something fun to do with them! 🙂
Back in the field, sadly, after about seven weeks of hand-pulling, the cockburs began slowly to seed out, and I still had about three to four acres left. And so, I decided it was more important to try to cut down as many as possible before the seeds matured, hopefully late enough to where they wouldn’t grow back; and I got out the gas-powered, hand-push lawn mower, and started chopping them down in between rows where they were most prevalent, with the idea we’d continue to pull out the ones intermixed with the grass.
Some things I did notice: while using the industrial method to handle the weeds, although I cleared rows a lot faster, it was actually harder work physically (ie. it wasn’t really easier), the weeds obviously have the opportunity to grow back (the overall job is done more poorly), and I found I had to concentrate on what I was doing and wasn’t able to focus on godly things. Also, using the mower made it much harder to be discriminate with chopping up the good grass (ie. much more of the good grass got chopped up). These all vs. doing it the slower, patient, agrarian way. I thought those were interesting, and examples of the difference of the two ways of living.
After mowing, we went back to pulling. Sadly by this time, most of the weeds had seeds on them, but we continued with them, placing them in small piles along the row clearings, which we hope to go get over the winter, to bring back to burn. While the mowing actually did seem to stop maybe 2/3 of the cocklebur weeds from growing, that other 1/3 or so were still alive, and re-started to leaf out, so those had to be pulled up now as well.
Interestingly, later in the pulling, the stems seemed to start to harden or something, and I started ending up with splinters in my hands after pulling. Thankfully that was only near the end of the weeding time.
But, about 9 days into October — over 3 months and a week at it, I finally realized that as I was coming from the north, I had reached the place I had left off in the south part — in other words, weed pulling complete! Wow! Actually done! Oddly the next day, I almost had empty nest syndrome, since most days I was focused on getting chores done and getting up to the field, and now I didn’t have to. 🙂
But, excellent! Hopefully we’ll be able to go get those seeded weeds we did pull, and get them out of the field; and hopefully the field will benefit from this process.
And mostly again, my hope and prayer is that God glorified Himself with this, even if it was just to the heavenly realms! And I’m very grateful to the Lord for granting the spiritual lessons and physical strength to get this done!
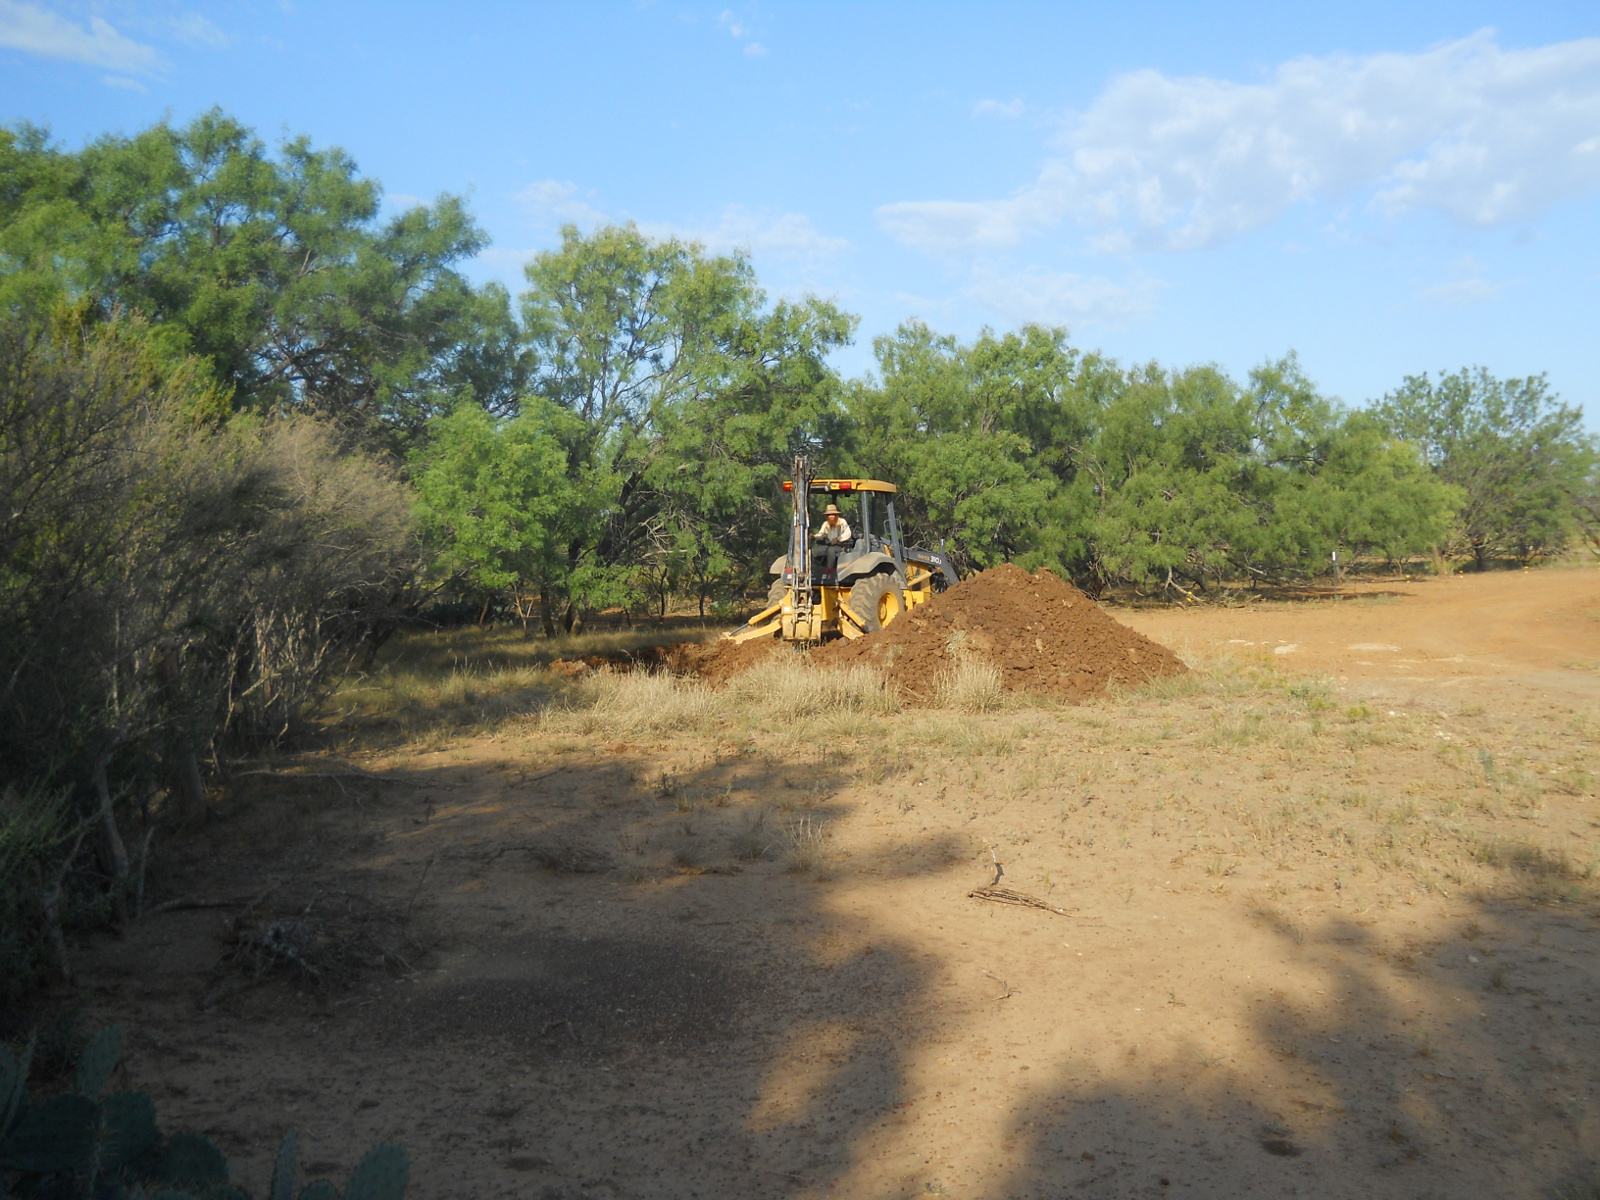
Out here where it’s very hot during the summer, and rain is intermittent, we’re always looking for ways to keep rain water on the land. On our homestead, we’ve done our first catch water system, the cistern, and a tank (pond) expansion. Recently, most of a backhoe week-long rental payment was donated to the Pecks here, which they graciously then donated to be spread around to the group. Lots of root cellars, tanks, etc. were dug out. At first, for us, I was just going to move a little dirt to the far end of our pond expansion, to allow for some more water to be kept in the pond; but after thinking about it more, and given we have a corner in our inner field that is a water collecting point, we thought it would be good to see if we could get a hole dug down there to create a tank for the goats to drink from, and hopefully the geese to swim in (and maybe be able to actually mate! 🙂 ).
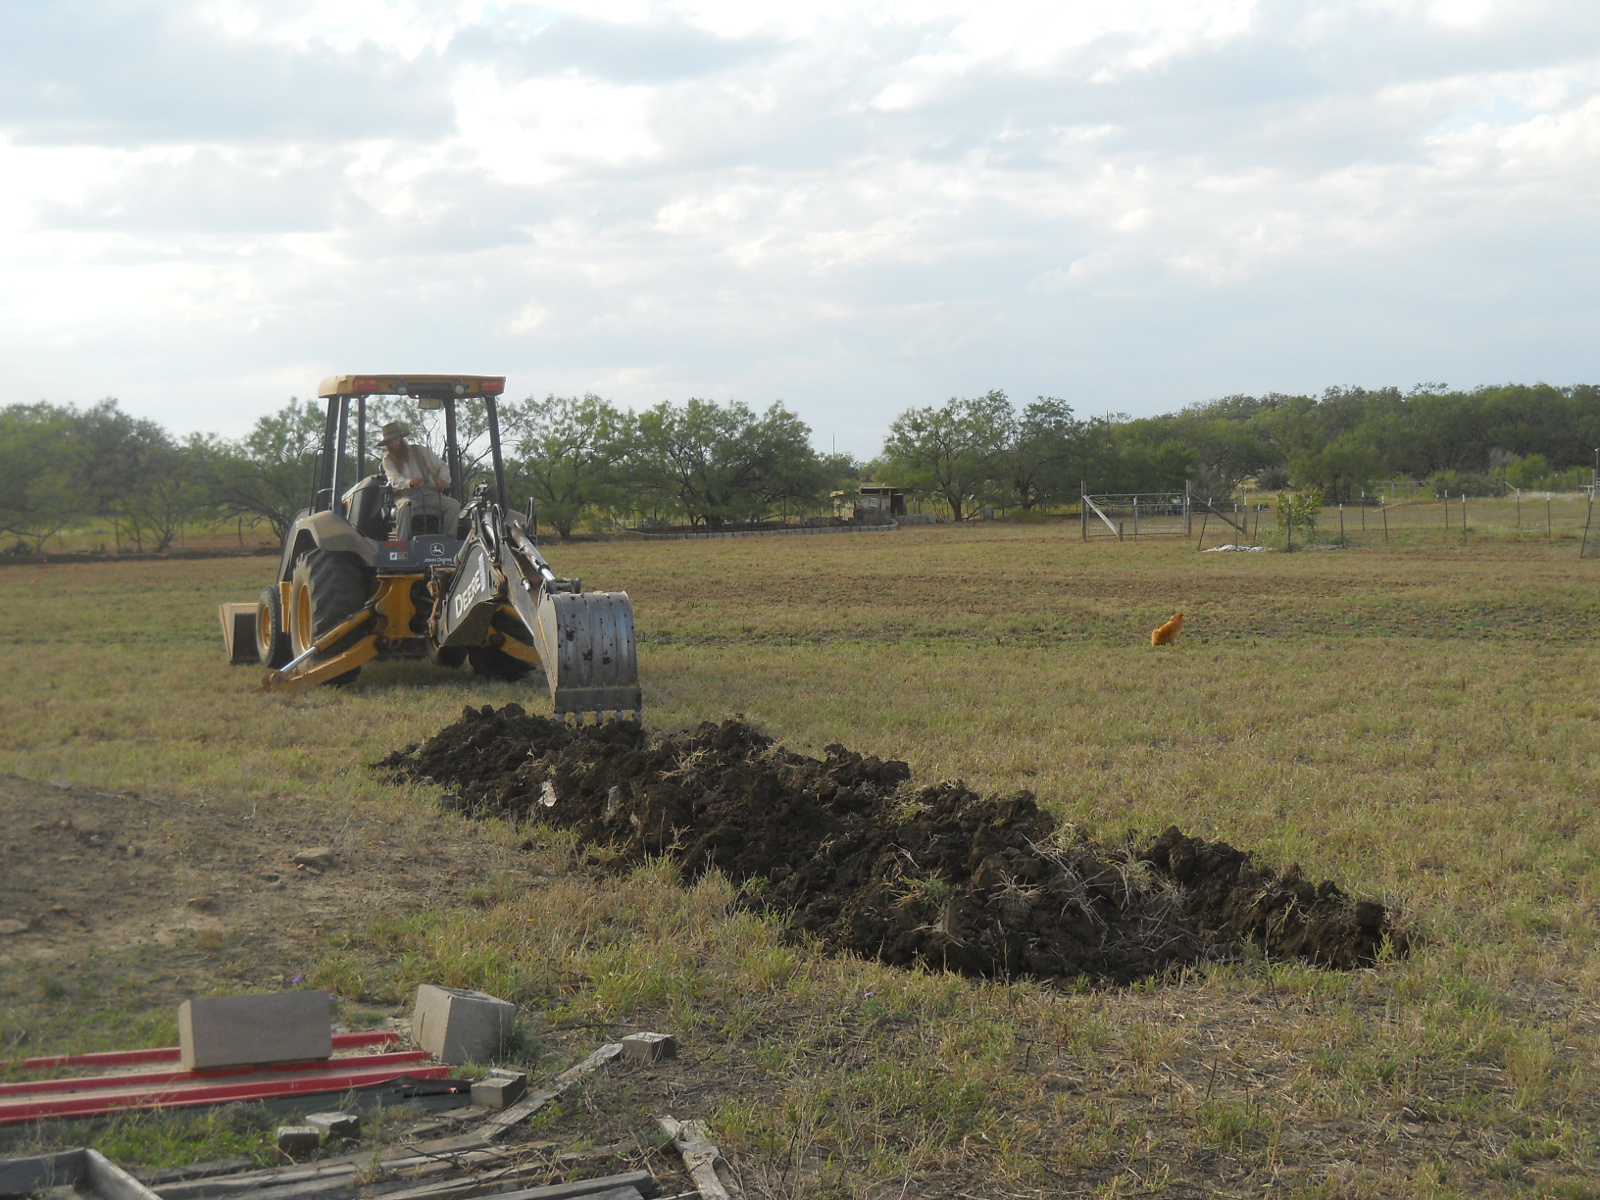
Mr. Stonger here graciously granted his time for the week to be the backhoe digger guy, and so he came down and dug out that area near the southwest end.
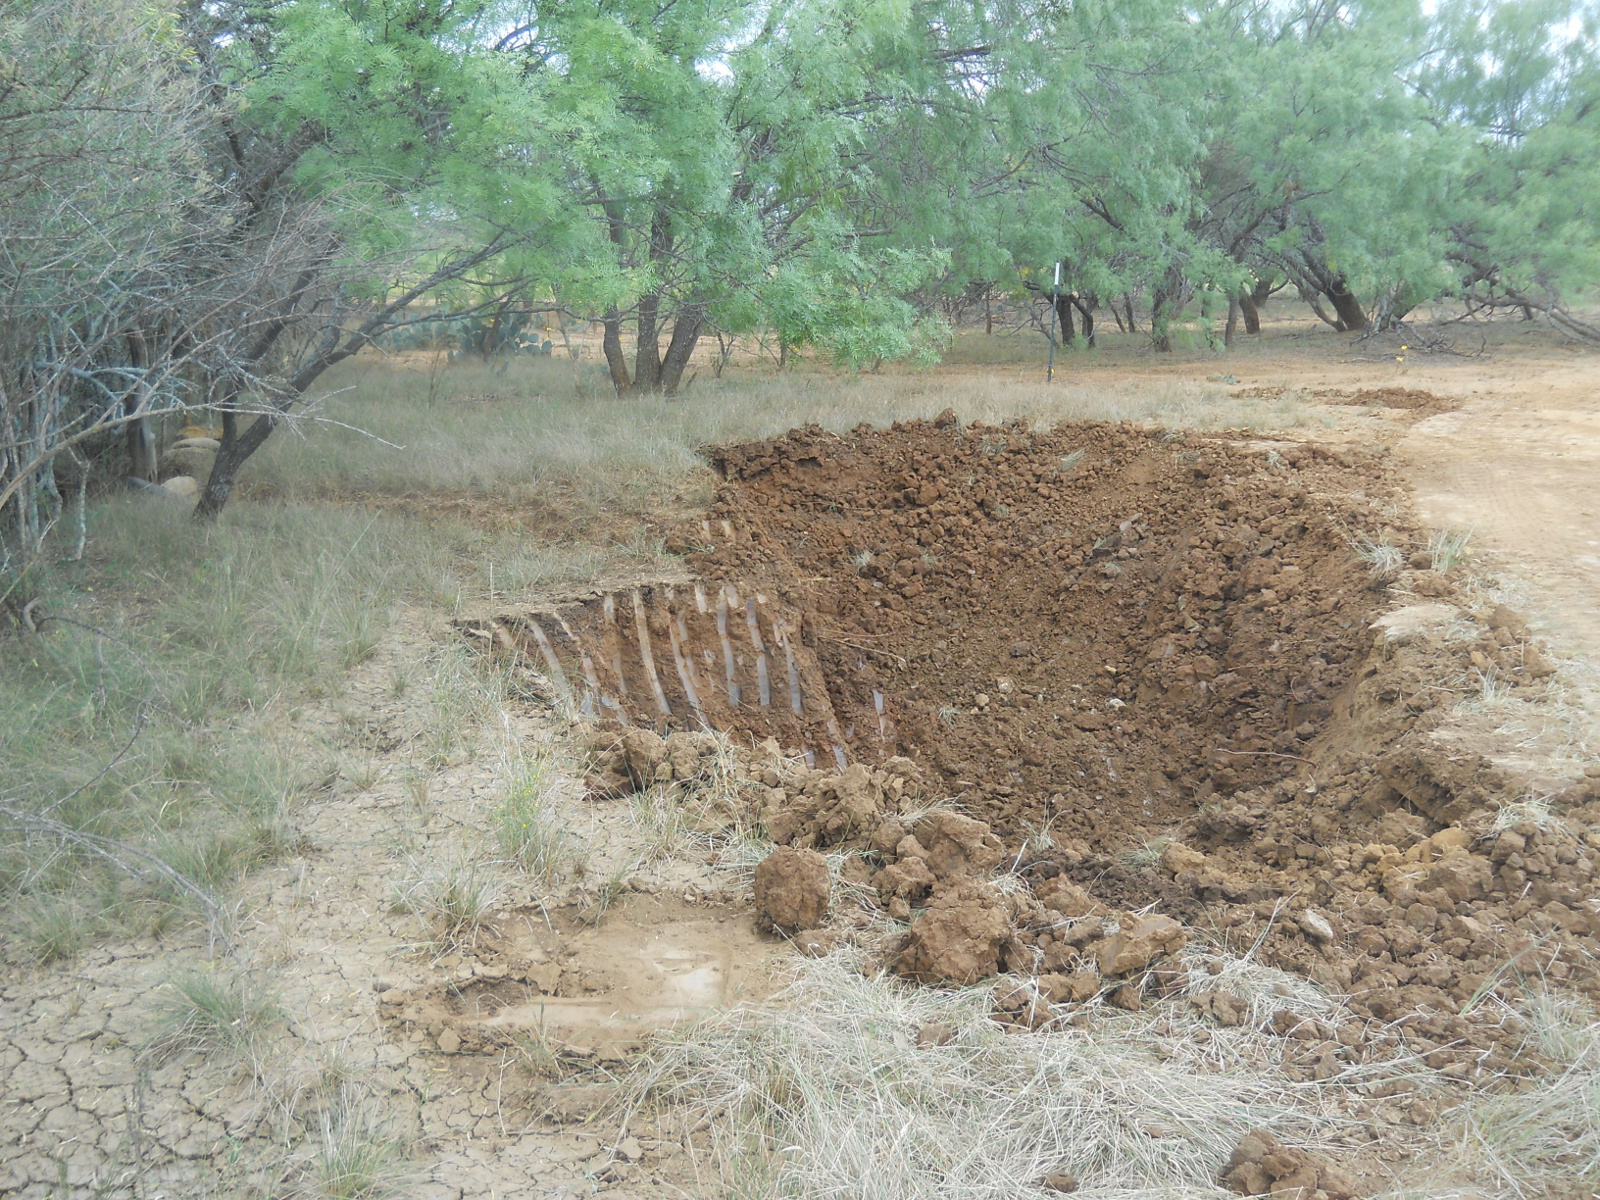
And here it is, ready for water!
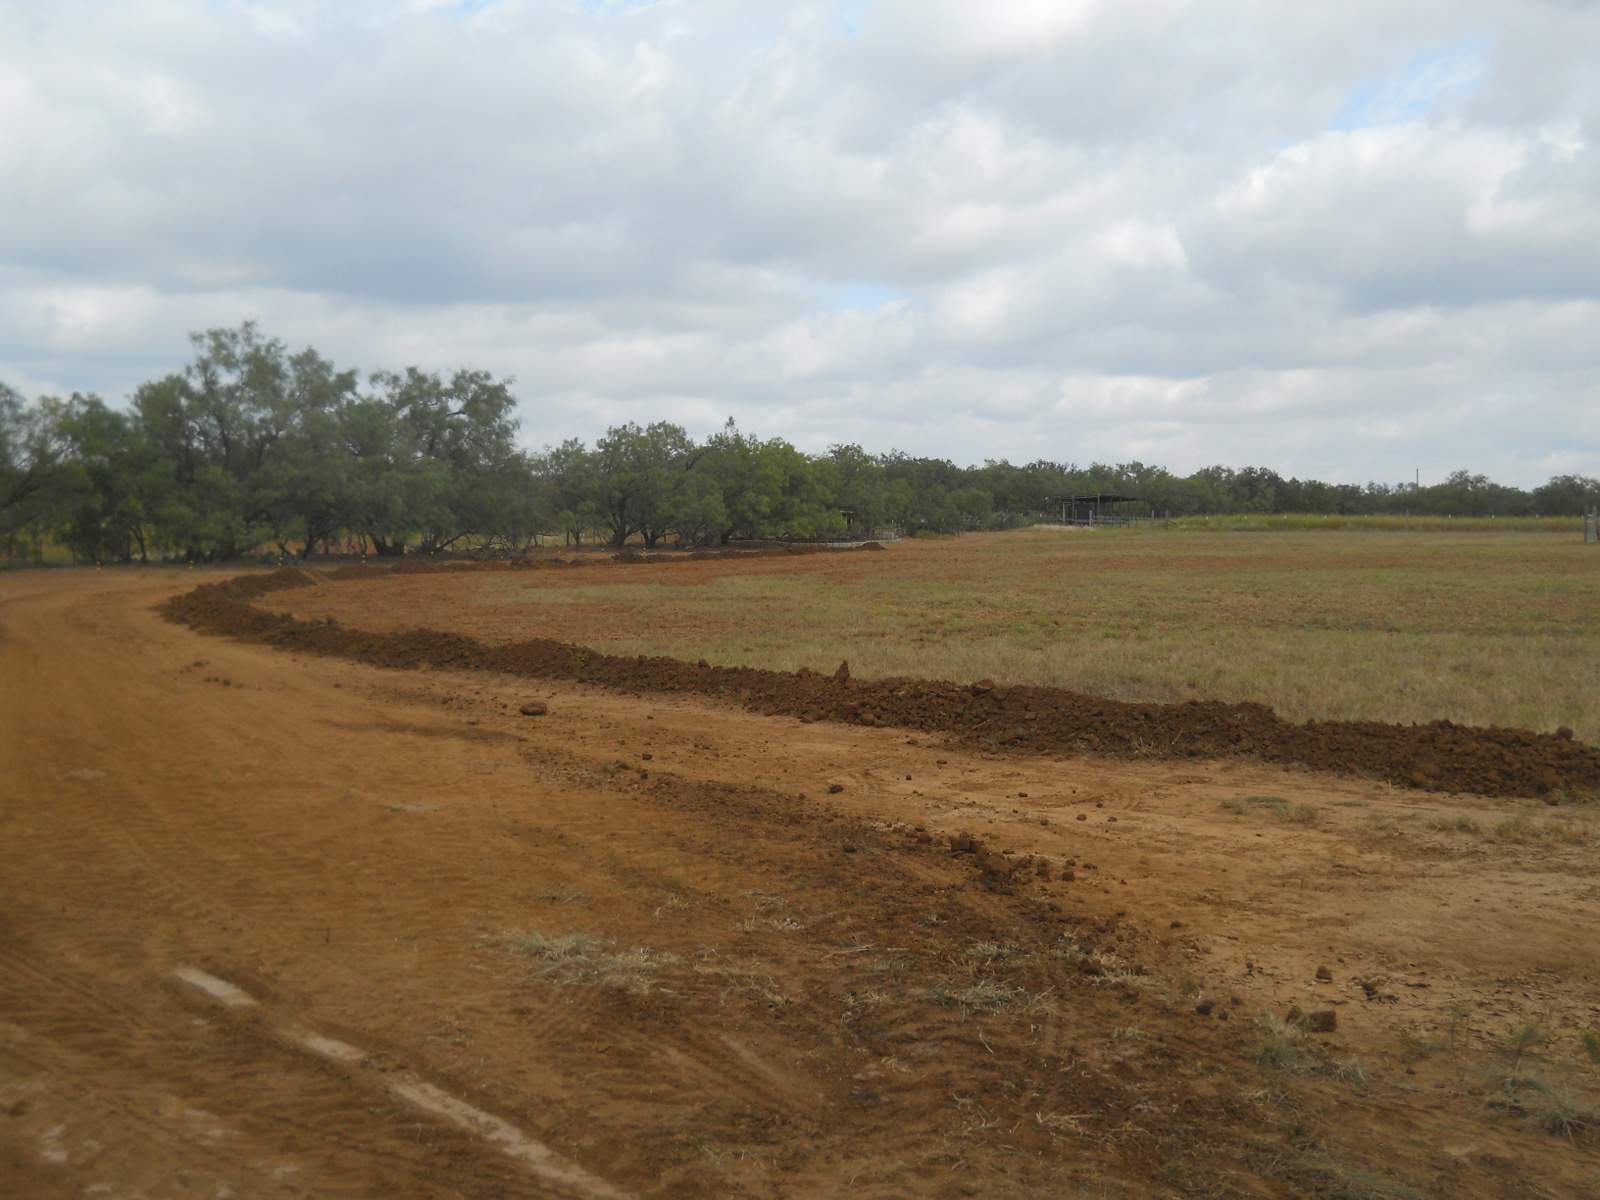
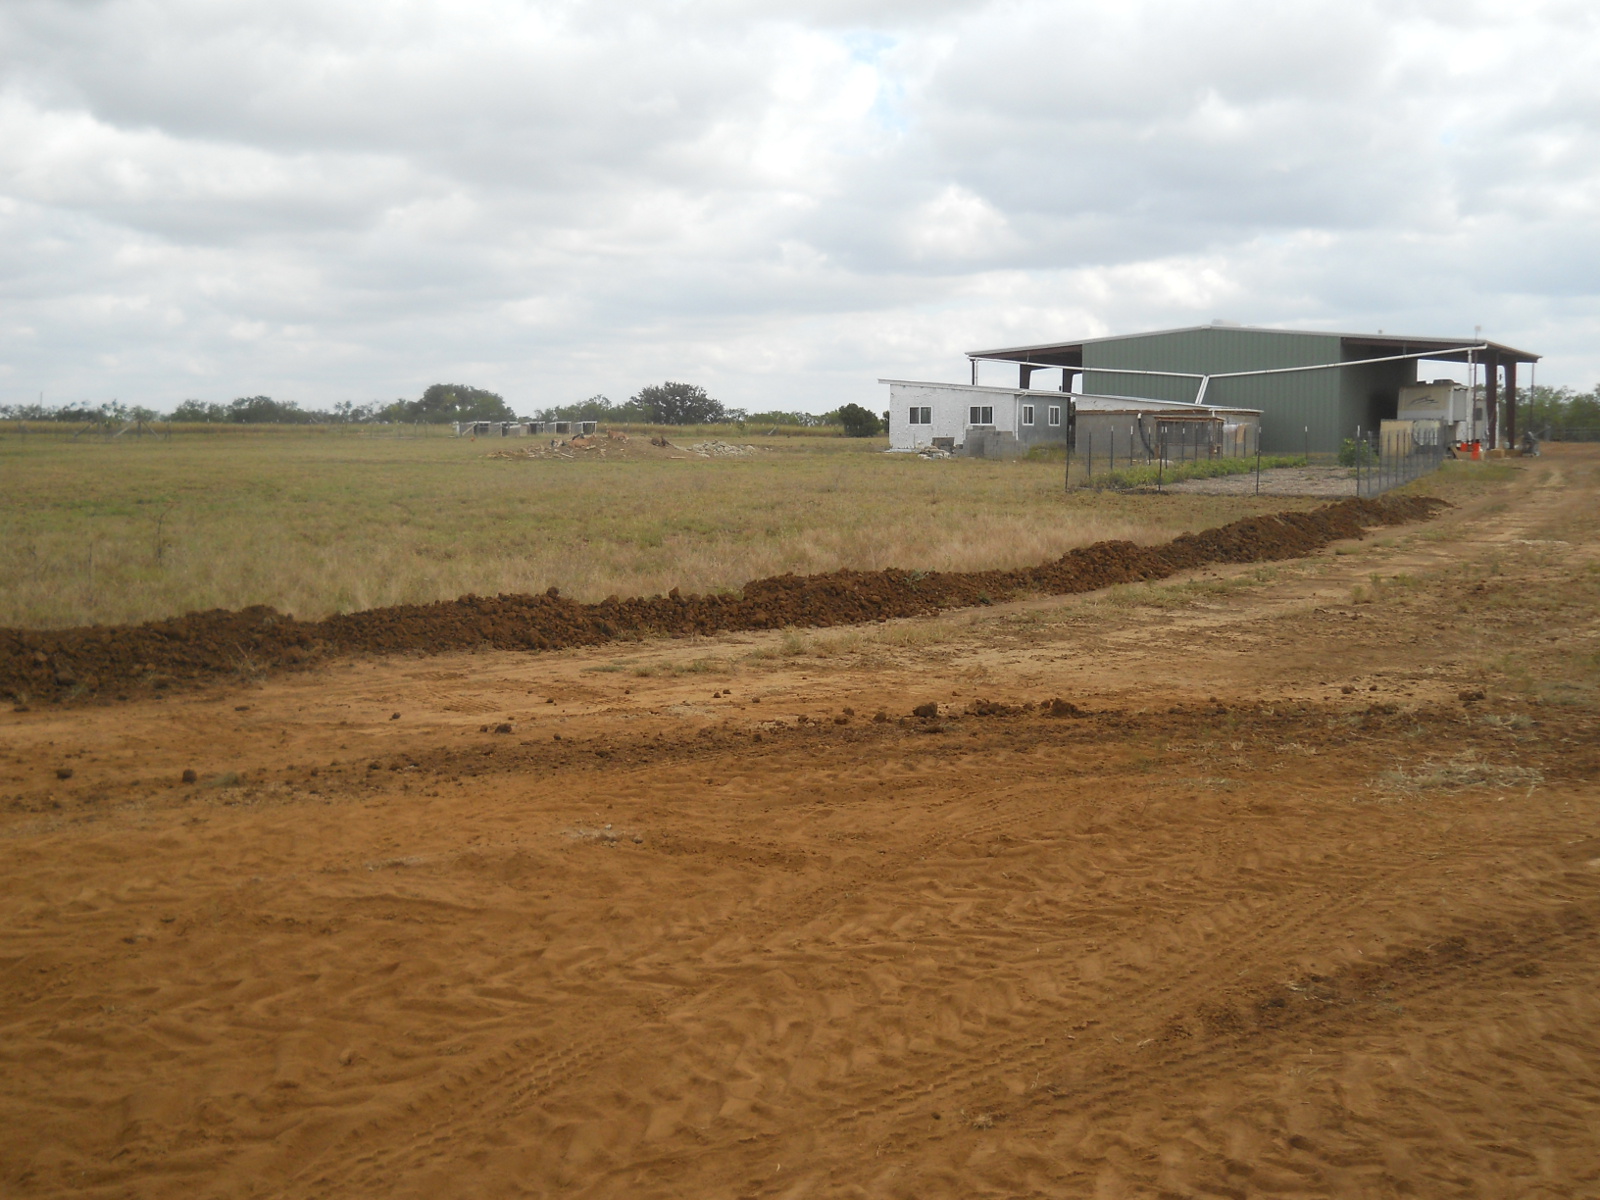
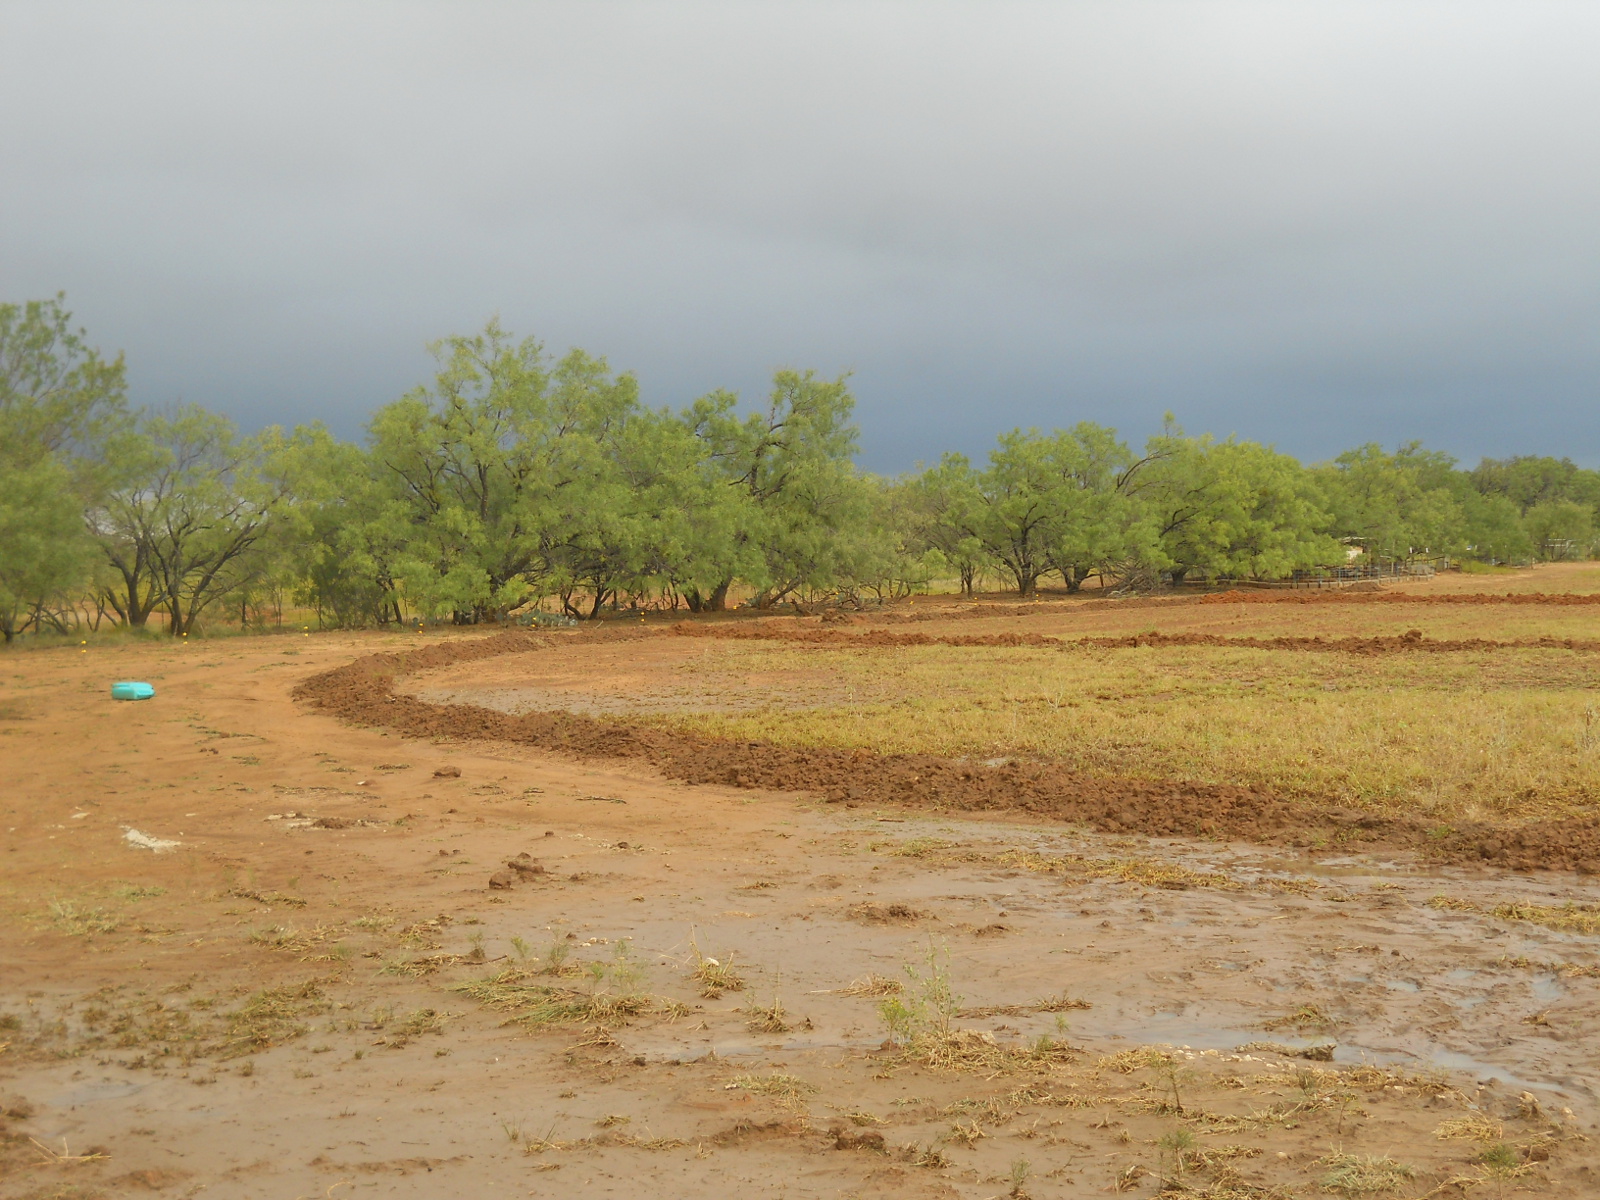
He also took the dug-out dirt and placed it as a berm around the lower edge of the field:
The Lord granted that our inner field this year grow unplanted grass; and with that happening, and with that 3+ acres being a bit much for Sue and I to try to process some form of planted grain, I decided that we’d just keep the field in grass for the goats, as they are a major focus for our homestead. Lord willing, He will continue the field in grass.
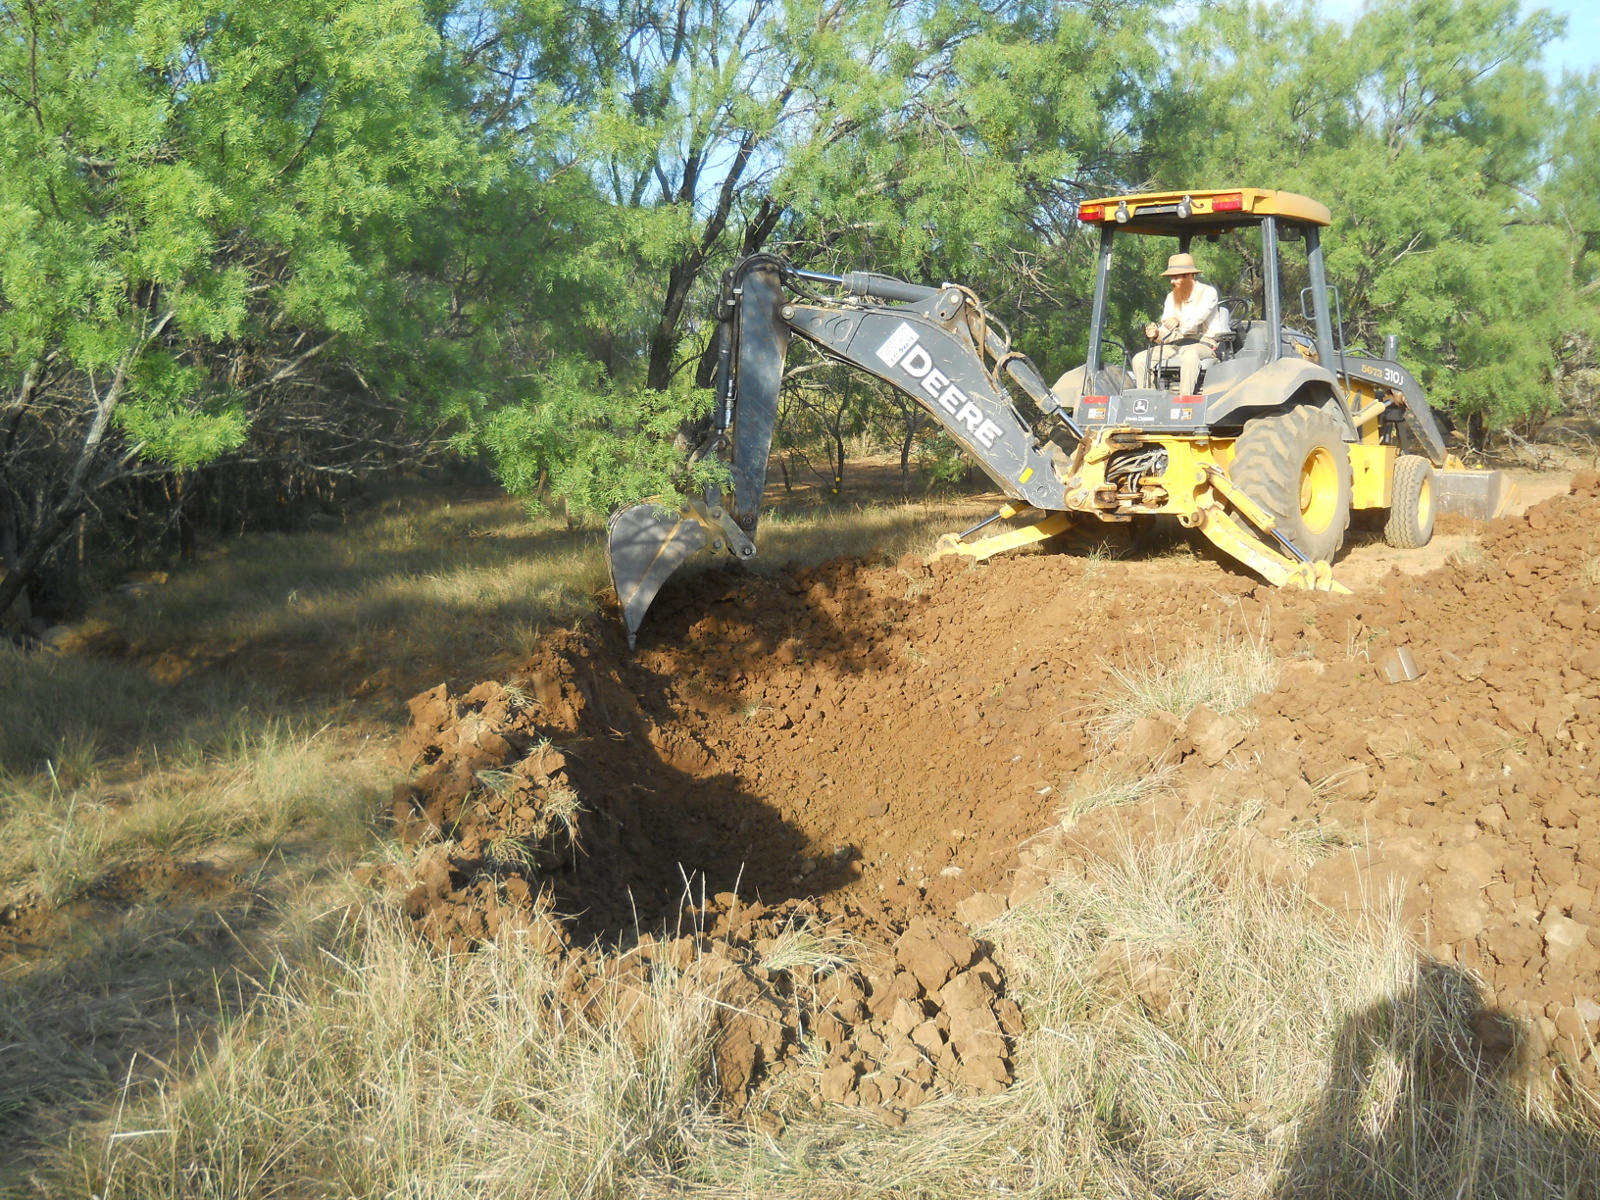
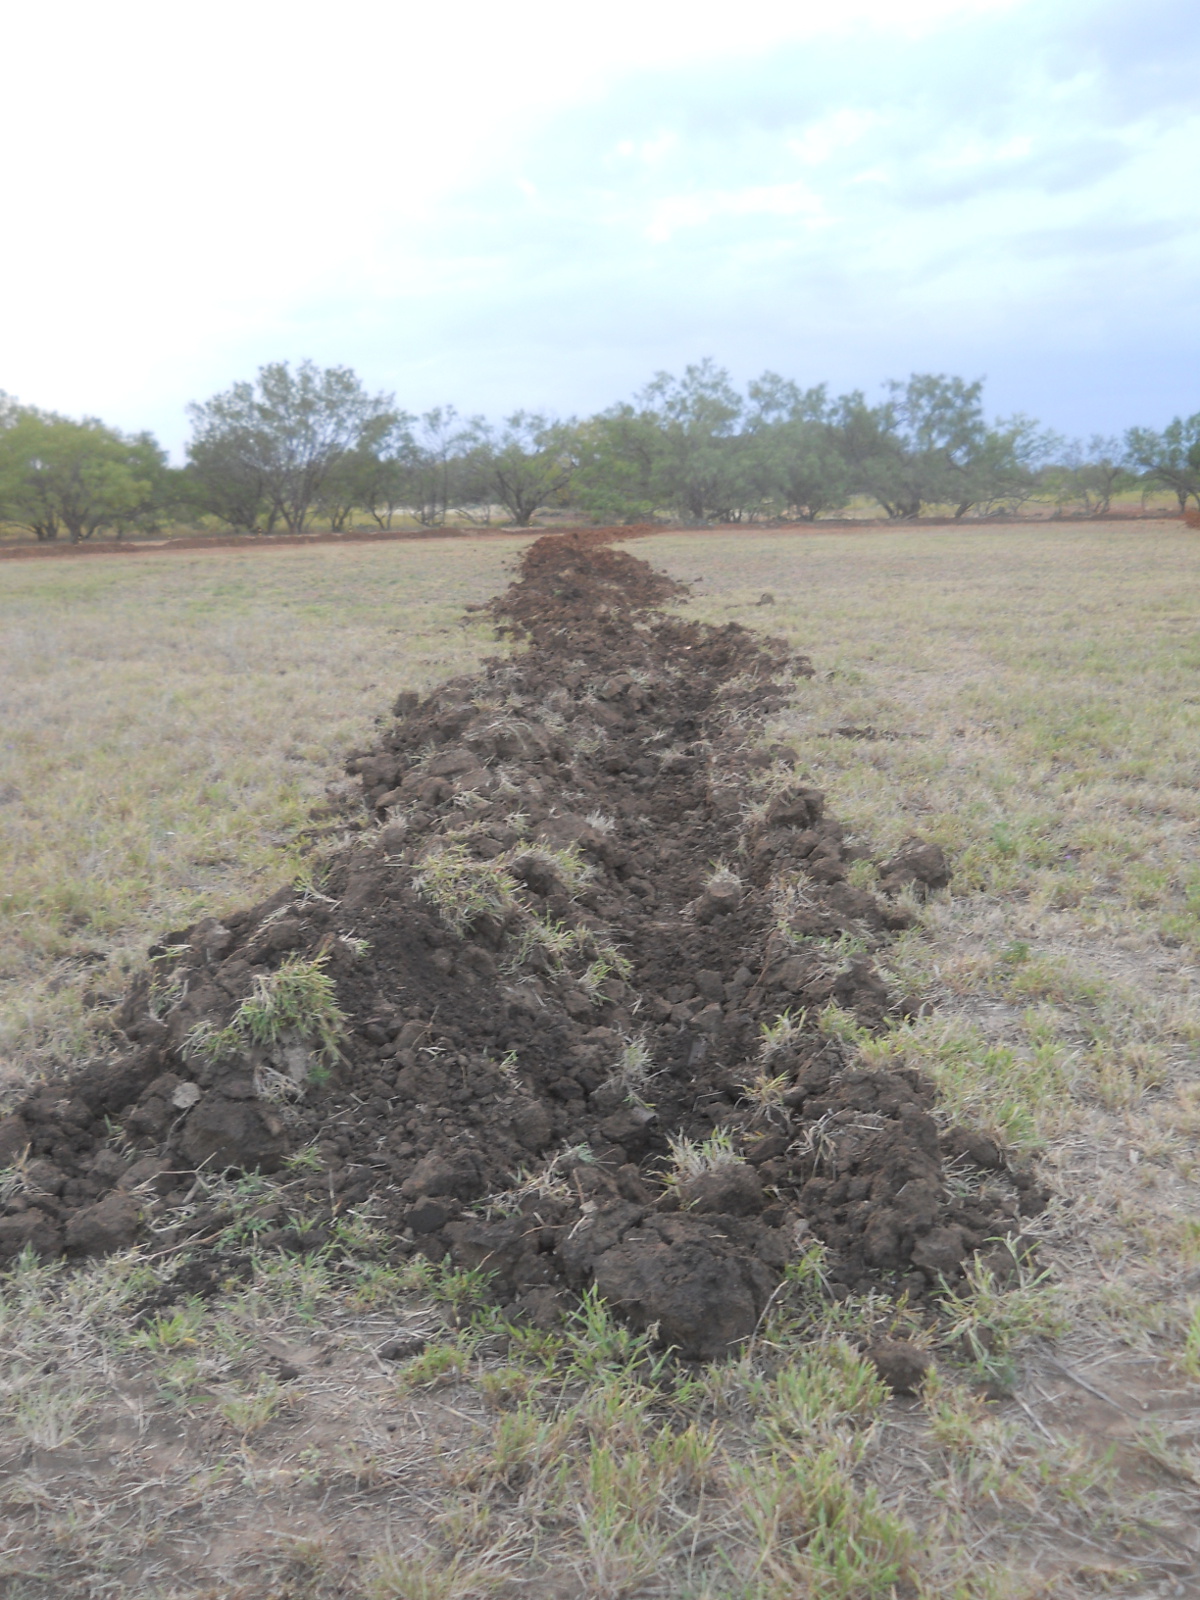
Given that, and after he was done, since he had already done it for some other people, Mr. Stonger offered that if we wanted, he would dig out some trenches as swales, with the purpose of keeping more water on the field. And with him willing, we went ahead with that.
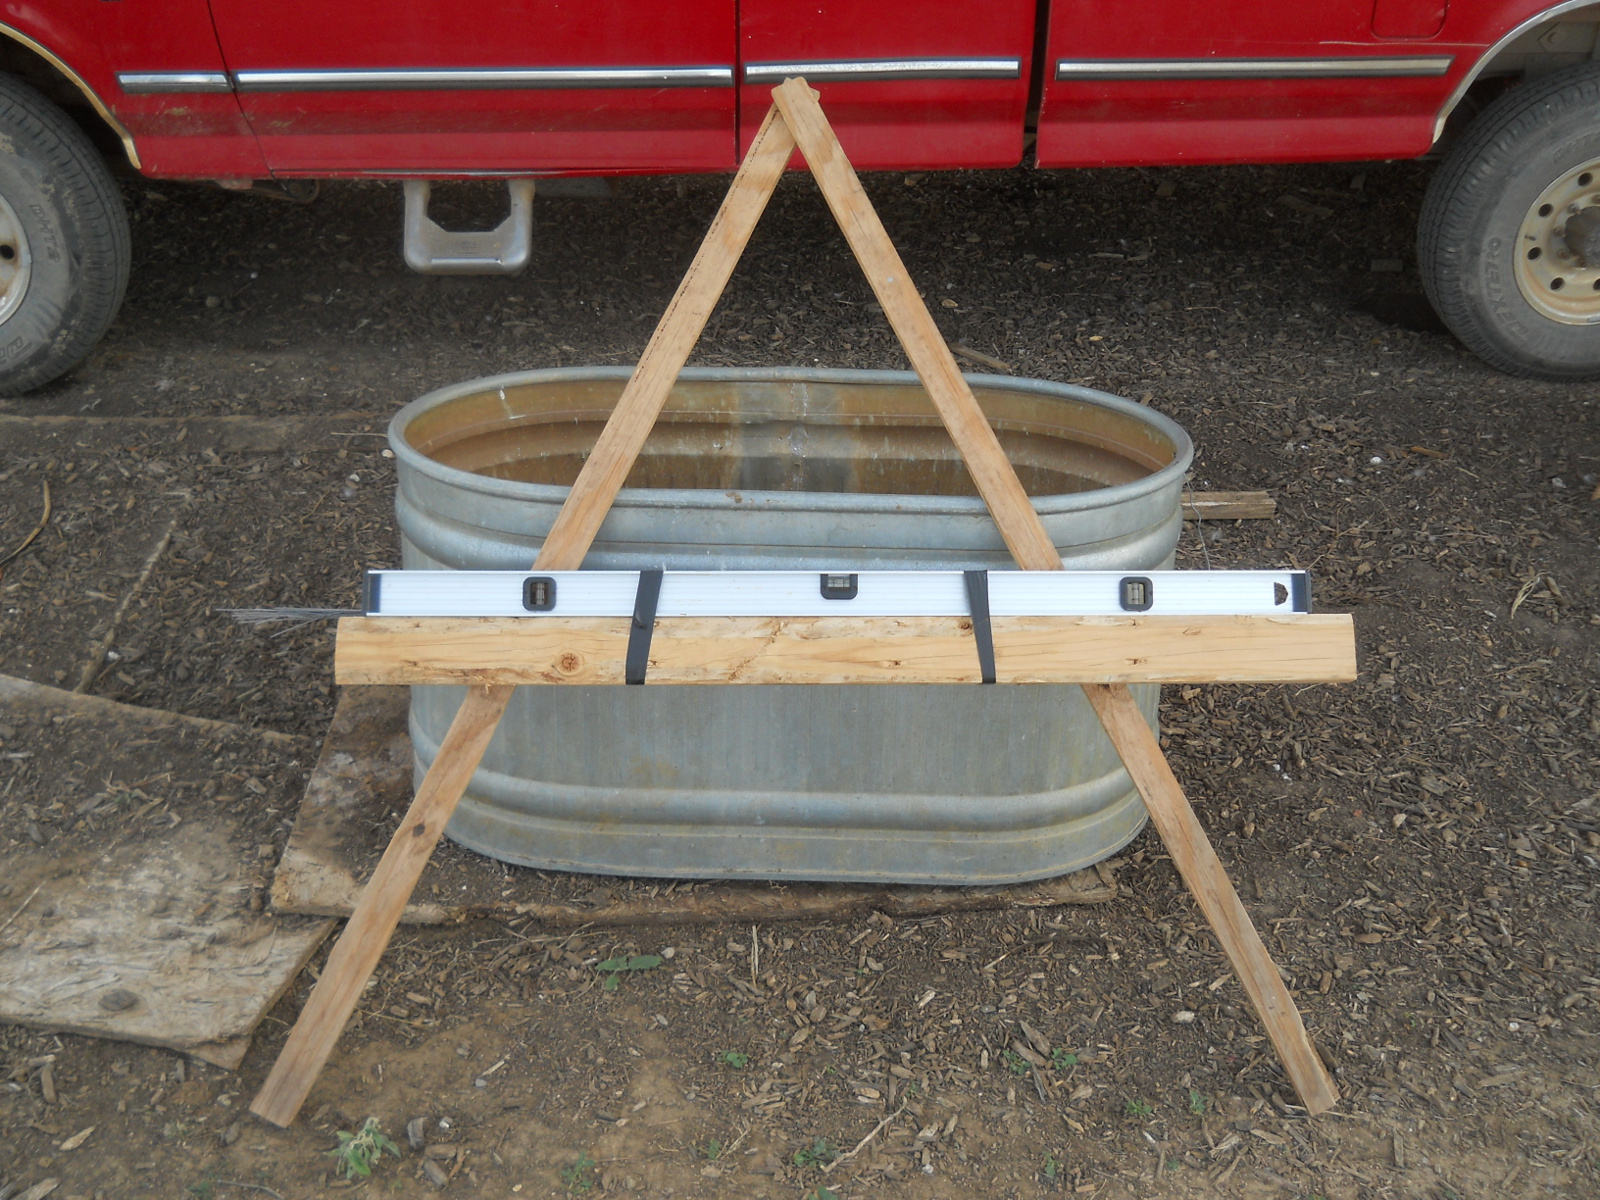
This is the tool Mr. Stonger made to find a level line across the field:
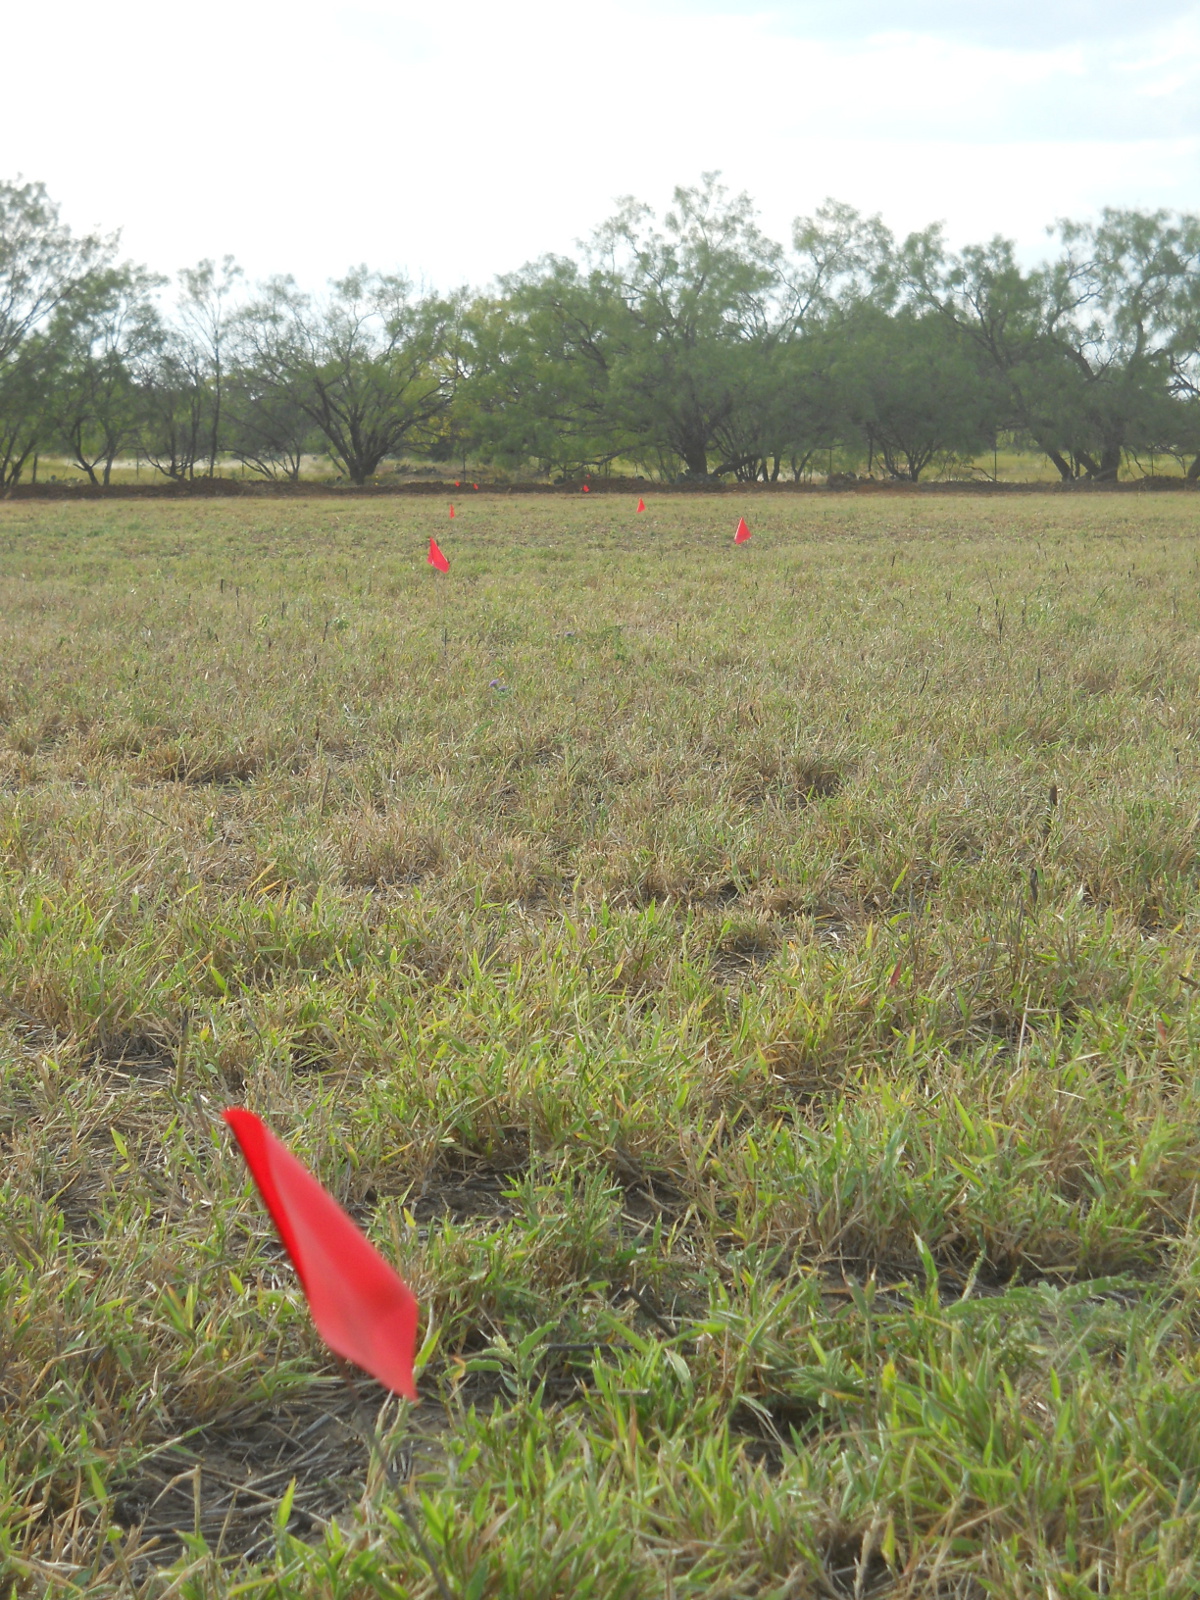
And here is a line of flags placed. After placing a flag at each placement of the leveling tool, I would look back and find a general trend line and keep the flags at the ends of the trend line and remove the ones in between, which allowed for more flags being available for farther down the line:
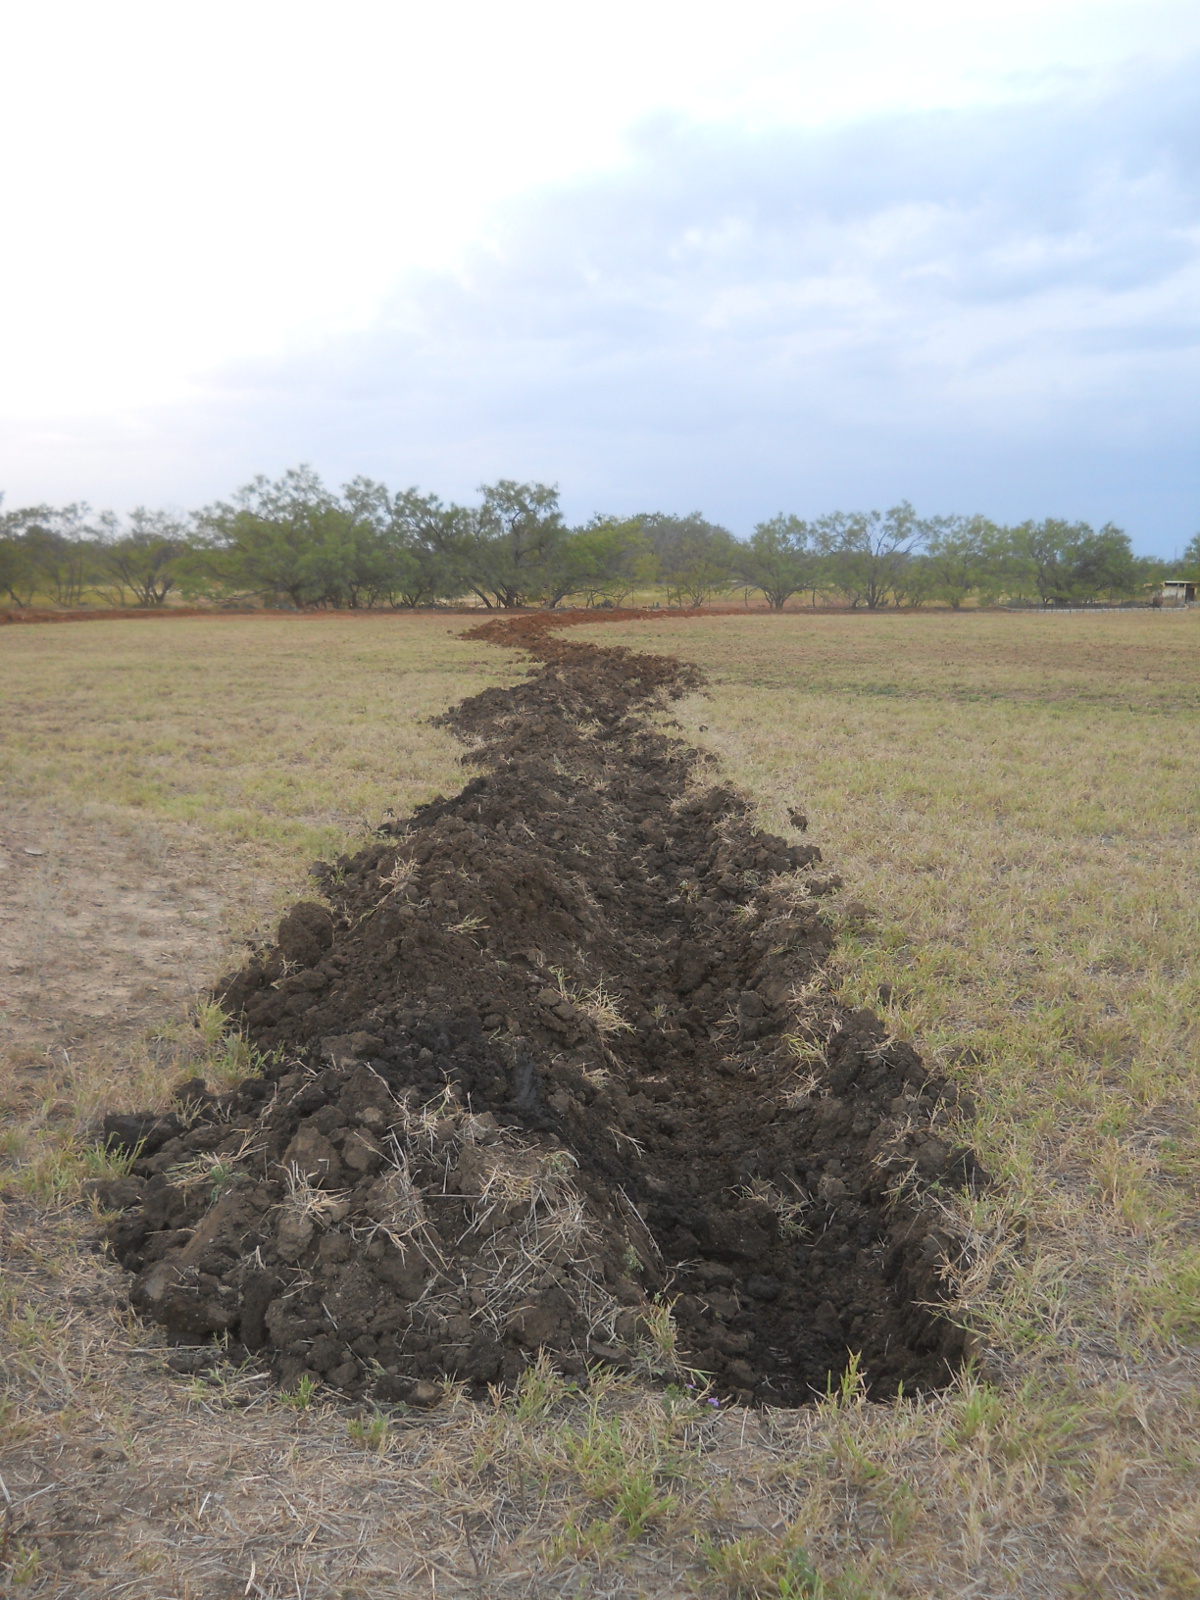
And then Mr. Stonger came back to our place after the tank digging to dig the swales…
Brave rooster! (Look closely)
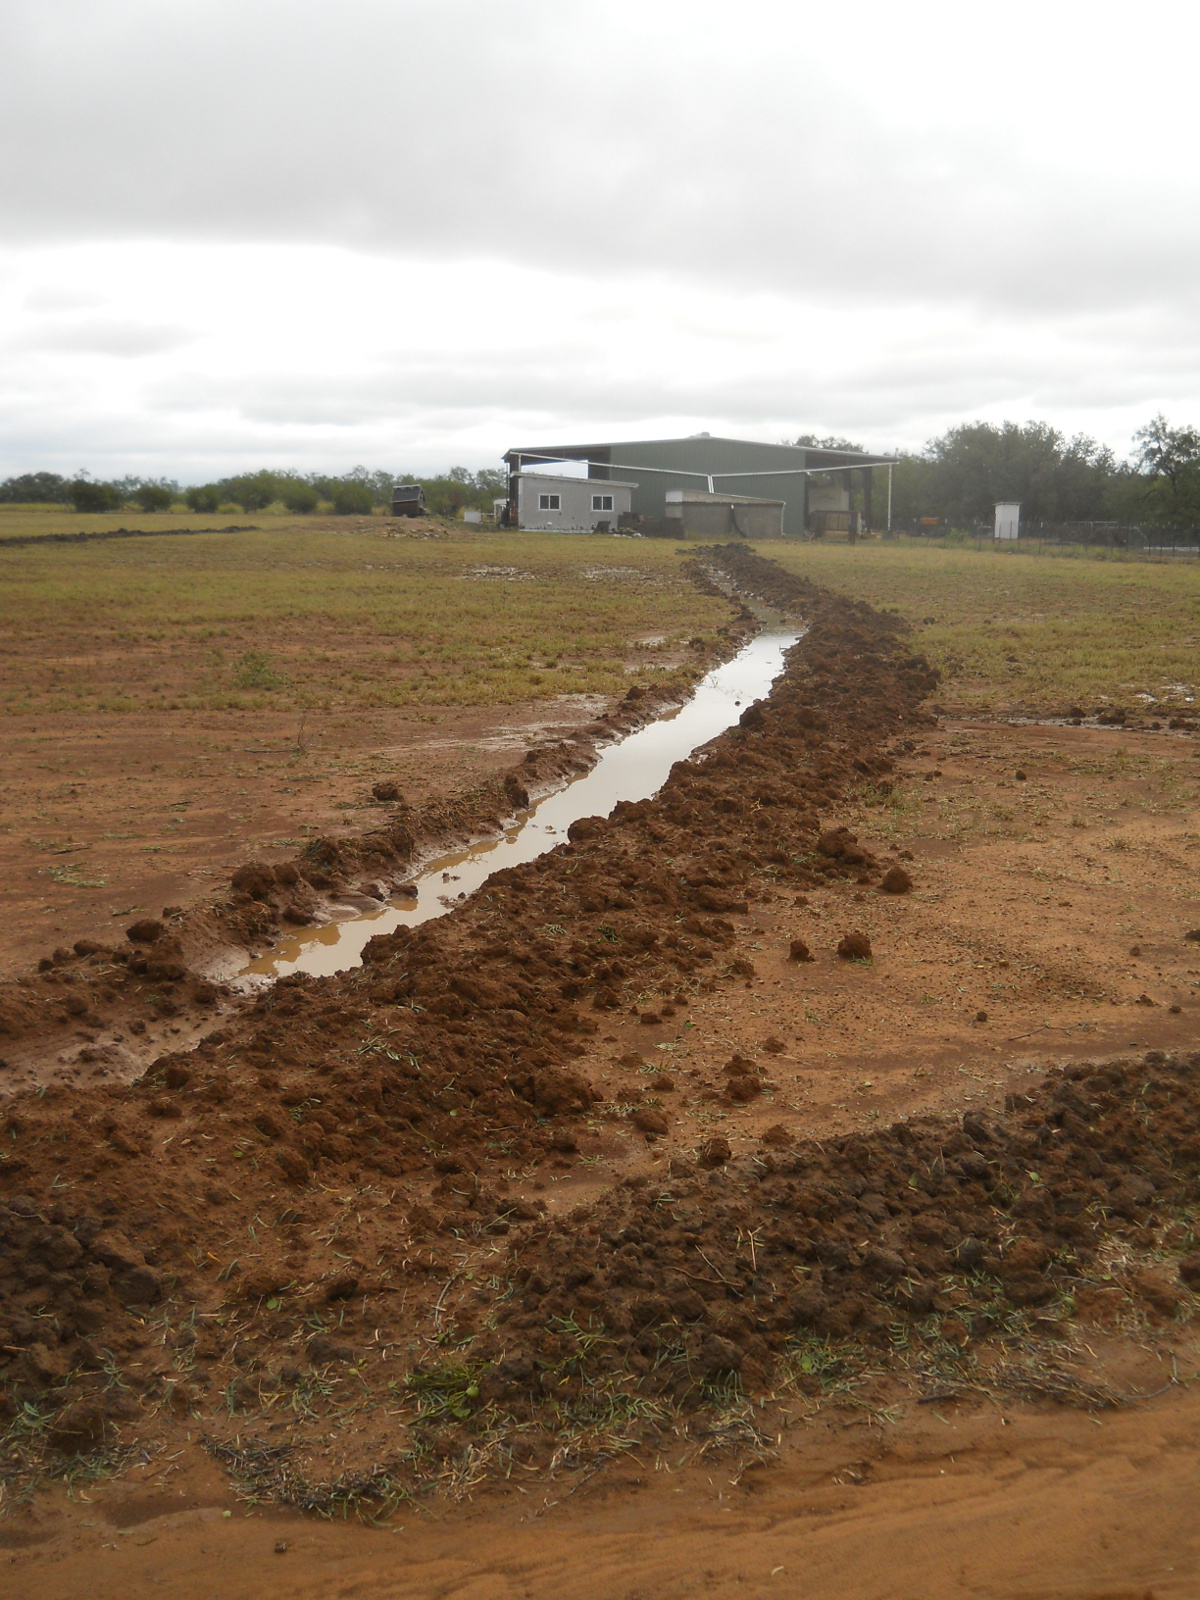
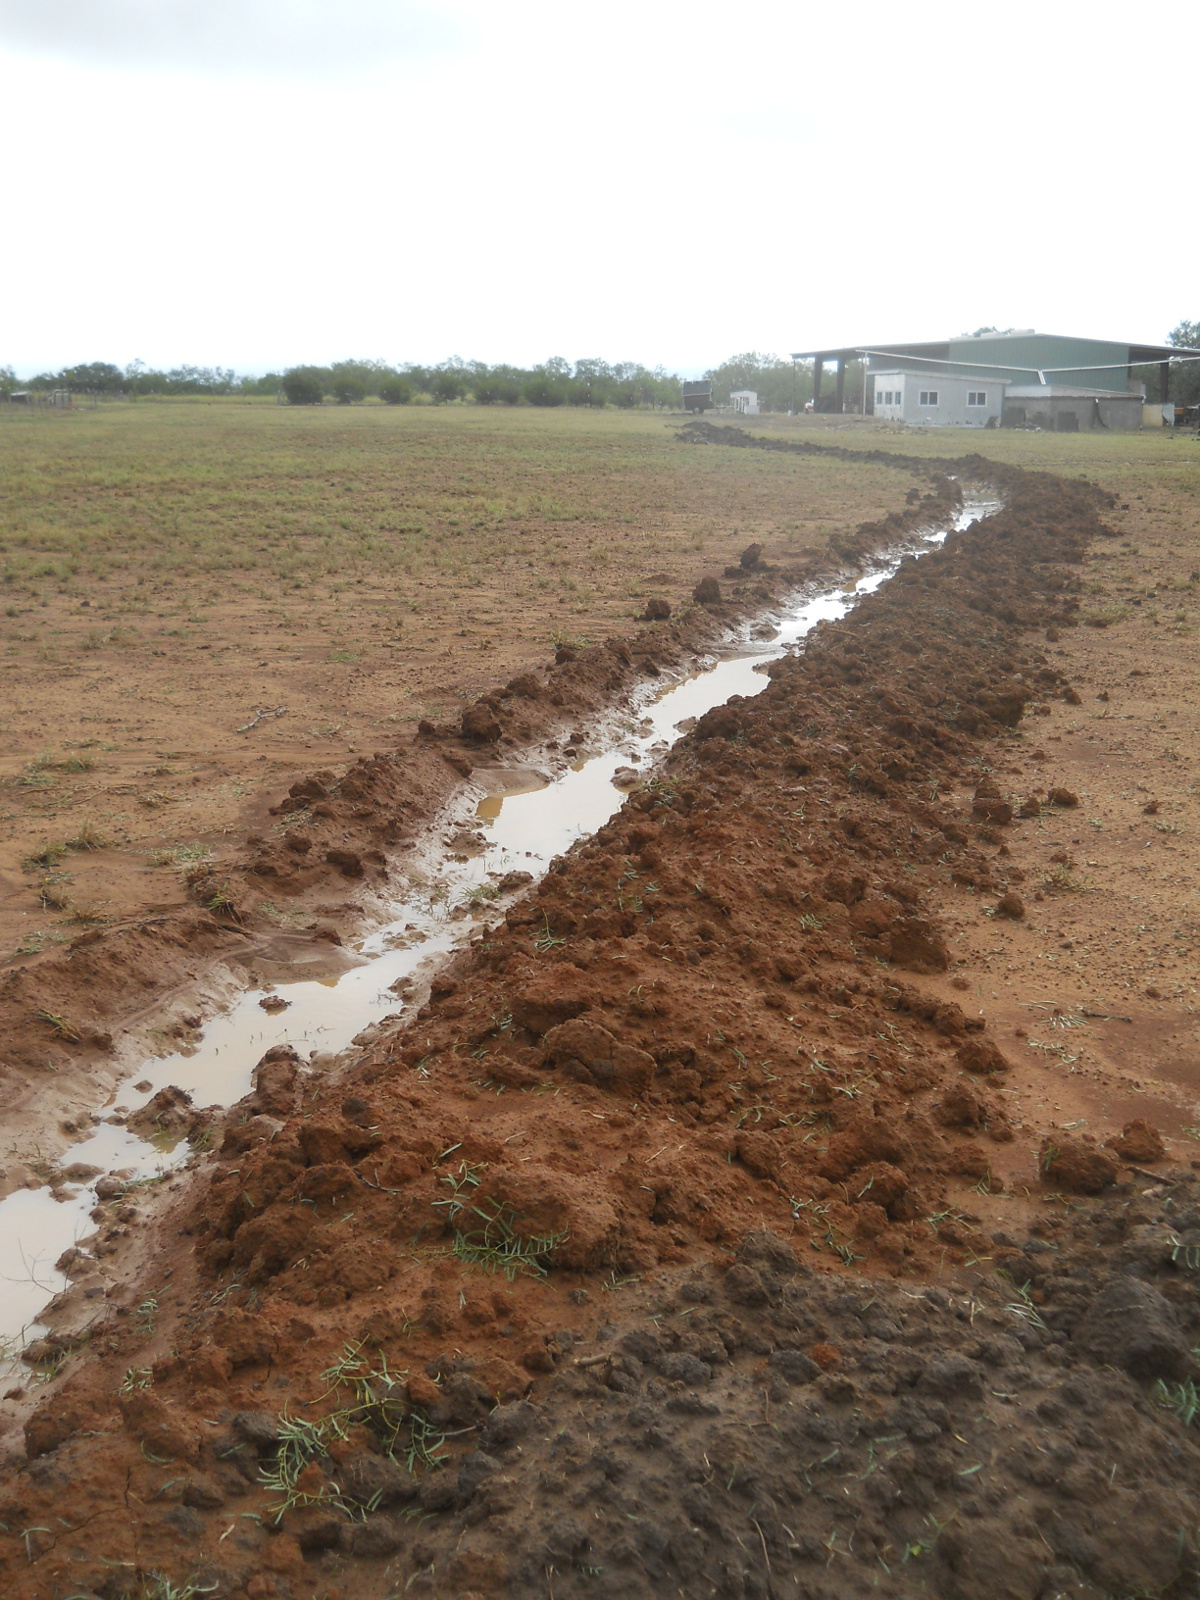
And here are the two swale trenches dug out:
When he was done, I went through the swale berms moving the dirt around trying to fill in some of the gaps, as there was potential rain that evening.
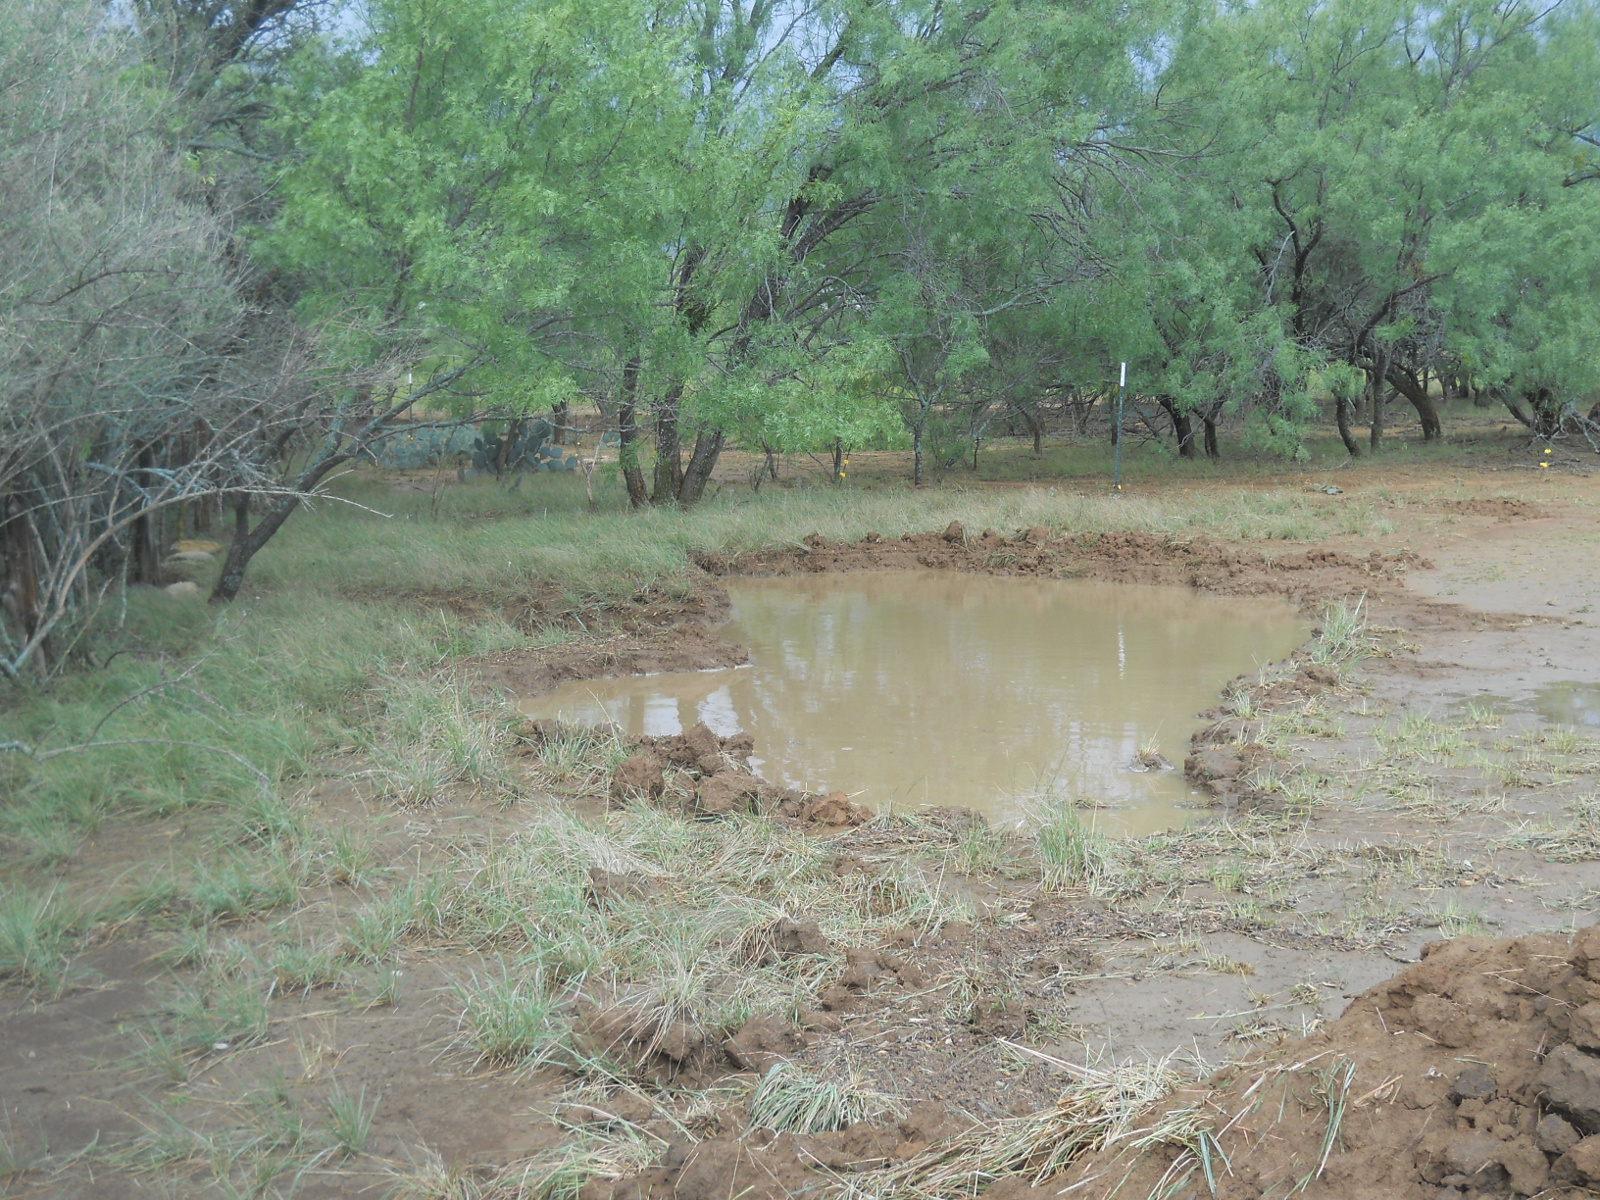
Well, probably within an hour or so, the storms a-came — with a severe one in fact. It brought some of the fastest storm winds we’ve had out here so far. But the Lord granted mercies toward us in the storm, with allowing us to have our animals put away for the night, and the worst of it just missing us, but granting quite a bit of heavy rains. And later He brought some more, although these were much more calm.
And here are the results the next day!
The new tank:
Swale trenches:
And lower berm:
The berm and the swales did wash through…
…but I went through and filled up those gaps again, and they did much better two days later after some more rain.
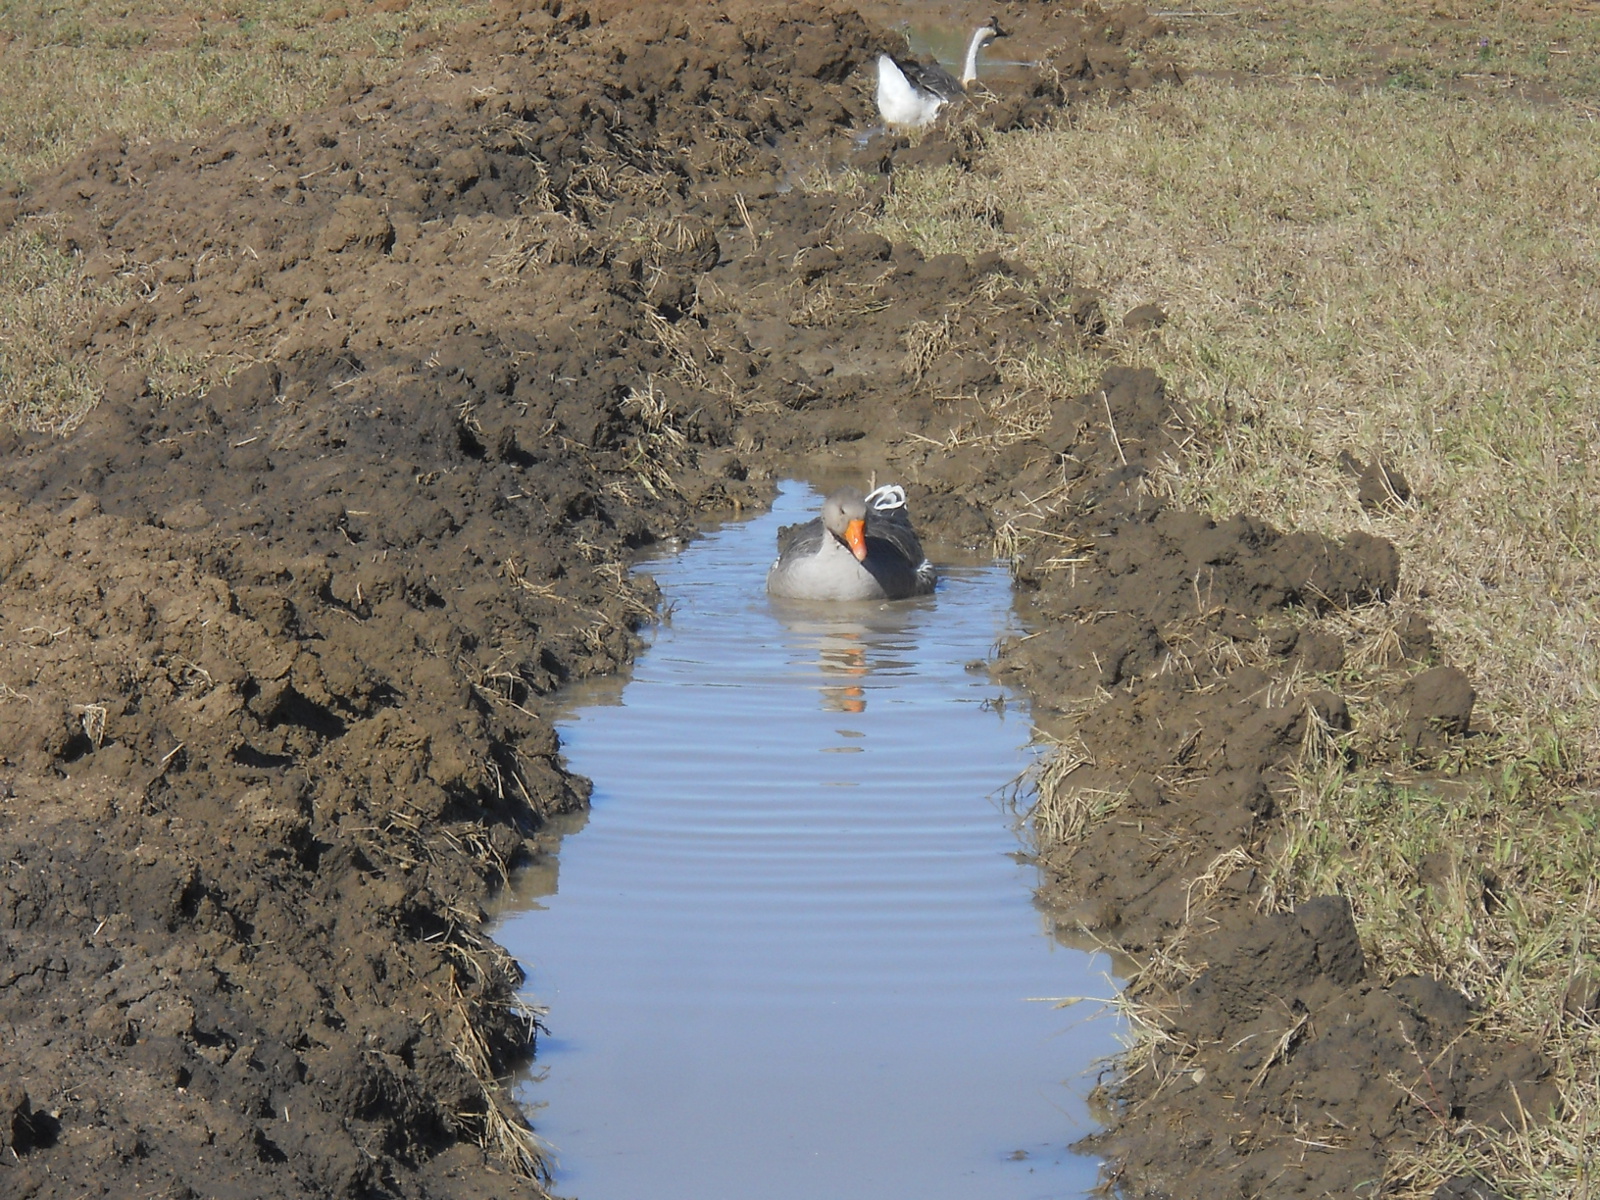
And here are the geese taking advantage of that! Our next job is to try to get them to swim in the new pond. We have gotten them over there a couple of times, but they didn’t seem too interested for any length of time:
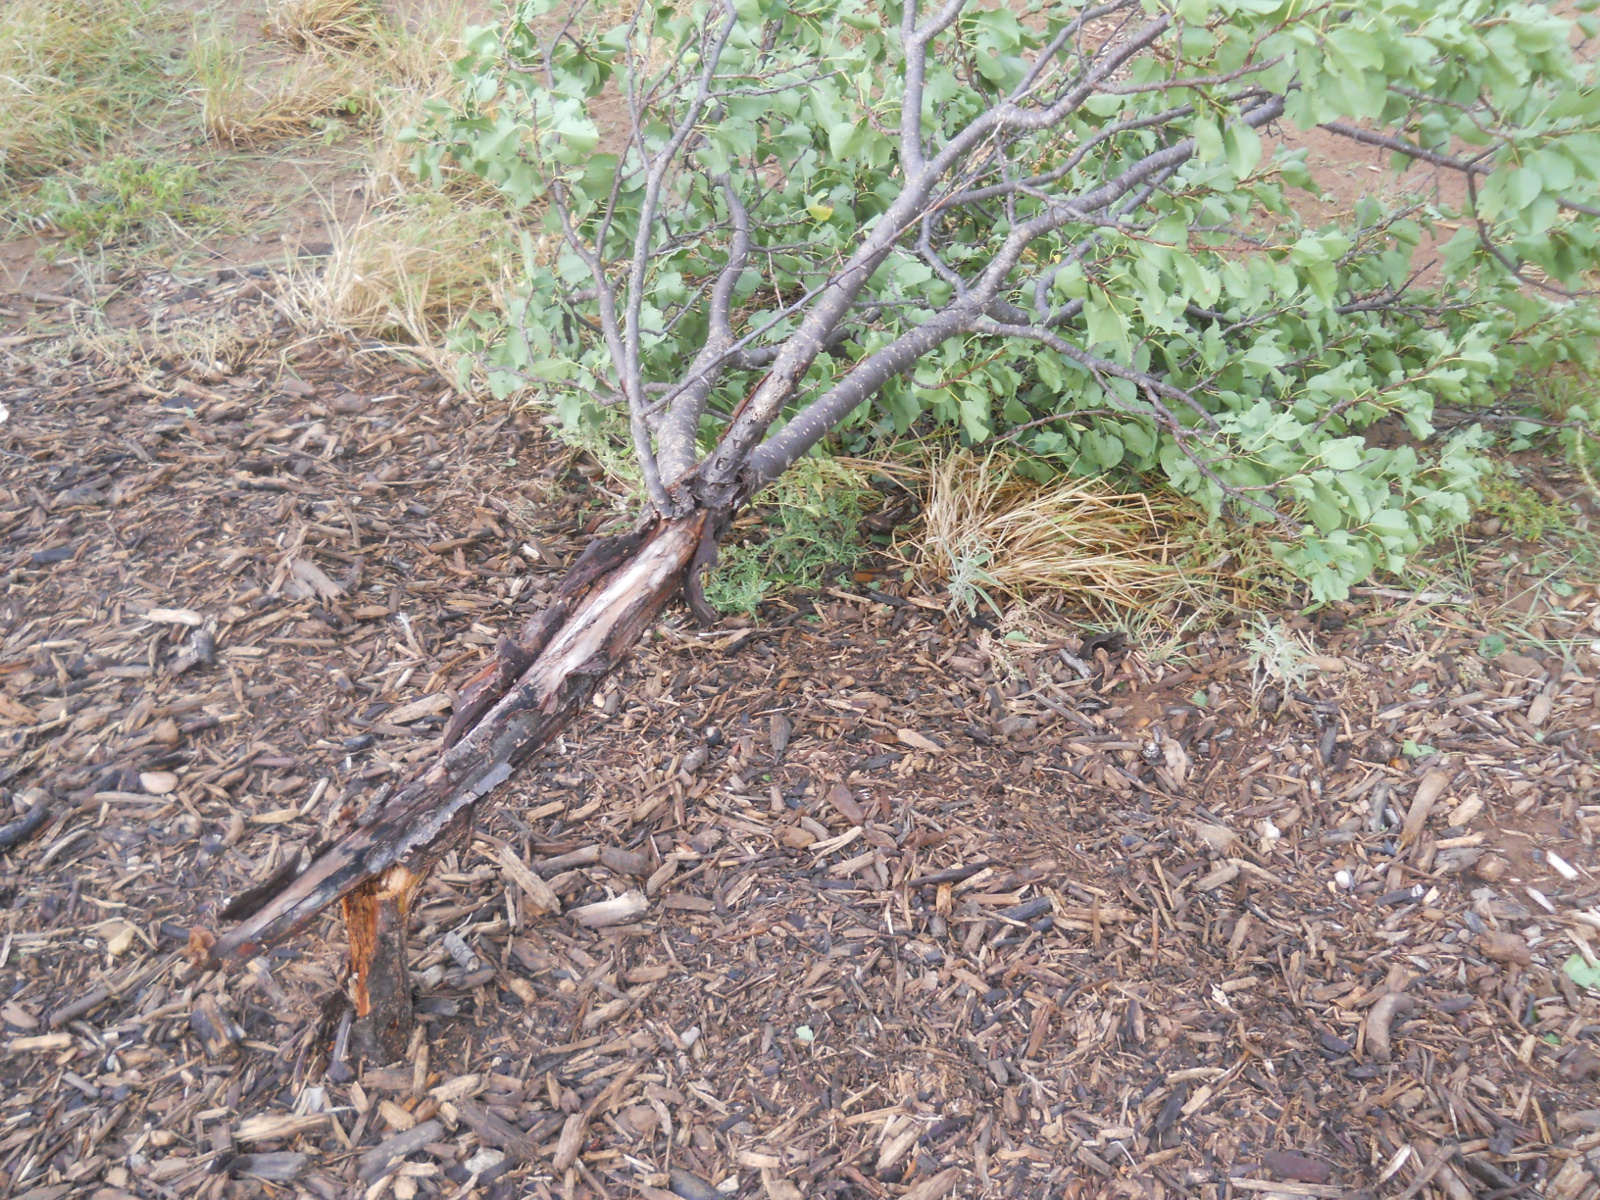
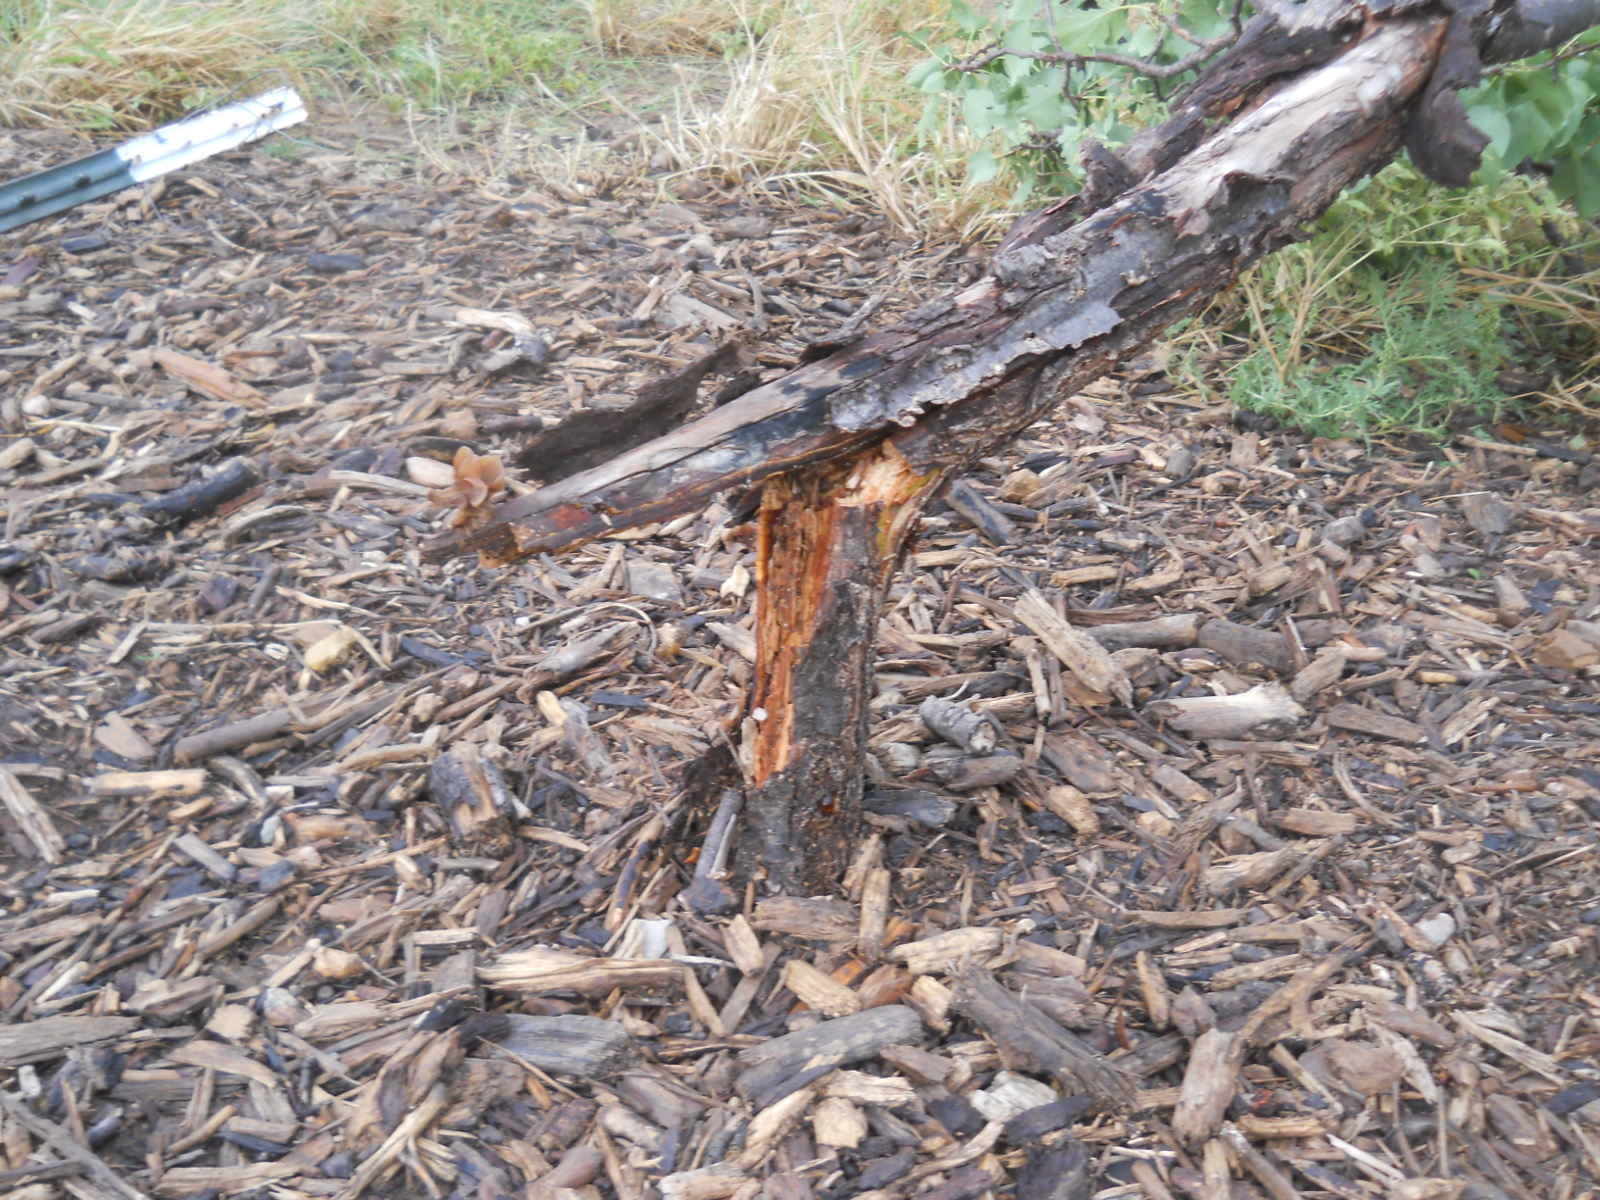
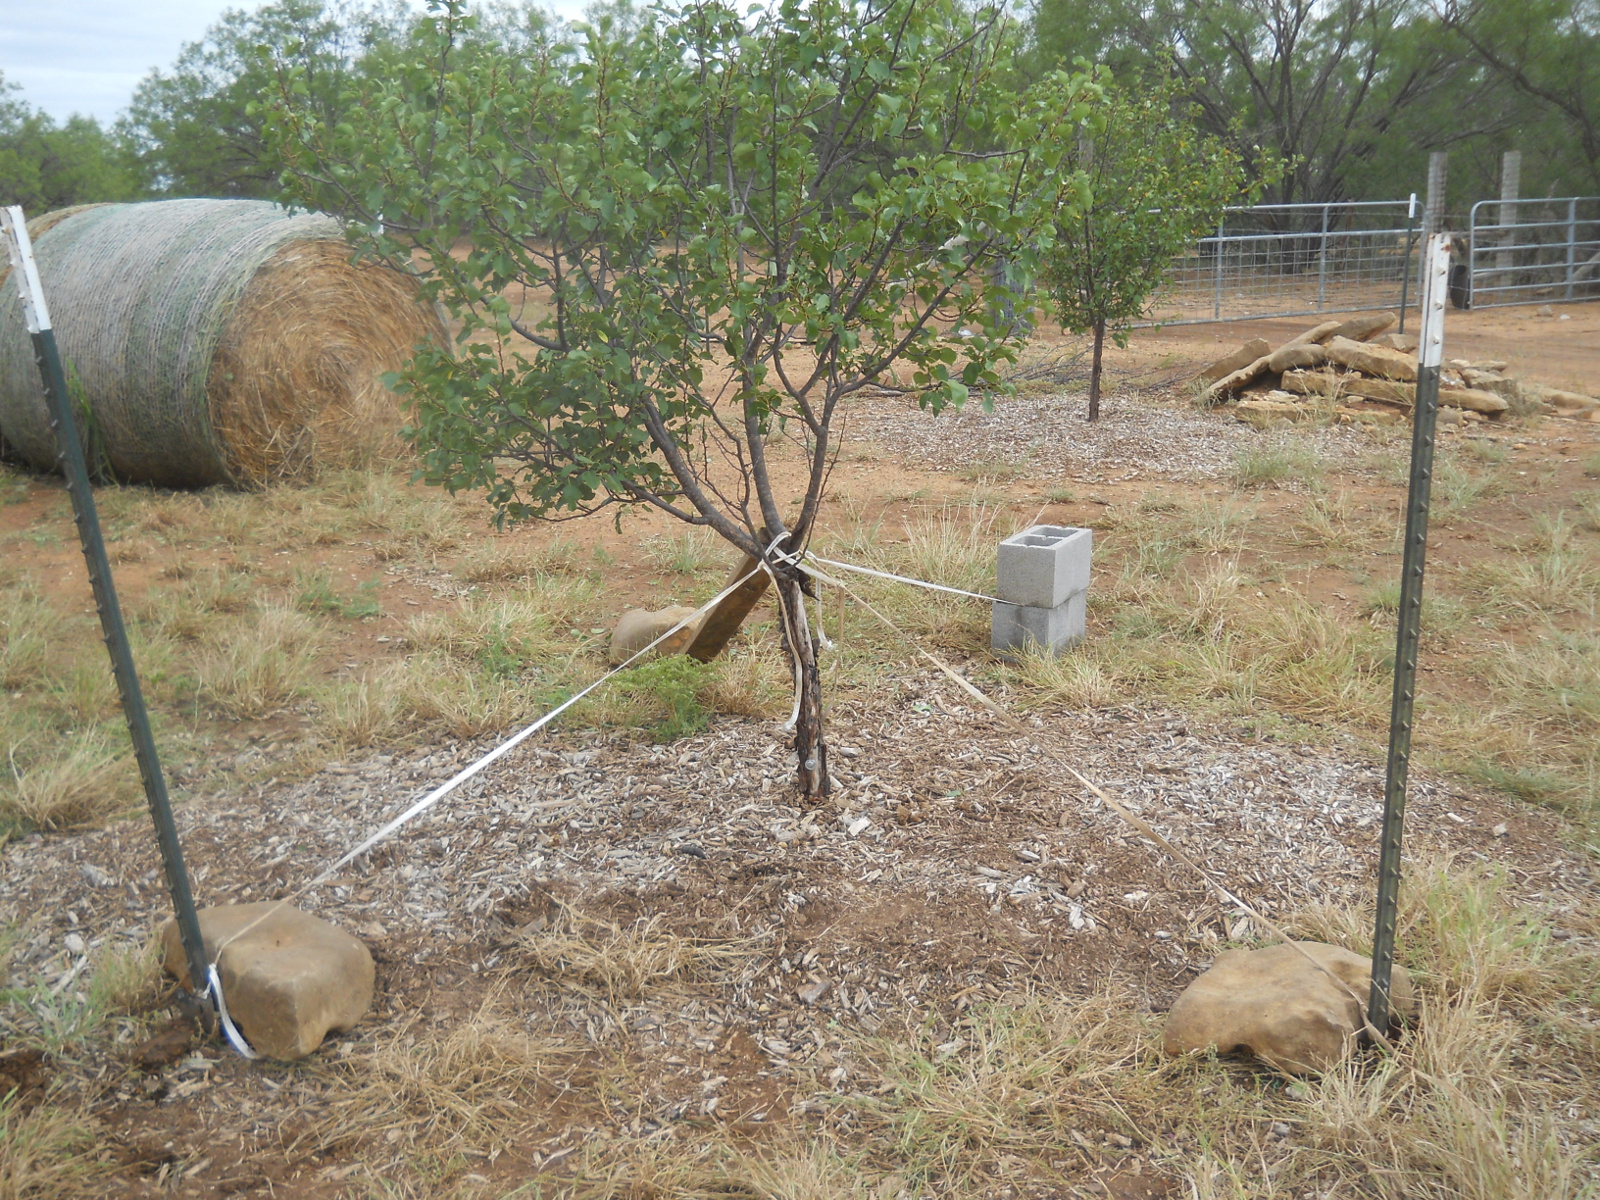
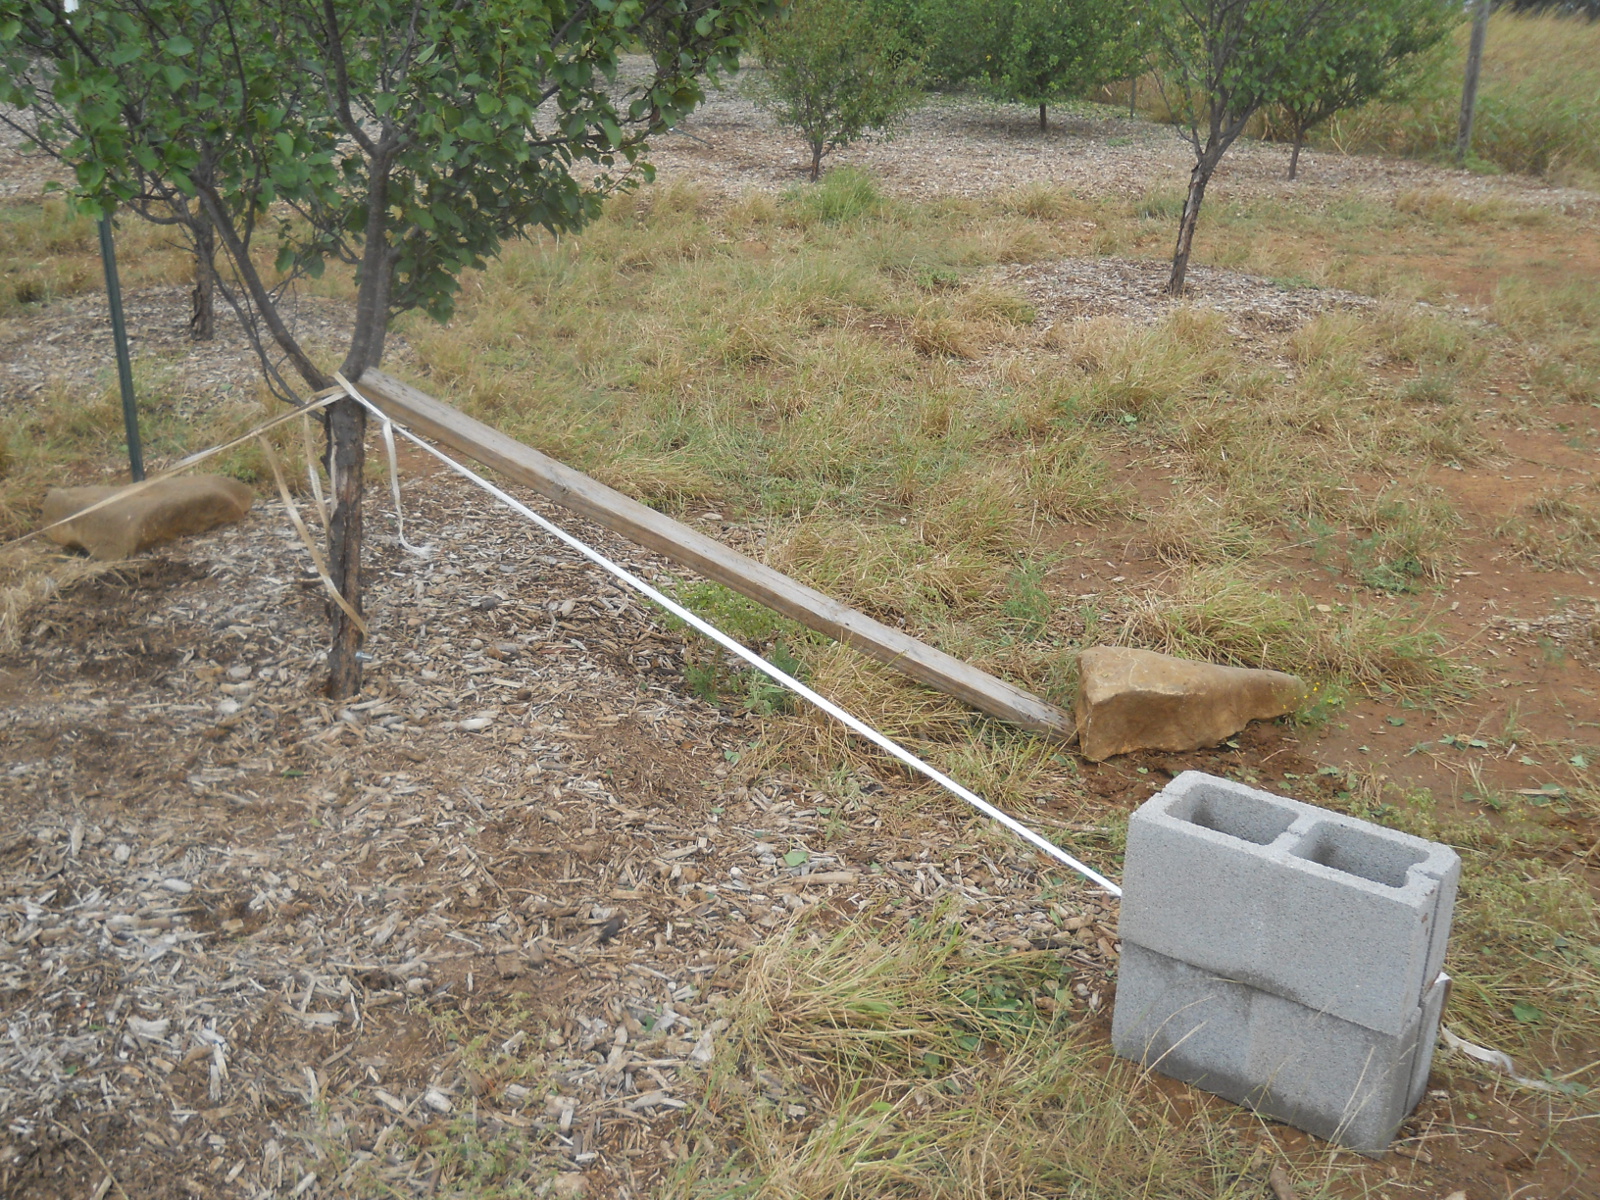
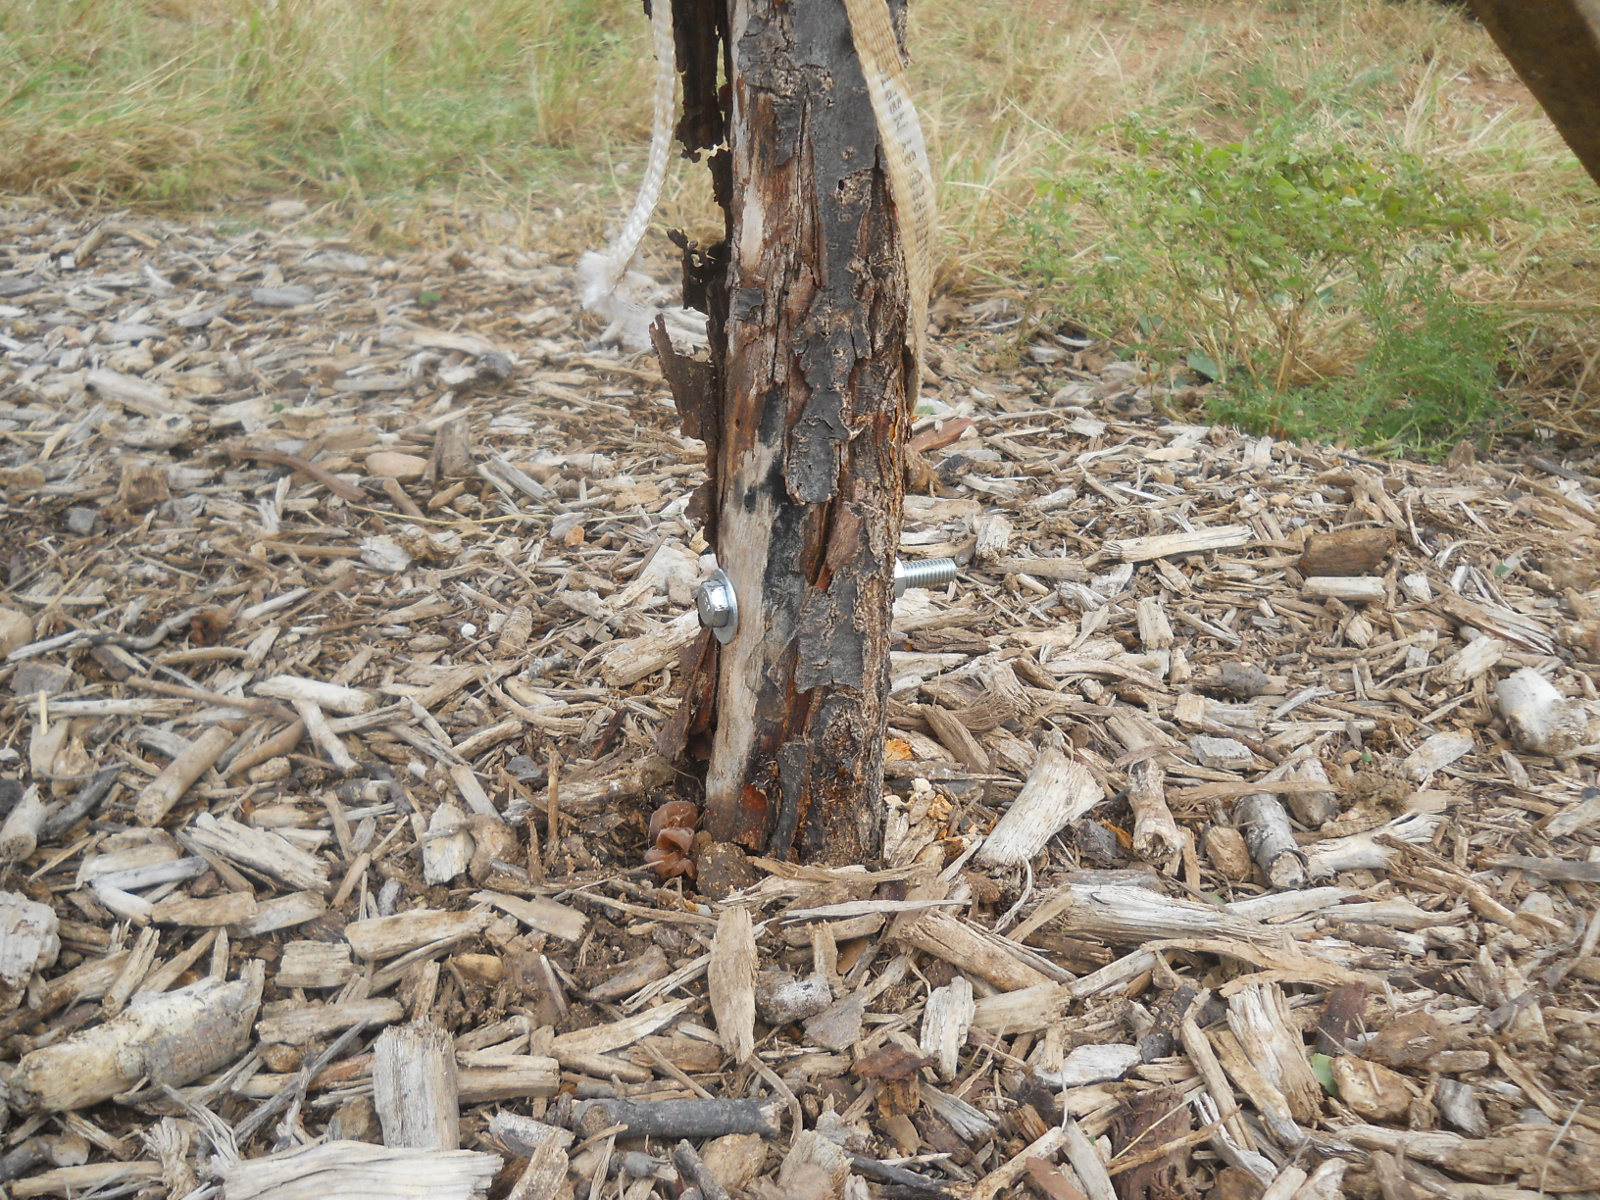
With the fierce storm winds, one of our older apricot trees didn’t fare too well. Some of our trees over time, and I believe because of the heat and drought, have had the bark on some sides of their trunks dry up and peel away, and my guess is the exposed wood there is dry, and with this facing the wind direction, this is where this tree broke and was knocked over. However, with the bark in tact on the other side, it didn’t completely separate:
After a little research, we propped up the tree, secured it to t-posts and cinder blocks in three places with a 2×4 brace behind as well, and I bolted the two broken parts of the trunk together — apparently that’s supposed to work. So, Lord willing, this apricot tree will heal and continue on its life.
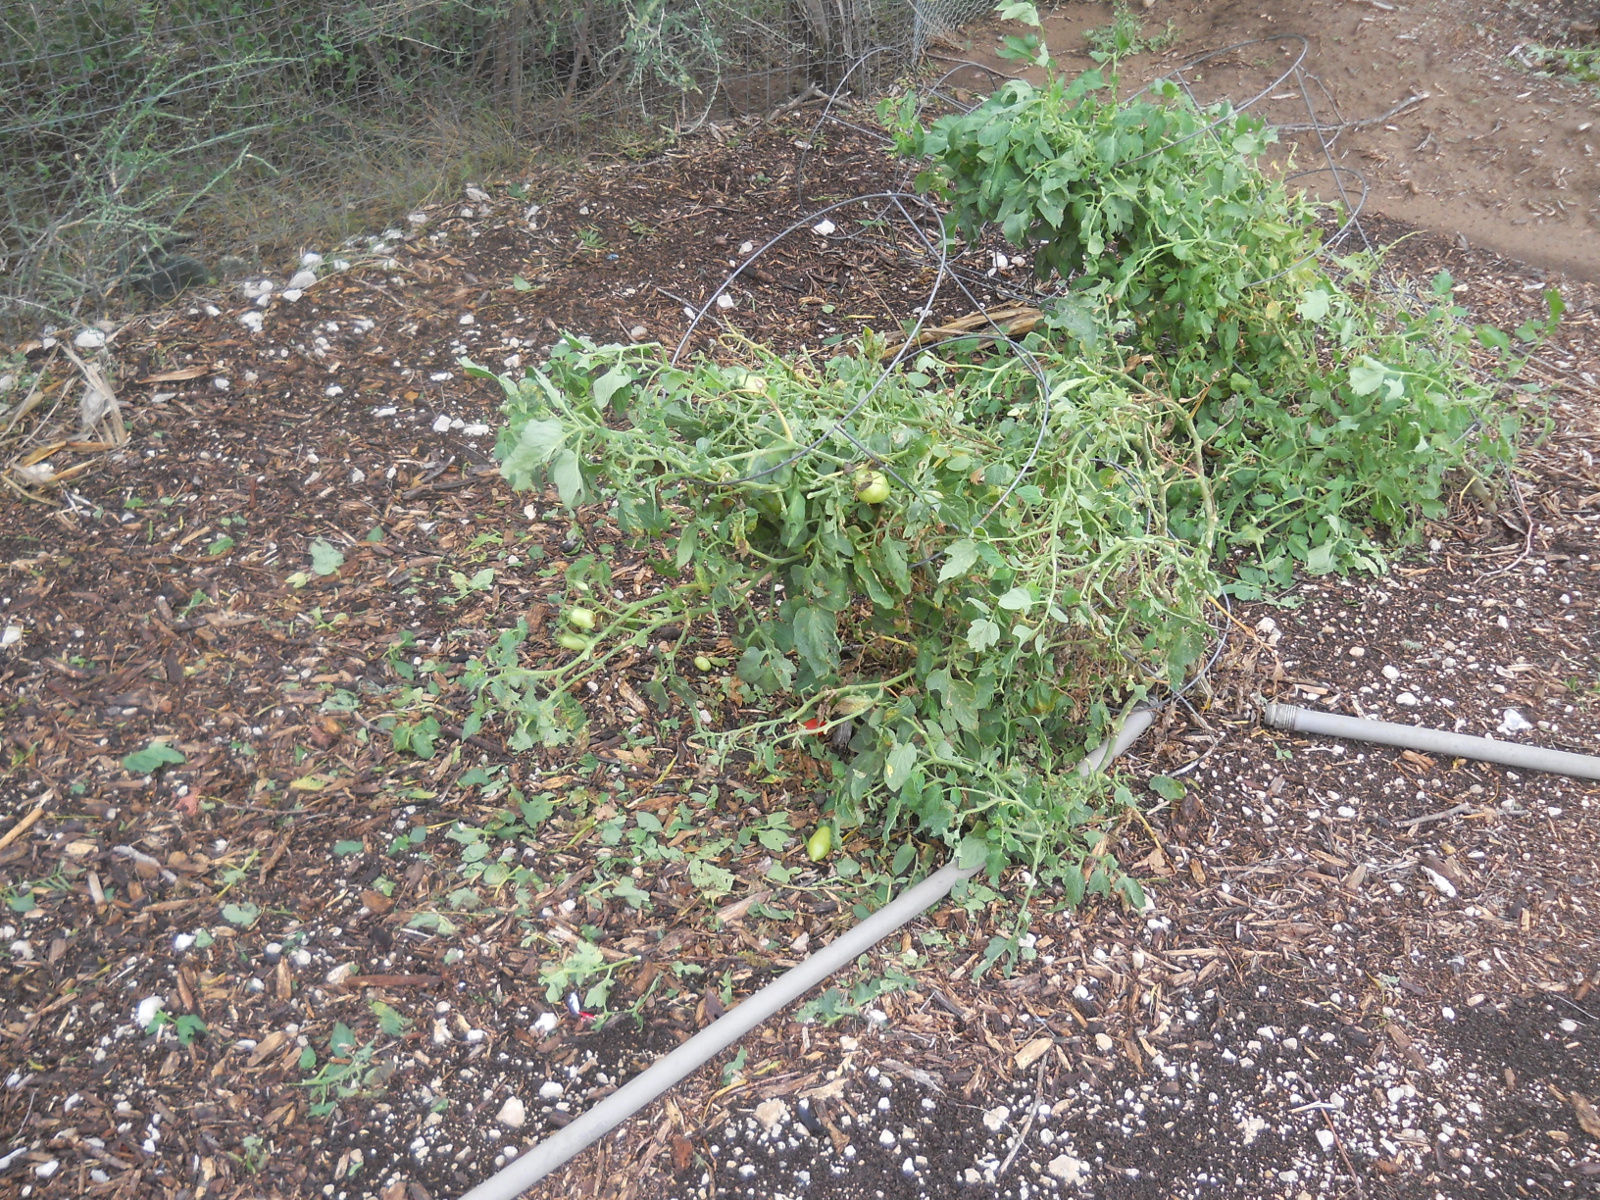
And here is some garden damage, but for the most part, the plants were thankfully okay:
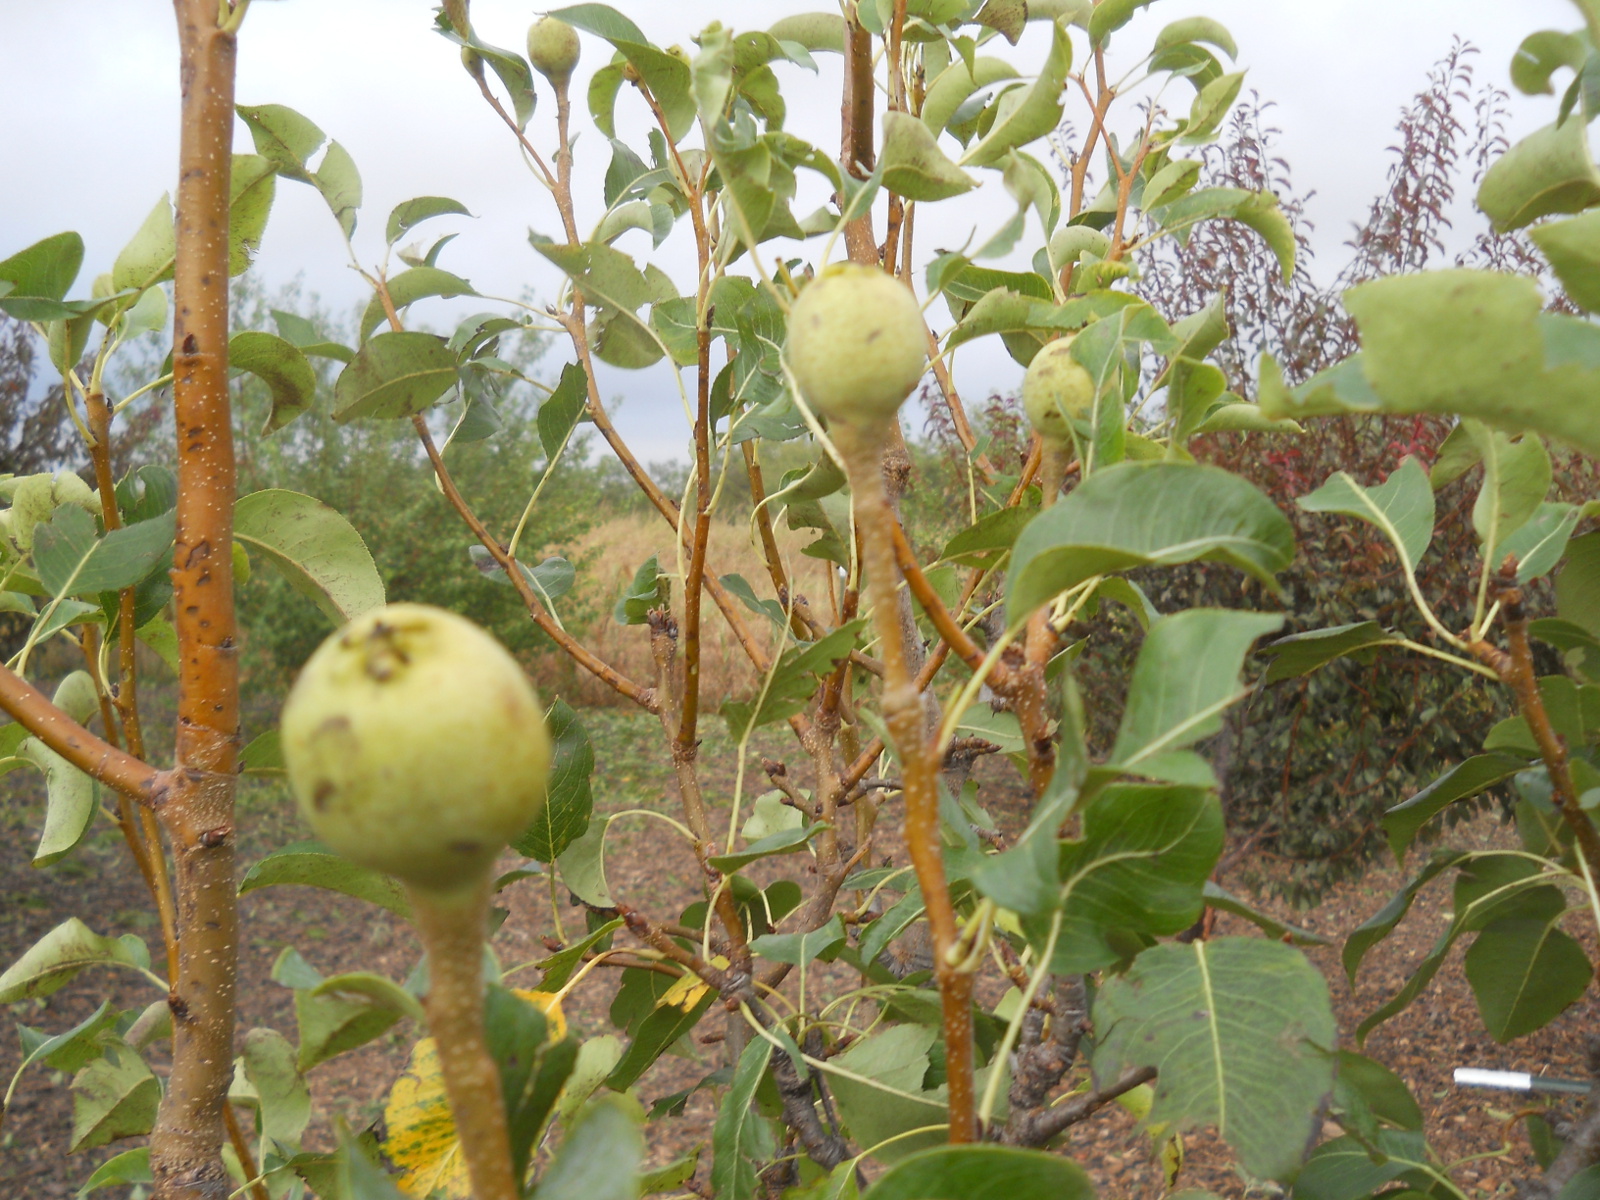
I did find some tiny pears on our pear tree though too!
As always, we are thankful to the Lord for this opportunity to store more rain, and hopefully benefit the fields and the animals! Thanks to Him for the safety He granted Mr. Stonger (and Robert, who did a little) while on the backhoe, and the mercies in the weather! And thanks much to the donator of the backhoe to the group, the Pecks for donating the backhoe time to the group, and Mr. Stonger for all his hard work!
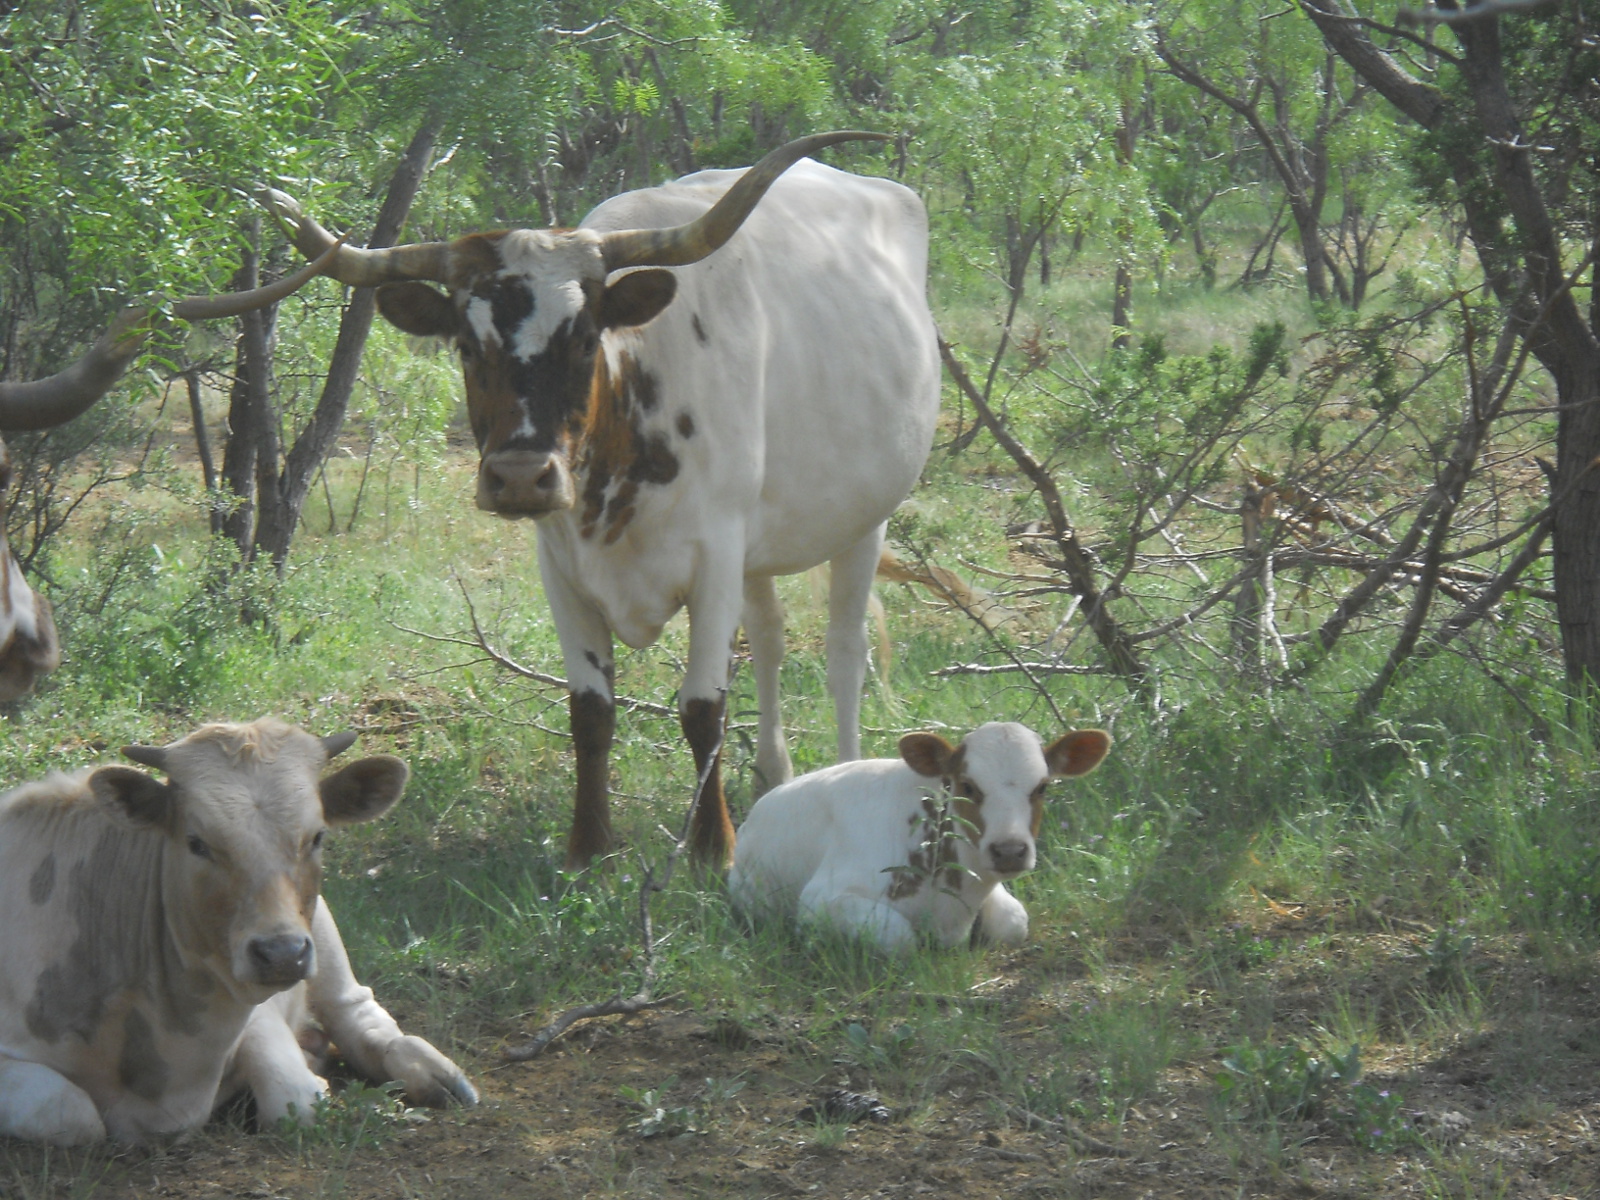
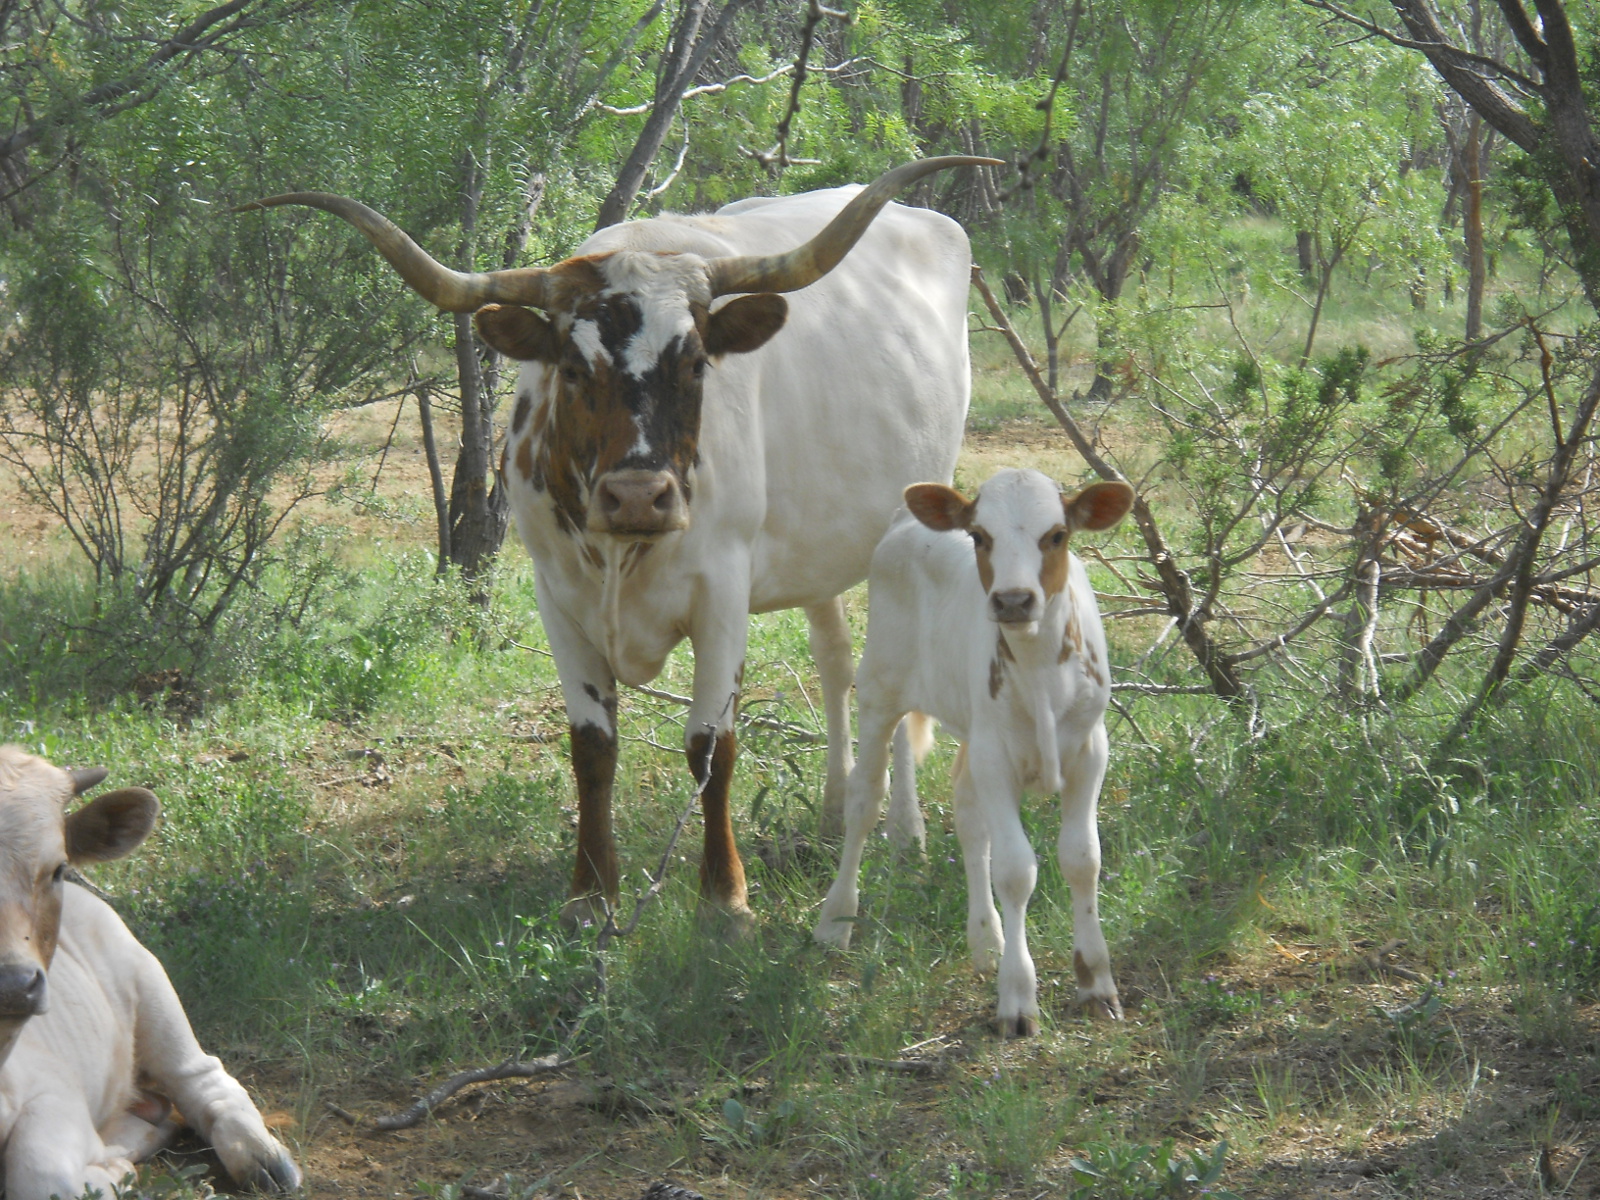
Back in late June, early July, the Lord graciously granted our final cow, Casi Blanca, to give birth to a calf for this year! It ended up being a little bull calf, and we decided to name him Salomón, which means “peaceable.”
Here are a few pictures of him, and with Casi:
And a little video:
As always, we are so very grateful to the Lord for granting these continued provisions, and the resources He’s graciously granted to be able to feed the cattle!
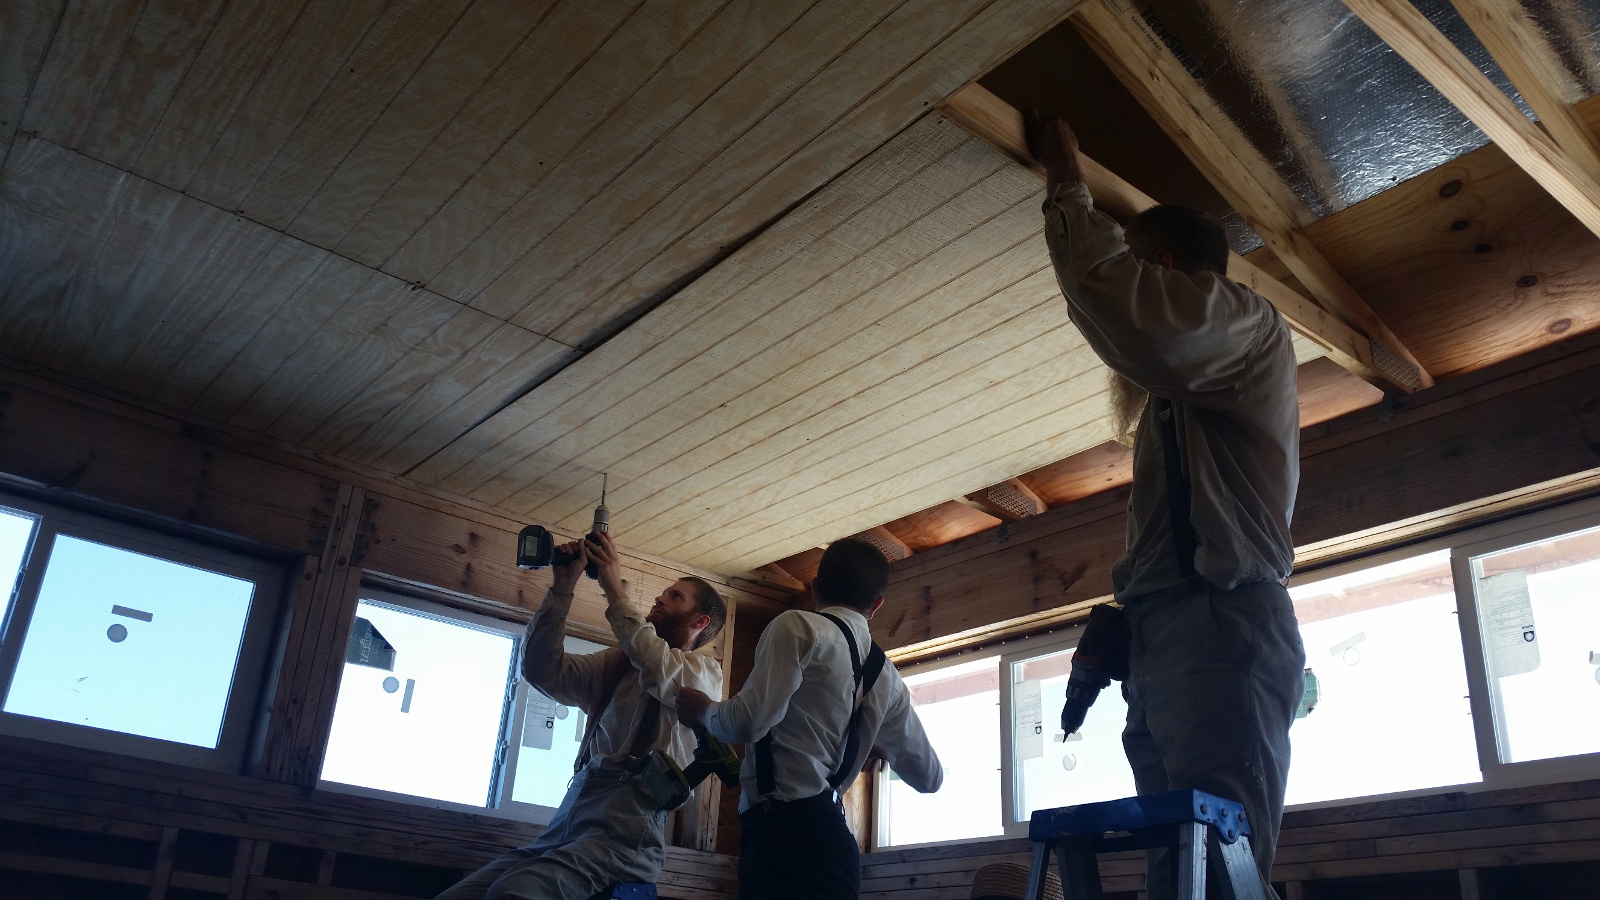
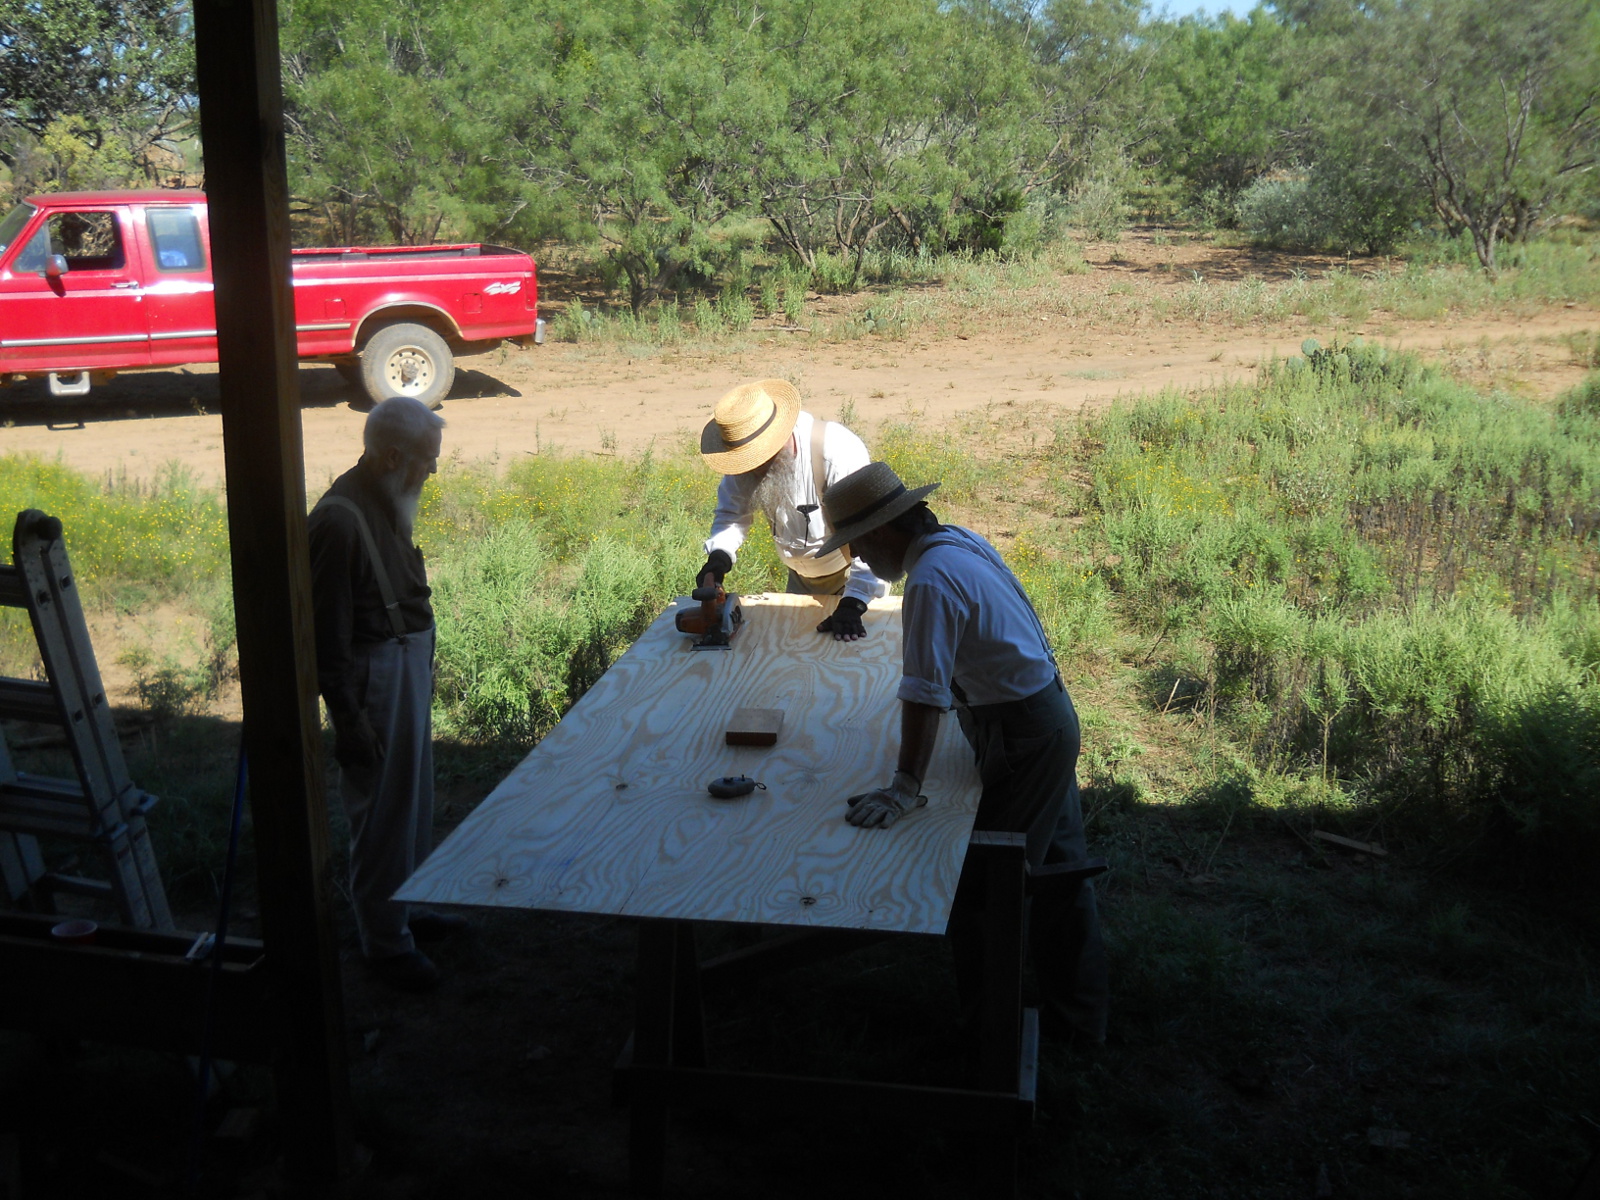
For the guys, it was back into the house to try to finish up as much of the ceiling as possible.
And here are a few pictures of the work:
And the final progress! Almost total complete now…just some edge pieces, and I need to figure out an attic access point:
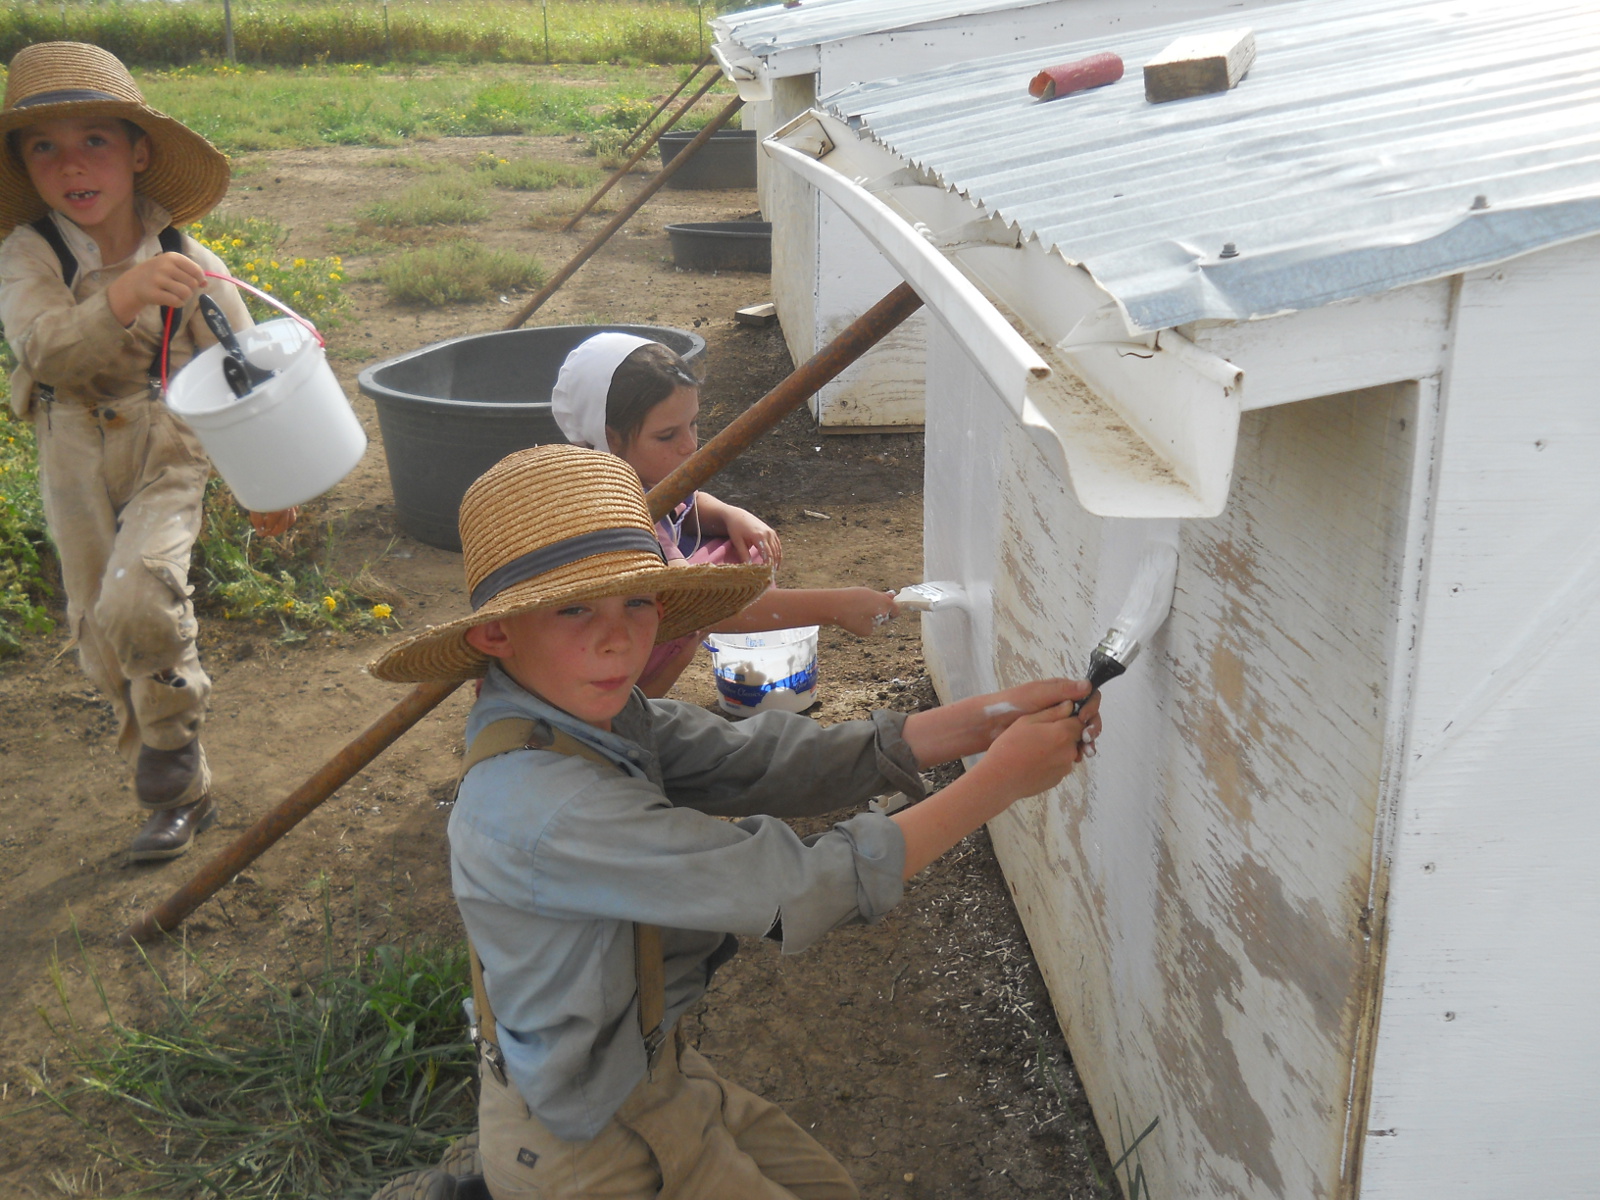
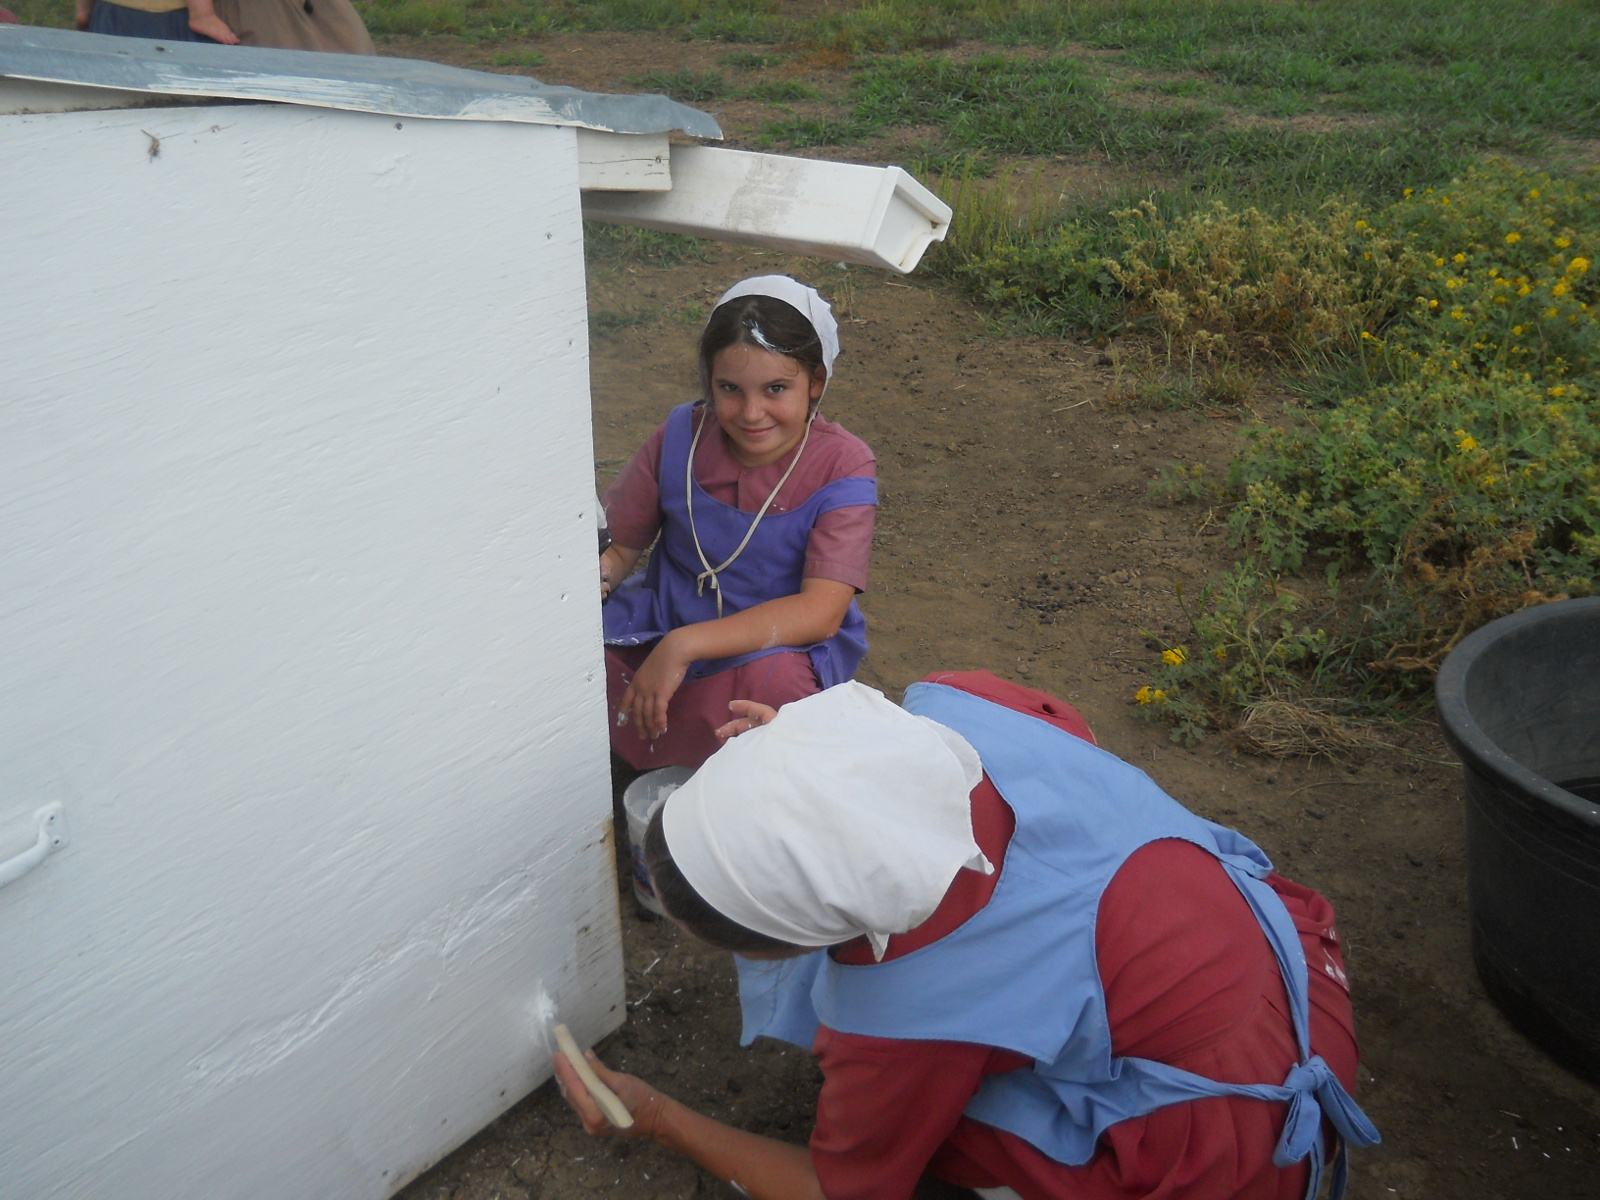
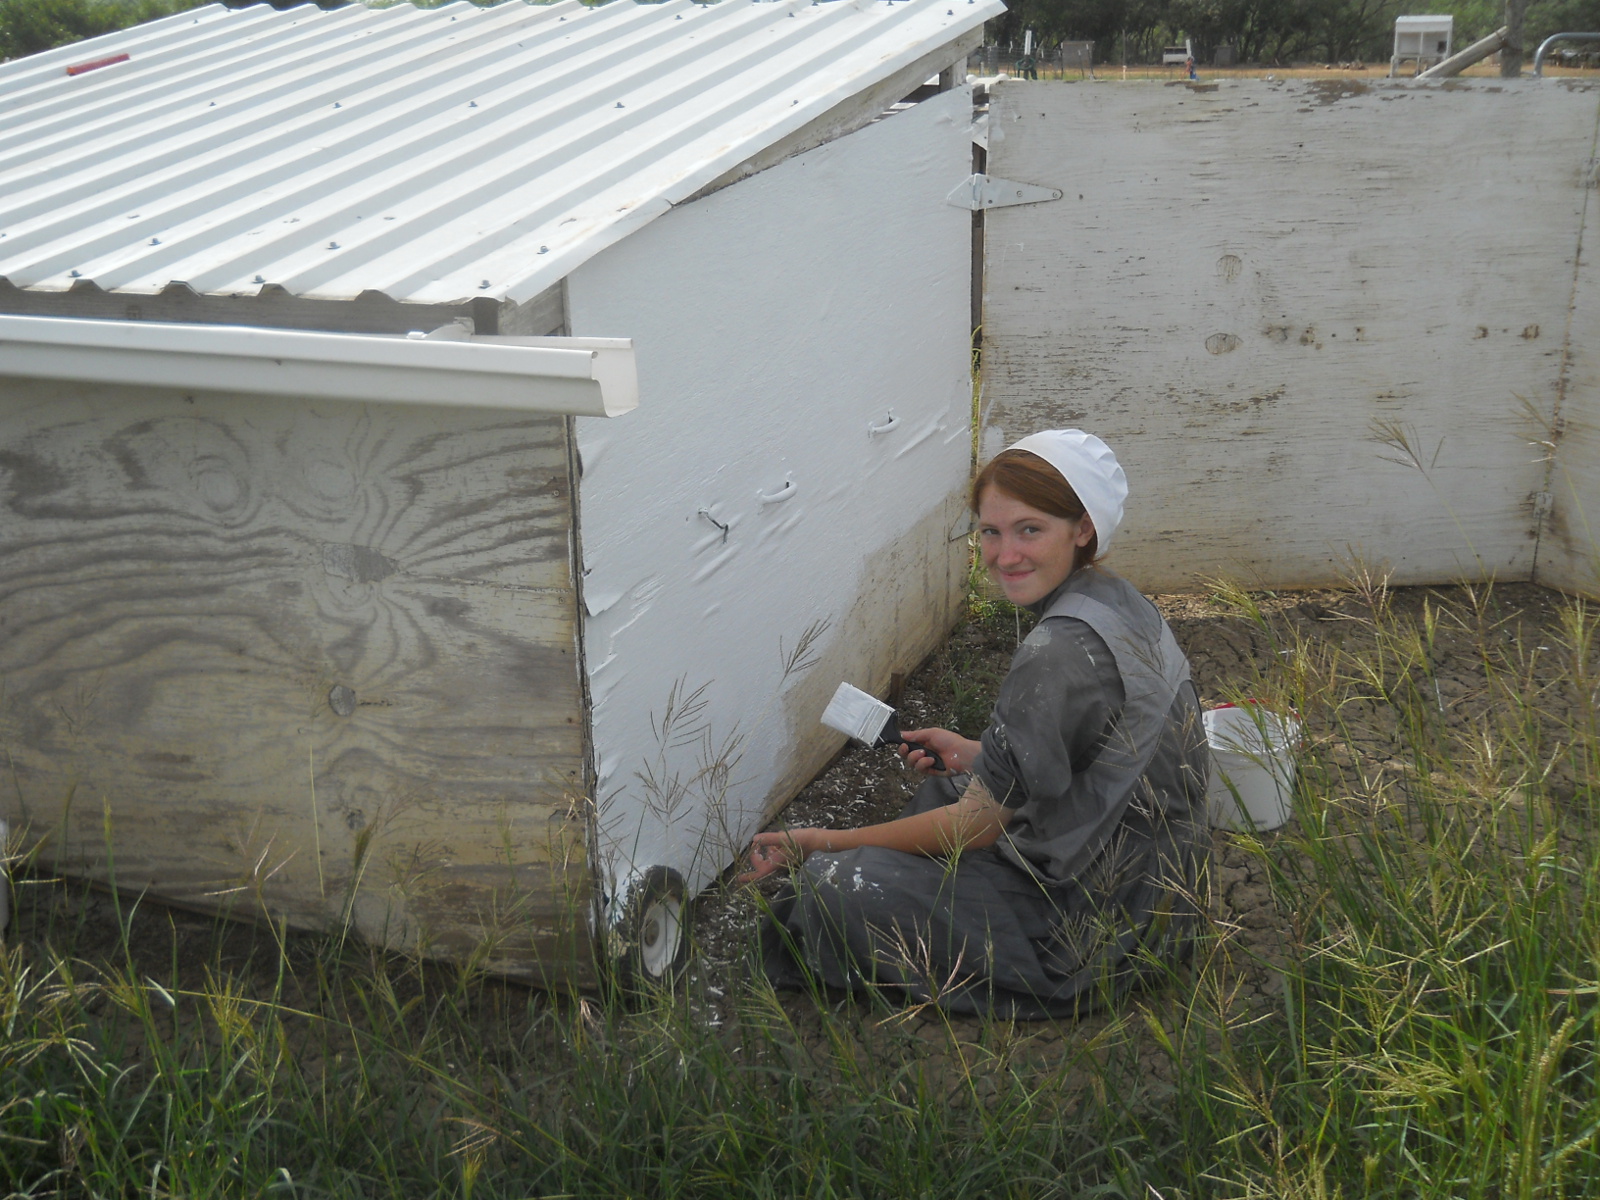
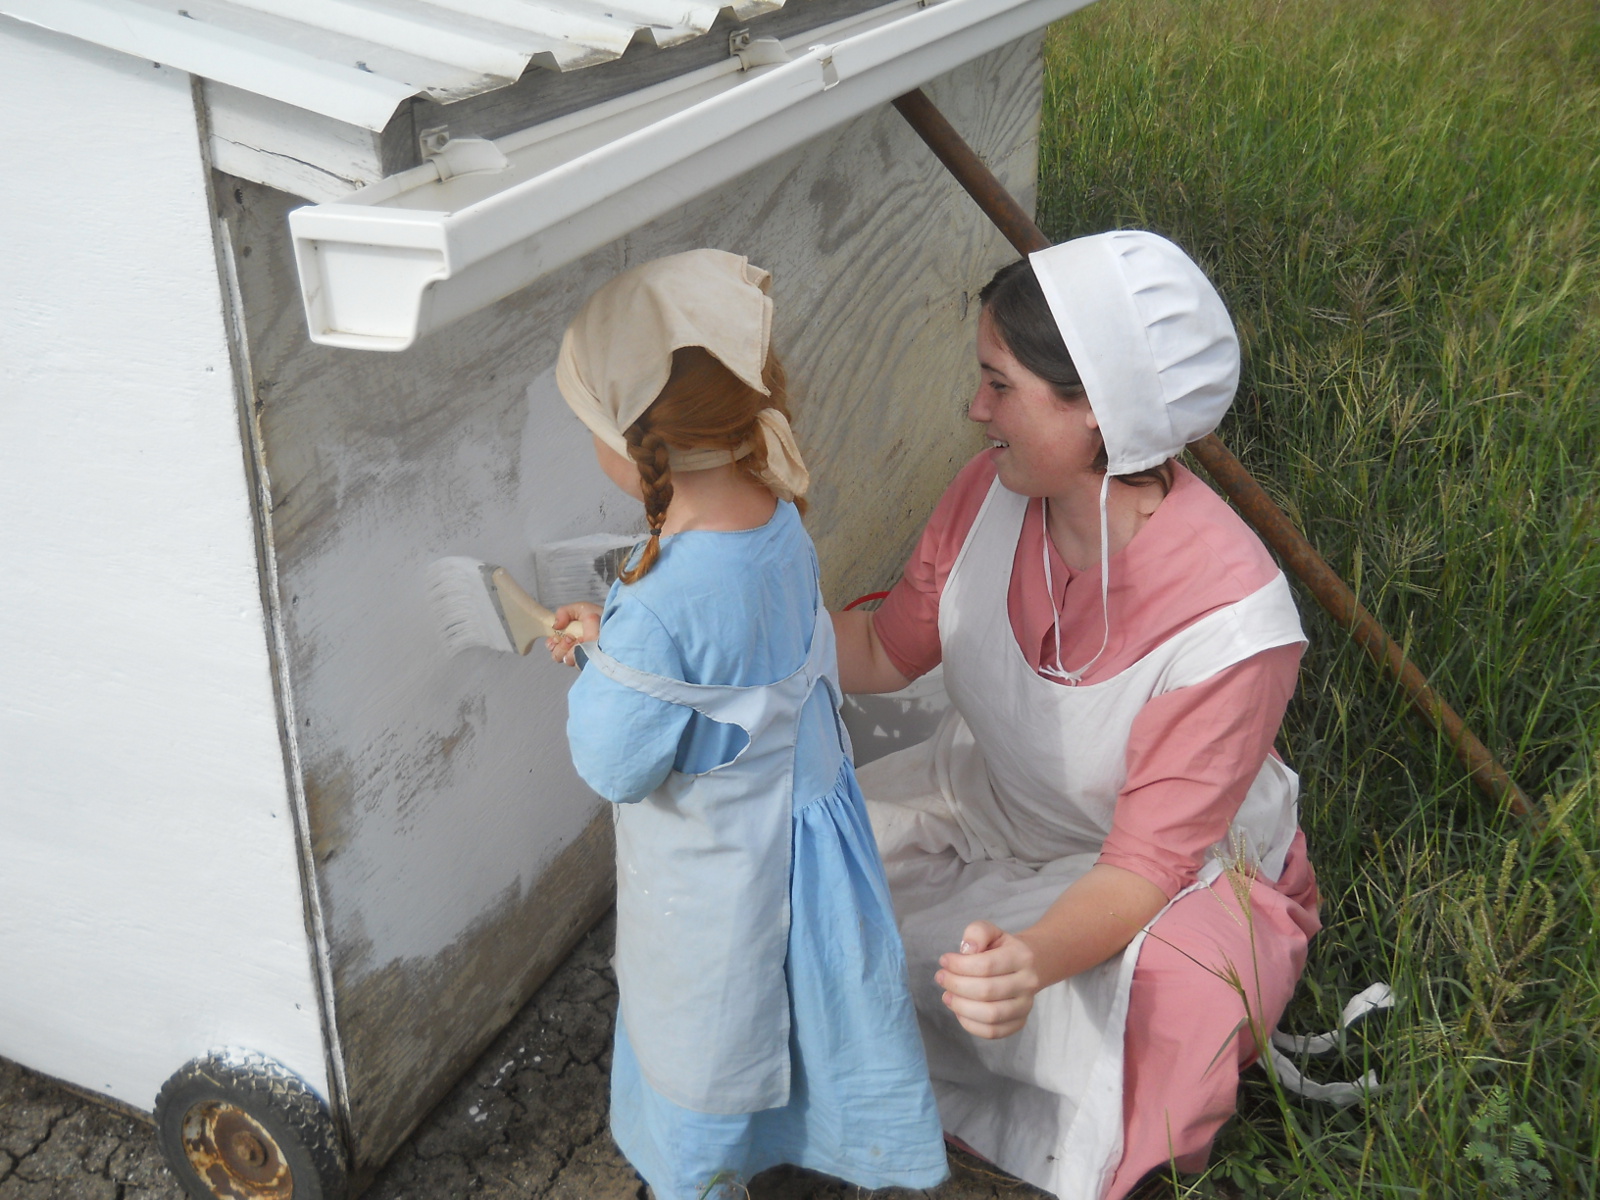
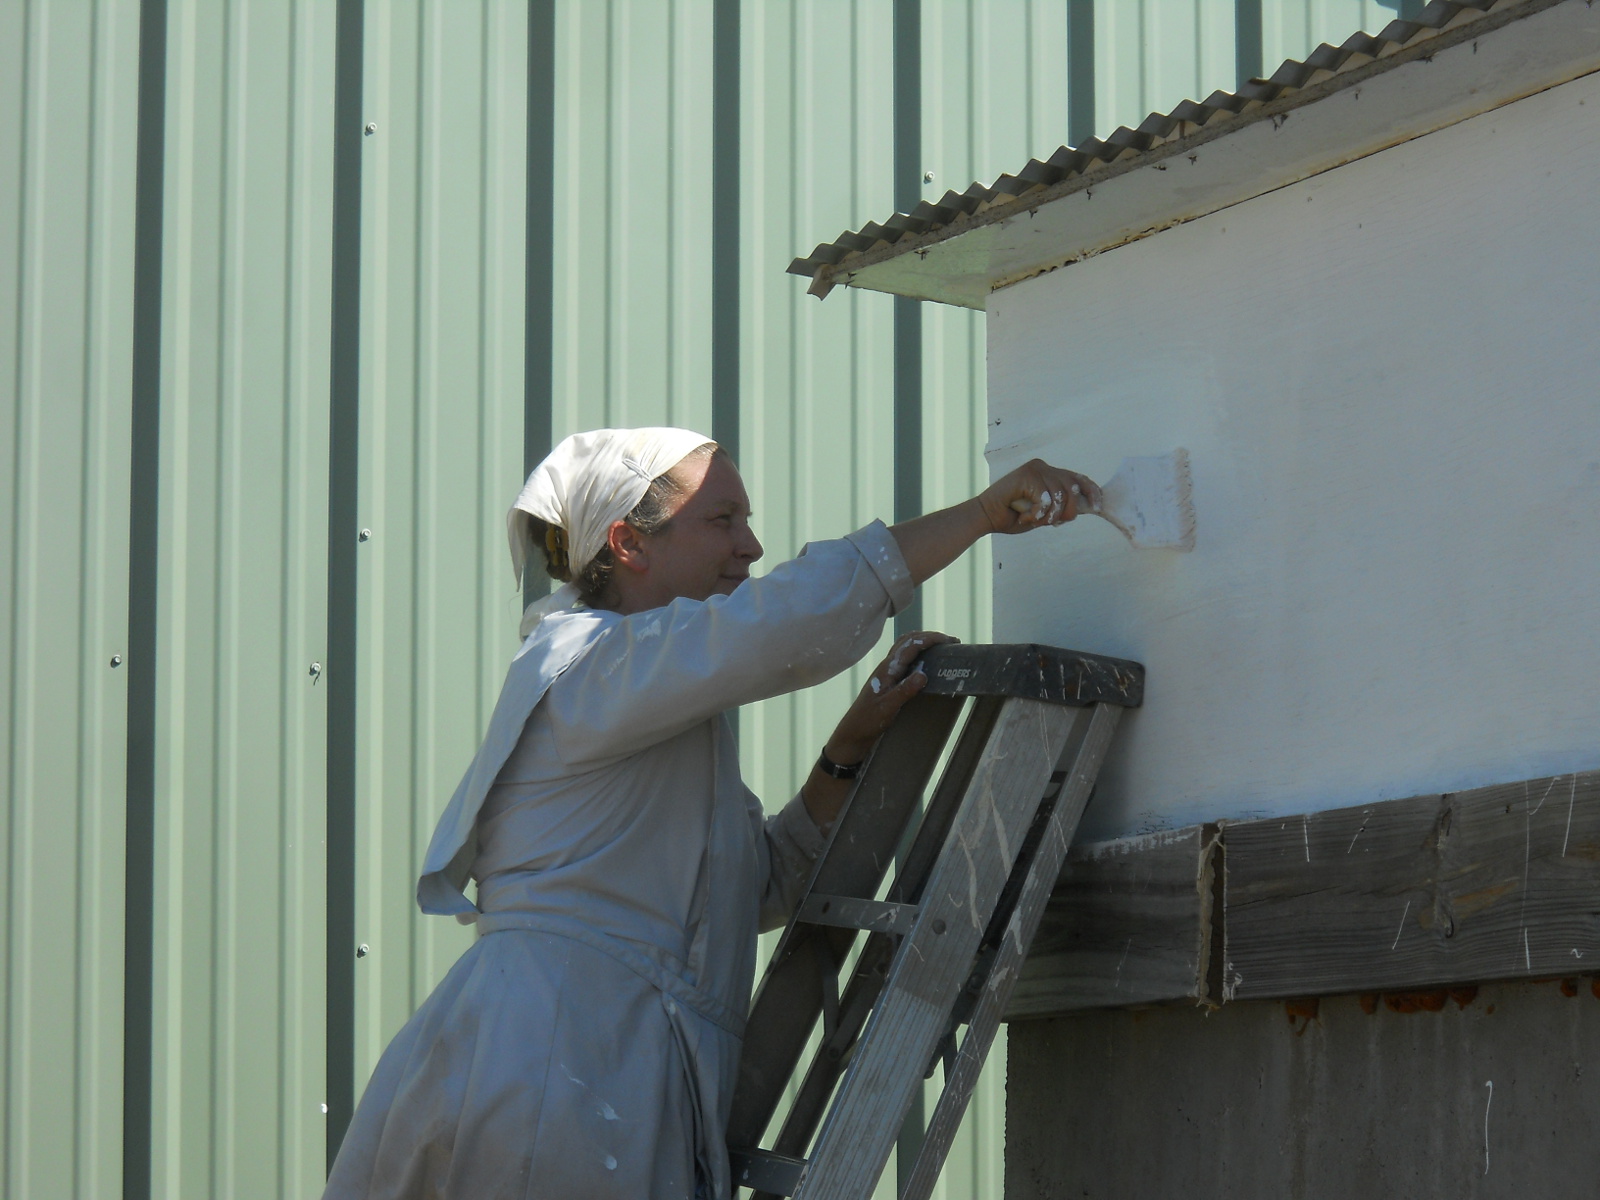
Community Work Day Homestead Painting
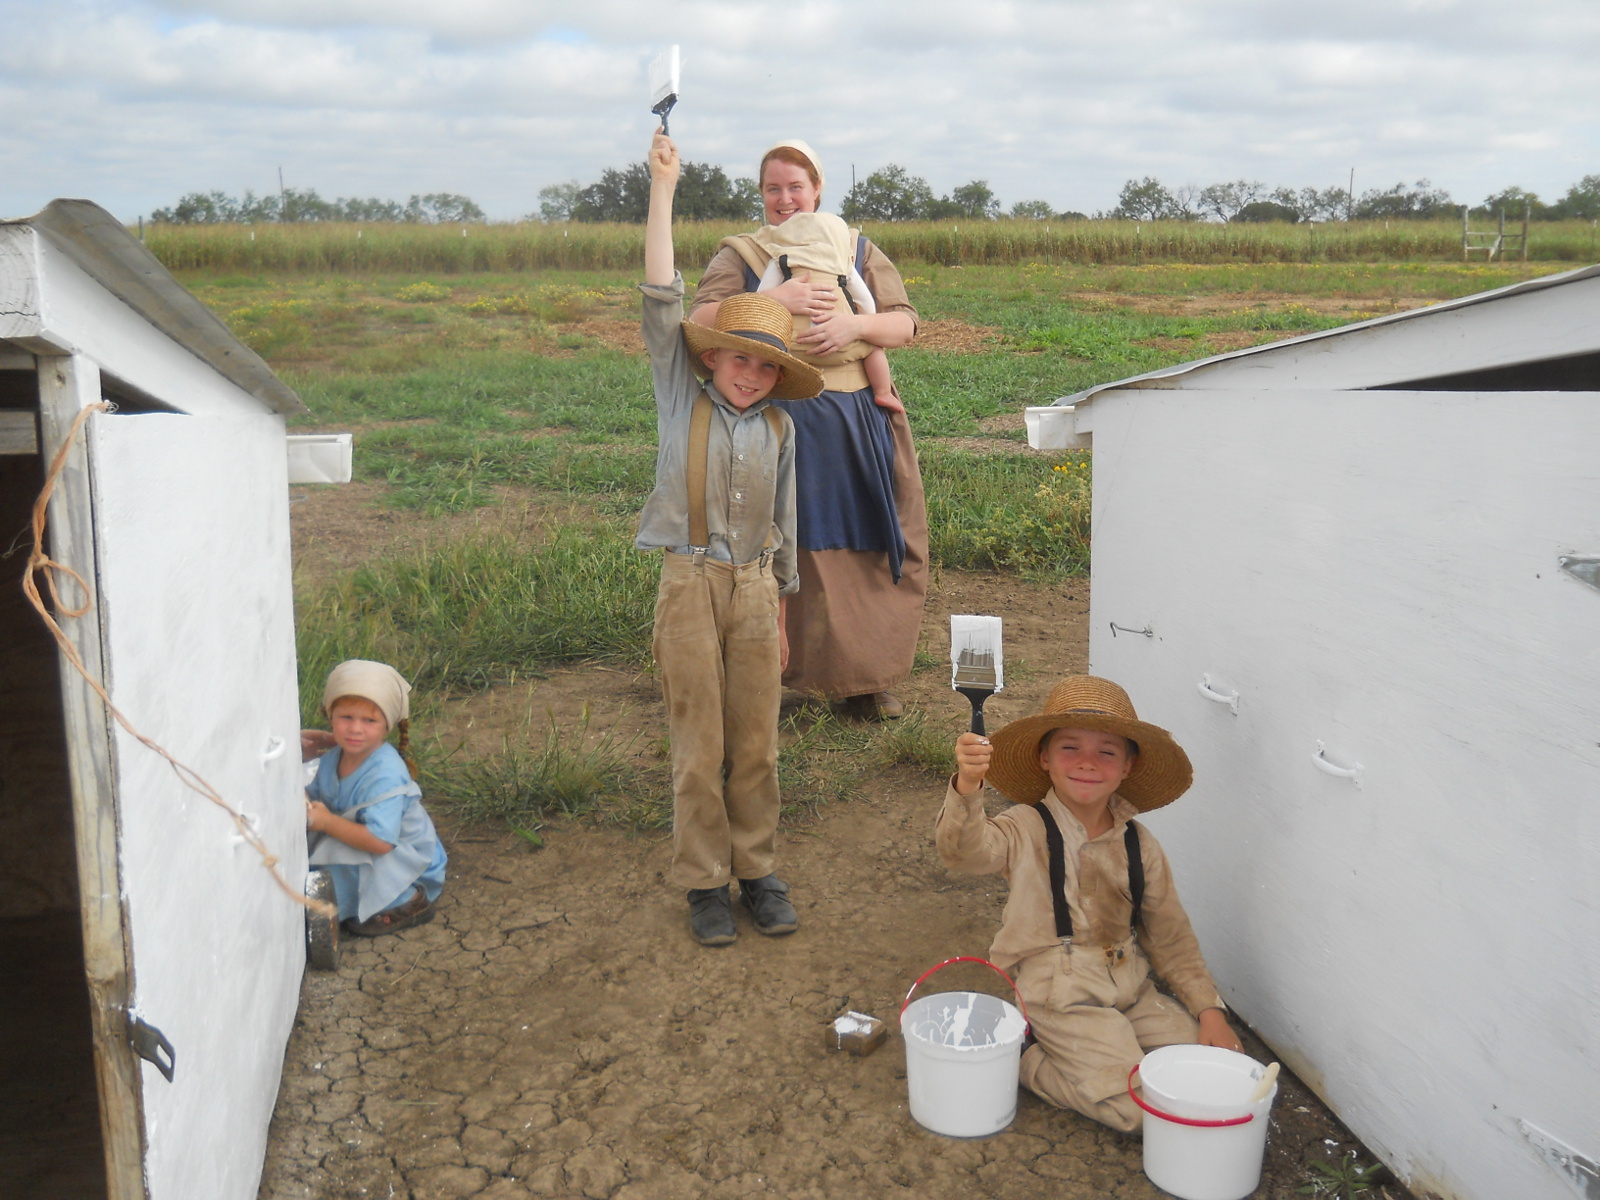
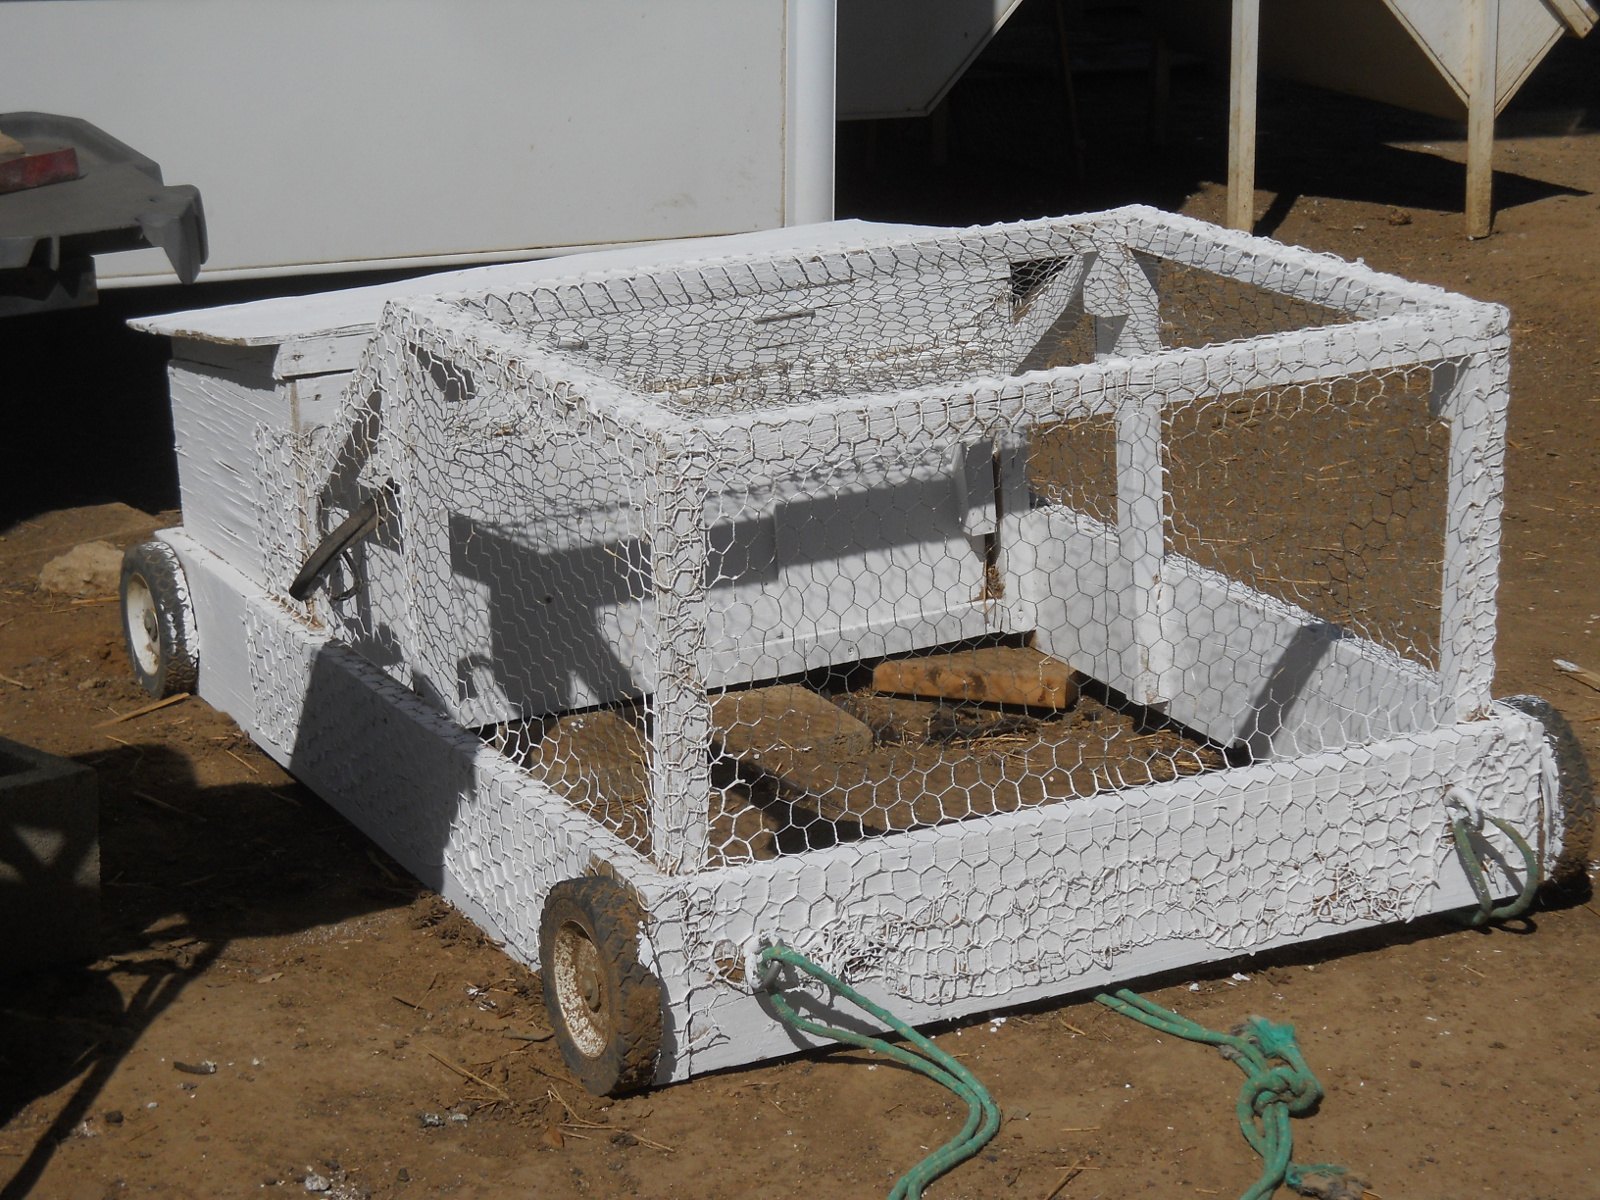
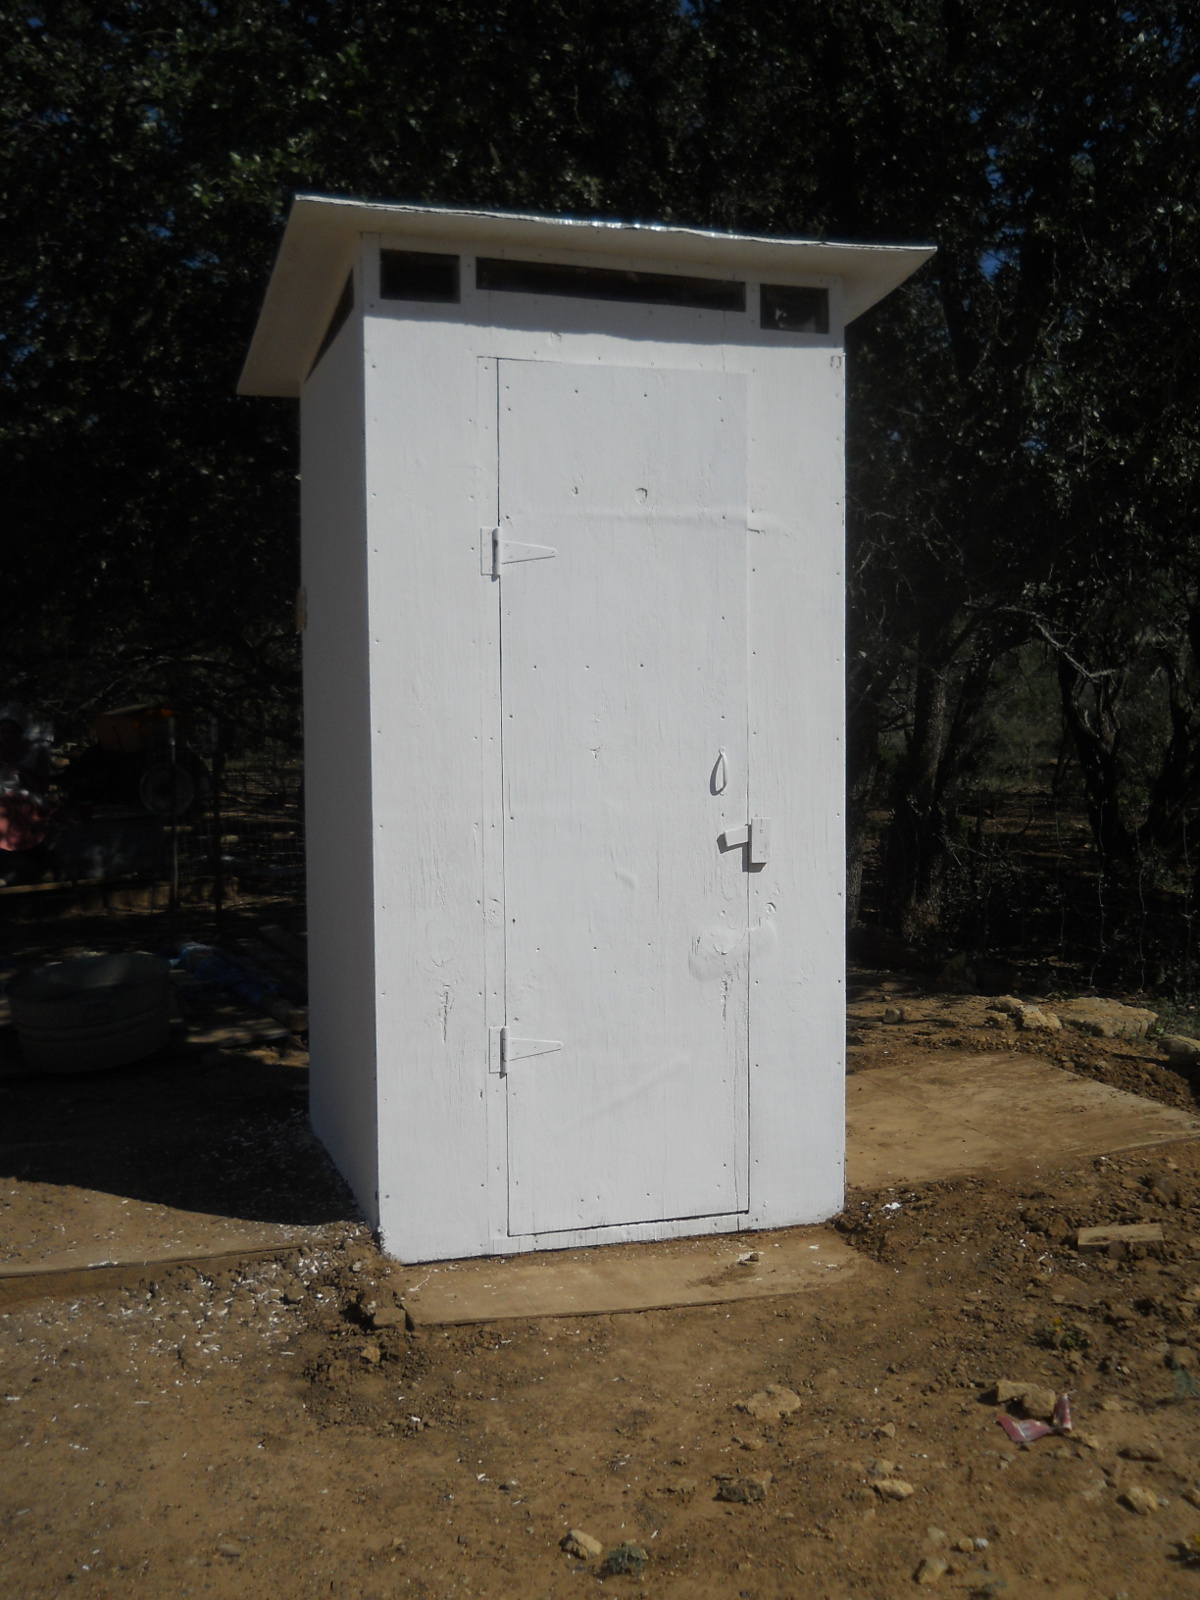
The ladies and children came over too, and graciously helped out in painting just about all of the painted structures we have in our inner field area — goat sheds, chicken tractors and coups, the outhouse, summer kitchen roof fascia, the cistern covering structure, and a generator box. They sanded the wood, and then painted…
And here they are in freeze-frame action!
Victory over the goat sheds!
Painting war paint! (there’s irony in there somewhere 🙂 )
And some of the other completed structures:
We’re grateful to the Lord for granting the resources and a serving community of people to help us as we desire and try to live our lives out of love for Christ and love for each other, and thanks very much to the group for all of the help!
Heb. 11:8-10 - "By faith Abraham, when he was called to go out into a place which he should after receive for an inheritance, obeyed; and he went out, not knowing whither he went. By faith he sojourned in the land of promise, as in a strange country, dwelling in tabernacles with Isaac and Jacob, the heirs with him of the same promise: For he looked for a city which hath foundations, whose builder and maker is God."
Receive New Blog Posts by Email
Usually only 1-3 a month. We will never share your information nor solicit you.