After the floor of the house was completed, it was time to get the porch posts into the ground, because I didn’t want to put up the wall frames and then have to wait all of the time to do the porch posts with the wall frames sitting out that much longer in the elements.
I decided to make the porch 10 feet, because I wanted to have enough room to have the community sit outside all together; and I wanted to have it go all the way around the house, so that we could sit under a porch and be out of the sun, or in the sun, or in a breeze, regardless of time of day or weather conditions.
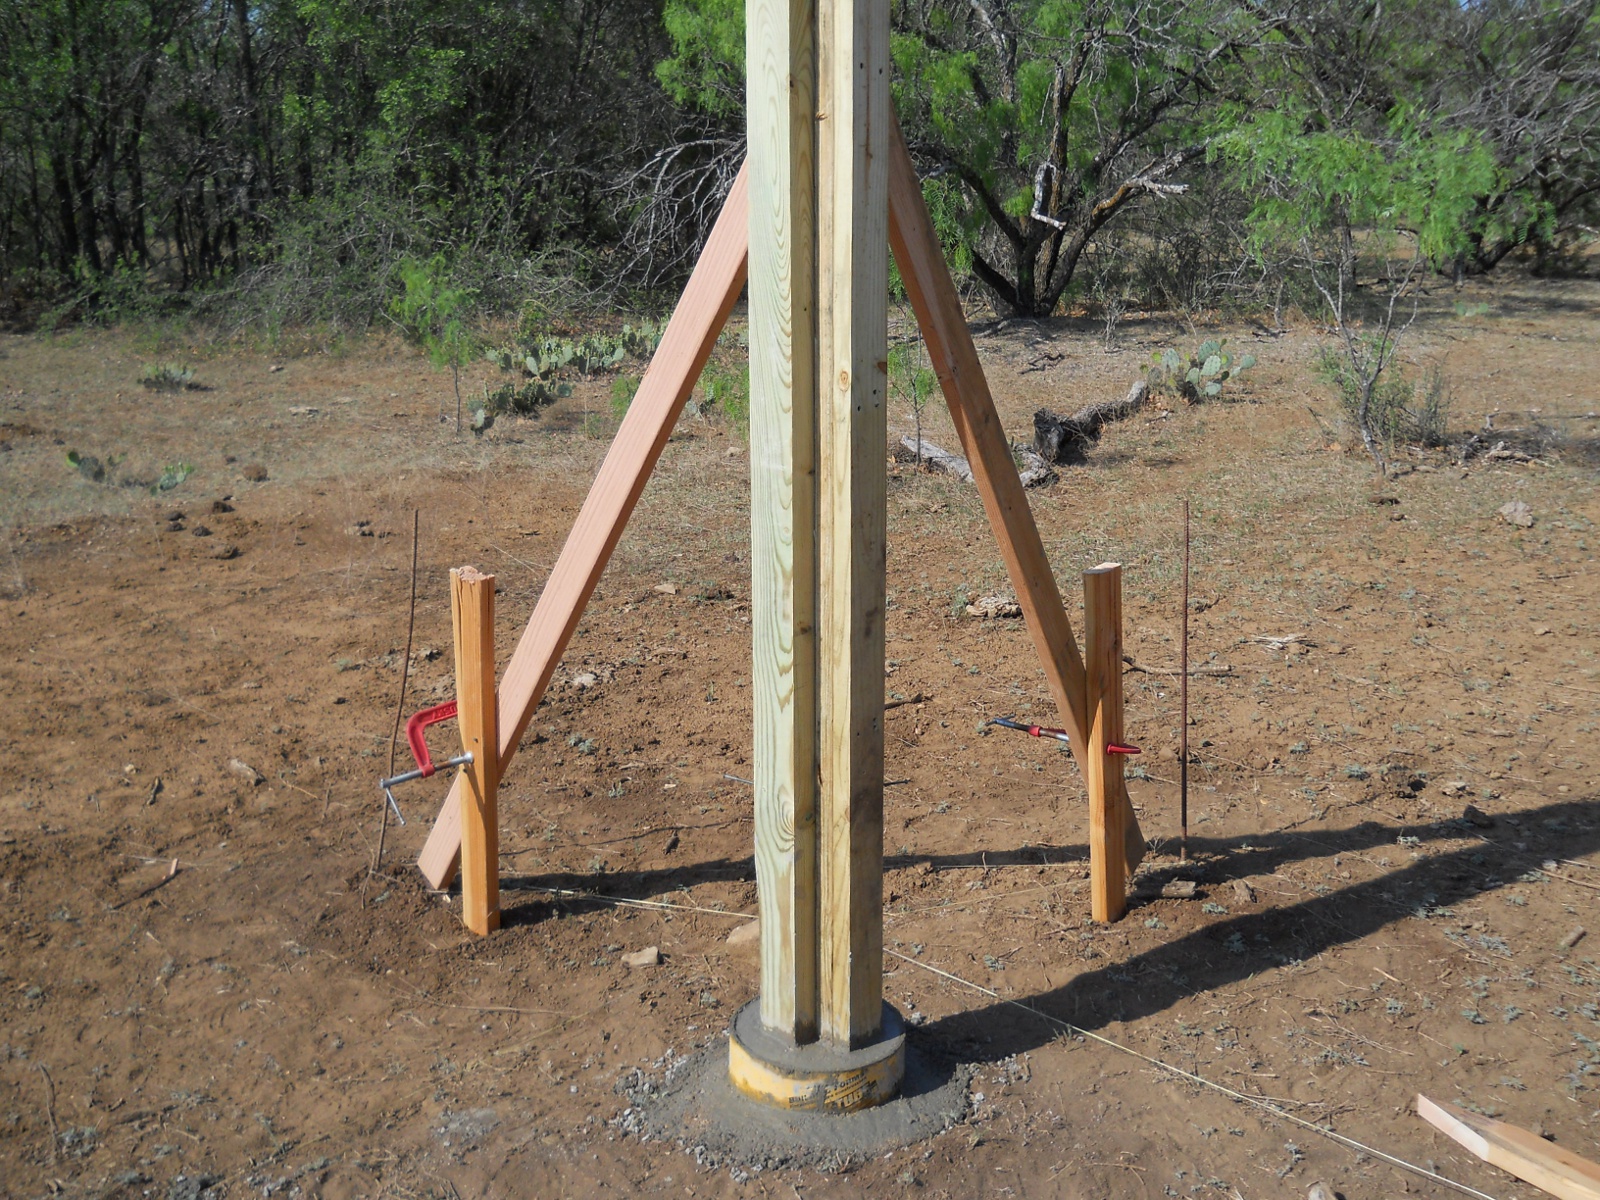
I also decided to go with a single post all the way into the ground vs. only doing a platform and attaching the roof posts after — it just seemed the single porch post would be more sturdy. Further, I decided to use 4×6 inch treated lumber for the posts. The biggest issue with these are that these types of treated posts can sometimes start to torque and bend in the sun; but I figured that if I could get to them quickly enough, it wouldn’t cause too much trouble.
And so the process began…
I set up the stringer for a line of posts, and here set it up for the corner:
And here’s the hole dug for the corner with the brace supports pounded into the ground. At the bottom of each hole, I beveled out the bottom so the dirt above the bevel would hold the concrete more securely in the ground:
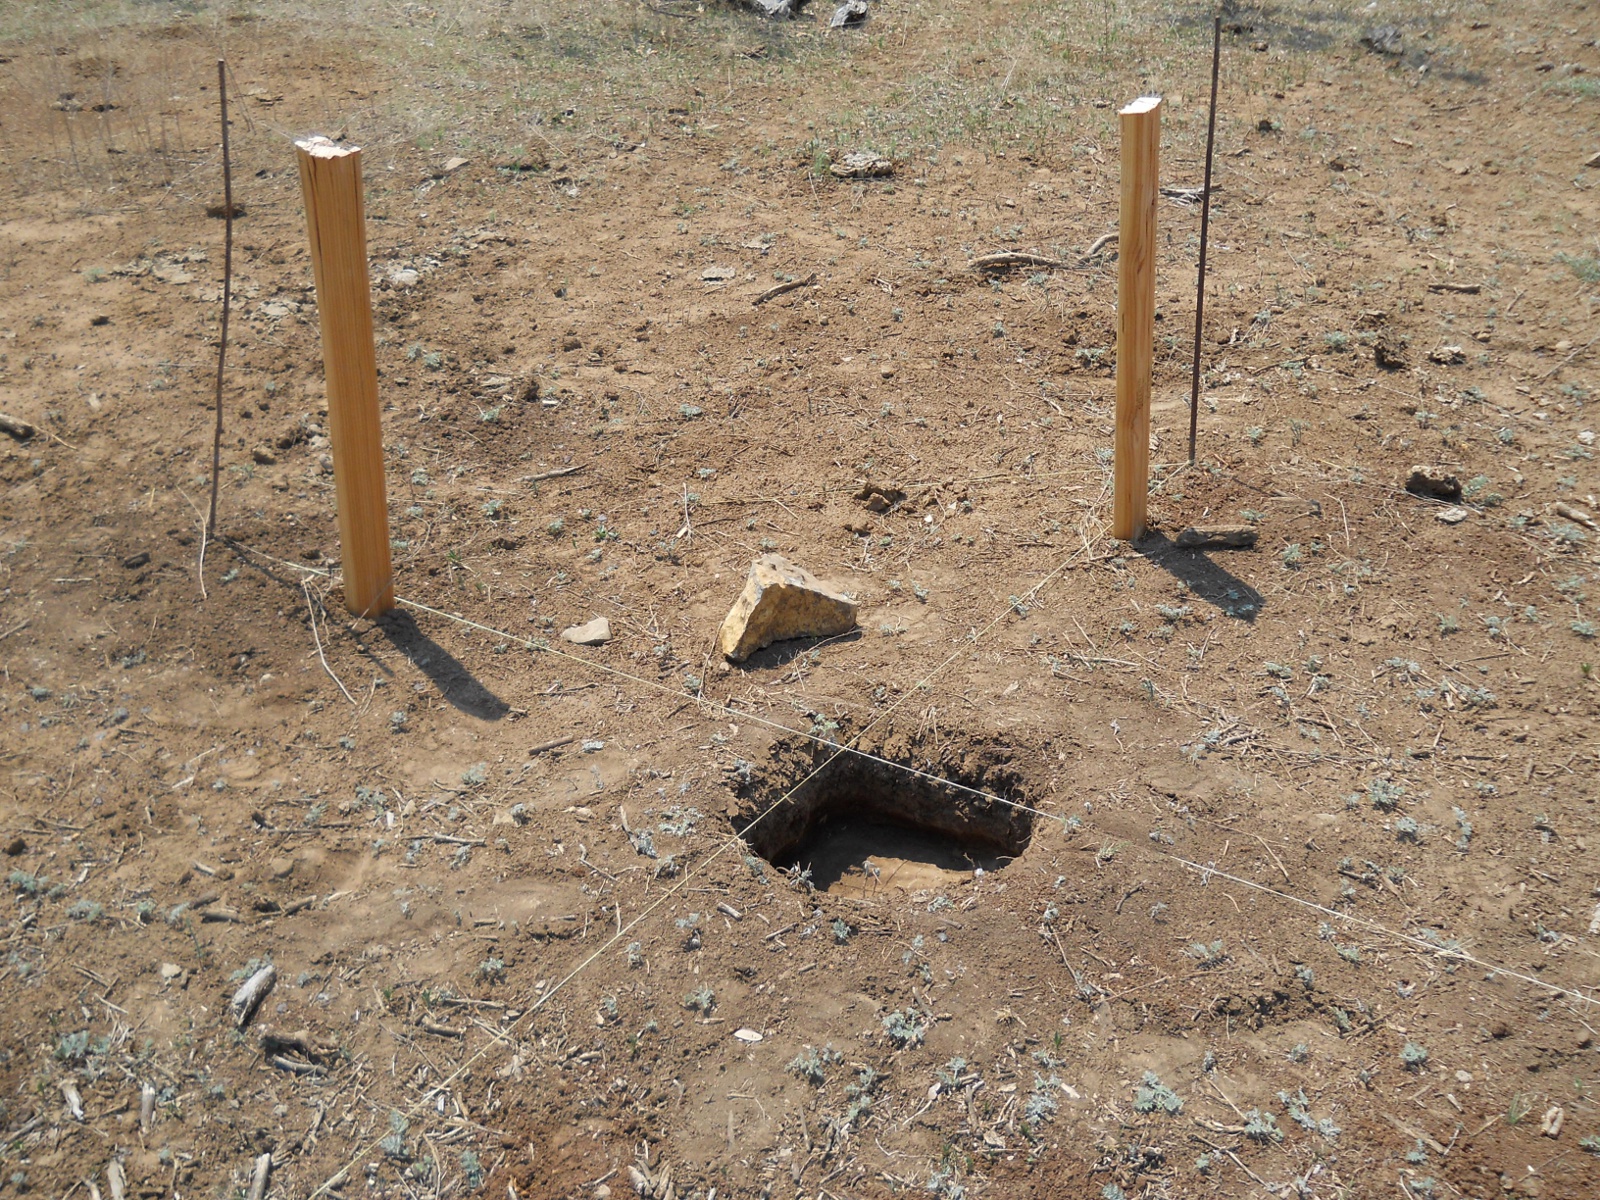
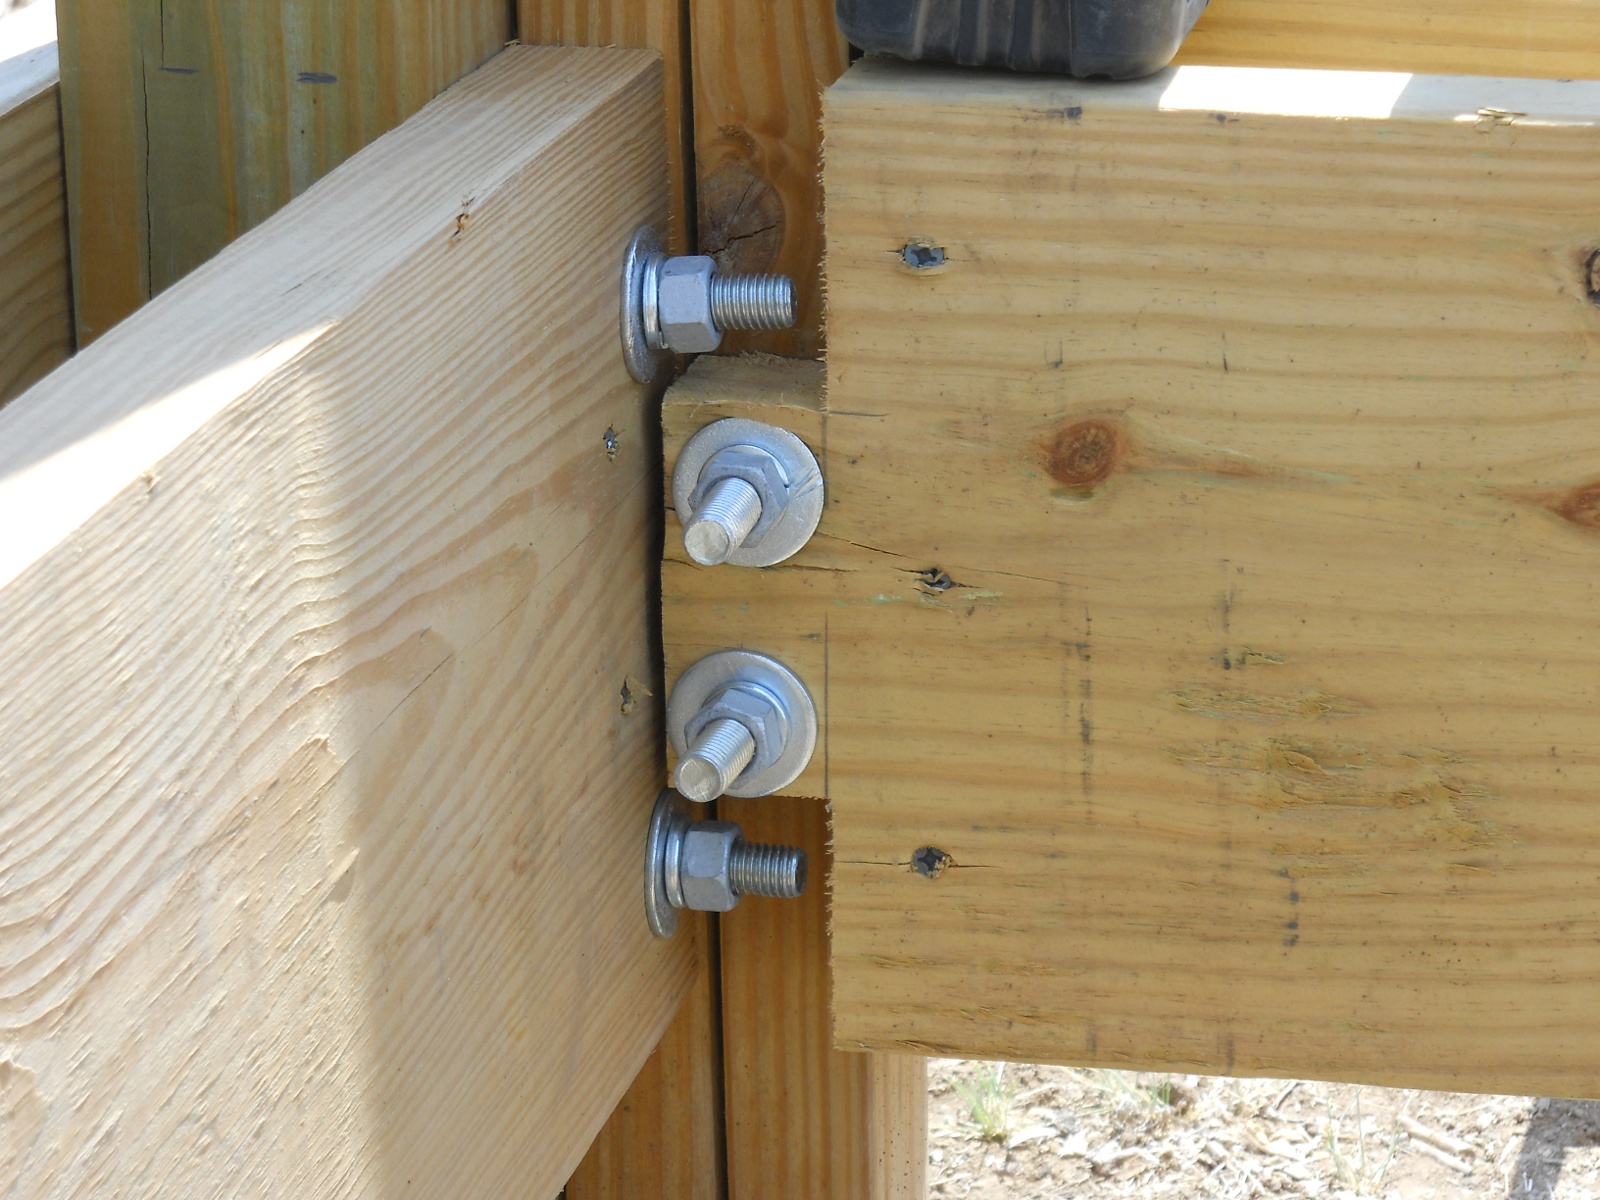
For the corners, I decided to attach two 2×4’s on one long side of the 4×6, which made the post “L”-shaped. I also drilled holes and pounded in rebar so as to hold the post more firmly in the concrete:

To build the concrete up around the post slightly, so as to keep the soil from touching the wood, and to make it a little nicer looking, I used 8 inch (12 inch for the corners) concrete tubes cut at 4 inches high, and would slide it up the post, propping it up with screws, before standing up the post in the hole:
Here is a post set in the ground before final floating of the concrete and setting the concrete tube footer:

And here is a post completed, including the tube footer:
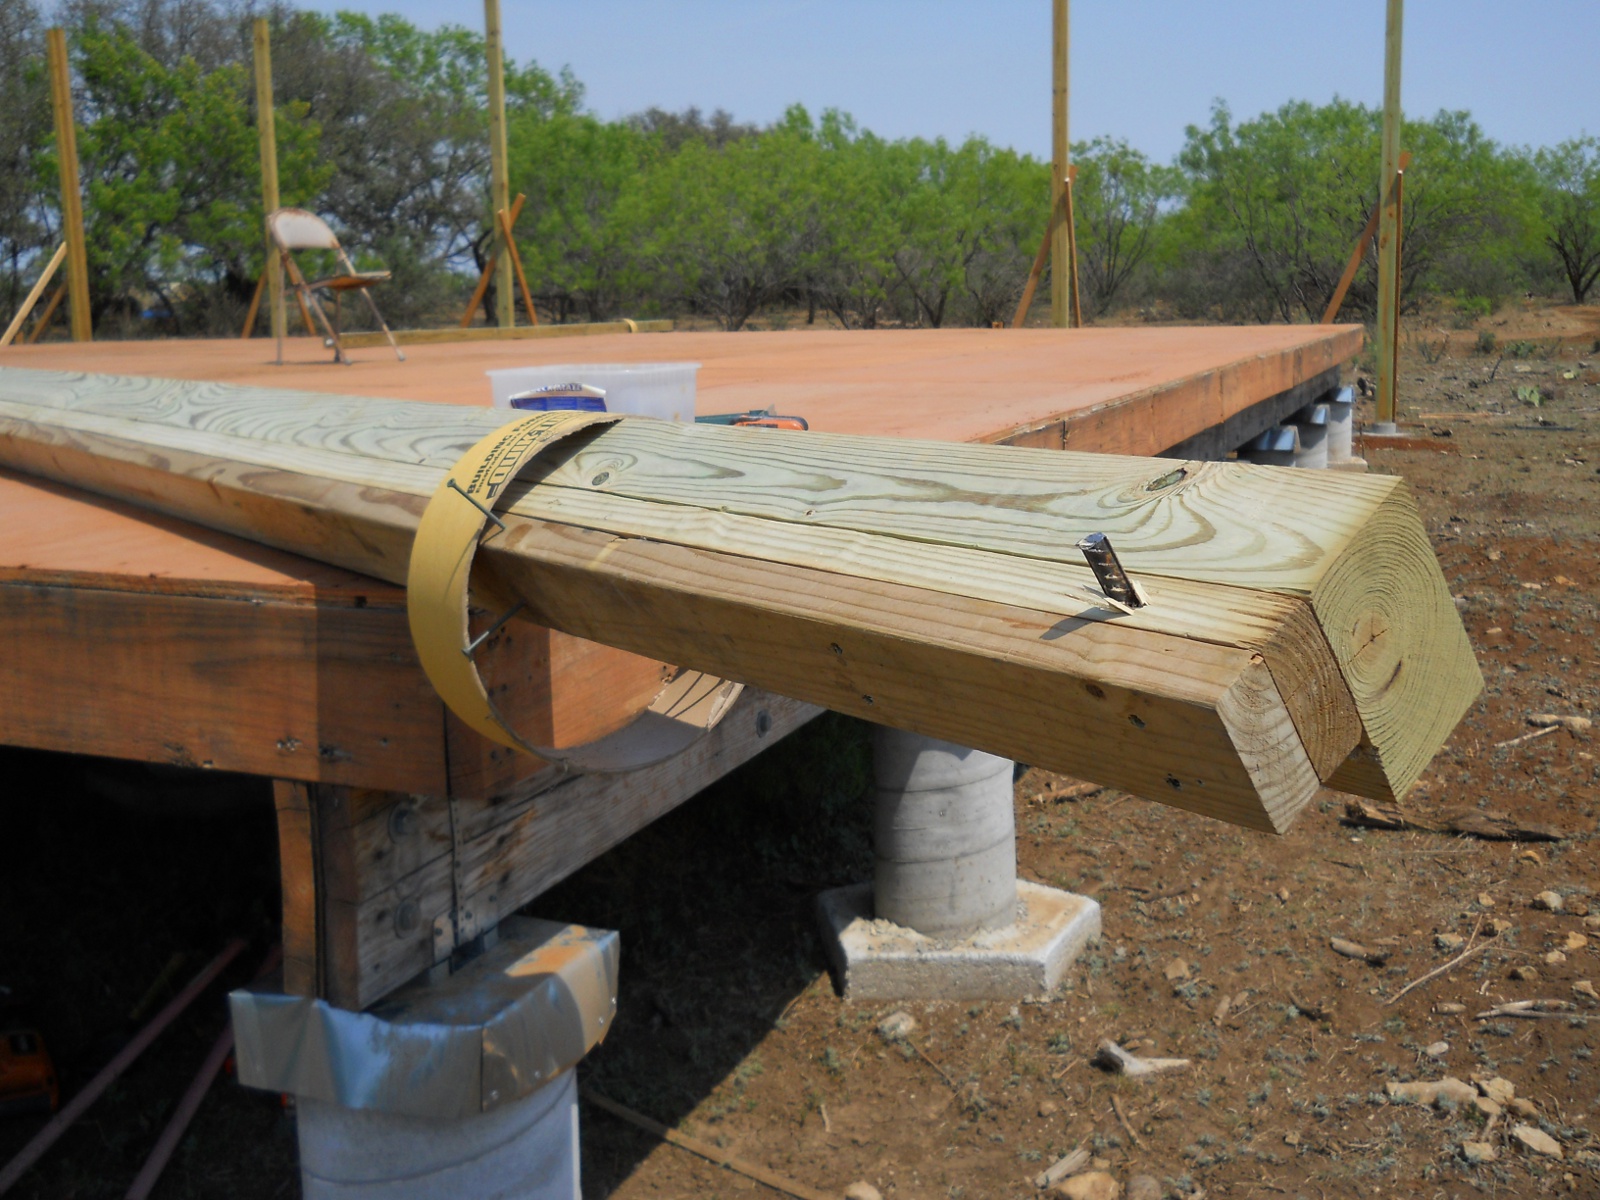
With each side of the house being 40 feet, thus making a porch side 60 feet, I decided to place each post around 10 feet apart (it actually ended up being 9 feet, 10 inches, to allow for some overhang of the porch joists), and then figured to use double 2×10 inch treated boards for the joist supports. I also put two spacers between the two boards, about 1/3 of the way in from each post. To level the boards from post to post, we used the same water level we used in leveling the concrete piers of the main house structure; and we leveled each post based on a single post so that any error introduced into the leveling would not be cumulative. Also, before attaching the joist supports, I’d have to sometimes use ratchet straps to re-level vertically the two posts I was working with, because they would sometimes over time start to get a little off-level:
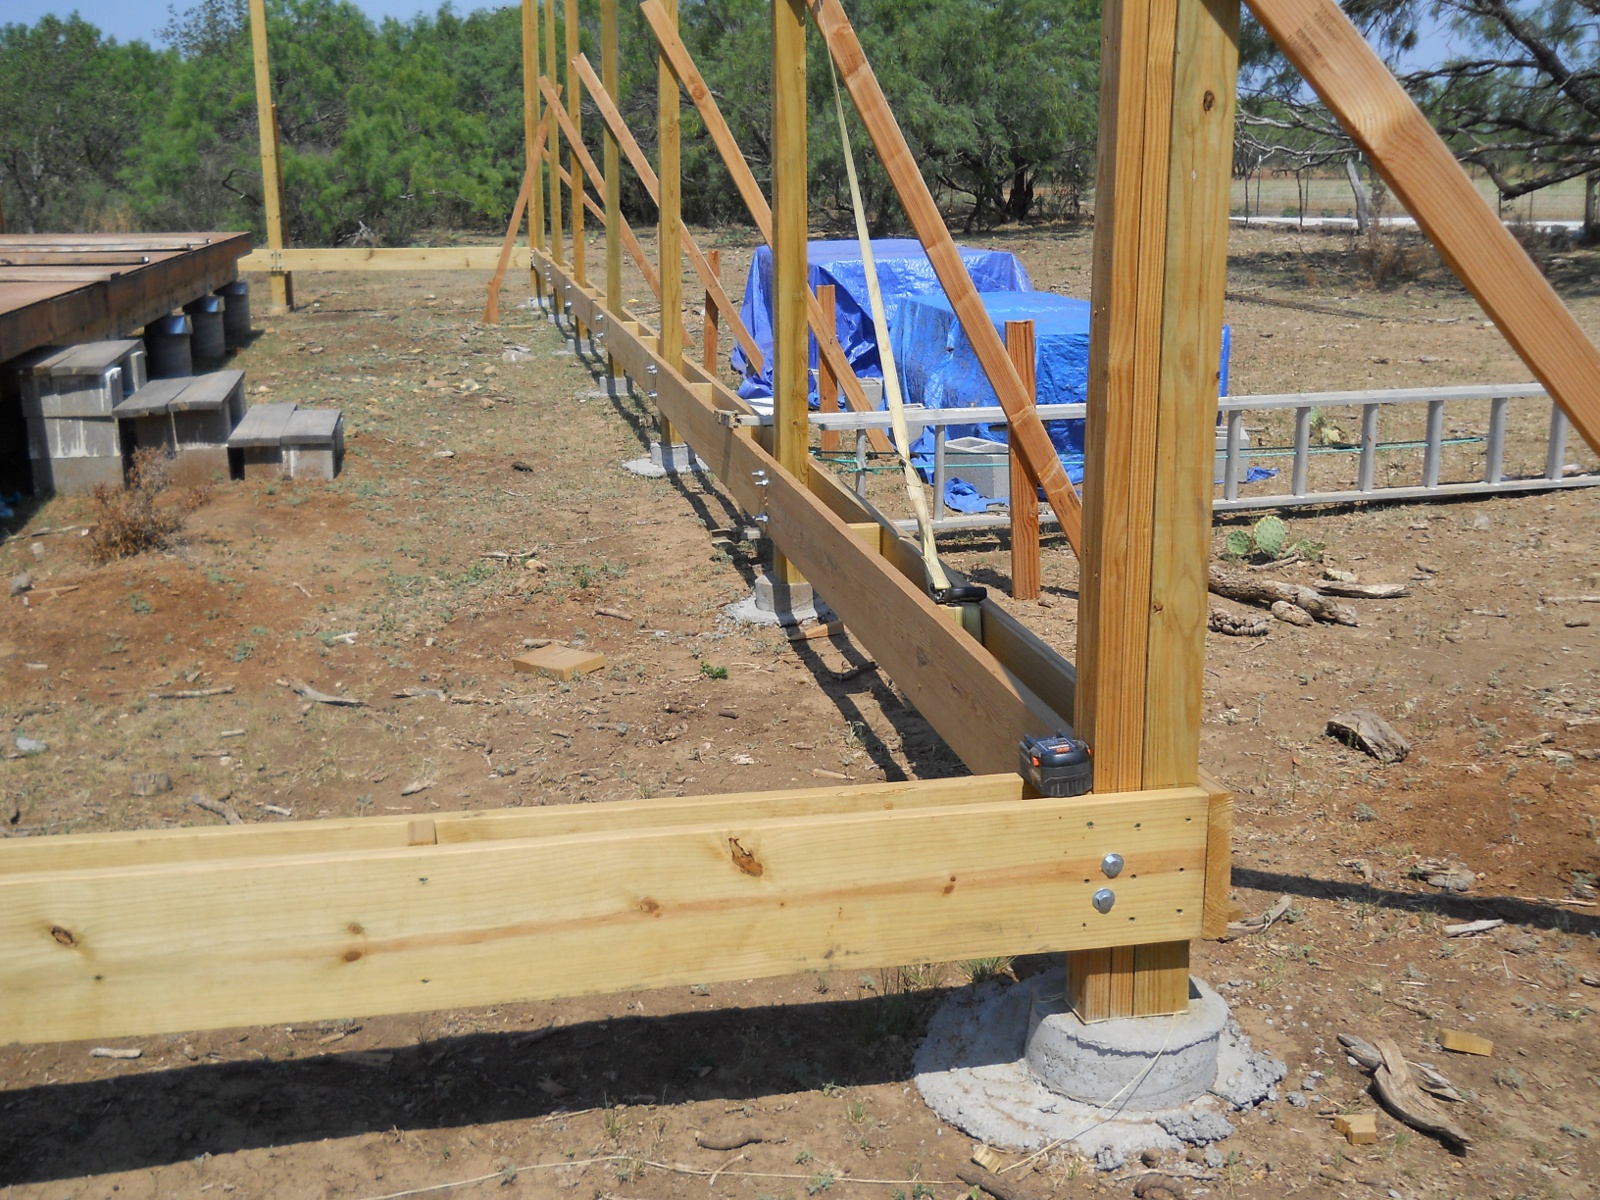
Here’s an inside look of how I joined the corners. I used 1/2 inch hex bolts and screws to hold them up. Also, I had to add another piece of 2×4 between the boards attached to the two vertical 2x4s that were part of the overall post to be able to add a little more support for the boards (I probably should have had those part of the main post structure):
And here is a middle post join:

And here they are all in place!
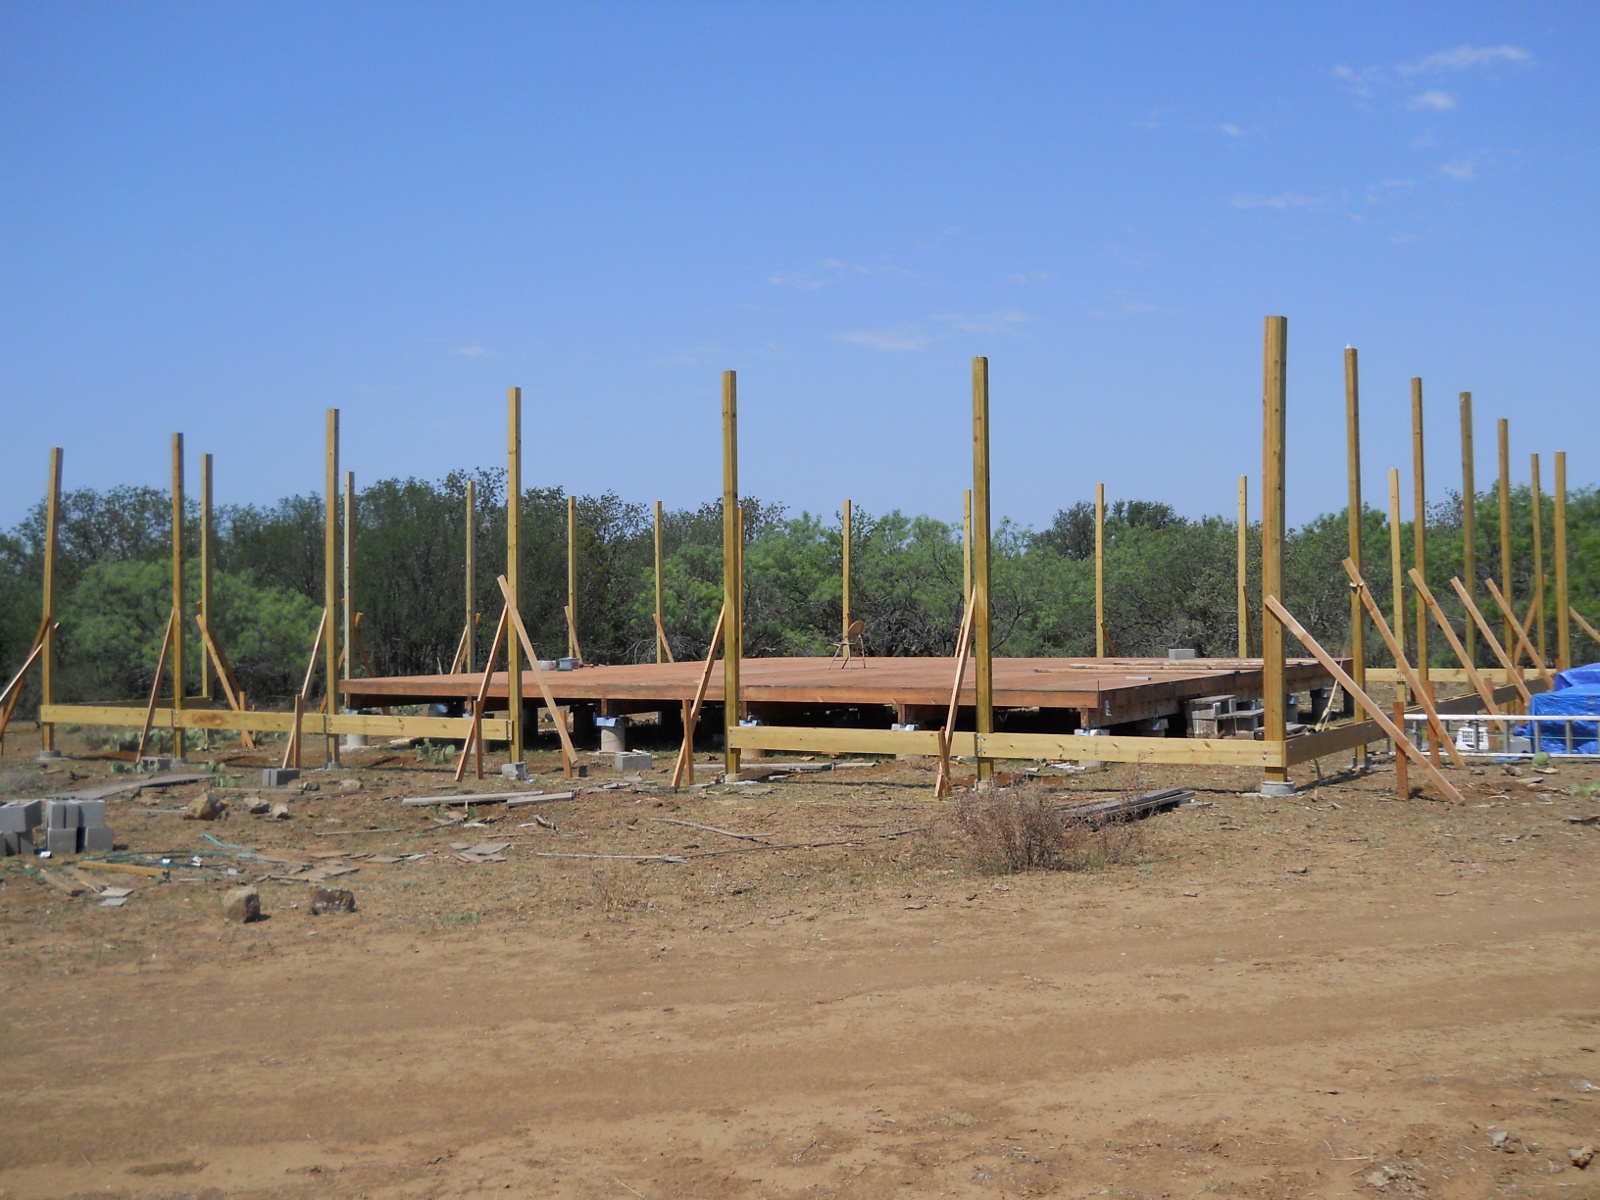
As I had feared, some of the posts are starting to twist and bend; but hopefully we’ll be able to straighten them enough to where that won’t cause long-term issues.
We’re grateful again to God for allowing us the resources and strength to work on the house; and we look forward to continued progress on it, as He might will.
— David